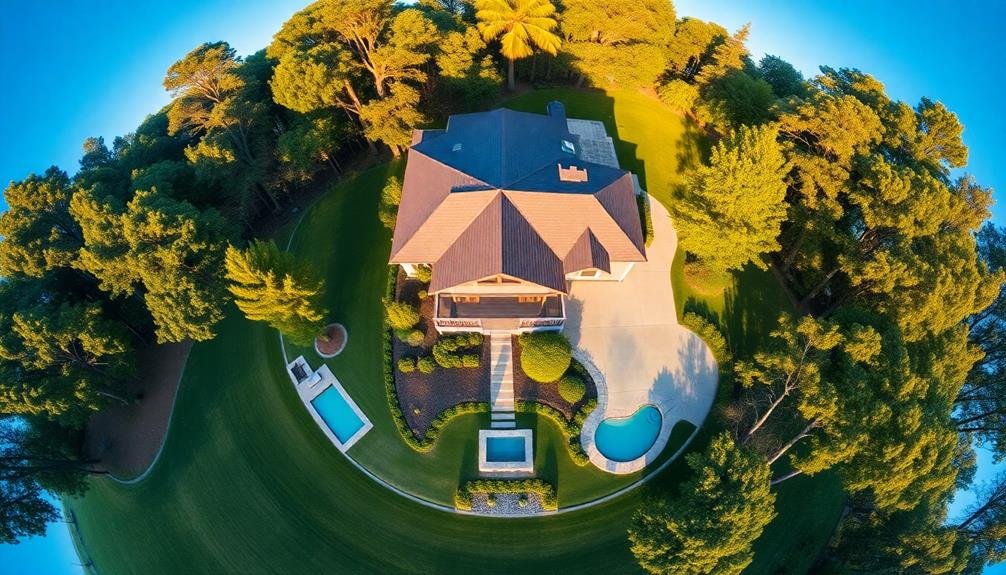
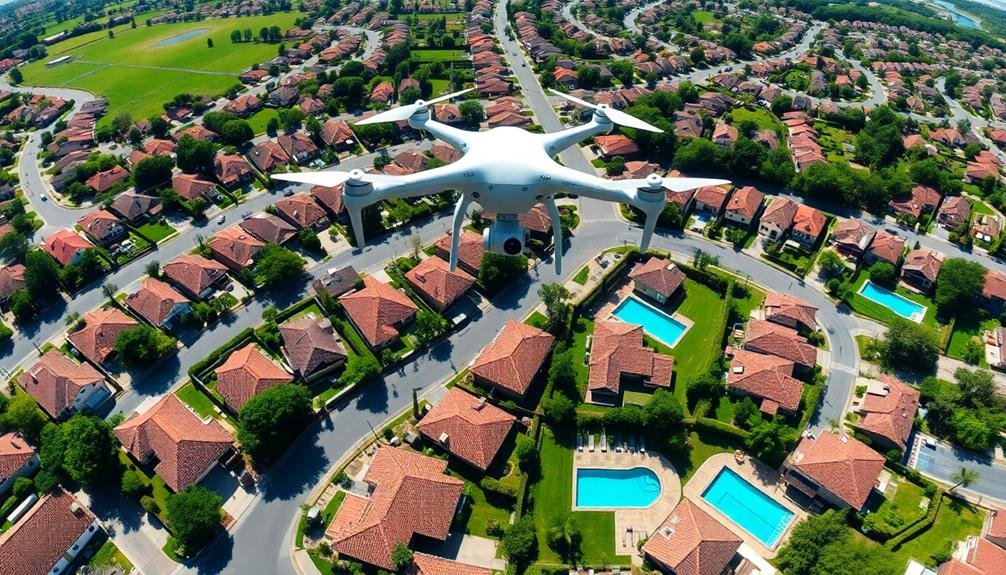
To create stunning 360° property views from above, you'll need a high-quality drone with a 360° camera or a compatible mount. Plan your flight path carefully, considering FAA regulations and local laws. Set your camera to manual mode for ideal exposure control, and fly in a circular pattern around the property at a consistent altitude. Capture images at regular intervals to guarantee proper overlap for stitching. Use specialized software to combine your photos into a seamless panorama, and enhance the final image with post-processing techniques. Don't forget to integrate your 360° views into virtual tours and marketing materials. Mastering these techniques will elevate your real estate marketing to new heights.
Key Takeaways
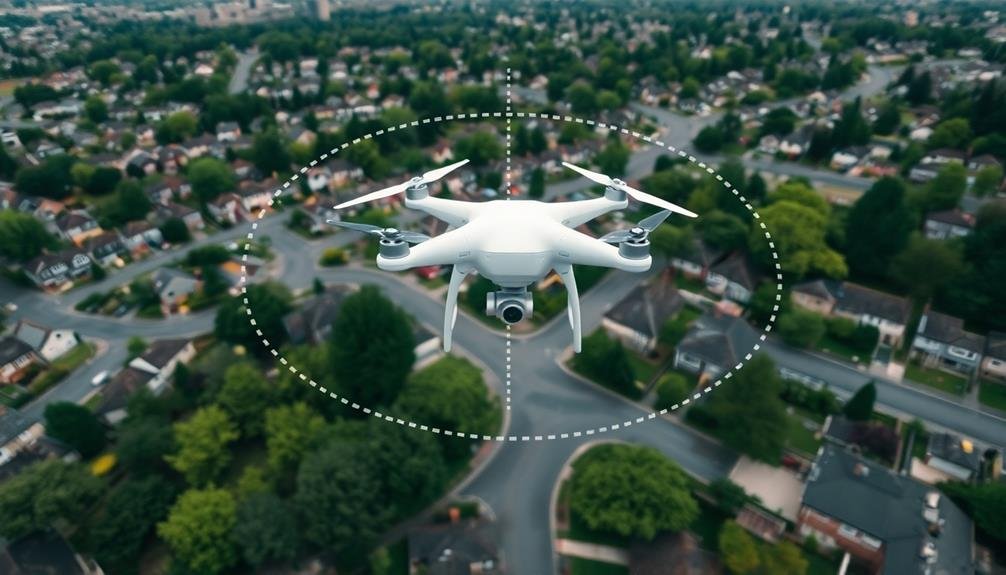
- Use a drone equipped with a 360° camera to capture aerial footage of the property.
- Plan a circular or spiral flight path around the property, maintaining consistent altitude and intervals.
- Configure camera settings for optimal exposure, using manual mode for full control.
- Capture multiple angles, including wide shots of the entire property and close-ups of key features.
- Stitch images together using specialized software, ensuring 30-40% overlap for seamless panoramas.
Equipment Needed for Aerial 360° Views

To capture stunning aerial 360° property views, you'll need a few key pieces of equipment. First and foremost, invest in a high-quality drone capable of carrying a 360° camera. Look for models with stable flight characteristics, long battery life, and GPS functionality for precise positioning.
Next, choose a 360° camera that's compatible with your drone. Opt for a lightweight camera with high resolution and good low-light performance. Some popular options include the Insta360 ONE R and the GoPro Max.
You'll also need a secure mounting system to attach the camera to your drone. Many manufacturers offer specialized mounts, or you can use a universal adapter.
Don't forget about accessories. Extra batteries for both your drone and camera are essential for extended shooting sessions. A tablet or smartphone with a large screen will make it easier to control your drone and monitor your shots.
Lastly, consider investing in ND filters to manage exposure in bright conditions, and a rugged carrying case to protect your equipment during transport.
With these tools, you'll be well-equipped to create impressive aerial 360° property views that showcase properties in their best light.
Choosing the Right Drone

When selecting a drone for 360° property views, you'll want to prioritize camera quality to capture crisp, high-resolution images.
Consider the drone's battery life to guarantee you can complete your shoot without interruptions.
Look for models with advanced flight stability features, which will help you capture smooth, professional-looking footage even in challenging conditions.
Camera Quality Matters
The camera's quality is paramount when choosing a drone for creating 360° property views. You'll want to focus on resolution, sensor size, and lens quality to capture crisp, detailed images that showcase properties in their best light.
Look for drones with at least 12MP cameras and 4K video capabilities. A larger sensor, like a 1-inch CMOS, will perform better in low-light conditions and produce higher-quality images overall. Take into account the field of view as well; a wider angle lens can capture more of the property in a single shot.
Here's a quick comparison of camera features to evaluate:
| Feature | Entry-Level | Mid-Range | Professional |
|---|---|---|---|
| Resolution | 12MP | 20MP | 48MP+ |
| Sensor Size | 1/2.3" | 1" | 1" or larger |
| Video Quality | 4K/30fps | 4K/60fps | 8K/30fps |
| ISO Range | 100-3200 | 100-6400 | 100-12800 |
Don't forget about stabilization features like gimbals, which help reduce blur and shakiness in your shots. Additionally, take into account drones with RAW photo capabilities, allowing for more flexibility in post-processing. By prioritizing camera quality, you'll guarantee your 360° property views stand out and impress potential buyers or clients.
Battery Life Considerations
Endurance is essential when selecting a drone for 360° property views. You'll want a model that can stay airborne long enough to capture all necessary footage without interruption. Most consumer drones offer flight times between 20 to 30 minutes, but this can vary based on factors like wind conditions and payload weight.
To maximize your drone's battery life and efficiency, consider these tips:
- Plan your flight path in advance to minimize unnecessary movements.
- Use intelligent flight modes that automate capture sequences.
- Carry spare batteries and swap them out between property shoots.
- Adjust your flying speed to conserve power when appropriate.
Remember that cold weather can greatly reduce battery performance. If you're working in chilly conditions, keep your batteries warm until just before use.
Additionally, invest in a drone with a "return-to-home" feature, which automatically brings the aircraft back when the battery reaches a critical level. This safety measure guarantees you don't lose your drone or footage due to an unexpected power loss mid-flight.
Flight Stability Features
While battery life keeps your drone in the air, flight stability features guarantee your 360° property shots remain smooth and professional. When choosing a drone for real estate photography, prioritize models with advanced stabilization systems.
Look for drones equipped with 3-axis gimbals, which compensate for pitch, roll, and yaw movements, ensuring your camera stays level regardless of the drone's orientation.
GPS-assisted hover is another vital feature. It allows your drone to maintain a fixed position in the air, even in light winds, which is essential for capturing steady panoramic shots. Some higher-end models offer RTK (Real-Time Kinematic) positioning, providing centimeter-level accuracy for ultra-precise hovering and flight paths.
Don't overlook obstacle avoidance sensors. These help prevent collisions with trees, buildings, or other objects during flight, safeguarding your investment and ensuring uninterrupted shooting sessions.
Intelligent flight modes like orbit, waypoints, and tracking can also contribute to stability by automating complex flight patterns.
Lastly, consider drones with return-to-home functionality. This feature brings your drone back to its takeoff point automatically if the battery runs low or signal is lost, adding an extra layer of safety and stability to your aerial photography sessions.
Understanding FAA Regulations

For real estate professionals venturing into drone photography, understanding FAA regulations is vital. The Federal Aviation Administration (FAA) has specific rules for commercial drone operations, including those used for real estate marketing.
You'll need to obtain a Remote Pilot Certificate by passing the FAA's Aeronautical Knowledge Test and registering your drone with the FAA.
When operating your drone for property photography, you must adhere to these key regulations:
- Fly below 400 feet above ground level
- Keep your drone within visual line of sight at all times
- Don't fly over people or moving vehicles
- Avoid restricted airspace, such as airports or military bases
You're required to conduct pre-flight inspections and maintain your drone in a safe operating condition.
Be aware of local laws and privacy concerns, as some areas may have additional restrictions on drone usage. Weather conditions also play a significant role in safe operations, so always check forecasts before flying.
Planning Your Flight Path
Planning your flight path is a crucial step in creating 360° property views. You'll need to take into account several factors to guarantee you capture all necessary angles while maintaining safety and efficiency.
Start by identifying the property's boundaries and key features you want to highlight. Use satellite imagery or property maps to outline your flight area.
Next, determine your flight altitude. Higher altitudes provide wider coverage but may sacrifice detail, while lower altitudes offer more detail but require more passes. Reflect on the property's size and surrounding obstacles when deciding.
Plan your flight pattern. A circular or spiral path often works well for 360° views. For larger properties, you might use a grid pattern with overlapping paths to assure complete coverage.
Don't forget to account for takeoff and landing areas.
Set waypoints along your planned route to guide your drone. Most drone apps allow you to program these points for automated flights. Include hover points where you want to capture specific views or panoramas.
Setting Up Camera Parameters

Before you take flight, it's crucial to configure your camera settings for best results. Proper camera parameters guarantee you capture high-quality footage for your 360° property views.
Start by setting your camera to manual mode, giving you full control over exposure, aperture, and shutter speed. Choose a low ISO to minimize noise in your images, typically between 100-400 depending on lighting conditions.
Select a narrow aperture (high f-number) to keep the entire scene in focus, usually f/8 or higher. Set your shutter speed to at least double your frame rate to avoid motion blur. For example, if you're shooting at 30 fps, use a shutter speed of 1/60th or faster.
Enable your camera's RAW format to capture maximum detail and allow for greater flexibility in post-processing.
To create stunning 360° property views, consider these additional tips:
- Use a gimbal to stabilize your camera and reduce vibrations
- Set your white balance manually to maintain consistent color throughout the shoot
- Enable lens correction in your camera settings to minimize distortion
- Adjust your camera's picture profile for a flat, neutral image that's easier to color grade later
Optimal Altitude for Property Shots
When determining the ideal altitude for property shots, you'll need to balance capturing the entire property with showcasing its key features. Generally, an altitude between 100 and 400 feet works best for most residential properties. Start by flying at 200 feet and adjust as needed.
For smaller properties or those in dense urban areas, you'll want to stay lower, around 100-150 feet. This height allows you to capture details like landscaping and architectural features while still providing context.
Larger estates or rural properties may require higher altitudes of 300-400 feet to encompass the entire grounds.
Consider the property's surroundings when choosing your altitude. If there are tall trees or neighboring buildings, you'll need to fly higher to avoid obstructions. However, don't go too high, as you'll lose detail and the property will appear less impressive.
Test different heights and review your footage to find the sweet spot. Remember, you can always vary the altitude during your shoot to capture both wide-angle views and more detailed shots.
This approach guarantees you'll have a range of perspectives to choose from when creating your final 360° property view.
Capturing Multiple Angles

Once you've determined the ideal altitude, it's time to focus on capturing multiple angles of the property. To create an extensive 360° view, you'll need to capture images from various positions around the property.
Start by flying your drone in a circular pattern, maintaining a consistent altitude and distance from the center of the property. As you circle the property, take photos at regular intervals, ensuring there's sufficient overlap between each shot. This overlap will be essential for stitching the images together later.
Don't forget to capture different perspectives, including:
- Wide-angle shots that showcase the entire property and its surroundings
- Close-up views of key features like the front entrance, backyard, or unique architectural elements
- Overhead shots that highlight the property's layout and landscaping
- Angled shots that provide depth and dimension to the final 360° view
Remember to adjust your camera settings as needed to account for changing light conditions as you move around the property.
Pay attention to shadows and reflections that might affect image quality. By capturing a diverse range of angles, you'll have the necessary raw material to create a stunning and immersive 360° property view.
Stitching Images Together
The process of stitching images together is essential for creating a seamless 360° property view. Once you've captured multiple angles of the property, you'll need to combine these images into a single panoramic view.
Start by importing your photos into specialized stitching software like PTGui, Hugin, or Adobe Photoshop. These programs use advanced algorithms to align and blend your images automatically. They analyze overlapping areas between photos to match features and create a smooth connection.
You'll need to verify your images have sufficient overlap (about 30-40%) for the software to work effectively. After the initial automatic stitching, you may need to make manual adjustments. Look for misalignments, ghosting, or visible seams and use the software's tools to correct these issues.
Pay special attention to moving objects or changing light conditions that might cause discrepancies. Once you're satisfied with the alignment, adjust the overall exposure and color balance to create a consistent look across the entire panorama.
Post-Processing Techniques

After stitching your images together, post-processing techniques can elevate your 360° property view to a professional level. Focus on enhancing colors, adjusting exposure, and fine-tuning details to create a stunning final product. Use software like Adobe Lightroom or Photoshop to make these adjustments.
Start by correcting any lens distortions and straightening horizon lines. Then, adjust the overall exposure and contrast to guarantee the image is well-balanced. Fine-tune individual elements like shadows, highlights, and mid-tones to bring out the property's best features.
Next, enhance the colors to make the image pop. Adjust saturation and vibrancy, but be careful not to overdo it. You want the property to look appealing but still realistic.
Finally, apply sharpening and noise reduction to improve image clarity. This step is vital for maintaining detail in large-format prints or high-resolution digital displays.
Here's a quick list of essential post-processing steps:
- Correct lens distortions and straighten horizons
- Adjust exposure, contrast, and tonal balance
- Enhance colors and saturation
- Apply sharpening and noise reduction
Remember to save your work in high-quality formats suitable for various output mediums, including web and print.
Creating Interactive Virtual Tours

Creating interactive virtual tours takes your 360° property views to the next level. You'll need specialized software to stitch your panoramic images together and create a seamless, navigable experience. Popular options include Matterport, 3DVista, and Cupix. These platforms allow you to add hotspots, information points, and even multimedia elements to your tour.
Start by organizing your 360° images in a logical sequence. You'll want to create a natural flow that mimics walking through the property. Next, import your images into your chosen software and begin linking them together. Create connection points between rooms or areas, ensuring smooth navigation for users.
Add interactive elements to enhance the experience. Include floor plans with clickable areas, information pop-ups about specific features, and even embedded videos or audio narrations.
Don't forget to optimize your tour for different devices, as many users will access it on mobile phones or tablets.
Enhancing Image Quality

To enhance the quality of your 360° property images, you'll need to master several key techniques.
Start by optimizing your camera settings, ensuring proper exposure and focus for each shot.
Apply post-processing techniques to fine-tune color, contrast, and sharpness, and consider using High Dynamic Range (HDR) imaging to capture a wider range of light and shadow detail in challenging lighting conditions.
Optimize Camera Settings
Camera optimization plays an essential role in capturing high-quality 360° property views. To achieve the best results, you'll need to adjust your camera settings carefully.
Start by selecting the highest resolution available on your device, ensuring you capture every detail of the property. Set your camera to shoot in RAW format if possible, as this will give you more flexibility during post-processing.
Next, focus on exposure settings. Use a low ISO to minimize noise in your images, typically between 100-400. Adjust your aperture to maintain a deep depth of field, usually between f/8 and f/11. Choose a fast shutter speed to prevent motion blur, especially if you're using a drone.
Here's a quick checklist to optimize your camera settings:
- Set white balance to match the lighting conditions (sunny, cloudy, or custom)
- Enable image stabilization if available
- Turn off automatic settings and switch to manual mode
- Use a remote trigger or timer to minimize camera shake
Post-Processing Techniques
After capturing your 360° property views, post-processing techniques can greatly enhance image quality and create a more immersive experience. Start by adjusting exposure and color balance to guarantee consistent lighting across all images.
Use HDR merging to combine multiple exposures, preserving details in both highlights and shadows.
Next, apply lens corrections to remove distortions and vignetting. Stitch your images together using specialized 360° software, guaranteeing seamless shifts between shots. Fine-tune the stitching by manually adjusting control points where necessary.
Enhance sharpness and clarity to bring out architectural details and textures. Use selective adjustments to improve specific areas without affecting the entire image. Remove any unwanted objects or imperfections using cloning and healing tools.
Add metadata to your 360° images, including property information and navigation hotspots. This will improve the viewer's experience and provide valuable context.
High Dynamic Range Imaging
Why settle for flat, dull images when you can create stunning, lifelike 360° property views? High Dynamic Range (HDR) imaging is the key to achieving breathtaking results that capture the full range of light and shadow in your property shots.
By combining multiple exposures, you'll produce images that closely mimic what the human eye sees, resulting in more engaging and realistic 360° views.
To implement HDR in your 360° property photography:
- Capture bracketed exposures: Take at least three shots of each scene – one underexposed, one properly exposed, and one overexposed.
- Use a tripod: Guarantee your camera remains perfectly still between shots to avoid alignment issues during processing.
- Merge exposures: Utilize specialized HDR software to combine your bracketed images into a single high dynamic range photo.
- Tone map the result: Adjust the HDR image to balance highlights, shadows, and midtones for a natural look.
Showcasing Property Features From Above
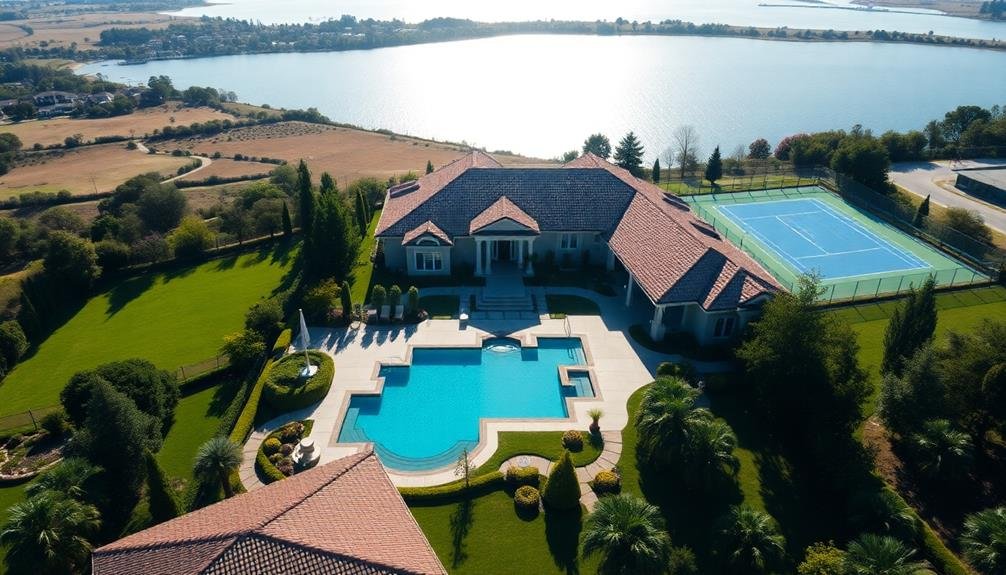
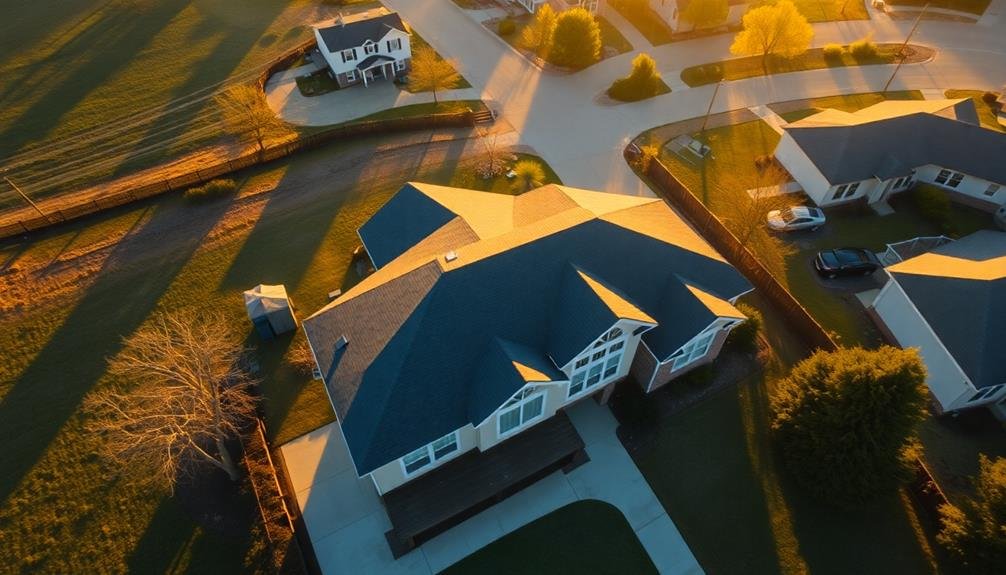
Have you ever wondered how real estate professionals capture those stunning aerial views of properties? Showcasing property features from above has become an essential tool in the real estate industry. You'll need to use drones or hire a professional aerial photographer to achieve these impressive shots.
When capturing aerial views, focus on highlighting the property's key features. Showcase the layout, landscaping, and surrounding area. You'll want to capture images from various angles and altitudes to provide a thorough view.
Here's a breakdown of essential aerial shots for showcasing property features:
| Shot Type | Altitude | Purpose |
|---|---|---|
| Overview | High | Show entire property and surroundings |
| Front | Medium | Highlight curb appeal and entrance |
| Back | Medium | Display backyard and outdoor amenities |
| Side | Low | Capture unique architectural features |
| Detail | Very Low | Focus on specific selling points |
Remember to comply with local regulations and obtain necessary permits before flying drones. Post-processing is vital to enhance the images and create a cohesive look. By incorporating these aerial shots into your 360° property views, you'll provide potential buyers with a thorough understanding of the property and its surroundings.
Marketing With 360° Aerial Views
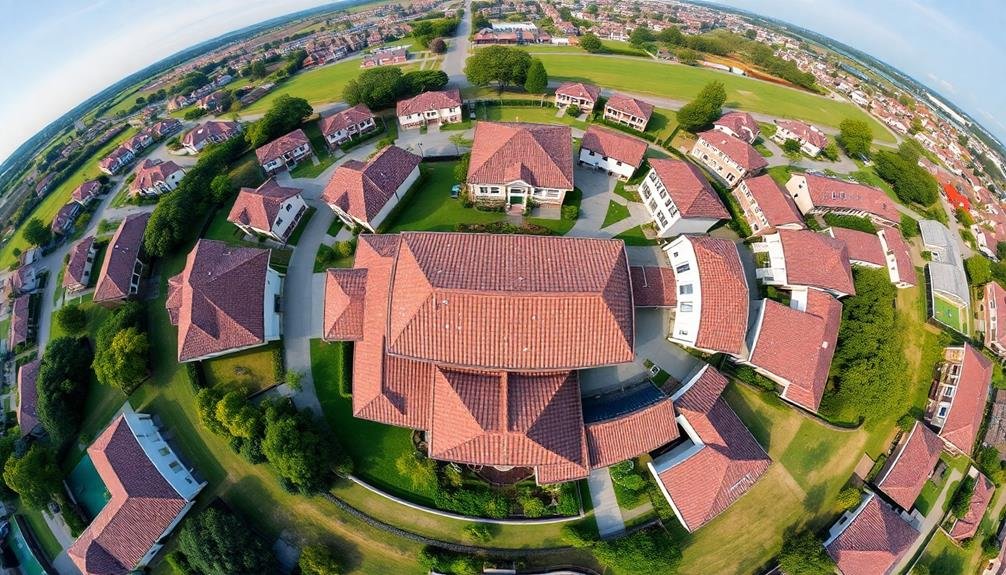
With the rise of immersive technology, 360° aerial views have become a game-changer in real estate marketing. These panoramic images offer potential buyers a thorough look at properties and their surroundings, helping them make informed decisions.
By incorporating 360° aerial views into your marketing strategy, you'll stand out from competitors and provide a unique, engaging experience for your clients.
To effectively market properties using 360° aerial views:
- Showcase the property's location and context by capturing nearby amenities, landmarks, and natural features.
- Highlight the property's unique selling points, such as expansive gardens, swimming pools, or architectural details.
- Create virtual tours that allow users to explore the property and its surroundings from multiple angles.
- Integrate the 360° views into your website, social media platforms, and property listings.
When sharing these immersive views, make certain they're easily accessible across devices and platforms.
Consider using virtual reality (VR) headsets to provide an even more immersive experience during property viewings.
Troubleshooting Common Issues

When creating 360° property views, you'll likely encounter some common issues.
You may face equipment malfunctions, such as camera failures or drone breakdowns, which can halt your progress.
Weather-related challenges and software glitches can also impede your work, requiring quick problem-solving skills to keep your project on track.
Equipment Malfunctions
What happens when your 360° camera refuses to cooperate? Equipment malfunctions can quickly derail your property viewing project, but don't panic. Understanding common issues and their solutions will help you get back on track.
First, check your camera's battery life and memory capacity. Low power or insufficient storage can cause unexpected shutdowns or incomplete captures. Always carry spare batteries and memory cards to avoid these setbacks.
When facing technical glitches, try these troubleshooting steps:
- Power cycle the camera by removing the battery for 30 seconds
- Update the camera's firmware to the latest version
- Reset the camera to factory settings
- Check for loose connections or damaged cables
If your camera overheats, which is common during long shoots, give it time to cool down. Avoid direct sunlight and use a sun shade if possible.
For persistent issues, consult your camera's manual or contact the manufacturer's support team.
Weather-Related Challenges
Weather can throw a wrench in your 360° property viewing plans. Wind is your biggest enemy, as it can destabilize your drone and blur images. Don't fly in winds exceeding 20 mph, and always check forecasts before scheduling shoots.
Rain and snow aren't just hazardous for your equipment; they also reduce visibility and image quality. Avoid flying in precipitation, and be cautious of wet surfaces that can cause glare.
Extreme temperatures can affect battery life and drone performance. In cold weather, keep batteries warm and limit flight times. Hot weather can cause overheating, so provide shade for your drone between flights.
Lighting conditions are vital for quality 360° views. Overcast days provide even lighting but may lack vibrancy. Bright sunlight creates harsh shadows and potential overexposure. Early morning or late afternoon often offer the best lighting balance.
Fog and haze can add atmosphere but may obscure important details. Consider rescheduling if visibility is poor.
Software Glitches
Despite careful planning, software glitches can disrupt your 360° property view creation. These technical hiccups can range from minor annoyances to major setbacks, potentially compromising the quality of your final product.
To help you navigate these challenges, here are some common software issues you might encounter and how to address them:
- Stitching errors: If your software fails to properly align and merge individual images, you'll need to manually adjust the stitching points. Look for overlapping areas and fine-tune the alignment to create a seamless panorama.
- Color inconsistencies: Variations in lighting or camera settings can lead to color discrepancies. Use your software's color correction tools to balance and harmonize the hues across all images.
- Ghosting artifacts: Moving objects or people can create ghostly duplicates in your final image. Remove these by using your software's masking or cloning tools to blend problematic areas.
- Export failures: If you're unable to export your finished 360° view, try reducing the file size or changing the output format. Some platforms have specific requirements, so verify you're using compatible settings.
Frequently Asked Questions
How Long Does It Take to Learn Aerial 360° Photography?
You can learn basic aerial 360° photography in a few weeks, but mastering it may take several months. It depends on your existing skills, practice frequency, and equipment. You'll need to dedicate time to both flying and photography techniques.
Can I Use 360° Property Views for Non-Real Estate Purposes?
You're not limited to real estate. You can use 360° views for virtual tours of museums, showcasing event venues, documenting construction progress, or creating immersive experiences for tourism. The possibilities are vast for various industries and purposes.
What Insurance Considerations Should I Have for Drone Photography?
You'll need liability insurance to cover potential damages or injuries. Confirm your policy includes drone-specific coverage. Don't forget equipment insurance for your drone. Check local regulations, as some areas require additional insurance for commercial drone use.
How Often Should I Update 360° Property Views?
You should update your 360° property views regularly, ideally every 6-12 months. If there are significant changes to the property or surroundings, update sooner. Keep your views current to maintain accuracy and attract potential buyers or renters.
Are There Privacy Concerns When Capturing Aerial 360° Views of Properties?
Yes, there are privacy concerns with aerial 360° property views. You should respect people's privacy by avoiding capturing detailed images of private areas, obtaining consent when necessary, and following local laws regarding drone usage and aerial photography.
In Summary
You've now got the tools to create stunning 360° aerial property views. Remember to always follow FAA regulations and prioritize safety. With practice, you'll master flight paths and camera settings to showcase properties at their best. These immersive views will set your listings apart and impress potential buyers. Don't be discouraged by initial challenges; troubleshoot and refine your techniques. Soon, you'll be capturing breathtaking aerial perspectives that elevate your real estate marketing game.
As educators and advocates for responsible drone use, we’re committed to sharing our knowledge and expertise with aspiring aerial photographers.


Leave a Reply