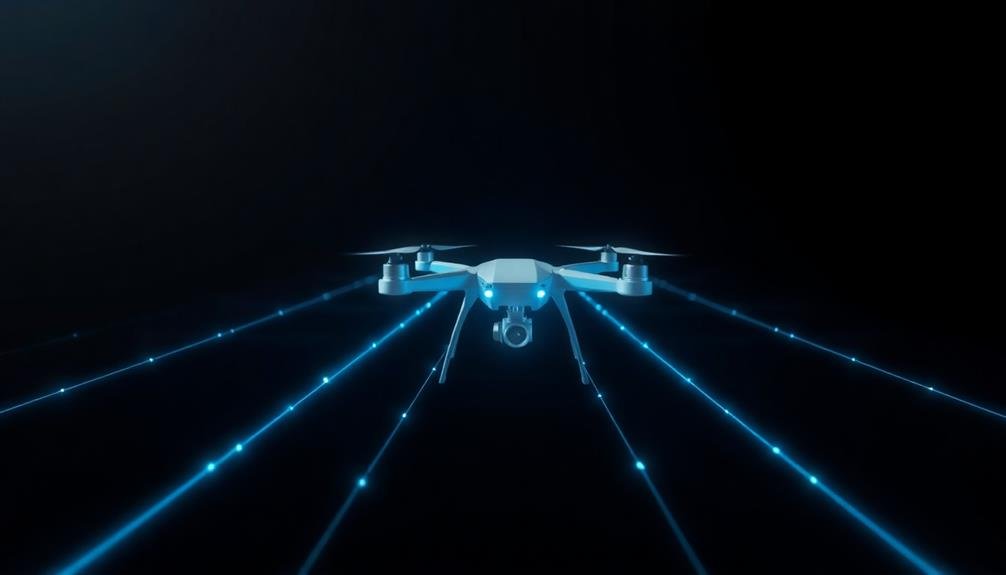
Advanced aerial motion tracking transforms your drone footage into enchanting visual masterpieces. You'll need a high-quality drone with a stabilized 4K camera and updated firmware. Start by selecting stable, high-contrast footage and importing it into your editing software. Identify key tracking points in distinct shapes or patterns, then fine-tune your tracking parameters for ideal results. Apply markers strategically and analyze the tracking data to refine your results. Don't forget to filter out noise and visualize movement patterns for a polished final product. With these steps, you'll elevate your aerial videography to new heights. The journey to mastering this technique is just beginning.
Key Takeaways
- Choose a high-quality drone with stabilized camera gimbal and 4K resolution for optimal aerial footage.
- Set camera frame rate to at least 60fps and enable RAW shooting for post-production flexibility.
- Select stable footage with high-contrast scenes and easily recognizable static elements for accurate tracking.
- Identify key tracking points in high-contrast areas, distinct shapes, or unique patterns visible across multiple frames.
- Adjust motion tracking parameters, including sensitivity, detection threshold, and keyframe interval, for optimal results.
Equipment Setup and Preparation
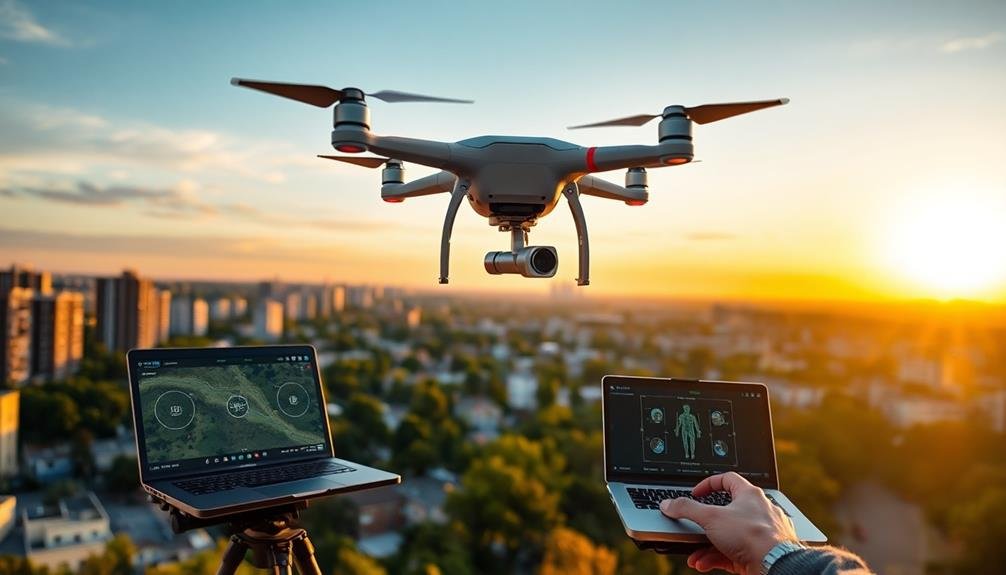
Every successful aerial motion tracking project begins with proper equipment setup and preparation.
You'll need a high-quality drone equipped with a stabilized camera gimbal, preferably one that supports 4K resolution. Make sure your drone's firmware is up-to-date and its batteries are fully charged. Don't forget spare batteries for extended filming sessions.
Your camera settings are vital. Set your frame rate to at least 60fps for smooth motion tracking. Enable RAW shooting if available, as it provides more flexibility in post-production. Adjust your shutter speed to double your frame rate (e.g., 1/120 for 60fps) to reduce motion blur.
For precise tracking, you'll need visible markers. Use brightly colored objects that contrast with the environment. Place these markers strategically in your filming area, confirming they're visible from various angles.
Before takeoff, calibrate your drone's compass and GPS. Check local regulations and obtain necessary permits for aerial filming.
Scout your location in advance, noting potential obstacles and ideal flight paths. Finally, create a shot list to maximize efficiency during your limited flight time.
Selecting Suitable Footage

Three key factors determine the suitability of aerial footage for motion tracking: stability, contrast, and markers. You'll want to focus on these elements when selecting your footage for ideal results.
Stability is essential. Choose shots with minimal camera shake or sudden movements. Smooth, controlled drone flights provide the best foundation for tracking. If you're working with existing footage, look for segments where the camera motion is predictable and consistent.
Contrast plays an important role in successful tracking. Select scenes with distinct visual differences between the subject and background. High-contrast environments make it easier for tracking software to identify and follow points of interest throughout the footage.
Markers, whether natural or artificial, are critical for accurate tracking. Seek out footage that includes easily identifiable static elements in the scene, such as buildings, trees, or terrain features. These serve as reference points for the tracking algorithm. If you're planning a shoot, consider placing artificial markers in the environment to enhance tracking precision.
When reviewing potential footage, pay attention to lighting conditions, frame rate, and resolution. Well-lit scenes with consistent exposure, higher frame rates, and higher resolutions generally yield better tracking results.
Importing Video Into Editing Software
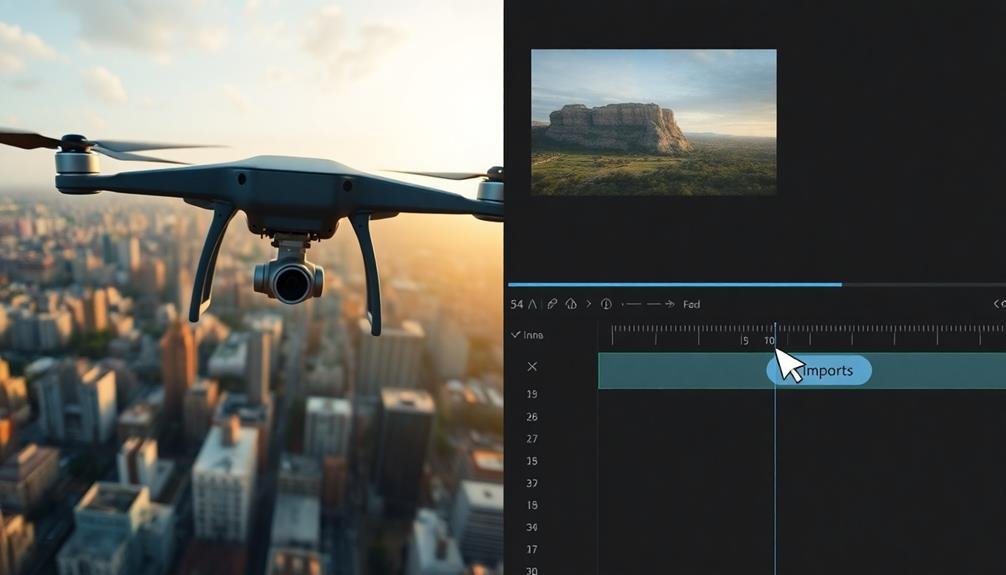
Once you've selected suitable footage for motion tracking, the next step is to bring it into your editing software. Most professional editing programs support a wide range of video formats, but it's essential to guarantee your footage is compatible. If it's not, you'll need to convert it using a third-party tool before importing.
To import your video, open your editing software and locate the import function. This is often found under the "File" menu or as a dedicated import button. Select your footage and choose the destination folder within your project. Pay attention to any import settings, such as frame rate or resolution, to maintain the original quality of your aerial footage.
For large files, consider using a proxy workflow. This involves creating lower-resolution copies of your footage for smoother editing, then linking back to the high-quality originals for final export. Many editing programs offer built-in proxy creation tools.
Once imported, organize your footage in the project panel. Create bins or folders to separate different shots or shooting days. This organization will streamline your workflow as you begin the motion tracking process.
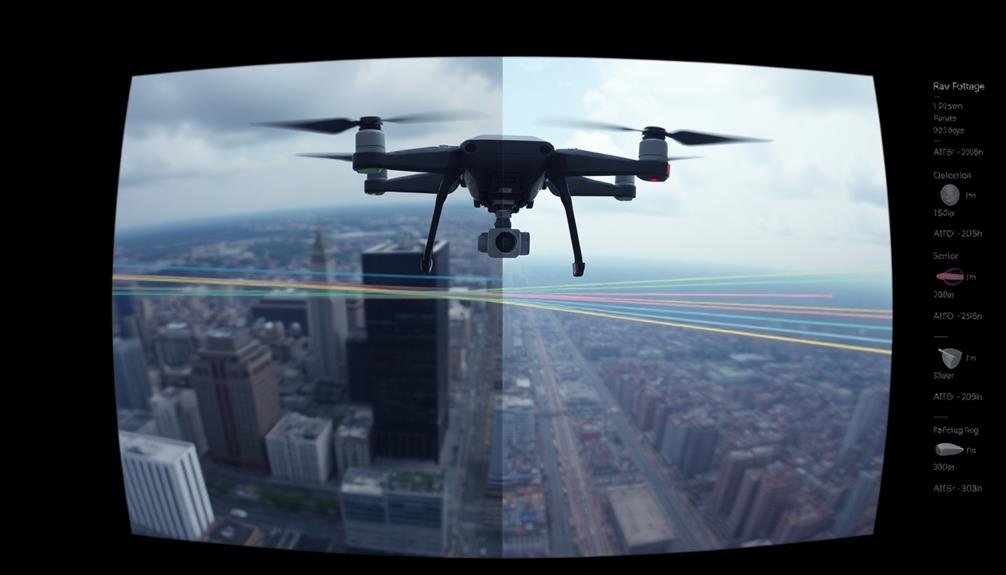
Identifying Key Tracking Points
When identifying key tracking points for aerial motion tracking, you'll need to select ideal features that the software can easily follow.
Look for high-contrast areas, distinct shapes, or unique patterns that stand out from their surroundings.
Remember to balance the quantity of tracking points with their quality, as too many poor-quality points can lead to inaccurate results.
Selecting Optimal Tracking Features
Selecting ideal tracking features is essential for accurate aerial motion tracking. You'll want to focus on elements that remain consistent throughout your footage. Look for high-contrast areas, unique patterns, or distinct shapes that stand out from their surroundings. Avoid features that may change appearance due to lighting variations or perspective shifts.
When choosing tracking points, prioritize corners, intersections, or sharp edges. These provide more stable reference points compared to flat surfaces or gradual color changes. Aim for features that are visible in multiple frames and don't get obscured by other objects or move out of frame.
Consider the scale of your subject. For larger objects, select multiple tracking points spread across different areas. This approach helps maintain accuracy even if some points become temporarily hidden. For smaller subjects, focus on the most prominent and stable features.
Be mindful of potential distractions. Avoid tracking points on reflective surfaces, areas with repetitive patterns, or regions prone to motion blur. Instead, opt for features that maintain their distinct characteristics throughout the shot, ensuring a more reliable tracking process.
Balancing Quantity and Quality
Striking the right balance between quantity and quality of tracking points is essential for effective aerial motion tracking. You'll want to identify enough points to guarantee robust tracking, but not so many that it overwhelms your system or introduces unnecessary noise.
Start by selecting 10-15 high-contrast, distinct features in your frame. These could be corners of buildings, unique patterns on the ground, or other easily distinguishable elements. As you add more points, assess their contribution to the overall tracking accuracy. You'll often find that after a certain threshold, additional points don't notably improve results.
Consider the distribution of your tracking points across the frame. Aim for an even spread, avoiding clusters in one area. This will provide a more thorough representation of the motion in your scene.
Setting Motion Tracking Parameters
When setting up motion tracking for aerial footage, you'll need to fine-tune your sensitivity settings to match the movement in your shots.
You can adjust these parameters to account for factors like camera shake, wind, or rapid directional changes.
Additionally, configuring your keyframe interval will help you balance tracking accuracy with processing time, allowing for more efficient workflows.
Adjusting Sensitivity Settings
Fine-tuning the sensitivity settings of your aerial motion tracking system is essential for superior performance. You'll need to adjust these settings based on your specific filming conditions and desired outcomes. Start by focusing on three key parameters: detection threshold, tracking speed, and motion prediction.
The detection threshold determines how easily your system recognizes movement. Set it too low, and you'll pick up unwanted noise; too high, and you might miss subtle motions. Experiment with different values to find the sweet spot for your environment.
Tracking speed affects how quickly your camera responds to subject movement. A higher setting works well for fast-moving subjects, while a lower value suits slower, more predictable motion.
Motion prediction helps your system anticipate where the subject will move next. Adjust this setting based on the predictability of your subject's movements.
| Parameter | Low Setting | High Setting |
|---|---|---|
| Detection Threshold | Sensitive, noisy | Less sensitive, cleaner |
| Tracking Speed | Smooth, laggy | Responsive, jittery |
| Motion Prediction | Conservative tracking | Aggressive tracking |
Keyframe Interval Configuration
Configuring the keyframe interval is a crucial step in optimizing your aerial motion tracking system. This setting determines how frequently your software creates reference points for tracking motion. A shorter interval means more keyframes, which can increase accuracy but also processing time and storage requirements.
To set the keyframe interval, access your motion tracking software's settings menu. You'll typically find this option under "Tracking Parameters" or "Advanced Settings." Start with the default interval, often one keyframe per second, and adjust based on your footage.
For slow, steady movements, you can increase the interval to reduce unnecessary keyframes. However, for rapid or erratic motion, decrease the interval to capture more detail. Remember, the ideal setting balances accuracy with efficiency.
Test different intervals on sample footage before finalizing your choice. Pay attention to how changes affect tracking quality and processing time. If you notice jumps or inaccuracies in tracking, try reducing the interval. Conversely, if tracking is smooth but slow, consider increasing it.
Don't forget to save your preferred settings as a preset for future projects with similar motion characteristics. This will streamline your workflow and promote consistency across multiple tracking sessions.
Applying Tracking Markers
For effective aerial motion tracking, applying tracking markers is an essential step. You'll need to strategically place these markers on your subject or environment to guarantee accurate tracking. Choose high-contrast markers that stand out against the background and are easily visible to your camera.
When applying tracking markers, consider the following tips:
- Use a variety of shapes and sizes to improve recognition
- Distribute markers evenly across the tracking area
- Avoid placing markers in areas with heavy motion blur
- Confirm markers are securely attached to prevent movement
Here's a quick reference guide for common tracking marker types:
| Marker Type | Best Use Case | Pros | Cons | Example |
|---|---|---|---|---|
| Circular | General purpose | Easy to detect | Can be confused with other circular objects | ● |
| Square | Planar surfaces | Provides orientation information | May be less visible at extreme angles | ■ |
| X-shaped | Complex geometry | Distinct shape | Can be mistaken for background elements | ✕ |
| LED | Low-light conditions | Highly visible | Requires power source | � |
| QR code | Advanced tracking | Encodes additional data | Larger size required | � |
Remember to test your marker placement before starting your full tracking session. Adjust as needed to achieve ideal results and smooth motion tracking throughout your aerial footage.
Analyzing Tracking Data
You'll need to interpret tracking trajectories to understand the motion patterns of aerial subjects.
It's essential to filter noise effectively, removing erroneous data points that can skew your analysis.
Interpreting Tracking Trajectories
Trajectories paint a detailed picture of aerial motion, revealing essential insights about an object's path through space and time. When interpreting tracking trajectories, you'll need to focus on key elements that provide valuable information about the subject's movement.
Start by examining the overall shape of the trajectory. Is it linear, curved, or erratic? This can indicate the object's general behavior and any external forces acting upon it.
Next, look at the trajectory's density. Areas with tightly clustered points suggest slower movement or hovering, while sparse sections indicate rapid motion.
Pay attention to sudden changes in direction or speed, as these can signify important events or decisions made by the tracked subject. Analyze the trajectory's height variations to understand vertical movement patterns and altitude preferences.
Compare multiple trajectories to identify patterns or anomalies across different subjects or time periods. This can help you spot trends or unusual behaviors.
Don't forget to take into account environmental factors that might influence the trajectory, such as wind patterns or obstacles in the flight path.
Filtering Noise Effectively
Despite the precision of modern tracking systems, noise in aerial motion data is inevitable. You'll need to apply effective filtering techniques to separate meaningful data from unwanted fluctuations.
Start by identifying the sources of noise, which may include atmospheric interference, sensor limitations, or motion artifacts.
Next, choose an appropriate filtering method. For aerial motion tracking, you'll often use low-pass filters to remove high-frequency noise while preserving the underlying motion data. Butterworth or Kalman filters are popular choices.
Implement your chosen filter in your data processing pipeline, carefully adjusting parameters to strike a balance between noise reduction and data preservation.
After applying the filter, evaluate its effectiveness by comparing the filtered data to the raw data. Look for smoother trajectories and reduced jitter in the filtered results.
If necessary, fine-tune your filter settings or try alternative filtering methods. Remember that over-filtering can lead to loss of important motion details, so aim for the minimum level of filtering that achieves your desired results.
Visualizing Movement Patterns
With clean, filtered data in hand, it's time to bring your aerial motion tracking results to life through visualization. Start by plotting the tracked object's position over time using 2D or 3D graphs. You'll want to create separate plots for x, y, and z coordinates to clearly show movement along each axis. Use different colors or line styles to distinguish between multiple tracked objects or various segments of the flight path.
Next, generate heat maps to highlight areas of frequent activity or prolonged hovering. These visual representations can quickly reveal patterns that mightn't be obvious from raw data alone. Consider creating velocity and acceleration graphs to analyze speed changes throughout the flight. You can also plot trajectory curves to showcase the overall path of movement.
For more advanced visualization, implement interactive 3D models that allow you to rotate and zoom in on specific segments of the flight path. Use animation techniques to recreate the motion in real-time or at adjustable speeds.
Don't forget to add relevant labels, legends, and scales to your visualizations for easy interpretation. By effectively visualizing your data, you'll gain deeper insights into aerial movement patterns and behaviors.
Refining Tracking Results
Refining tracking results is an essential step in achieving accurate aerial motion data. After initial tracking, you'll often find inconsistencies or errors that need addressing. Start by reviewing your footage frame-by-frame, looking for jumps or glitches in the tracked points. Use your software's smoothing tools to eliminate jitter and reduce noise in the data.
Next, focus on filling in gaps where tracking was lost. You can manually keyframe these sections or use interpolation techniques to estimate the missing data. Pay special attention to areas with rapid movement or changes in lighting, as these are common sources of tracking errors.
To further improve your results:
- Apply filters to remove outliers and anomalies
- Use multiple tracking points for increased stability
- Calibrate your camera settings for more accurate 3D reconstruction
- Cross-reference with other data sources, like GPS or IMU data
- Implement machine learning algorithms for advanced pattern recognition
Don't hesitate to re-track problematic sections using different settings or methods. Experiment with various tracking algorithms to find the best fit for your specific footage.
Adding Visual Effects
Once you've refined your tracking data, adding visual effects becomes an exciting next step.
Begin by importing your tracked footage into a compositing software like After Effects or Nuke. Create a new composition matching your footage's settings. Next, add a null object and apply your tracking data to it. This null object will serve as a parent for your visual effects.
Now, you can start adding effects. For text overlays, create a text layer and parent it to the null object. Adjust its position and scale as needed.
For 3D elements, import your models and align them with the scene. Parent these to the null object as well. You'll need to match the lighting and camera perspective for seamless integration.
For particle effects, use plugins like Particular or native particle systems. Adjust emission points and parameters to match your scene's movement.
Don't forget to add motion blur to your effects to match the original footage. Finally, color grade your added elements to blend with the source material.
Experiment with different blending modes and opacity settings for best results. Remember to regularly preview your work to guarantee smooth motion and realistic integration.
Stabilizing Shaky Footage

Occasionally, even the most careful aerial cinematographers encounter shaky footage. When this happens, you'll need to stabilize your shots in post-production. Start by importing your shaky footage into your preferred video editing software. Most modern editing programs offer built-in stabilization tools that can greatly improve your footage.
To stabilize your aerial shots effectively:
- Analyze the footage to identify the most problematic areas
- Adjust the stabilization settings gradually, starting with lower values
- Pay attention to motion blur and artifacts that may appear
- Use keyframes to fine-tune stabilization for specific sections
- Consider cropping slightly to remove edge distortions
Begin by applying the stabilization effect to your clip. You'll typically see options for smoothness, method, and borders. Experiment with these settings to find the right balance between stability and maintaining the original movement.
Remember, over-stabilizing can lead to warping or a jelly-like effect. If your software's built-in stabilizer isn't sufficient, consider using specialized third-party plugins. These often provide more advanced algorithms and greater control over the stabilization process.
As you work, regularly preview your footage to verify you're achieving the desired result without introducing new issues.
Exporting Final Composition
After you've completed all your edits and motion tracking adjustments, it's time to export your final composition for delivery. Choose the appropriate export settings based on your project requirements and intended platform. Select the correct resolution, frame rate, and codec to guarantee peak quality and compatibility.
Before exporting, double-check your work area to confirm all elements are within the frame. Render a preview to catch any last-minute issues. When you're ready, navigate to the export menu and select your desired format.
Here's a quick reference guide for common export settings:
| Platform | Resolution | Frame Rate | Codec |
|---|---|---|---|
| YouTube | 1920×1080 | 30 fps | H.264 |
| 1080×1080 | 30 fps | H.264 | |
| Vimeo | 2560×1440 | 60 fps | ProRes 422 |
| 1280×720 | 30 fps | H.264 | |
| Cinema | 4096×2160 | 24 fps | DCI-compliant |
Monitor the export progress and verify the final file once it's complete. Play through the exported video to confirm smooth playback and accurate motion tracking. If you notice any issues, return to your project, make necessary adjustments, and re-export. With your final composition exported, you're ready to share your polished aerial footage with the world.
Troubleshooting Common Tracking Issues
Three common tracking issues often plague aerial motion tracking projects: jittery tracks, drifting markers, and lost tracking points.
To address jittery tracks, try increasing your motion blur or adjusting the tracking algorithm's sensitivity. For drifting markers, verify you've selected high-contrast tracking points and consider manually adjusting keyframes where necessary.
When dealing with lost tracking points, you'll need to reestablish them. Look for consistent, contrasting features in your footage to serve as new anchor points. If the issue persists, you might need to split your composition and track sections separately.
Here are five essential troubleshooting tips to keep in mind:
- Regularly check your track's accuracy throughout the process
- Use multiple tracking points for increased stability
- Adjust search area size to accommodate fast-moving objects
- Experiment with different tracking algorithms
- Clean up your footage before tracking (e.g., remove lens distortion)
Frequently Asked Questions
How Does Aerial Motion Tracking Differ From Ground-Based Motion Tracking?
You'll find aerial motion tracking more complex due to 3D movement and changing backgrounds. It requires specialized equipment like drones and advanced software. You'll need to account for wind, altitude changes, and wider camera movements.
What Are the Legal Considerations for Using Drones in Motion Tracking?
When using drones for motion tracking, you'll need to take into account legal requirements. You must follow local regulations, obtain necessary permits, respect privacy laws, and adhere to airspace restrictions. Don't forget to register your drone if required.
Can Motion Tracking Be Combined With Photogrammetry for 3D Reconstruction?
Yes, you can combine motion tracking with photogrammetry for 3D reconstruction. You'll capture multiple images from different angles, track camera movement, and use specialized software to create accurate 3D models of objects or environments.
How Does Weather Affect the Accuracy of Aerial Motion Tracking?
Weather can greatly impact your aerial motion tracking accuracy. You'll face challenges with wind, rain, and fog. They'll affect camera stability, visibility, and data quality. Extreme temperatures can also interfere with your equipment's performance.
Are There Specific Certifications Required for Professional Aerial Motion Tracking Work?
You'll likely need certifications for professional aerial motion tracking. Common requirements include a drone pilot's license, FAA Part 107 certification, and specialized training in motion tracking software. Always check local regulations for specific requirements in your area.
In Summary
You've now mastered the basics of advanced aerial motion tracking. With practice, you'll refine your skills and create stunning visual effects. Don't be discouraged by initial challenges – troubleshooting is part of the process. Keep experimenting with different footage and tracking points to expand your abilities. Remember, the key is patience and attention to detail. As you continue to hone your craft, you'll reveal endless creative possibilities in your video projects.
As educators and advocates for responsible drone use, we’re committed to sharing our knowledge and expertise with aspiring aerial photographers.


Leave a Reply