Elevate your aerial cinematography with these seven advanced follow shot techniques. Master orbital tracking for dynamic circular movements, and use disclose and soar to create dramatic landscape unveilings. Implement dynamic altitude changes to capture ascending or descending subjects, while parallax panning adds depth to your shots. Try the reverse dolly zoom for a mind-bending perspective shift, and perfect the spiral ascent for mesmerizing vertical journeys. Finally, employ the leading line follow technique to guide viewers through visually striking landscapes. Each method requires precise control and practice, but mastering these techniques will transform your drone footage into cinematic masterpieces. Discover how to execute these shots like a pro and take your aerial filmmaking to new heights.
Key Takeaways
- Orbital tracking creates dynamic circular shots around a subject, adjusting altitude and speed for varied effects.
- Parallax panning adds depth by moving laterally while centering the subject, utilizing foreground objects for enhanced movement.
- The spiral ascent technique combines circular movement with altitude increase for a mesmerizing visual effect.
- Dynamic altitude changes capture ascending or descending journeys, revealing expansive landscapes or creating dramatic tension.
- The reverse dolly zoom technique requires synchronized backward drone movement and camera zoom-in for a unique perspective shift.
Orbital Tracking
In recent years, orbital tracking has revolutionized aerial cinematography. This technique involves flying your drone in a circular path around a subject, maintaining a consistent distance while keeping the camera locked on target. To execute this move, you'll need a drone with intelligent flight modes and a gimbal-stabilized camera.
Start by selecting your subject and setting your desired radius. Fly your drone to the starting position and activate the orbital tracking mode. As the drone begins its circular flight path, adjust your altitude and speed to create the desired effect. For smoother footage, use slower speeds and wider orbits.
You can add depth to your shot by gradually changing the altitude during the orbit. Ascending or descending as you circle creates a dynamic, spiraling effect. Experiment with different angles by tilting the camera up or down during the orbit.
To master orbital tracking, practice maintaining a consistent distance from your subject and smoothly shifting in and out of the move. Use this technique to showcase landscapes, architecture, or moving subjects like vehicles or athletes.
Remember to comply with local drone regulations and prioritize safety throughout your shoot.
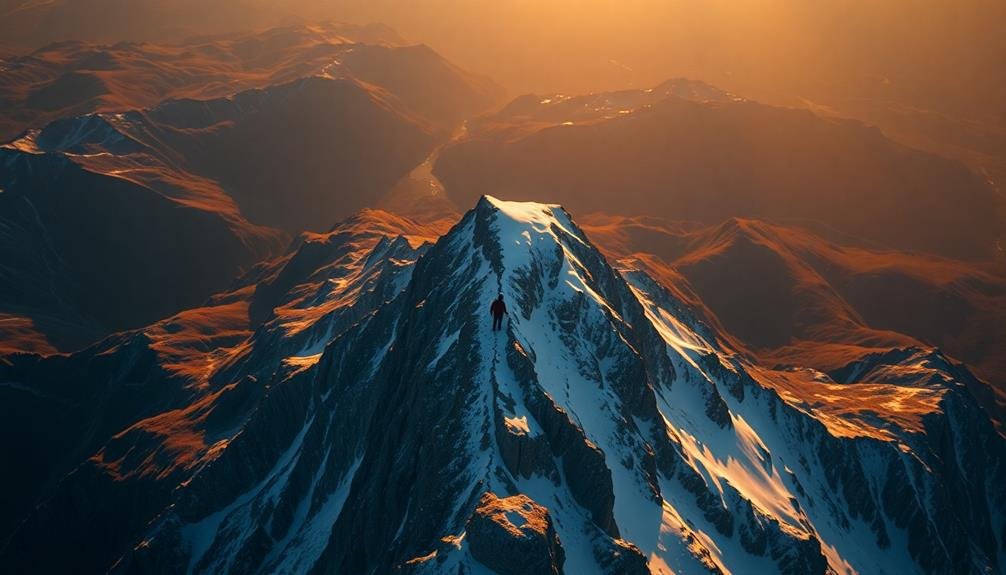
Reveal and Soar
Cinematographers love the "Reveal and Soar" technique for its dramatic impact on aerial footage. This advanced maneuver combines two powerful elements: a reveal shot and an ascending movement.
To execute this technique, you'll start with your drone positioned low, often behind an obstacle. As you begin filming, slowly move forward, revealing the landscape or subject. Once the reveal is complete, smoothly shift into an ascending motion, soaring upwards to capture a breathtaking aerial view.
The key to mastering this technique lies in your timing and control. Start with a slow, steady reveal, maintaining a consistent speed as you uncover the scene. As you shift to the soar, gradually increase your drone's altitude while adjusting the camera angle to keep your subject in frame.
Pay attention to your ascent rate; it should be smooth and deliberate, not rushed.
For best results, scout your location beforehand to identify ideal starting points and flight paths. Practice the maneuver several times before capturing your final shot, fine-tuning your movements to achieve the perfect balance of surprise and awe in your footage.
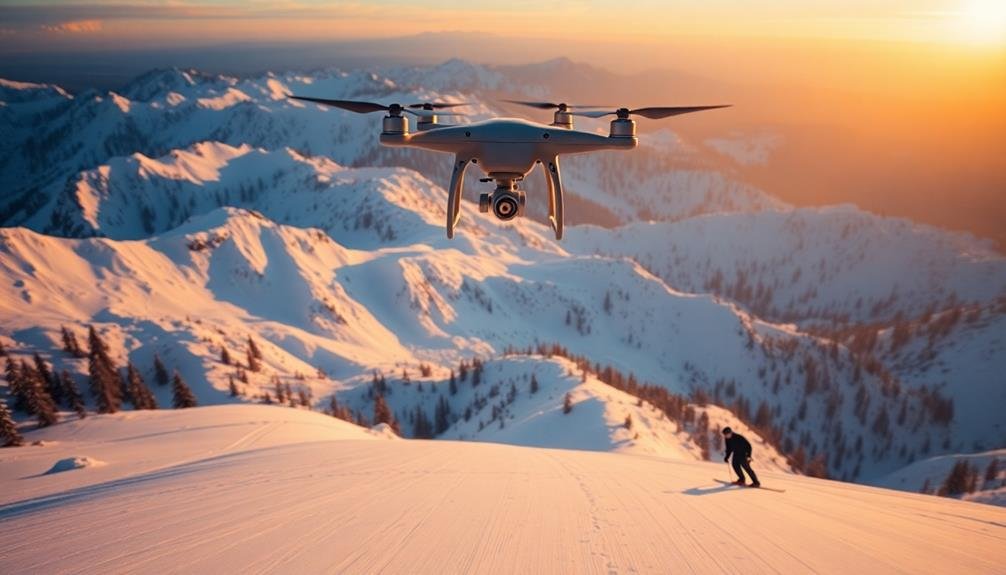
Dynamic Altitude Changes
Dynamic altitude changes can elevate your aerial cinematography to new heights.
You'll master ascending shots to keep pace with rising subjects, capturing their upward journey with fluid grace.
Conversely, you'll learn to descend swiftly, creating dramatic tension and revealing expansive landscapes below your subject.
Ascending With Moving Subjects
How do you capture the thrill of a subject rapidly gaining altitude while maintaining a smooth, cinematic shot? Ascending with moving subjects requires precise control and anticipation. As your subject climbs, you'll need to match their ascent rate while keeping them perfectly framed. This technique is particularly challenging but can result in breathtaking footage when executed correctly.
To master ascending follow shots, focus on these key aspects:
- Anticipate your subject's trajectory
- Maintain a consistent distance
- Adjust your camera angle gradually
Start by positioning your drone slightly below and behind the subject. As they begin to ascend, gradually increase your altitude while moving forward. This creates a dynamic shot that conveys the sense of height and movement.
Keep your movements smooth and deliberate, using gentle stick inputs to avoid jerky motions.
Practice coordinating your ascent with various subjects, such as climbers, paragliders, or even other aircraft. Remember to account for wind conditions and obstacles that may affect your flight path.
With practice, you'll develop the intuition needed to create stunning ascending follow shots that truly capture the excitement of your subject's vertical journey.
Descending for Dramatic Effect
When capturing aerial footage, few techniques can match the heart-pounding excitement of a rapid descent. To master this technique, you'll need to carefully plan your shot and maintain precise control over your drone's movements.
Start by positioning your drone well above your subject. As you begin your descent, gradually increase your speed to create a sense of acceleration. Keep your camera focused on the subject, adjusting your framing as needed to maintain composition. You'll want to time your descent to reach maximum velocity just as you approach your subject for maximum impact.
Pay close attention to your surroundings and any obstacles in your path. It's essential to maintain a safe distance from your subject and any structures. Use your drone's obstacle avoidance features if available, but don't rely on them entirely.
To add even more drama, try combining your descent with other movements like orbiting or tracking. This can create complex, multi-dimensional shots that truly showcase your subject.
Remember to practice this technique in open areas before attempting it in more challenging environments. With practice, you'll be able to create breathtaking descending shots that elevate your aerial cinematography.
Parallax Panning

In aerial cinematography, parallax panning adds depth and dimension to your shots. This technique involves moving your drone laterally while keeping the subject centered in the frame. As you pan, objects in the foreground appear to move faster than those in the background, creating a dynamic sense of movement and space.
To master parallax panning, you'll need to practice smooth, controlled movements. Start by flying your drone at a constant speed and altitude, parallel to your subject. As you move, adjust your camera's rotation to maintain focus on the main point of interest. The key is to maintain a steady pace and consistent distance from your subject throughout the shot.
Here are three tips to enhance your parallax panning:
- Use obstacles in the foreground to amplify the parallax effect
- Experiment with different speeds to find the right balance of motion
- Combine parallax panning with gentle ascending or descending movements for added complexity
Reverse Dolly Zoom
To execute a reverse dolly zoom in aerial cinematography, you'll need to carefully configure your drone's camera settings and stabilization system.
You must master precise control over your drone's speed and trajectory while simultaneously adjusting the camera's zoom.
In post-production, you'll refine the effect by fine-tuning the footage's speed and potentially applying digital zoom adjustments to enhance the visual impact.
Equipment Setup and Calibration
For the reverse dolly zoom technique, proper equipment setup and calibration are vital. You'll need a drone with a high-quality camera and a gimbal capable of smooth, controlled movements. Verify your drone's firmware is up-to-date and its sensors are calibrated for peak performance.
Your camera should be set to manual mode, allowing you full control over focus, exposure, and zoom settings. Before flight, carefully plan your shot and set your focus point. You'll need to maintain this focus throughout the movement, so use focus peaking or manual focus assist features if available.
Adjust your camera's zoom range to accommodate the desired effect, typically starting wide and ending on a tighter frame.
To execute the reverse dolly zoom effectively:
- Set your drone's flight path to move backward steadily
- Simultaneously zoom in at a rate that matches your drone's backward movement
- Maintain consistent altitude and heading throughout the shot
Practice this technique in a controlled environment before attempting it on location. Pay close attention to your drone's battery life and wind conditions, as they can affect the smoothness of your movement.
With proper setup and calibration, you'll be able to capture stunning reverse dolly zoom shots that add a dynamic and professional touch to your aerial cinematography.
Timing and Speed Control
Mastering the timing and speed control of a reverse dolly zoom is essential to achieving a polished, professional result.
You'll need to carefully coordinate your drone's backward movement with the camera's zoom-in to create the desired effect. Start by setting your drone's speed to match your camera's zoom rate. This synchronization is vital for maintaining a consistent subject size while the background appears to rush forward.
Practice smooth acceleration and deceleration of your drone to avoid jerky movements. Begin the shot with a slow backward motion, gradually increasing speed as you progress. Simultaneously, adjust your camera's zoom from wide to telephoto at a steady pace. Keep your subject centered in the frame throughout the movement.
Use visual markers or reference points to gauge your drone's distance and speed. This will help you maintain consistency across multiple takes. Experiment with different speeds and zoom rates to find the perfect balance for your specific shot.
Post-Production Editing Techniques
Post-production wizardry can elevate your reverse dolly zoom shots from good to great. In the editing room, you'll have the opportunity to fine-tune your footage and create a truly mesmerizing effect.
Start by carefully selecting the best takes, paying close attention to the steadiness of the camera movement and the subject's positioning throughout the shot.
Next, you'll want to stabilize your footage using advanced software tools. This step is essential for smoothing out any minor bumps or shakes that occurred during the flight.
Once stabilized, focus on adjusting the speed of your footage. You can create a more dramatic effect by gradually increasing or decreasing the playback speed as the zoom progresses.
To make your reverse dolly zoom truly stand out, consider these additional techniques:
- Add subtle motion blur to enhance the sense of movement
- Experiment with color grading to emphasize the changing perspective
- Incorporate sound design that complements the visual effect
Spiral Ascent

The Spiral Ascent technique elevates your aerial cinematography from out of the ordinary to extraordinary. This dynamic move involves your drone ascending in a circular pattern around a central subject, creating a mesmerizing spiral effect.
To execute this shot, you'll need to master simultaneous control of altitude, yaw, and lateral movement.
Begin by positioning your drone at eye level with your subject. As you increase altitude, slowly rotate the drone around the subject while maintaining a consistent distance. The key is to keep your subject centered in the frame throughout the ascent. Adjust your speed based on the desired effect—slower for a gradual reveal, faster for a more dramatic impact.
To enhance the Spiral Ascent, consider these tips:
- Use a wide-angle lens to capture more of the surroundings.
- Experiment with different ascent speeds and rotation rates.
- Try starting from below your subject and spiraling up and away.
- Incorporate natural or architectural elements as reference points.
- Adjust your gimbal angle gradually to reveal more of the landscape below.
With practice, you'll create stunning Spiral Ascent shots that add depth and visual interest to your aerial cinematography.
Leading Line Follow

One of the most visually compelling techniques in aerial cinematography is the Leading Line Follow. This method involves using natural or man-made linear elements in the landscape to guide your drone's movement and the viewer's eye. You'll fly your drone along these leading lines, creating a dynamic and engaging shot that draws the audience into the scene.
To execute a Leading Line Follow effectively:
- Identify strong linear elements in your environment, such as roads, rivers, or architectural features.
- Position your drone at one end of the chosen line, ensuring it's aligned with the path.
- Maintain a consistent altitude and speed as you follow the line, adjusting your framing to keep the subject in view.
As you fly, focus on smooth, steady movement to enhance the visual flow. You can vary your altitude slightly to add depth to the shot, but avoid drastic changes that might disrupt the line's continuity.
Consider the end point of your leading line carefully, as it can serve as a powerful reveal or shift point in your composition. By mastering this technique, you'll create visually striking aerial footage that guides viewers through your narrative with precision and style.
Frequently Asked Questions
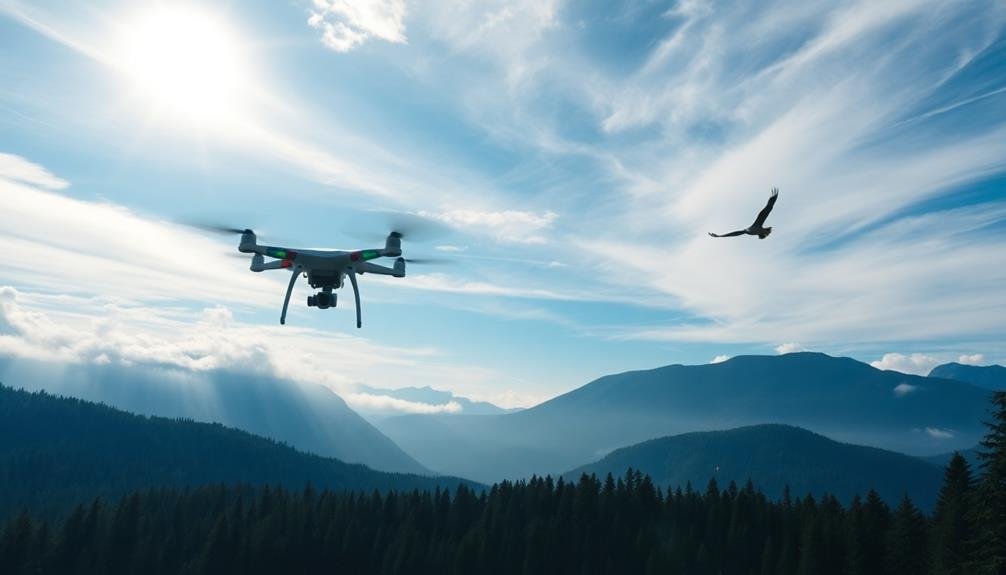
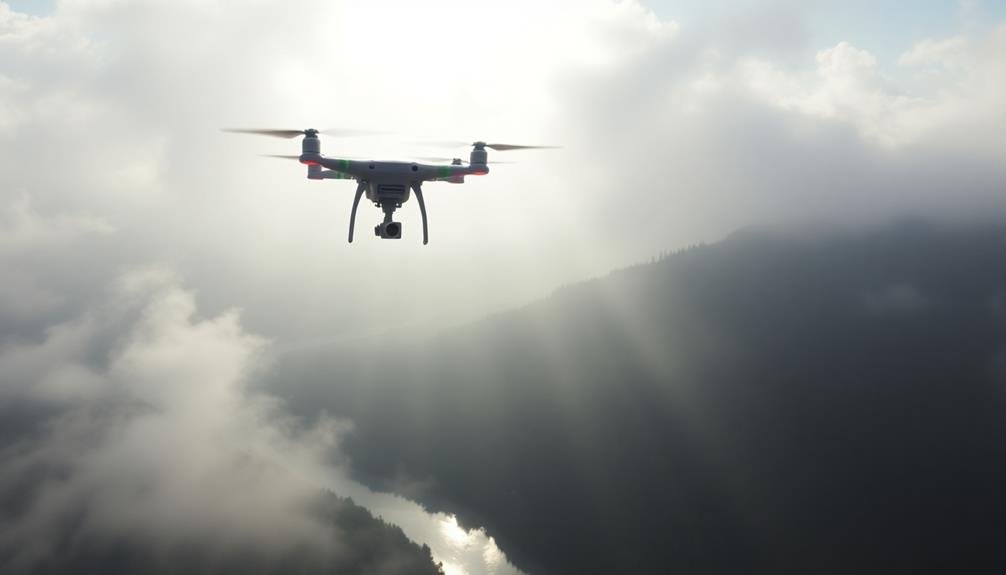
How Do Weather Conditions Affect Advanced Aerial Cinematography Techniques?
Weather greatly impacts your aerial cinematography. Wind can destabilize your drone, affecting smooth shots. Rain or fog limit visibility and camera quality. Extreme temperatures may impact battery life. You'll need to adapt techniques for each condition.
What Safety Precautions Should Be Taken When Performing Complex Aerial Shots?
You'll need to prioritize safety when performing complex aerial shots. Always check your equipment, follow regulations, maintain visual line of sight, and avoid flying over people. Don't push your limits and be prepared for emergencies.
Which Drones Are Best Suited for Executing Advanced Follow Shot Techniques?
You'll want to contemplate DJI's Mavic 3 Pro or Inspire 2 for advanced follow shots. They offer excellent tracking capabilities, long flight times, and high-quality cameras. Don't forget the Autel EVO II Pro for its robust features.
How Can Pilots Improve Their Skills for Mastering These Advanced Techniques?
You'll improve your advanced follow shot skills by practicing consistently, studying flight patterns, and analyzing pro footage. Experiment with different speeds and angles, use flight simulators, and always prioritize safety while pushing your boundaries.
What Post-Production Software Is Recommended for Enhancing Advanced Aerial Footage?
You'll want to use top-tier software like Adobe Premiere Pro, DaVinci Resolve, or Final Cut Pro X for enhancing aerial footage. They offer powerful color grading, stabilization, and special effects tools to elevate your aerial cinematography.
In Summary
You've now mastered seven advanced follow shot techniques for aerial cinematography. By incorporating orbital tracking, reveal and soar, dynamic altitude changes, parallax panning, reverse dolly zoom, spiral ascent, and leading line follow into your repertoire, you'll elevate your drone footage to new heights. Don't be afraid to experiment and combine these methods for unique, eye-catching results. Remember, practice makes perfect, so get out there and start flying! Your aerial cinematography skills will soar in no time.
As educators and advocates for responsible drone use, we’re committed to sharing our knowledge and expertise with aspiring aerial photographers.


Leave a Reply