To capture breathtaking sky photographs, you'll want to master several composition techniques. Start with the rule of thirds, use leading lines to guide the viewer's eye, and frame your shots with interesting foreground elements. Incorporate symmetry and reflections, utilize negative space effectively, and create striking silhouettes against the sky. Look for patterns and textures in cloud formations, play with scale and perspective to emphasize vastness, and take advantage of dynamic weather conditions. Don't forget to experiment with creative angles and unique viewpoints. By applying these techniques, you'll elevate your sky photography from ordinary to extraordinary. The sky's the limit when it comes to enhancing your compositions.
Key Takeaways
- Use the Rule of Thirds to create balanced compositions by placing key elements along grid lines or intersections.
- Incorporate leading lines to guide viewers' eyes through the image and create depth.
- Frame the sky with foreground elements to add context and create visual interest.
- Utilize negative space to emphasize the vastness of the sky and create a sense of tranquility.
- Capture golden hour lighting to enhance colors and textures in sky photographs.
Rule of Thirds
One of the most fundamental composition techniques in sky photography is the Rule of Thirds. This principle divides your frame into a 3×3 grid, creating nine equal sections. To apply this rule, you'll want to place key elements of your sky scene along these grid lines or at their intersections.
When shooting sky photos, consider positioning the horizon along either the upper or lower horizontal line. This creates a more dynamic composition than centering the horizon. For dramatic skies, place the horizon on the lower third to emphasize the sky's expanse. Conversely, if the foreground is equally interesting, position the horizon on the upper third.
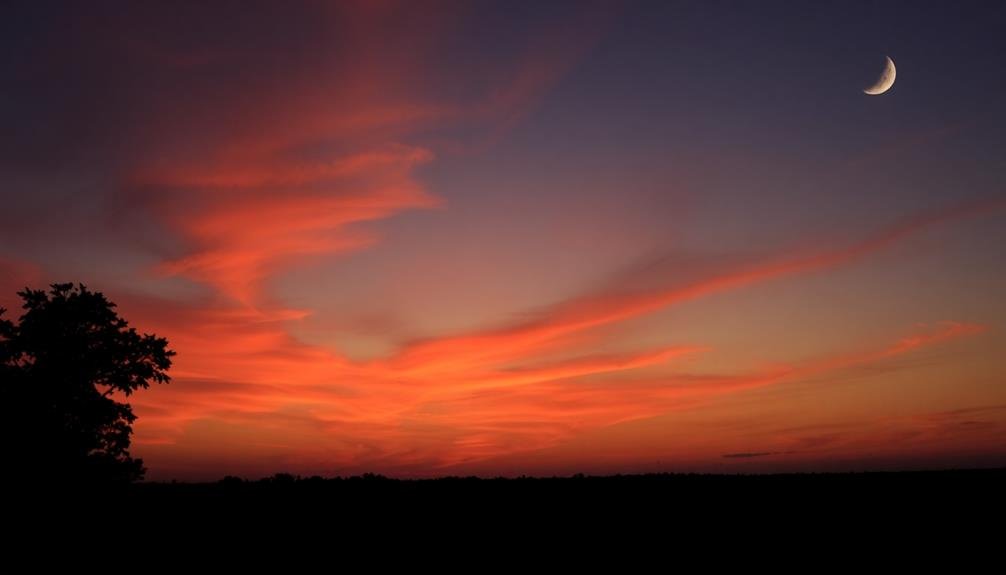
You can also use the Rule of Thirds to frame prominent sky features. Place the sun, moon, or striking cloud formations at grid intersections to create visual interest. This technique naturally draws the viewer's eye to these focal points.
Leading Lines

Leading lines are powerful tools to direct your viewer's gaze through your sky photographs. You can use natural elements like tree lines, rivers, or cloud formations to create paths that lead the eye towards key points of interest in the sky.
Don't overlook architectural features such as roads, bridges, or buildings, which can serve as strong linear elements to guide attention upwards and enhance the overall composition of your sky imagery.
Guide Viewer's Eye
When composing sky photographs, guiding the viewer's eye is essential for creating impactful images.
You'll want to use visual elements within your frame to direct attention towards the most striking aspects of the sky. This technique helps create a sense of depth and encourages the viewer to explore the entire image.
To effectively guide the viewer's eye in sky photography, consider these techniques:
- Use leading lines like roads, fences, or tree lines
- Incorporate foreground elements that point towards the sky
- Position clouds to create natural pathways
- Utilize contrasting colors to draw attention
- Place points of interest at intersections of the rule of thirds
Natural Landscape Elements
Natural elements in the landscape provide powerful tools for creating leading lines in sky photography. You can use these elements to guide the viewer's eye towards the sky or to create a sense of depth and perspective in your images. Look for features like rivers, roads, fences, or tree lines that naturally draw the eye upward or across the frame.
When composing your shot, position these elements strategically to lead into the most interesting parts of the sky. For example, a winding path can guide the viewer's gaze towards a dramatic cloud formation or a colorful sunset. Remember that leading lines don't always have to be straight; curved or diagonal lines can add dynamism to your composition.
Here's a table of natural landscape elements and their potential uses as leading lines:
| Element | Direction | Effect |
|---|---|---|
| Rivers | Winding | Flow |
| Roads | Straight | Direct |
| Fences | Diagonal | Dynamic |
| Trees | Vertical | Height |
| Beaches | Curved | Sweep |
Architectural Features as Lines
In urban environments, architectural features offer a wealth of opportunities for creating compelling leading lines in sky photography. You'll find that skyscrapers, bridges, and other structures can guide the viewer's eye towards the sky, creating a sense of depth and perspective in your images.
To effectively use architectural elements as leading lines, consider the following tips:
- Look for converging lines in tall buildings or rows of streetlights
- Use the edges of bridges or overpasses to frame the sky
- Incorporate staircases or railings for diagonal lines
- Seek out unique architectural features like arches or spires
- Experiment with reflective surfaces on modern buildings
When composing your shot, position yourself to maximize the impact of these lines. You might need to get low to the ground or find an elevated vantage point.
Pay attention to the time of day and how light interacts with the architecture, as this can enhance or soften the lines in your image. Don't be afraid to use wide-angle lenses to exaggerate the perspective and create more dramatic leading lines.
Framing With Foreground Elements

Framing your sky photographs with foreground elements can dramatically enhance their visual impact. By incorporating objects in the foreground, you'll create depth and context, guiding the viewer's eye to the sky. Look for natural frames like tree branches, rock formations, or archways that can encircle the sky or celestial bodies. These elements add interest and scale to your composition.
When selecting foreground elements, consider their shape, texture, and silhouette. Dark, well-defined objects work best against a bright sky. Position yourself to align the frame with your main subject, whether it's the sun, moon, or a cloud formation. You can also use man-made structures like windows, doorways, or bridges to frame the sky creatively.
Experiment with different apertures to control the depth of field. A wide aperture will blur the foreground, creating a soft frame, while a narrow aperture keeps both foreground and sky in focus.
Remember to expose for the sky to avoid overexposure, and use graduated filters if needed to balance the exposure. By mastering this technique, you'll transform ordinary sky shots into enthralling visual stories.
Symmetry and Reflections
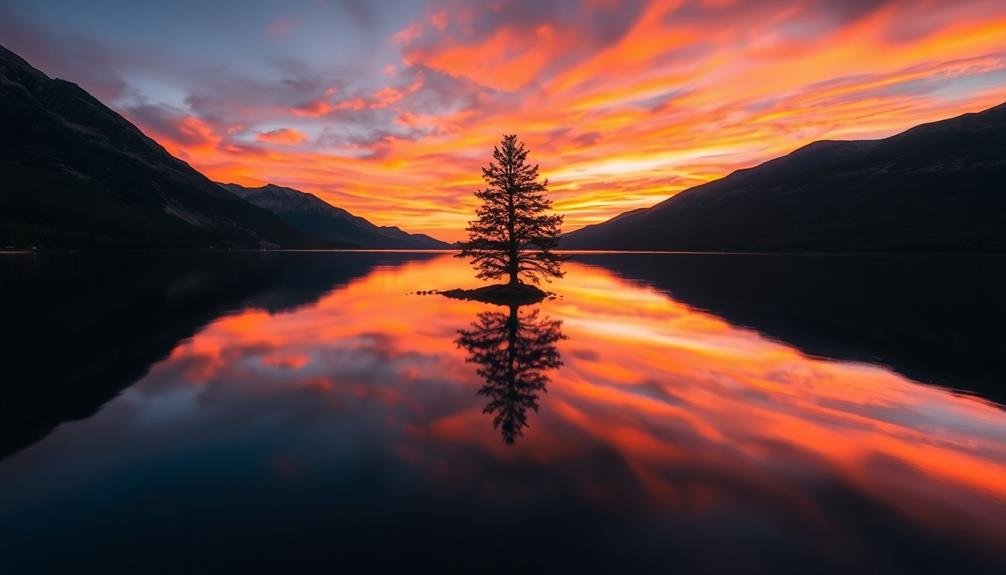
Symmetry and reflections offer powerful tools for creating visually striking sky photographs. By incorporating these elements, you'll add depth and intrigue to your compositions. Look for natural reflective surfaces like calm lakes, puddles, or even glass buildings to create mirror-like effects of the sky.
When composing your shot, align the horizon at the center of the frame to achieve perfect symmetry, or experiment with off-center placements for a more dynamic feel.
To make the most of symmetry and reflections in your sky photography:
- Scout locations with reflective surfaces beforehand
- Use a tripod to guarantee precise alignment
- Experiment with long exposures to smooth out water reflections
- Try vertical compositions for tall structures or trees
- Incorporate leading lines that draw the eye to the reflected sky
Don't limit yourself to water reflections; consider other reflective surfaces like polished metal, wet sand, or even sunglasses.
Remember that symmetry doesn't always mean a perfect mirror image; you can create interesting compositions by juxtaposing contrasting elements on either side of your frame.
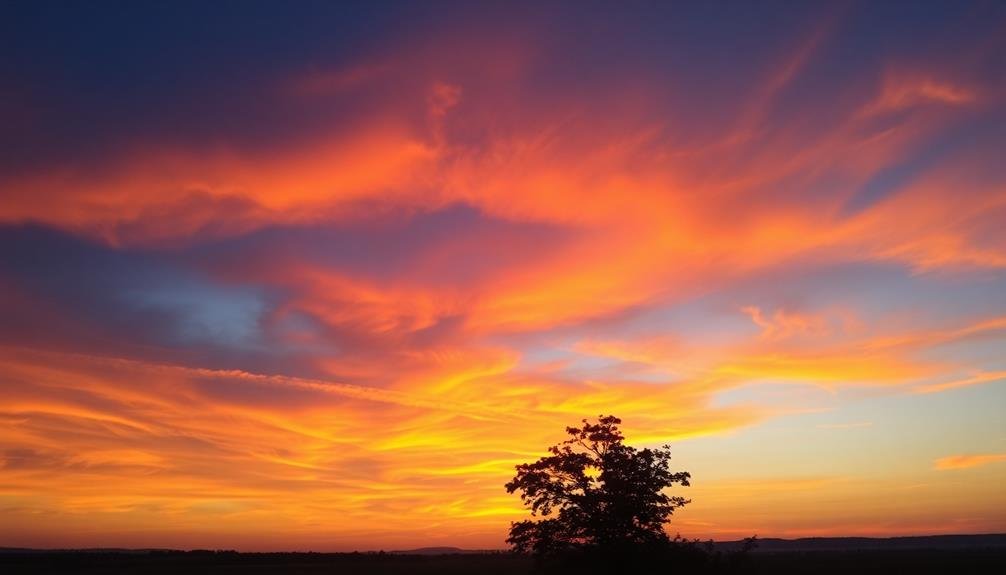
Negative Space

Embracing negative space in sky photography can dramatically enhance the impact of your images. By allowing large portions of the sky to remain empty, you'll create a sense of vastness and tranquility that draws viewers into your composition. This technique works particularly well with minimalist landscapes or lone subjects.
To effectively use negative space, look for clean, uncluttered areas of the sky. Aim to balance your main subject with the empty space around it. You'll often find that positioning your subject off-center, following the rule of thirds, creates a more dynamic composition.
Don't be afraid to let the sky dominate your frame; it's the star of the show in this genre. Experiment with different ratios of negative space to subject. You might be surprised by how powerful a tiny silhouette can be against a vast expanse of sky.
Pay attention to the quality of light and any subtle color gradients in the seemingly empty areas. These nuances can add depth and interest to your negative space, elevating the overall impact of your sky photographs.
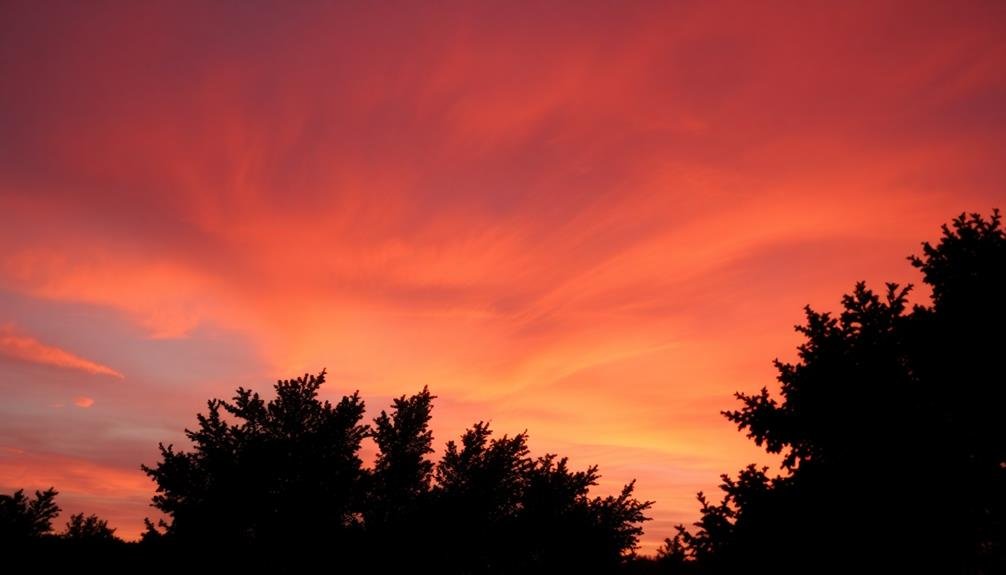
Golden Hour Lighting
The golden hour, a photographer's dream, bathes the sky in warm, soft light that's perfect for capturing breathtaking images. This magical time occurs twice daily, just after sunrise and before sunset, offering you a unique opportunity to create stunning sky photographs.
During the golden hour, you'll notice the sky takes on a rich, golden hue, casting long shadows and softening harsh contrasts. To make the most of this fleeting moment, plan your shoot in advance. Scout locations beforehand and arrive early to set up your equipment.
When composing your shots during the golden hour, consider these tips:
- Use the warm light to highlight foreground elements
- Experiment with silhouettes against the glowing sky
- Capture the sun's rays as they pierce through clouds
- Include reflections in water bodies for added drama
- Play with lens flares to create artistic effects
Don't be afraid to adjust your camera settings as the light changes rapidly. Experiment with different exposures and white balance settings to capture the true essence of the golden hour.
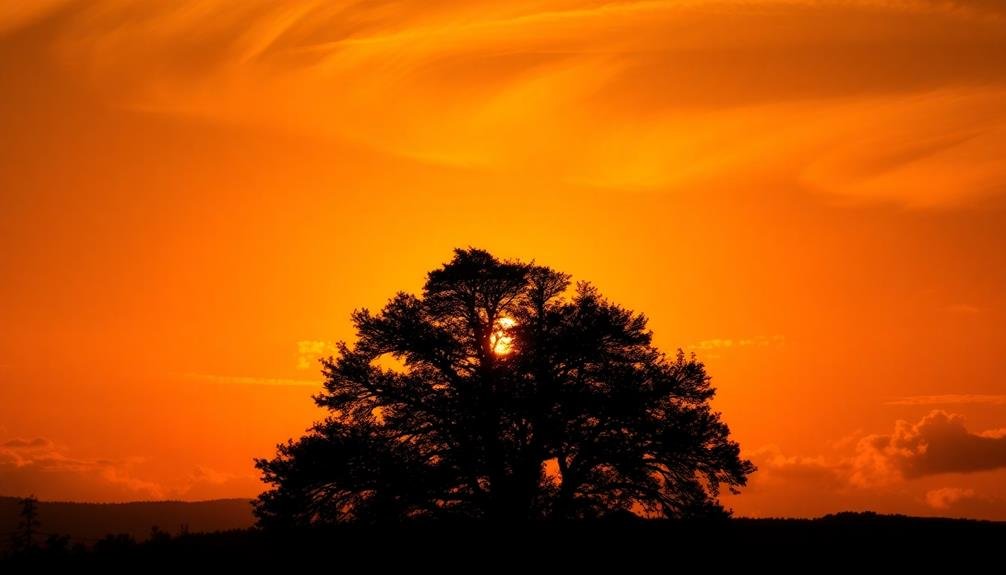
Silhouettes and Shadows
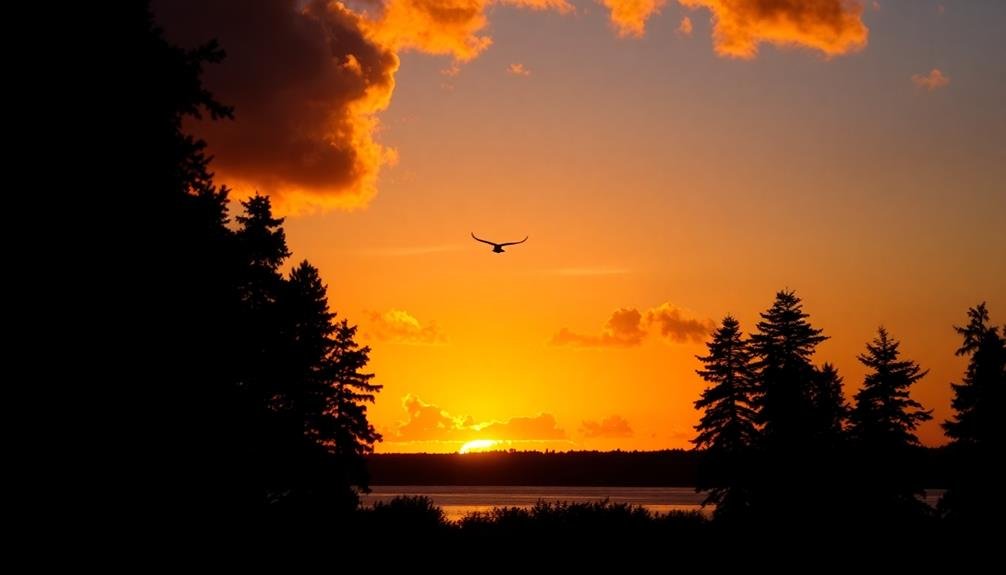
Silhouettes and shadows can transform your sky photographs into enchanting works of art.
You'll create dramatic contrast by positioning your subject against a bright sky, allowing its dark outline to stand out boldly.
To maximize the effect, time your shots during sunrise or sunset when the sky's colors are most vivid, and seek out interesting subjects like trees, buildings, or people to form compelling shapes against the luminous backdrop.
Creating Dramatic Contrast
By incorporating silhouettes and shadows into your sky photography, you'll create dramatic contrast that captivates viewers. Position your subject against a bright sky to form a distinct silhouette, emphasizing shape and form. Experiment with different angles and perspectives to achieve the most striking contrast between light and dark elements.
To create compelling shadow effects, shoot during golden hour or blue hour when the sun is low on the horizon. Use natural or artificial objects to cast long, dramatic shadows across your frame, adding depth and intrigue to your compositions.
Consider these techniques to enhance contrast in your sky photography:
- Expose for the sky, allowing foreground elements to become silhouettes
- Utilize backlighting to create rim lighting around your subjects
- Incorporate reflective surfaces to add highlights and contrast
- Play with negative space to emphasize the sky's colors and textures
- Use graduated neutral density filters to balance exposure between sky and foreground
Remember to experiment with various camera settings, such as adjusting your aperture and shutter speed, to achieve the desired contrast levels.
Post-processing tools can also help fine-tune contrast, but aim to capture as much as possible in-camera for the best results.
Finding Interesting Subjects
While creating dramatic contrast is key, finding compelling subjects for your silhouettes and shadows is equally important. Look for objects with distinct, recognizable shapes that'll stand out against the sky. Trees, buildings, and people make excellent subjects for silhouettes. Seek out interesting architecture, lone trees, or groups of people engaged in activities.
When shooting shadows, pay attention to the angle of the sun and how it casts shadows across the landscape. Long shadows during golden hour can add depth and interest to your compositions. Experiment with positioning yourself to capture shadows stretching across sand dunes, rippling water, or textured surfaces.
Don't forget to reflect upon the sky itself as a subject. Look for unique cloud formations, sun rays piercing through clouds, or the moon peeking out from behind wispy cirrus clouds. You can also incorporate foreground elements to frame the sky, such as archways or branches.
Remember to vary your perspective. Get low to the ground for a dramatic view of silhouettes against the sky, or climb to a high vantage point to capture sweeping landscapes with interesting shadow patterns.
Timing for Optimal Effect
Timing is essential for capturing stunning silhouettes and shadows in sky photography. You'll want to plan your shoots around the golden and blue hours, when the sun is low on the horizon. During these times, the light is softer and more diffused, creating dramatic contrasts between the sky and your subjects.
To maximize the impact of silhouettes and shadows in your sky photos, consider these tips:
- Position yourself with the sun behind your subject
- Expose for the sky, not the foreground
- Use a tripod to guarantee sharpness in low-light conditions
- Experiment with different angles and perspectives
- Look for interesting shapes and forms to create compelling silhouettes
Don't be afraid to wait for the perfect moment. Sometimes, patience is key to capturing that breathtaking shot.
Watch how the light changes as the sun moves across the sky, and be ready to adjust your composition accordingly. Remember, clouds can add depth and texture to your images, so keep an eye on their movement and formations.
Patterns and Textures
Nature's canvas often reveals enchanting patterns and textures in the sky, providing photographers with unique opportunities for striking compositions. To capture these elements effectively, you'll need to train your eye to recognize different cloud formations and atmospheric phenomena.
Look for repeating shapes, swirling patterns, or contrasting textures that can add depth and interest to your images. When you spot interesting patterns, experiment with various framing techniques. Try using the rule of thirds to position key elements, or fill the entire frame with a mesmerizing texture for a more abstract approach.
Don't shy away from negative space; sometimes, a single cloud formation against a clear sky can create a powerful image. Pay attention to the interplay of light and shadow on cloud surfaces, as this can enhance the perception of texture. Early morning or late afternoon light often accentuates these features beautifully.
Consider using filters or adjusting your camera settings to emphasize subtle variations in color and tone. Remember, patterns and textures in the sky are often fleeting, so be prepared to act quickly when you spot a compelling composition.
Scale and Perspective

When capturing sky photographs, you'll want to convey the immense scale of the heavens.
Try emphasizing vast horizons to showcase the sky's expansiveness, or juxtapose smaller objects against the sky to highlight its grandeur.
You can also use foreground elements to add depth and provide a sense of perspective, drawing the viewer's eye from the immediate surroundings to the boundless sky above.
Emphasize Vast Horizons
Vast horizons in sky photography offer a powerful way to convey scale and perspective. To emphasize these expansive vistas, you'll need to carefully consider your composition.
Place the horizon line low in the frame, dedicating more space to the sky. This technique draws the viewer's eye upward, highlighting the vastness of the heavens.
Use wide-angle lenses to capture more of the scene, creating a sense of grandeur. Include foreground elements to provide context and depth, guiding the viewer's gaze from the near to the far.
Look for leading lines that direct attention towards the horizon, such as roads, fences, or natural formations.
To make the most of vast horizons in your sky photography:
- Scout locations with unobstructed views
- Shoot during golden hour for dramatic lighting
- Experiment with panoramic shots
- Include silhouettes for added interest
- Use neutral density filters for long exposures
Juxtapose Objects Against Sky
Juxtaposing objects against the sky can create striking compositions that play with scale and perspective. To achieve this effect, look for interesting foreground elements that contrast with the vastness of the sky. Trees, buildings, or even people can serve as powerful silhouettes, adding depth and visual interest to your images.
When composing your shot, consider the size and placement of these objects carefully. Position them off-center to create a more dynamic composition, using the rule of thirds as a guide. You can also experiment with different angles to emphasize the scale of your subject against the sky.
Try shooting from a low angle to make objects appear larger and more imposing, or from a high vantage point to showcase their relationship to the surrounding landscape.
Don't be afraid to get creative with your compositions. Use leading lines to draw the viewer's eye from the foreground object to the sky, or incorporate reflections in water to create symmetry and balance.
Remember that the sky itself can be a powerful element in your composition, so pay attention to cloud formations, color gradients, and the position of the sun or moon.
Use Foreground for Depth
To create a sense of depth and scale in your sky photographs, incorporating foreground elements is essential. By including objects in the foreground, you'll give viewers a reference point to understand the vastness of the sky and the overall scene. This technique adds dimension to your images, making them more engaging and visually interesting.
When using foreground elements, consider the following tips:
- Look for interesting shapes or textures that complement the sky
- Position yourself to create a balanced composition
- Use leading lines to draw the viewer's eye into the image
- Experiment with different focal lengths to alter perspective
- Try silhouetting foreground objects for dramatic effect
Remember to maintain a proper exposure balance between the foreground and sky. You may need to use graduated filters or exposure blending techniques to achieve this.
Don't be afraid to get low to the ground or change your angle to find the most intriguing foreground elements. By mastering this technique, you'll transform your sky photographs from flat, two-dimensional images into enthralling scenes with depth and dimension that truly showcase the beauty of the sky above.
Dynamic Weather Conditions
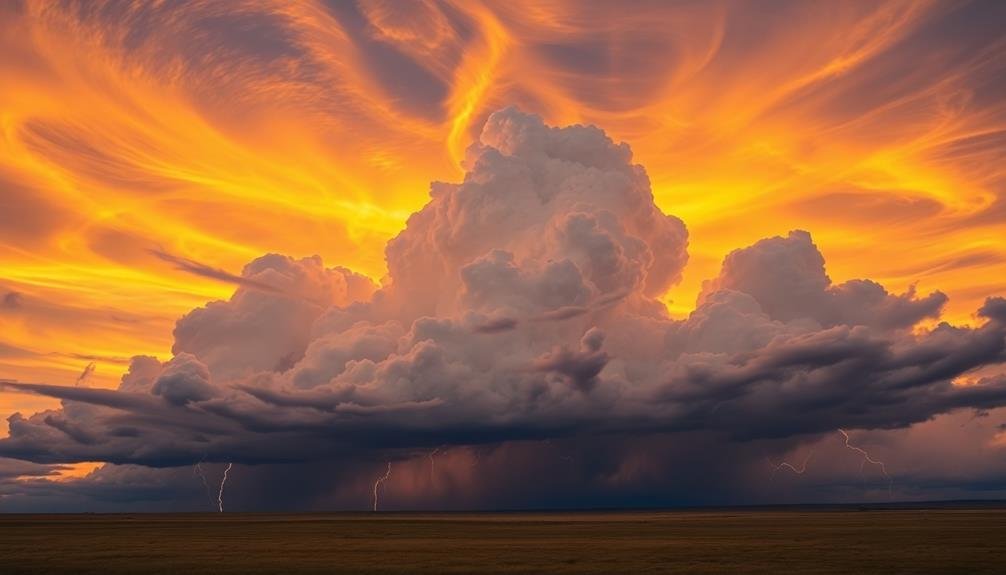
When it comes to capturing dynamic weather conditions, sky photographers have a golden opportunity to create stunning and dramatic images. You'll want to keep an eye on the forecast and be ready to head out when interesting weather patterns are predicted. Storms, approaching fronts, and rapidly changing conditions can provide unique lighting and cloud formations.
Don't shy away from shooting during or after rain. You might capture beautiful rainbows or dramatic storm clouds. Lightning strikes can add an electrifying element to your compositions, but remember to prioritize safety. Use a tripod and remote shutter release for long exposures in low light conditions.
Look for unusual cloud formations like mammatus, lenticular, or shelf clouds. These can add texture and interest to your sky photos. Sunsets and sunrises during dynamic weather often produce vibrant colors and dramatic light. Be patient and wait for the perfect moment when the light interacts with the clouds in enchanting ways.
Consider including elements that showcase the weather's impact, such as windswept trees, choppy water surfaces, or blowing snow. These details can enhance the sense of movement and energy in your sky photographs.
Frequently Asked Questions
What Camera Settings Are Best for Capturing Star Trails in Night Sky Photography?
To capture star trails, you'll want to use a wide aperture (f/2.8-f/4), long exposure (15-30 minutes), low ISO (100-400), and manual focus set to infinity. Don't forget a sturdy tripod and remote shutter release.
How Can I Effectively Use ND Filters for Long-Exposure Sky Photographs?
To use ND filters for long-exposure sky photos, you'll need to attach them to your lens. They'll reduce light, allowing for longer exposures. Experiment with different strengths to achieve smooth clouds or silky water effects in daytime shots.
What Techniques Help Reduce Lens Flare When Shooting Directly Towards the Sun?
To reduce lens flare when shooting towards the sun, you'll want to use a lens hood, clean your lens thoroughly, avoid filters if possible, and position yourself to block direct sunlight. Try changing your angle or composition slightly.
Are There Any Special Considerations for Photographing the Sky in Urban Environments?
When photographing urban skies, you'll need to take into account light pollution, building reflections, and obstructions. Use a polarizing filter to reduce glare, find elevated spots for clearer views, and time your shots during the golden hour.
How Can I Create Compelling Sky Compositions When Using a Telephoto Lens?
You'll create compelling sky compositions with a telephoto lens by isolating interesting cloud formations, focusing on celestial bodies, or capturing dramatic weather patterns. Frame your shot carefully, use leading lines, and experiment with different focal lengths for variety.
In Summary
You've now got the tools to capture stunning sky photographs. Remember, these techniques aren't rigid rules but guidelines to spark your creativity. Don't be afraid to experiment and break conventions. The sky's ever-changing nature offers endless opportunities for unique shots. Keep practicing, and you'll soon develop your own signature style. Whether you're shooting sunsets, storms, or starry nights, let your passion for the sky shine through your lens.
As educators and advocates for responsible drone use, we’re committed to sharing our knowledge and expertise with aspiring aerial photographers.


Leave a Reply