To capture stunning sky-high landscapes, you'll need the right gear and knowledge. Start with a reliable drone, high-quality camera, and essential accessories. Understand drone regulations, including registration and no-fly zones. Scout perfect locations with safety in mind, considering weather conditions for ideal flights. Master composition techniques like the rule of thirds and experiment with angles. Adjust camera settings for crisp shots and post-process to enhance your images. Always prioritize safety with pre-flight checks and hazard scanning. By following these tips, you'll be on your way to creating breathtaking aerial photographs. Explore further to elevate your sky-high landscape game.
Key Takeaways
- Invest in essential gear: reliable drone, high-quality camera, stabilization equipment, and necessary accessories.
- Understand and comply with drone regulations, including registration, licensing, and no-fly zones.
- Scout elevated vantage points for unobstructed views, considering accessibility and safety factors.
- Monitor weather conditions, avoiding high winds, moisture, extreme temperatures, and poor visibility for safe flights.
- Master composition techniques, including the rule of thirds, angles, lighting, and incorporating foreground elements for captivating aerial shots.
Essential Gear for Aerial Photography

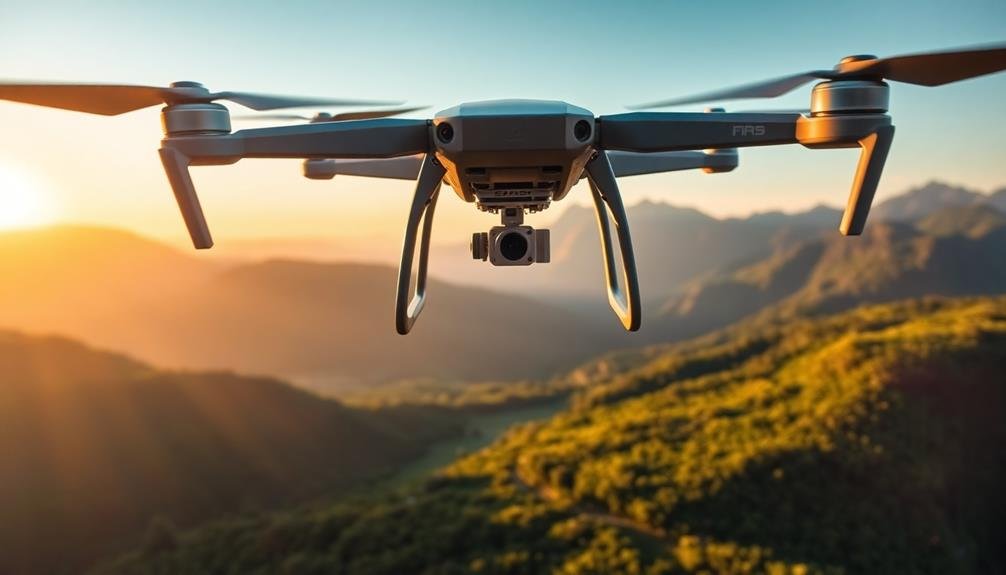
Three key pieces of equipment form the foundation of aerial photography: a reliable drone, a high-quality camera, and a sturdy gimbal.
When choosing a drone, consider factors like flight time, range, and wind resistance. Opt for a model with obstacle avoidance and GPS functionality for safer flights.
Your camera should have a high resolution sensor, ideally 20 megapixels or more, to capture crisp details. Look for cameras with adjustable settings like ISO, shutter speed, and aperture for greater creative control.
A gimbal is essential for stabilizing your camera and eliminating shake. Choose a 3-axis gimbal compatible with your drone and camera setup.
Don't forget essential accessories: extra batteries to extend your flight time, neutral density filters to manage light in bright conditions, and a sturdy carrying case for protection during transport.
Invest in a reliable memory card with fast write speeds to handle high-resolution images and 4K video.
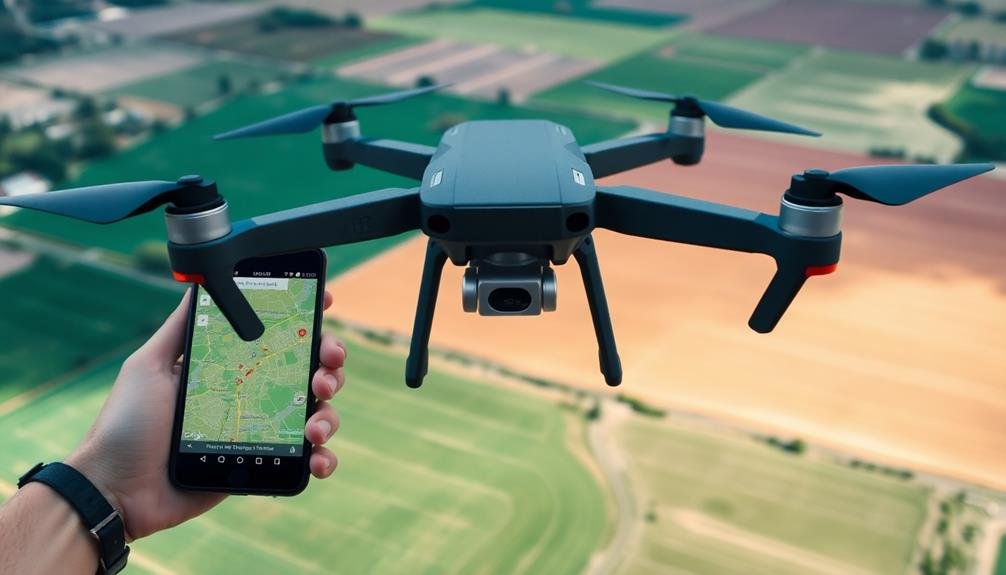
Finally, consider a tablet or smartphone with a large, bright screen for easier drone control and real-time image viewing.
With this gear, you'll be well-equipped to capture stunning aerial landscapes.
Understanding Drone Regulations
Before you take flight with your drone, you'll need to familiarize yourself with the legal requirements.
You must register your drone and obtain proper licensing, depending on your location and intended use.
It's essential to understand no-fly zones, which include areas around airports, government facilities, and other restricted spaces.
Registration and Licensing Requirements
Maneuvering through the legal landscape of drone operation is essential for any aspiring aerial photographer. To legally fly your drone for commercial purposes, you'll need to register it with the Federal Aviation Administration (FAA) and obtain a Remote Pilot Certificate.
Registration is straightforward: visit the FAA's website, create an account, and pay a small fee. You'll receive a registration number that must be displayed on your drone.
For the Remote Pilot Certificate, you're required to pass the Part 107 knowledge test. This exam covers topics like airspace classification, weather patterns, and emergency procedures. Once you've passed, you'll apply for the certificate through the FAA's Integrated Airman Certification and Rating Application system.
Some locations may require additional permits or licenses. National parks, for instance, generally prohibit drone use without special permission. State and local regulations can vary, so always check the rules for your specific area before flying.
No-Fly Zones Explained
Understanding no-fly zones is a key part of responsible drone operation. These restricted areas are established for safety, security, and privacy reasons. You'll need to familiarize yourself with various types of no-fly zones, including airports, military bases, national parks, and critical infrastructure.
Airports typically have a 5-mile radius no-fly zone, while military installations may have larger restricted areas. National parks often prohibit drone use to protect wildlife and preserve visitor experiences. Some no-fly zones are permanent, while others may be temporary due to events or emergencies.
To stay compliant, use official FAA resources and drone apps that provide up-to-date information on no-fly zones. These tools often include interactive maps and real-time alerts.
Remember that even if you're not in a designated no-fly zone, you must still follow general drone regulations, such as maintaining visual line of sight and respecting altitude restrictions.
Violating no-fly zones can result in severe penalties, including fines and potential criminal charges. Always check local regulations, as some areas may have additional restrictions beyond federal guidelines.
Selecting the Perfect Location
When selecting the perfect location for your sky-high landscape photography, you'll need to scout for elevated vantage points that offer breathtaking views.
You should consider the accessibility of these locations, ensuring you can safely transport and operate your drone.
Don't forget to assess potential hazards and obstructions that might interfere with your flight or compromise your safety.
Scouting Elevated Vantage Points
To capture stunning sky-high landscapes, you'll need to scout the perfect elevated vantage point. Start by researching potential locations using topographic maps, hiking guides, and online resources. Look for hills, mountains, or tall buildings that offer unobstructed views of your chosen landscape.
Once you've identified promising spots, visit them in person to assess their suitability. Consider factors like accessibility, safety, and the direction of sunlight at different times of day. Don't forget to check if you'll need permits or permission to access certain areas.
Arrive at your chosen location well before the golden hour to set up your equipment and familiarize yourself with the surroundings. Look for interesting foreground elements that can add depth to your composition, such as rocks, trees, or architectural features.
Be prepared to adjust your position as lighting conditions change. Sometimes, moving just a few feet can dramatically improve your composition. Don't be afraid to explore different angles and heights to find the most enchanting perspective.
Accessibility and Safety Considerations
Safety harnesses and sturdy boots are fundamental when choosing your sky-high vantage point. Before venturing out, research the area thoroughly and check local regulations. Some locations may require permits or have restricted access. Always inform someone of your plans and expected return time.
When scouting elevated spots, assess the terrain carefully. Look for stable ground and avoid loose rocks or slippery surfaces. If you're climbing structures, verify they're sturdy and can support your weight. Don't trespass on private property or ignore warning signs.
Weather conditions play a vital role in accessibility and safety. Check forecasts and avoid shooting during storms, high winds, or extreme temperatures. Be prepared for sudden changes in weather, especially at higher altitudes.
Bring appropriate gear, including a first aid kit, extra batteries, and enough water and snacks. If you're using drones, familiarize yourself with local airspace regulations and no-fly zones.
Weather Considerations for Drone Flights

Although many novice drone pilots focus solely on mastering their flight controls, understanding weather conditions is equally vital for successful aerial photography. You'll need to take into account wind speed, precipitation, temperature, and visibility before each flight.
Wind is your primary concern. Strong gusts can destabilize your drone, affecting image quality and potentially causing crashes. Always check wind forecasts and avoid flying in speeds exceeding 20 mph. Rain and snow are also off-limits, as moisture can damage your drone's electronics.
Temperature extremes can impact battery life and performance. In cold weather, your drone's flight time may decrease considerably, while hot conditions can cause overheating. Visibility is essential for maintaining visual line of sight and capturing clear images. Avoid flying in fog, haze, or low-light conditions.
| Weather Condition | Impact on Drone Flight |
|---|---|
| High Winds | Instability, Drift |
| Rain/Snow | Equipment Damage |
| Extreme Cold | Reduced Battery Life |
| Poor Visibility | Safety Risks, Blur |
Composition Techniques for Aerial Shots

How can you make your aerial shots truly stand out? Start by mastering the basics of composition. The rule of thirds is especially powerful in aerial photography, helping you create balanced and visually appealing images. Divide your frame into a 3×3 grid and place key elements along these lines or at their intersections.
Leading lines are another vital technique. Use roads, rivers, or coastlines to guide the viewer's eye through your image. These natural or man-made lines can create depth and draw attention to your main subject.
Don't forget about patterns and textures. From above, landscapes often reveal fascinating repetitions and textures that aren't visible from the ground. Look for interesting agricultural fields, urban layouts, or natural formations to capture these unique perspectives.
Here are three advanced composition techniques to elevate your aerial photography:
- Juxtaposition: Contrast different elements within your frame to create visual interest.
- Negative space: Use empty areas to emphasize your subject and create a sense of scale.
- Symmetry and reflections: Look for mirror-like compositions in bodies of water or architectural designs.
Experiment with these techniques to develop your unique style and create engaging aerial landscapes.
Mastering Camera Settings in Flight
With your composition skills sharpened, it's time to focus on the technical aspects of aerial photography. Mastering camera settings in flight is essential for capturing stunning sky-high landscapes. Start by setting your camera to manual mode, giving you full control over exposure.
Use a fast shutter speed to combat motion blur and vibrations. Aim for at least 1/1000th of a second, adjusting your aperture and ISO accordingly. Choose a mid-range aperture (f/5.6 to f/8) for peak sharpness across the frame. Keep your ISO as low as possible to minimize noise, but don't hesitate to increase it in low-light conditions.
Here's a quick reference guide for aerial photography settings:
| Scenario | Shutter Speed | Aperture | ISO |
|---|---|---|---|
| Bright Day | 1/2000s | f/8 | 100 |
| Cloudy Day | 1/1000s | f/5.6 | 400 |
| Sunset | 1/500s | f/4 | 800 |
| Night | 1/250s | f/2.8 | 3200 |
Remember to shoot in RAW format for maximum flexibility in post-processing. Use continuous autofocus and burst mode to increase your chances of capturing sharp images. Regularly check your histogram to verify proper exposure, and don't forget to adjust your white balance for accurate colors.
Post-Processing Aerial Landscape Images

Post-processing is an essential step in bringing your aerial landscape images to life. After capturing stunning aerial shots, you'll need to refine them to truly showcase their beauty.
Start by adjusting the exposure and contrast to enhance the overall dynamic range of your image. Don't be afraid to experiment with shadow and highlight recovery to reveal hidden details in both bright and dark areas.
Next, focus on color correction and saturation. Aerial landscapes often benefit from subtle adjustments to make colors pop without appearing unnatural. Pay special attention to the sky, as it's a vital element in these shots. You might need to use graduated filters to balance the exposure between the sky and land.
Consider these advanced techniques to elevate your aerial landscape images:
- Use luminosity masks to make precise, targeted adjustments
- Experiment with perspective correction to straighten horizon lines
- Apply selective sharpening to enhance texture and detail
Safety Precautions for Drone Pilots

As a drone pilot, your safety checklist starts before you even launch.
You'll need to master pre-flight safety checks, stay alert to weather conditions, and guarantee you're complying with all relevant regulations.
These critical steps will help protect you, your equipment, and others while capturing stunning aerial landscapes.
Pre-Flight Safety Checks
A drone pilot's safety checklist is vital before taking to the skies. You'll want to guarantee your equipment is in top condition and ready for flight. Start by inspecting your drone's body for any cracks, dents, or loose parts. Check that the propellers are securely attached and free from damage. Examine the battery, making sure it's fully charged and properly connected.
Next, calibrate your drone's compass and GPS systems. This step is imperative for maintaining stable flight and accurate positioning. Don't forget to update your drone's firmware to the latest version, as manufacturers often release significant safety improvements.
Before launching, scan your surroundings for potential hazards:
- Power lines and tall structures
- Trees and other obstacles
- No-fly zones or restricted airspace
Check the weather conditions, paying attention to wind speed and direction. Strong winds can affect your drone's stability and battery life.
Weather Awareness Tips
Weather conditions can make or break your drone photography session. To guarantee your safety and capture stunning sky-high landscapes, you'll need to be aware of various weather factors. Wind speed is vital; most consumer drones can't handle winds exceeding 20-25 mph. Check the forecast and avoid flying in gusty conditions.
Temperature affects battery life and performance. In cold weather, keep your batteries warm and expect shorter flight times. Hot temperatures can cause overheating, so avoid leaving your drone in direct sunlight.
Visibility is essential for safe flying. Don't operate in fog, heavy rain, or low-light conditions. Be cautious of sudden changes in weather, especially when flying near bodies of water or in mountainous areas.
Here's a quick reference table for weather considerations:
| Weather Factor | Safe Range | Precautions |
|---|---|---|
| Wind Speed | 0-15 mph | Use wind apps |
| Temperature | 32-100°F | Insulate batteries |
| Visibility | 3+ miles | Check local reports |
| Precipitation | None | Avoid flying in rain |
| Cloud Cover | Clear-Partly Cloudy | Be aware of changing conditions |
Regulatory Compliance Essentials
Steering through the legal landscape of drone photography is essential for any sky-high landscape enthusiast.
You'll need to register your drone with the FAA if it weighs more than 0.55 pounds. Familiarize yourself with airspace restrictions and no-fly zones in your area. Always keep your drone within visual line of sight and fly below 400 feet unless you have special authorization.
Before taking flight, check local regulations as they can vary by location. Some areas may require additional permits or have specific rules about drone usage. Respect privacy laws and don't fly over private property without permission.
Be aware of wildlife protection areas and avoid disturbing animals or their habitats.
To guarantee you're flying safely and legally, follow these key principles:
- Stay informed about current regulations and updates from aviation authorities
- Maintain situational awareness of your surroundings, including other aircraft and obstacles
- Prioritize safety over getting the perfect shot
Overcoming Common Aerial Photography Challenges

Mastery in aerial photography comes with its share of hurdles. As you commence your aerial photography journey, you'll encounter various challenges that may seem intimidating at first.
One common issue is camera shake, which can blur your images. To combat this, use a faster shutter speed and stabilize your drone or aircraft as much as possible.
Lighting conditions can be tricky when shooting from above. You'll often face harsh sunlight or shadows that affect image quality. Experiment with different times of day and use filters to manage light more effectively.
Wind is another factor that can disrupt your shots. Learn to anticipate and compensate for gusts to maintain stable footage.
Composition from the air differs greatly from ground-level photography. You'll need to develop a new perspective on framing and subject placement. Practice identifying interesting patterns and textures visible only from above.
Finally, battery life limitations can cut your sessions short. Always carry spare batteries and plan your shoots efficiently to maximize your time in the air.
Showcasing Your Sky-High Landscapes
After capturing breathtaking aerial landscapes, it's time to showcase your work to the world. Choose the best platforms to display your sky-high images, keeping in mind your target audience and personal goals. Social media sites like Instagram and 500px are excellent for reaching a wide audience and connecting with fellow photographers.
Consider creating a dedicated website or online portfolio to showcase your best work and attract potential clients or collaborators.
When presenting your aerial landscapes, focus on creating a cohesive narrative or theme. Group similar images together or arrange them in a way that tells a story about the locations you've captured. Don't forget to include captions or descriptions that provide context and enhance the viewer's understanding of your work.
To make your sky-high landscapes stand out:
- Experiment with different aspect ratios and cropping techniques
- Use post-processing to enhance colors and contrast without overdoing it
- Highlight unique patterns, textures, or perspectives that can only be seen from above
Remember to respect local regulations and obtain necessary permissions when sharing your aerial photography.
Frequently Asked Questions
How Long Does It Take to Become Proficient in Aerial Landscape Photography?
You'll need several months to a year to become proficient in aerial landscape photography. It depends on your dedication, practice frequency, and equipment familiarity. You'll improve faster if you're consistent and open to learning from mistakes.
Can I Use Filters on My Drone Camera for Better Aerial Shots?
Yes, you can use filters on your drone camera for better aerial shots. They'll help reduce glare, enhance colors, and improve image quality. Consider ND filters for exposure control and polarizing filters to cut reflections and boost contrast.
What Insurance Options Are Available for Drone Photographers?
You've got several insurance options as a drone photographer. You'll want to contemplate liability coverage, equipment protection, and hull insurance. Don't forget to check if your existing policies cover drones or if you need specialized aerial photography insurance.
How Do I Network With Other Aerial Photographers and Find Mentorship Opportunities?
You'll find networking opportunities at drone photography workshops, online forums, and social media groups. Join local UAV clubs, attend industry conferences, and reach out to experienced aerial photographers for mentorship. Don't hesitate to share your work and ask questions.
Are There Specific Editing Software Programs Recommended for Aerial Landscape Photography?
You'll find Adobe Lightroom and Photoshop essential for aerial landscape editing. DxO PhotoLab and Capture One are excellent alternatives. For panorama stitching, try PTGui or Hugin. Don't forget free options like GIMP and Darktable.
In Summary
You're now equipped to take your photography to new heights! Remember to always prioritize safety, respect regulations, and be patient as you hone your aerial skills. With practice, you'll capture breathtaking landscapes from perspectives few have seen. Don't forget to share your stunning sky-high shots and inspire others. The sky's the limit, so grab your drone, head out, and start creating awe-inspiring aerial masterpieces that'll leave viewers spellbound.
As educators and advocates for responsible drone use, we’re committed to sharing our knowledge and expertise with aspiring aerial photographers.


Leave a Reply