To master sky-high landscapes with drone photography, start by choosing a drone that matches your skill level and budget, with a high-quality camera. Pay attention to weather conditions, aiming for calm days and golden hour lighting. Use composition techniques like the rule of thirds and leading lines to create visually striking images. Adjust your camera settings for ideal exposure and sharpness, and shoot in RAW for greater editing flexibility. During post-processing, enhance details and correct colors to bring out the best in your aerial shots. Always follow local regulations and prioritize safety when flying. Exploring these essential tips will elevate your drone photography to new heights.
Key Takeaways
- Choose a drone with at least a 12-megapixel camera and RAW capability for high-quality landscape shots.
- Shoot during golden hours for warm, dramatic lighting, or on overcast days for soft, even illumination.
- Apply the rule of thirds and use leading lines to create balanced, visually appealing aerial compositions.
- Capture images in RAW format for greater flexibility in post-processing and detail recovery.
- Adjust exposure, contrast, and color in post-processing to enhance landscape details and counteract atmospheric haze.
Selecting the Perfect Drone
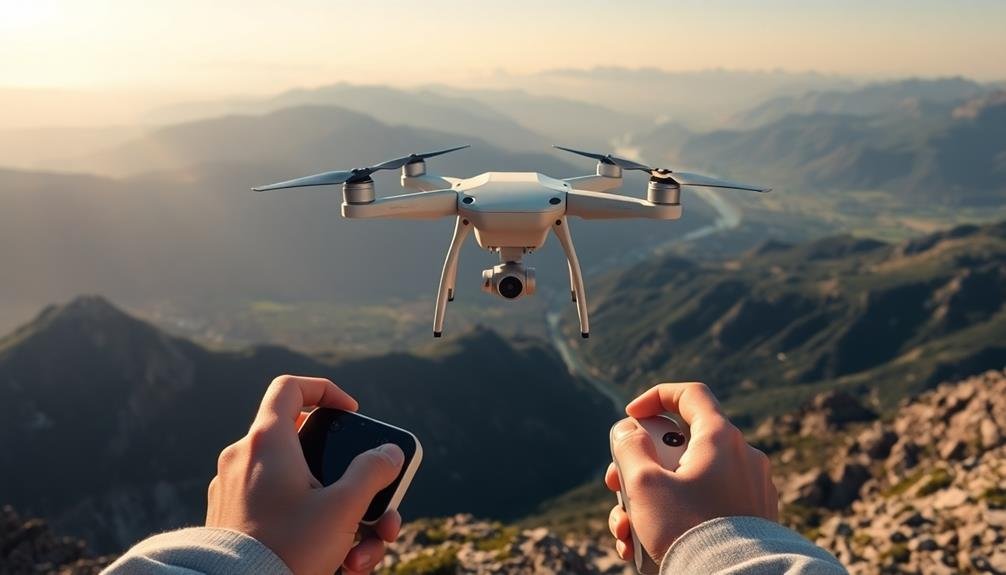
When choosing a drone for photography, consider your skill level and intended use. If you're a beginner, opt for a user-friendly model with built-in obstacle avoidance and automatic flight modes. For more experienced pilots, advanced drones with manual controls and customizable settings offer greater creative flexibility.
Camera quality is essential for aerial photography. Look for drones with at least a 12-megapixel camera and the ability to shoot in RAW format. A 3-axis gimbal is vital for stabilizing your shots and capturing smooth footage.
Consider the drone's flight time, as longer battery life allows for extended shooting sessions. Pay attention to the drone's size and portability. Compact, foldable drones are ideal for travel photography, while larger models may offer better stability in windy conditions.
Don't forget to check local regulations regarding drone use and registration requirements. Budget is another significant factor. While high-end drones offer superior features, there are many capable mid-range options that provide excellent image quality and performance.
Research customer reviews and compare specifications to find the best drone for your needs and budget.
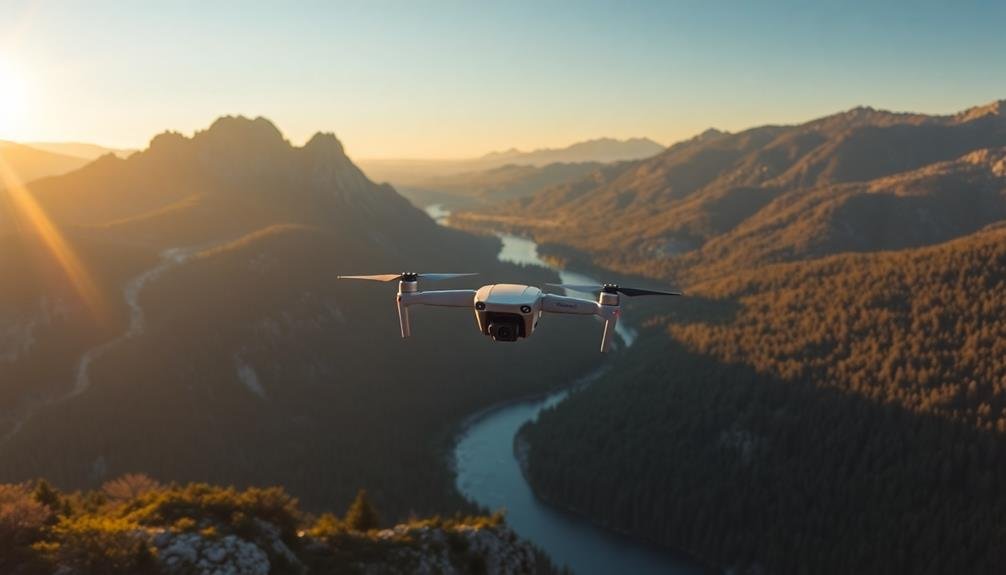
Understanding Weather and Lighting
Mastering weather and lighting conditions is essential for stunning drone photography. You'll need to take into account factors like wind speed, cloud cover, and time of day to capture the perfect shot. Wind can affect your drone's stability, so aim for calm days or use wind-resistant models. Cloud cover influences light quality, with overcast skies providing soft, even lighting for landscapes.
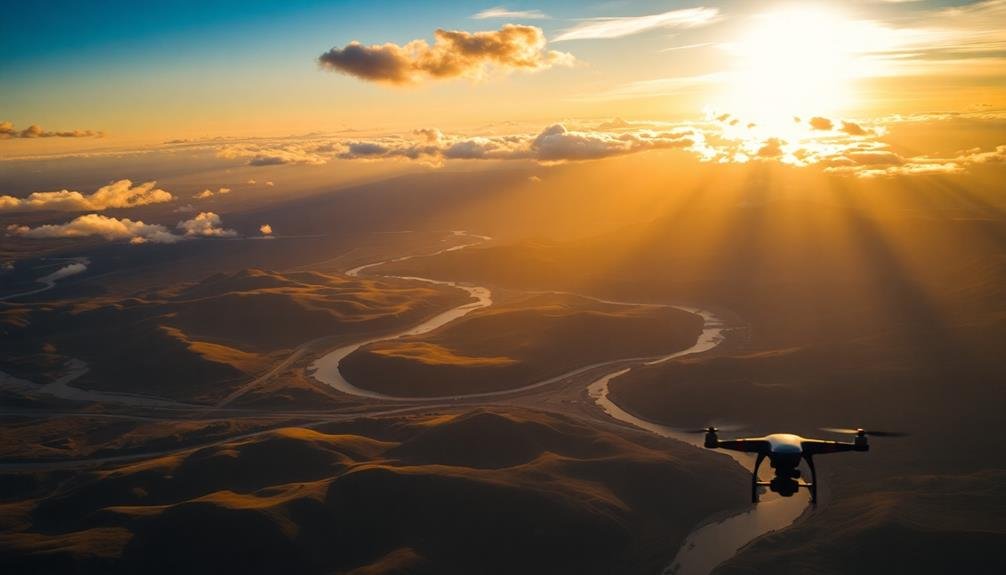
The golden hours—just after sunrise and before sunset—offer warm, dramatic lighting that can transform your images. Midday sun creates harsh shadows, but can work well for aerial shots of water or highly reflective surfaces. Always check local weather forecasts and drone regulations before flying.
Here's a quick reference guide for ideal drone photography conditions:
| Time of Day | Weather | Best Subjects |
|---|---|---|
| Sunrise | Clear | Landscapes, Cityscapes |
| Midday | Partly Cloudy | Water, Architecture |
| Sunset | Clear | Landscapes, Silhouettes |
Remember to adjust your camera settings accordingly. Use faster shutter speeds in bright conditions and higher ISO in low light. Experiment with different white balance settings to capture the mood of your scene accurately. By understanding and working with weather and lighting conditions, you'll elevate your drone photography to new heights.
Composition Techniques for Aerial Shots

With a solid grasp of weather and lighting, it's time to focus on composition techniques for aerial shots. When framing your drone photos, consider the rule of thirds. Divide your frame into a 3×3 grid and place key elements along these lines or at their intersections. This creates a balanced and visually appealing composition.
Look for leading lines in the landscape, such as roads, rivers, or shorelines. These natural elements can guide the viewer's eye through the image and add depth.
Experiment with symmetry and patterns, which are often more visible from above. Capture reflections in bodies of water for stunning mirror-like effects.
Don't forget to include a sense of scale in your shots. Incorporate recognizable objects or people to give context to the vastness of the aerial view.
Play with altitude to create different perspectives – lower flights can emphasize textures, while higher altitudes reveal grand landscapes.
Lastly, consider the direction of light and how it affects shadows. Side-lighting can create dramatic contrasts, while backlighting can produce silhouettes.
Camera Settings for Drone Photography

To capture stunning aerial images, you'll need to master your drone's camera settings.
Start by understanding ideal exposure settings, including aperture, shutter speed, and ISO, to achieve well-balanced shots in various lighting conditions.
Additionally, focus on achieving sharp images and consider shooting in RAW format for greater post-processing flexibility.
Optimal Exposure Settings
Countless stunning aerial shots rely on nailing the perfect exposure settings for your drone's camera. To achieve ideal exposure, you'll need to balance three key elements: aperture, shutter speed, and ISO.
Start by setting your aperture. For landscape shots, aim for a higher f-number (f/8 to f/11) to guarantee a wide depth of field and sharp images.
Next, adjust your shutter speed. A faster shutter speed (1/500s or higher) will help combat camera shake from drone movement and wind. However, in low light conditions, you may need to slow it down.
ISO is your last line of defense. Keep it as low as possible (100-400) to minimize noise, but don't hesitate to increase it if necessary in dimmer conditions. Remember, it's better to have a slightly noisy image than a blurry one.
Use your drone's histogram to check exposure levels and avoid clipping highlights or shadows.
If you're shooting in challenging lighting conditions, consider using bracketing to capture multiple exposures. This will give you more flexibility in post-processing to create perfectly exposed images.
Focus and Sharpness
Many drone photographers overlook the critical aspects of focus and sharpness, which can make or break your aerial shots. To guarantee your images are crisp and clear, you'll need to master your drone camera's focus settings. Most drones use fixed-focus lenses, which simplify the process but require careful attention to your subject's distance.
To achieve the best sharpness in your drone photography:
- Use a fast shutter speed: This minimizes motion blur caused by the drone's movement or wind.
- Shoot in RAW format: This allows for more flexibility in post-processing and helps preserve image quality.
- Utilize your drone's built-in stabilization: This feature compensates for minor movements and vibrations.
When shooting landscapes, set your focus to infinity to guarantee everything from the foreground to the horizon is sharp. For subjects closer to the drone, use the camera's autofocus or tap-to-focus feature if available.
Remember that depth of field is typically not a concern with drone photography due to the small sensor size and wide-angle lens. However, you can still create a sense of depth by including foreground elements in your composition.
Always review your images on a larger screen to check for sharpness and make adjustments as needed.
RAW vs. JPEG
When it comes to camera settings for drone photography, one of the most important decisions you'll face is whether to shoot in RAW or JPEG format. RAW files offer greater flexibility in post-processing, allowing you to recover more details in highlights and shadows. They're ideal for capturing high-contrast scenes or when you plan to edit extensively. However, RAW files are larger and require more storage space.
JPEG files, on the other hand, are compressed and ready to use straight out of the camera. They're smaller in size and don't require additional processing, making them perfect for quick sharing or when storage is limited. However, you'll have less flexibility in editing and may lose some image quality.
To help you decide, consider this comparison:
| Feature | RAW | JPEG |
|---|---|---|
| File Size | Large | Small |
| Editing Flexibility | High | Limited |
| Post-Processing Required | Yes | No |
Ultimately, your choice depends on your workflow and intended use. If you're shooting in challenging lighting conditions or plan to edit heavily, opt for RAW. For quick shots or when storage is a concern, JPEG might be the better choice. Many professionals shoot in both formats simultaneously to have the best of both worlds.
Post-Processing Aerial Landscape Images

Once you've captured stunning aerial landscapes with your drone, post-processing is the key to revealing their full potential. Start by adjusting the exposure and contrast to bring out the details in both highlights and shadows.
Don't be afraid to experiment with split toning to enhance the mood of your image, especially for sunrise or sunset shots.
Pay special attention to color correction, as aerial shots often have a blue cast due to atmospheric haze. Use the dehaze tool sparingly to improve clarity without making the image look unnatural.
Crop your image thoughtfully to emphasize the most interesting patterns or formations in the landscape.
Here are three advanced techniques to elevate your aerial landscape editing:
- Use luminosity masks to make targeted adjustments to specific tonal ranges
- Apply perspective corrections to straighten horizons and fix distortions
- Create a sense of depth by selectively sharpening foreground elements
Legal Considerations and Safety Precautions
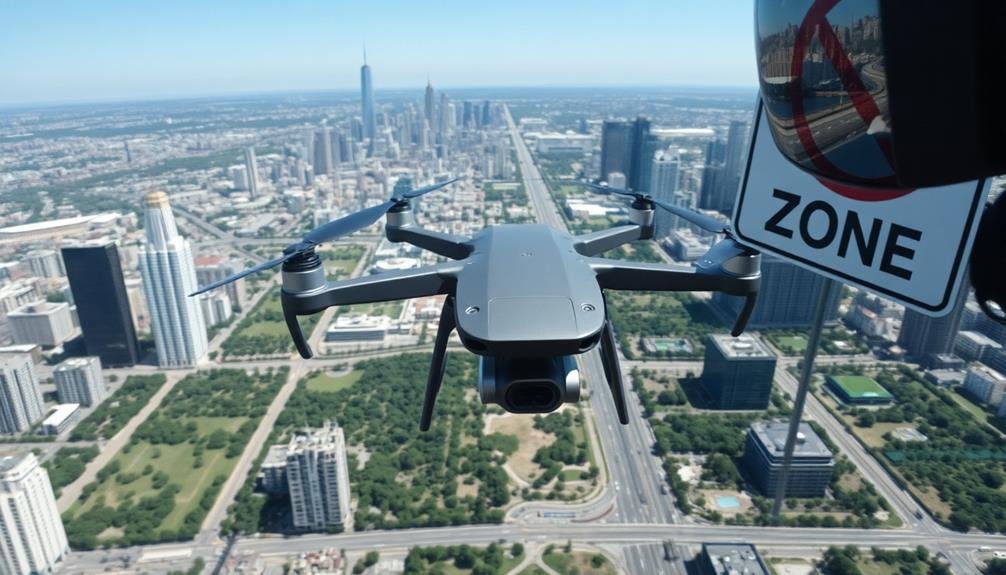
While mastering post-processing techniques can enhance your aerial photography, it's equally important to understand the legal landscape and safety protocols. Before launching your drone, research local regulations and obtain necessary permits. In the US, register your drone with the FAA and adhere to their guidelines, including maintaining visual line of sight and avoiding restricted airspace.
Safety should be your top priority. Always perform pre-flight checks, ensuring your drone's batteries are fully charged and propellers are secure. Monitor weather conditions, avoiding strong winds or precipitation that could compromise your flight.
Respect privacy by not flying over private property without permission, and steer clear of crowds or sensitive areas. Be aware of your surroundings, watching for obstacles like power lines, trees, or buildings. Maintain a safe distance from wildlife to prevent disturbance.
When capturing landscapes, choose takeoff and landing sites carefully, ensuring stable ground and minimal obstructions. Lastly, consider obtaining drone insurance to protect yourself and your equipment.
Frequently Asked Questions
How Do I Prevent Lens Flare When Shooting Towards the Sun?
To prevent lens flare when shooting towards the sun, you'll want to use a lens hood, adjust your angle slightly, or block the sun with an object. You can also try using filters or editing techniques in post-processing.
What's the Best Way to Capture Motion in Aerial Landscape Photography?
To capture motion in aerial landscapes, you'll want to use a slower shutter speed. Try panning with moving subjects, experiment with long exposures for flowing water or clouds, and use ND filters to control light in bright conditions.
How Can I Achieve a Tilt-Shift Effect With Drone Photography?
You can create a tilt-shift effect in drone photography by using post-processing software. Adjust focus and blur areas to simulate miniature scenes. Alternatively, some drones offer built-in tilt-shift modes for real-time effects during shooting.
Are There Specific Color Grading Techniques for Enhancing Aerial Landscape Images?
You'll enhance aerial landscapes by adjusting saturation, contrast, and temperature. Boost blues for skies, greens for vegetation. Use gradients to balance exposure. Don't overdo it; aim for natural-looking results that highlight the scene's unique perspective.
How Do I Plan and Execute Panoramic Shots Using a Drone?
To plan and execute panoramic drone shots, you'll want to scout locations, set your camera to manual mode, overlap images by 30-40%, maintain consistent altitude and speed, and use automated panorama modes if available on your drone.
In Summary
You've now got the tools to elevate your landscape photography to new heights. Remember, it's not just about having the right gear; it's about understanding your environment, mastering composition, and fine-tuning your camera settings. Don't forget to polish your images in post-processing and always prioritize safety and legal compliance. With practice and patience, you'll soon be capturing breathtaking aerial landscapes that'll leave viewers in awe. So go ahead, take flight, and let your creativity soar!
As educators and advocates for responsible drone use, we’re committed to sharing our knowledge and expertise with aspiring aerial photographers.


Leave a Reply