
To capture movie-quality drone shots, you'll want to master these lighting tricks. Take advantage of golden hour for soft, warm light and dramatic shadows. Use backlighting to create striking silhouettes and separate subjects from backgrounds. Experiment with nighttime urban scenes to capture mesmerizing light trails. Leverage long exposures for creative light painting effects. Don't forget to play with dramatic shadows in landscapes, especially during early morning or late afternoon. For water scenes, focus on reflections and lighting effects to add depth. Finally, consider using your drone as a mobile light source for unique illumination. These techniques will elevate your aerial footage to cinematic heights.
Key Takeaways
- Utilize golden hour lighting for dramatic shadows and rich hues in landscape shots.
- Master long exposure techniques for capturing light trails and creating cinematic effects.
- Experiment with backlighting to create striking silhouettes and enhance subject separation.
- Employ mobile lighting sources by attaching LED panels to drones for dynamic lighting effects.
- Leverage reflections and water effects during optimal lighting conditions for visually stunning compositions.
Golden Hour Drone Shots
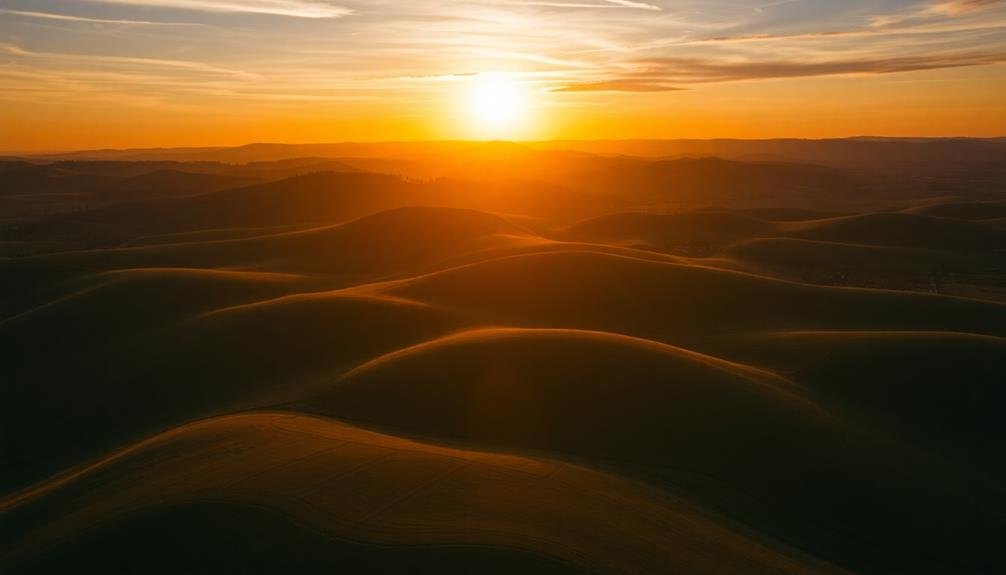
As the sun dips low on the horizon, golden hour presents a prime opportunity for breathtaking drone shots. You'll want to capitalize on this magical time when the light is soft, warm, and diffused, creating a cinematic atmosphere that's hard to replicate artificially.
To make the most of golden hour drone photography, plan your flight path in advance. Scout locations beforehand and identify interesting landscapes or subjects that'll be enhanced by the golden light.
Consider flying your drone parallel to the sun's rays to capture long, dramatic shadows that add depth to your shots. Experiment with backlighting by positioning your drone between the sun and your subject. This technique can create stunning silhouettes and lens flares that add visual interest to your footage.
Don't forget to adjust your camera settings to compensate for the changing light conditions. Use a lower ISO and faster shutter speed to avoid overexposure.
Try capturing both wide panoramic shots and close-up details during golden hour. The warm light can transform ordinary scenes into extraordinary visuals.
Dynamic Backlighting With Drones
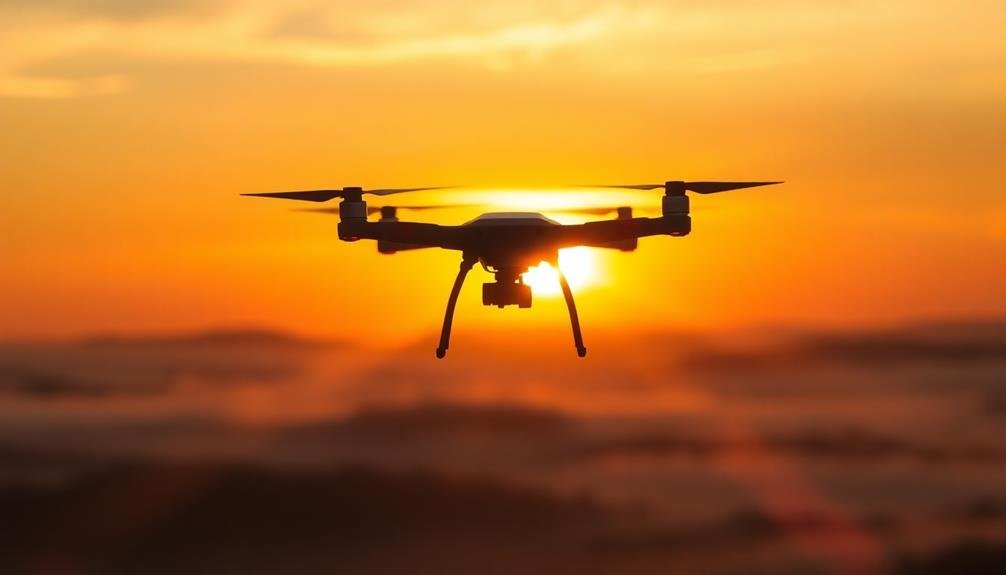
Dynamic backlighting with drones opens up exciting possibilities for your cinematography.
You can create dramatic silhouettes by positioning your drone between the sun and your subject, casting long shadows and outlining figures against a bright background.
Creating Dramatic Silhouettes
One of the most striking visual effects you can achieve with drone lighting is the creation of dramatic silhouettes. To accomplish this, position your drone with a powerful light source behind your subject, facing the camera. This technique works best during the golden hour or in low-light conditions when the contrast between the light and dark areas is more pronounced.
Start by placing your subject in front of a relatively clear background, such as the sky or a large, flat surface. Set your camera's exposure for the bright background, which will naturally darken the subject into a silhouette. Adjust the drone's height and distance from the subject to control the intensity and spread of the backlighting.
Experiment with different angles to create unique shapes and outlines. You can use multiple drones to add depth and complexity to your silhouettes. Try moving the drones slowly during the shot to create dynamic lighting changes. Remember to keep safety in mind and maintain clear communication with your drone operator.
For added drama, consider incorporating environmental elements like fog or smoke to diffuse the light and create a more atmospheric effect. This technique can transform ordinary scenes into visually stunning and emotionally impactful shots.
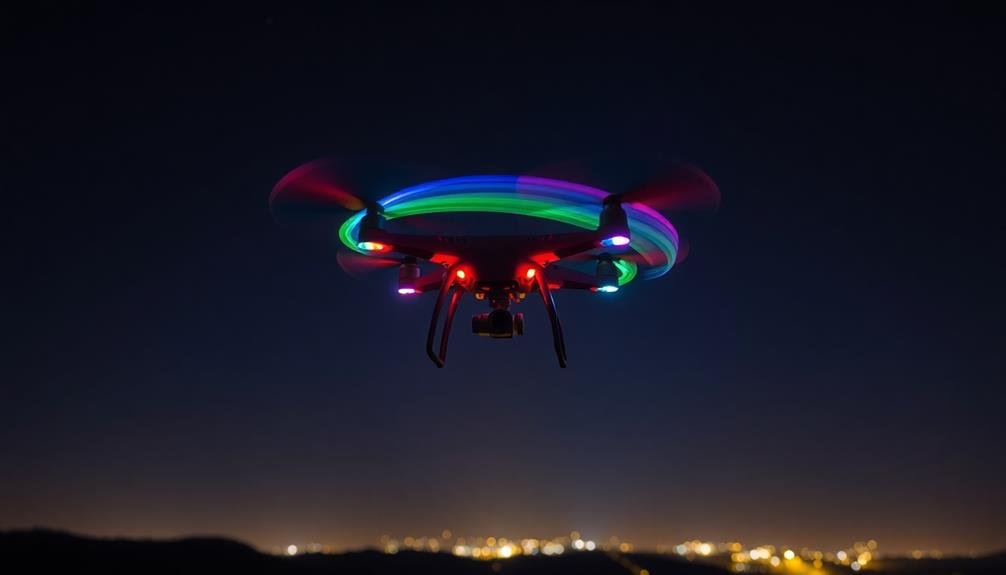
Moving Light Sources
Moving light sources can transform your drone cinematography, adding depth and dynamism to your shots. By attaching lights to your drone, you'll create a mobile lighting rig that opens up new creative possibilities.
Start by equipping your drone with lightweight LED panels or strips that won't compromise its flight performance.
For dynamic backlighting, fly your drone behind your subject, illuminating them from the rear. This technique creates a stunning halo effect and separates your subject from the background. You can also use your drone to simulate moving car headlights or moonlight filtering through trees.
Experiment with different flight patterns to achieve various lighting effects. Try sweeping movements to create dramatic light streaks, or hover and slowly ascend to mimic a rising sun. For a more subtle approach, use your drone as a moving fill light to softly illuminate your subject's features as they move through the frame.
Remember to adjust your camera settings to compensate for the moving light source. Use a slightly slower shutter speed to capture light trails, or increase your ISO if the drone-mounted lights aren't powerful enough.
Always prioritize safety and follow local regulations when flying lit drones at night.
Capturing Silhouettes From Above

Silhouettes from above offer a unique perspective that can add drama and intrigue to your drone footage. To capture stunning aerial silhouettes, you'll need to position your drone between the subject and the light source, typically the sun. Timing is essential; aim for golden hour or just after sunset when the sky is still bright but the ground is darkening.
Position your subject against a bright background, like the sky or a reflective surface. Adjust your camera settings to expose for the bright background, which will naturally darken your subject into a silhouette. Underexpose slightly to enhance the contrast between the subject and background.
Experiment with different angles and heights to create varied shapes and compositions. Try capturing people, animals, or interesting architectural elements. Look for strong, recognizable outlines that tell a story or evoke emotion.
For added depth, include foreground elements like trees or buildings. This creates layers in your shot and adds visual interest.
Don't forget to take into account the rule of thirds when composing your frame. Finally, use smooth, slow movements to maintain the silhouette effect and create cinematic results.
Nighttime Urban Light Trails
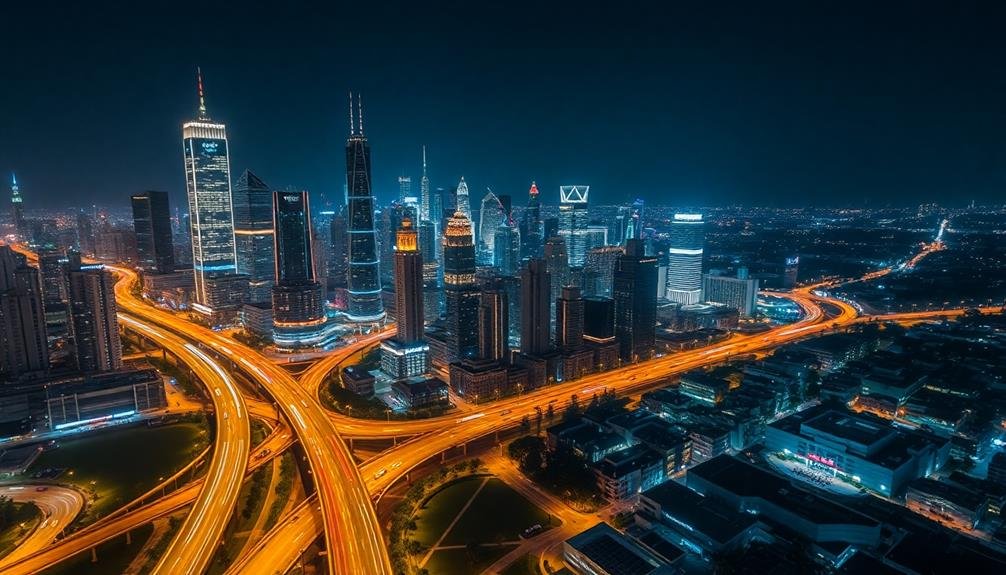
Capturing nighttime urban light trails with a drone offers a mesmerizing way to showcase city life and movement. To achieve this effect, you'll need to master long exposure techniques while keeping your drone stable.
Start by setting your camera to manual mode and adjusting the shutter speed to 2-8 seconds, depending on the desired trail length. Lower your ISO to minimize noise and set your aperture between f/4 and f/8 for ideal sharpness.
Choose a location with heavy traffic flow, such as busy intersections or highway overpasses. Position your drone at a height that captures the full scope of the light trails. You'll want to use a gimbal to keep the camera steady during the long exposure. Enable your drone's tripod mode or altitude hold feature to minimize movement.
Timing is essential. Shoot during the "blue hour" just after sunset for a balance between ambient light and vehicle lights. Experiment with different angles and heights to create unique compositions.
Don't forget to include recognizable landmarks or city skylines to provide context. Post-processing can enhance the vibrancy of the light trails and balance the overall exposure of your shot.
Dramatic Shadows in Landscape Footage
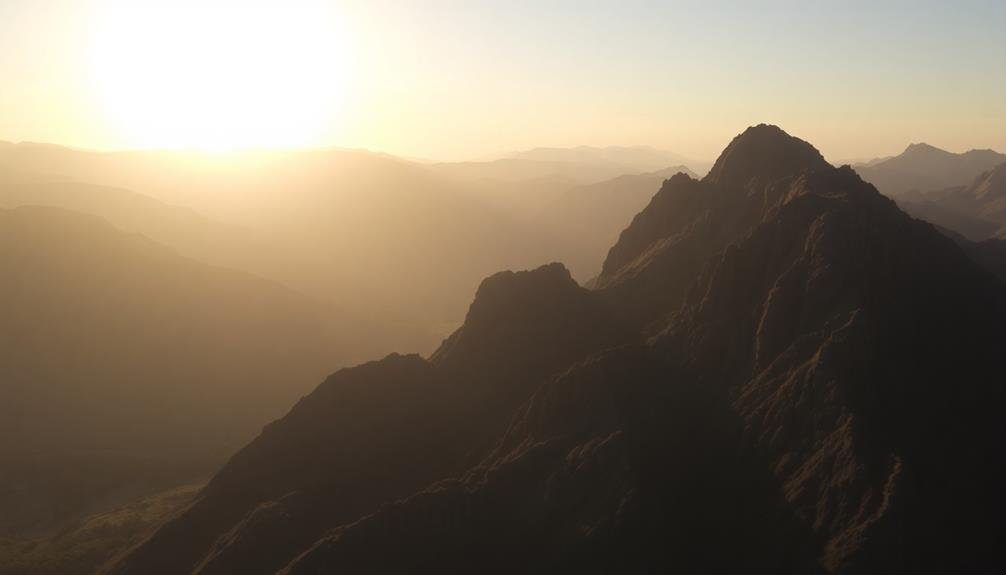
To capture dramatic shadows in landscape footage with your drone, you'll need to master positioning and timing.
You can create long, striking shadows by flying your drone when the sun is low on the horizon, typically during early morning or late afternoon.
Remember that the angle of your drone relative to the sun and landscape features will greatly impact the shadow patterns you capture, so experiment with different heights and directions for the most compelling results.
Positioning for Long Shadows
Long shadows cast by the setting sun can transform ordinary landscapes into dramatic, visually striking scenes. To capture these cinematic effects with your drone, you'll need to position it strategically. First, scout your location in advance and identify interesting features that'll cast compelling shadows. Look for tall trees, rock formations, or buildings that'll create long, dramatic lines across the terrain.
Time your shoot for the golden hour, just before sunset or after sunrise, when the sun is low on the horizon. Position your drone perpendicular to the sun's rays to maximize shadow length. You'll want to fly at a relatively low altitude to emphasize the shadows' size and impact. Experiment with different angles; try shooting directly into the sun for silhouettes, or with the sun at your back for more detailed landscapes.
Consider the terrain's texture and how shadows will interact with it. Rippled sand dunes, rolling hills, or textured grasslands can create mesmerizing patterns when long shadows stretch across them.
Don't forget to adjust your camera settings to handle the high contrast between bright sunlit areas and deep shadows. Use filters or HDR techniques if necessary to capture the full dynamic range of the scene.
Time of Day Matters
The time of day you choose to fly your drone can make or break your landscape footage. For dramatic shadows and stunning contrast, aim for the golden hours: just after sunrise or before sunset. During these periods, the sun's low angle creates long, striking shadows that add depth and texture to your shots.
Early morning flights offer crisp, clear air and often calmer winds, ideal for steady footage. You'll capture landscapes bathed in soft, warm light, with dew glistening on foliage.
Sunset shoots provide rich, golden hues and the potential for breathtaking silhouettes against colorful skies.
Midday sun, while bright, can flatten your image and wash out colors. If you must shoot during these hours, use polarizing filters to reduce glare and enhance contrast. Alternatively, embrace the harsh light for high-contrast urban scenes or to highlight geometric patterns in architecture.
Overcast days shouldn't be overlooked. They provide soft, diffused light that's excellent for capturing details in landscapes without harsh shadows.
This lighting is particularly effective for forest scenes or when showcasing intricate textures in natural formations.
Light Painting With Long Exposures
Creating mesmerizing light trails in the night sky becomes possible with long-exposure drone photography. This technique, known as light painting, allows you to transform your drone into a flying paintbrush. To achieve this effect, you'll need a camera capable of long exposures and a drone equipped with bright LED lights.
Start by setting your camera to manual mode with a slow shutter speed, typically between 10 to 30 seconds. Mount the camera on a sturdy tripod to eliminate shake. As you fly your drone, its lights will create streaks of color across the frame. Experiment with different flight patterns to produce unique shapes and designs.
You can enhance your light paintings by attaching additional LEDs or glow sticks to your drone. Change colors mid-flight for more dynamic results. Remember to keep your drone's movements smooth and deliberate for cleaner light trails.
It's essential to follow local regulations and obtain necessary permits for night flying.
For added depth, incorporate stationary elements in your composition. Landmarks, structures, or even stars can provide context and contrast to your light trails.
With practice, you'll master this technique and create stunning, otherworldly images that captivate viewers.
Reflections and Water Lighting Effects
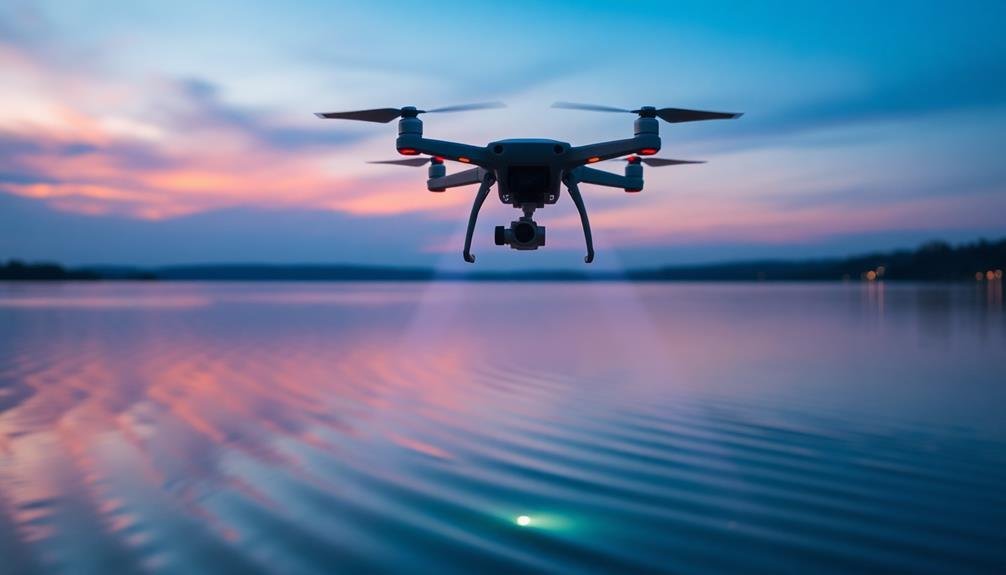
Frequently, drones offer unique opportunities to capture stunning reflections and water lighting effects. You can leverage these aerial perspectives to create mesmerizing shots that'll elevate your filmmaking. To achieve the best results, fly your drone during golden hour or blue hour when the light is soft and warm.
For reflections, position your drone low over still water surfaces like lakes or calm seas. Adjust your camera angle to capture both the scenery and its mirror image. You'll want to experiment with different altitudes to find the perfect balance between the reflection and the actual landscape.
When it comes to water lighting effects, try these techniques:
| Technique | Effect | Best Time |
|---|---|---|
| Skimming | Creates rippling light patterns | Sunset |
| Hovering | Highlights water texture | Midday |
| Following | Tracks light movement on water | Sunrise |
Don't forget to use your drone's built-in filters or add post-processing effects to enhance the water's appearance. You can boost contrast, adjust saturation, or apply color grading to make the reflections and lighting pop. With practice, you'll master these drone lighting tricks and capture cinematic water shots that'll wow your audience.
Frequently Asked Questions
What Drone Certifications Are Required for Commercial Filming?
You'll need a Part 107 Remote Pilot Certificate from the FAA for commercial drone filming. It's crucial to pass a knowledge test and follow regulations. Don't forget to register your drone and obtain necessary airspace authorizations.
How Do Weather Conditions Affect Drone Lighting Techniques?
Weather greatly impacts your drone lighting techniques. You'll need to adjust for sun position, cloud cover, and wind. Overcast days diffuse light, while bright sun creates harsh shadows. Wind can affect stability, so you'll need to compensate accordingly.
What Are the Best Drones for Low-Light Photography?
You'll want to contemplate drones with larger sensors and wide apertures for low-light photography. The DJI Mavic 3, Autel EVO II Pro, and DJI Air 2S are excellent choices. They offer better light sensitivity and image quality in dim conditions.
How Can I Avoid Lens Flare When Shooting Towards Light Sources?
You can avoid lens flare by using a lens hood, adjusting your shooting angle, or using your hand to block direct light. Polarizing filters can help too. If you're editing, you can remove minor flares in post-production.
Are There Specific Drone Flight Patterns for Optimal Lighting Effects?
You'll find several flight patterns for great lighting effects. Try orbiting your subject, flying towards or away from light sources, and using figure-eight movements. Don't forget to experiment with altitude changes for dynamic shadows and highlights.
In Summary
You've now got seven powerful lighting techniques to elevate your drone footage. Don't be afraid to experiment with these tricks in different settings and conditions. Remember, lighting can make or break your shots, so take the time to plan and execute each technique carefully. With practice, you'll be capturing cinematic, movie-quality aerial footage that'll wow your audience. Keep pushing your creative boundaries and let your drone's eye view tell stunning visual stories.
As educators and advocates for responsible drone use, we’re committed to sharing our knowledge and expertise with aspiring aerial photographers.


Leave a Reply