
For stunning night flight long exposures, you'll need essential gear: a sturdy tripod, manual-mode camera, wide-angle lens, extra batteries, and a remote shutter release. Set your camera to low ISO, slow shutter speed, and smaller aperture for ideal results. Choose dark locations with interesting features, and plan your flight path carefully. Master light trails by capturing moving sources and experiment with cityscapes during blue hour. Post-processing is vital for enhancing contrast and reducing noise. Always prioritize safety by following regulations and using proper visibility equipment. With these pro tips, you're ready to elevate your nighttime aerial photography to new heights.
Key Takeaways
- Use a sturdy tripod and remote shutter release to ensure stability during long exposures.
- Set low ISO (100-200) and slow shutter speeds (10-30 seconds) to capture light trails and minimize noise.
- Choose a wide-angle lens with a large aperture (f/2.8 or wider) for broader views and better light gathering.
- Scout locations beforehand, considering flight paths, landmarks, and legal restrictions for optimal compositions.
- Monitor weather conditions, aiming for clear skies and low wind speeds to maximize image quality and stability.
Essential Equipment for Night Flights
While long exposure photography can be enthralling, it's vital to have the right equipment for night flights. First and foremost, you'll need a sturdy tripod to keep your camera steady during long exposures. Opt for a carbon fiber model that's lightweight yet stable in windy conditions.
Your camera should have manual mode and the ability to shoot in RAW format for maximum control and image quality. A wide-angle lens with a large aperture (f/2.8 or wider) will help capture more light and a broader field of view.
Don't forget extra batteries, as long exposures and cold temperatures can drain power quickly. A remote shutter release or intervalometer is important to avoid camera shake when triggering the shutter.
Pack neutral density filters to control light intake during twilight hours. A headlamp with a red light option will help you navigate and adjust settings without affecting your night vision.
Lastly, bring warm clothing, hand warmers, and a thermos of hot beverages. Night photography often involves long waits in cold conditions, so staying comfortable is key to capturing those perfect shots.
Camera Settings for Long Exposures
You'll need to master three key camera settings for successful long exposure photography.
Start by selecting a low ISO to minimize noise, then choose a slow shutter speed to capture motion blur or light trails.
Optimal ISO Settings
ISO settings play a crucial role in long exposure photography. For night flights, you'll want to keep your ISO as low as possible to minimize noise in your images. Start with ISO 100 or 200, which will provide the cleanest results. However, if you're struggling to achieve proper exposure, don't be afraid to bump up the ISO slightly.
Remember that higher ISO values can introduce unwanted grain, especially in darker areas of your image. This can be particularly noticeable in long exposures, where noise tends to accumulate over time. If you find yourself needing to increase ISO, try to stay below 800 for the best quality.
When shooting star trails or light trails from aircraft, you might need to experiment with slightly higher ISO settings to capture more light. In these cases, aim for ISO 400-800 as a starting point.
Always review your images on your camera's LCD screen and zoom in to check for noise levels. If you notice excessive graininess, consider using a wider aperture or longer exposure time instead of increasing ISO further.
Balancing ISO with other camera settings is key to achieving ideal results in long exposure night flight photography.
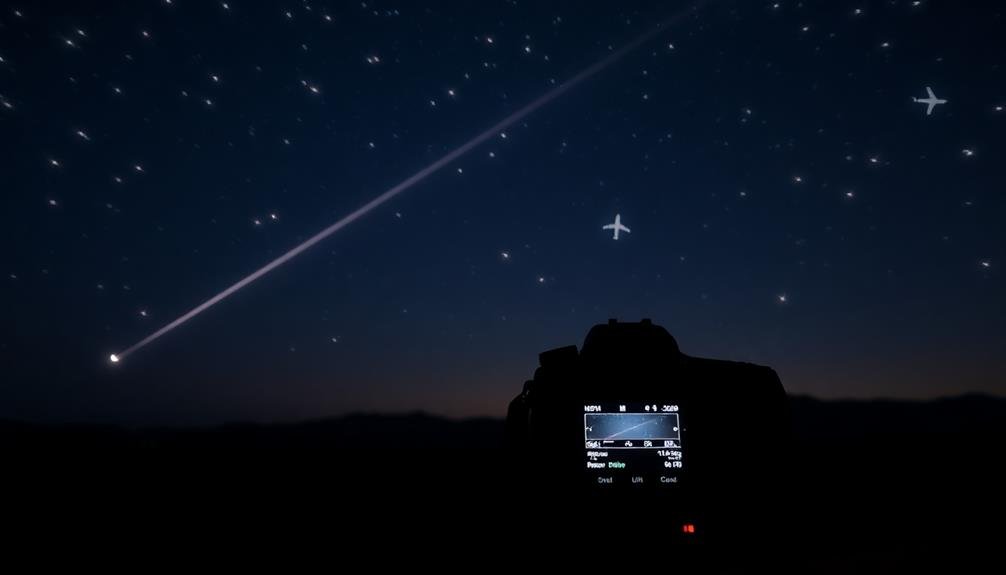
Shutter Speed Selection
Shutter speed is the heart of long exposure photography, especially for night flights. You'll need to select a slow shutter speed to capture the movement of lights and create stunning light trails. For aircraft, start with speeds between 10 to 30 seconds, depending on their velocity and distance.
To determine the ideal shutter speed, consider your subject's speed and desired effect. Faster planes require shorter exposures, while slower ones allow for longer shutter times. Experiment with different durations to find the perfect balance between light trail length and overall image brightness.
Use your camera's Bulb mode for ultimate control. This setting lets you keep the shutter open for as long as you hold down the button, allowing for exposures longer than 30 seconds. It's particularly useful when capturing multiple planes in a single frame or creating extra-long light trails.
Remember to factor in your camera's stability. Longer exposures amplify any camera shake, so use a sturdy tripod and a remote shutter release to minimize vibrations.
If you're shooting in windy conditions, consider using a shorter shutter speed or adding weight to your tripod for added stability.
Aperture Considerations
Along with shutter speed, aperture plays an essential role in long exposure photography. When shooting night flights, you'll typically want to use a smaller aperture (higher f-number) to achieve a greater depth of field and guarantee that both the aircraft and any stationary elements in your composition remain sharp. A good starting point is f/8 or f/11, which balances depth of field with overall image quality.
However, don't be afraid to experiment with wider apertures in certain situations. For instance, if you're capturing a single plane against a dark sky, a wider aperture like f/4 or f/5.6 can help you gather more light and potentially use a faster shutter speed. This can be particularly useful if you're handholding your camera or if the aircraft is moving quickly.
Remember that your aperture choice will affect your ISO and shutter speed settings. If you're using a smaller aperture, you may need to increase your ISO or lengthen your exposure time to compensate for the reduced light intake.
Always consider the trade-offs between depth of field, light sensitivity, and motion blur when selecting your aperture for long exposure night flight photography.
Choosing the Perfect Location
Where you choose to shoot can make or break your long exposure photographs. When selecting a location, take into account both the subject matter and the surrounding elements that'll contribute to your composition. Look for areas with interesting foreground elements, such as rocks, piers, or architectural features, to add depth and interest to your images.
Light pollution is an essential factor to take into account. While city lights can create stunning streaks and patterns in your photos, they can also overpower delicate star trails or moonlit landscapes. If you're aiming for astrophotography, seek out dark sky locations away from urban areas.
When scouting locations, keep these key factors in mind:
- Accessibility: Make sure you can safely reach and set up your equipment at the chosen spot.
- Weather conditions: Check forecasts for clear skies and ideal shooting conditions.
- Seasonal changes: Think about how the location might vary throughout the year.
Don't forget to research local regulations and obtain any necessary permits before shooting. Some popular locations may require advance permission or have specific rules for night photography.
Planning Your Flight Path
When planning your flight path for long exposure photography, you'll want to research ideal routes that maximize your shooting opportunities.
Don't forget to take into account weather conditions, as they can greatly impact your ability to capture stunning images.
As you map out your journey, identify interesting landmarks or geographical features that could serve as striking focal points in your aerial long exposures.
Research Optimal Flight Routes
Planning your flight path is a crucial step in long exposure drone photography. When researching ideal flight routes, you'll need to take into account various factors that can impact your shots. Start by studying satellite imagery and topographical maps of your chosen location. This will help you identify potential obstacles, interesting features, and the best angles for your photographs.
Next, check local regulations and airspace restrictions to guarantee you're flying legally and safely. You don't want your shoot interrupted by authorities or risk endangering others. Reflect on the time of day and lighting conditions when planning your route, as these can greatly affect your long exposure shots.
To enhance your flight route, keep these key points in mind:
- Plan multiple paths to capture different perspectives
- Account for battery life and confirm you have enough power for the entire flight
- Include buffer zones for unexpected weather changes or technical issues
Once you've mapped out your route, use flight planning apps to create a detailed flight plan. These tools can help you visualize your path, set waypoints, and estimate flight times.
Remember to remain flexible, as conditions may change on-site, requiring you to adjust your plans accordingly.
Consider Weather Conditions
Weather conditions play a vital role in long exposure drone photography. You'll need to carefully consider the forecast before planning your night flight. Clear skies are perfect, as they'll allow you to capture crisp, star-filled images. However, some cloud cover can add drama and interest to your shots, especially when illuminated by city lights.
Wind is an important factor to monitor. Even slight breezes can cause camera shake during long exposures, resulting in blurry images. Aim for nights with wind speeds below 5 mph for best stability.
Temperature also affects your drone's performance and battery life. Cold temperatures can greatly reduce flight time, so plan accordingly and bring extra batteries.
Humidity levels impact visibility and can cause lens fogging. If you're shooting in humid conditions, pack a lens cloth and consider using a dehumidifier in your drone case.
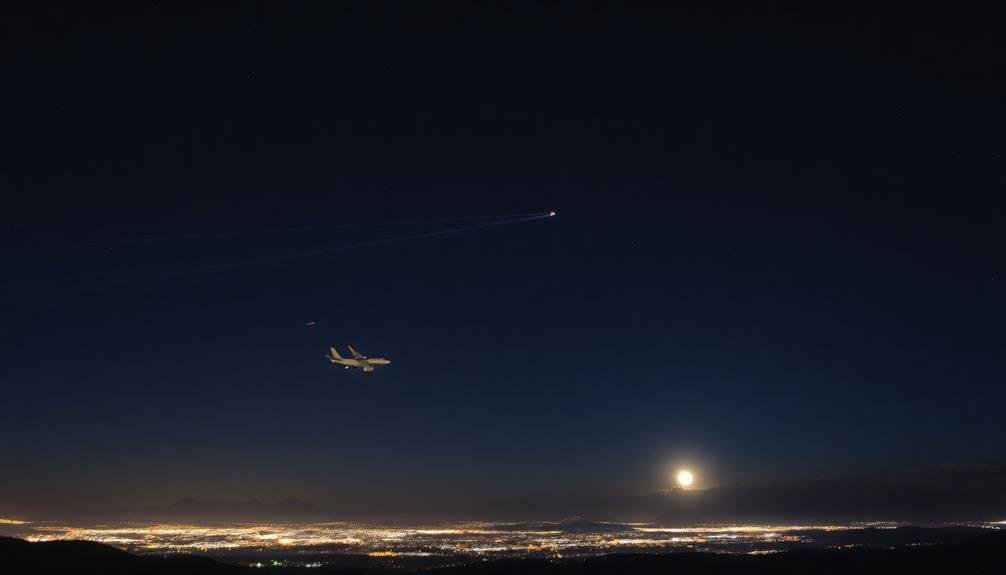
Moonlight is another consideration; a full moon can provide natural illumination but may overpower fainter stars. New moon nights offer the darkest skies for astrophotography.
Identify Interesting Landmarks
Identifying intriguing landmarks is essential for planning your long exposure drone flight path. Before you take off, research your area for striking features that'll make your photos pop.
Look for buildings with unique architecture, bridges spanning rivers or canyons, and natural formations like waterfalls or rock formations. These elements will serve as focal points in your compositions, drawing the viewer's eye and adding depth to your images.
Use online maps and satellite imagery to scout potential locations. Don't overlook less obvious landmarks that might come alive at night, such as:
- Industrial areas with smoke stacks or cooling towers
- Amusement parks with colorful rides and attractions
- Harbors with boats and shipping activity
Once you've identified your landmarks, plan your flight path to capture them from various angles.
Consider how the landmarks interact with each other and the surrounding landscape. Think about foreground elements that could add interest to your shots, like trees, rocks, or smaller structures.
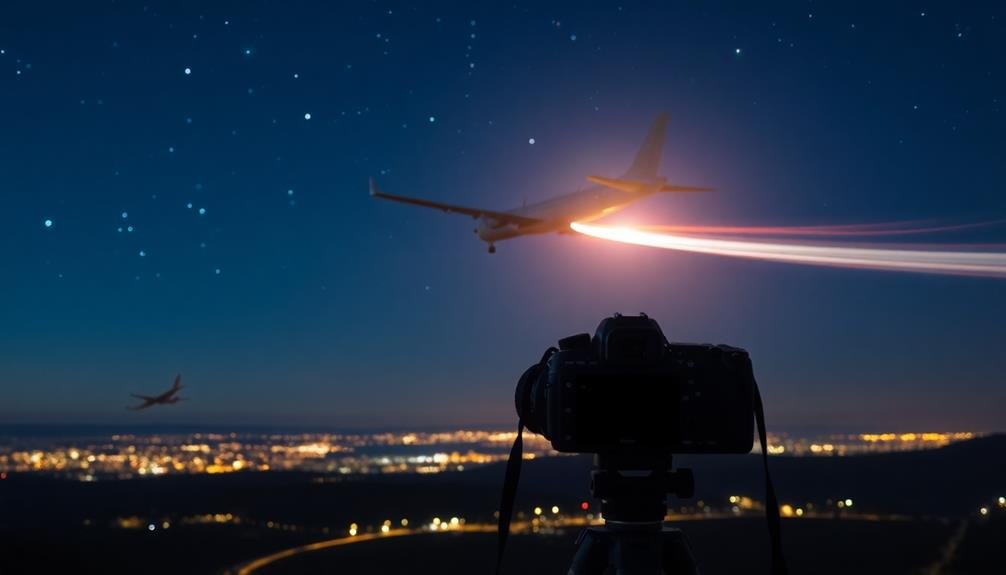
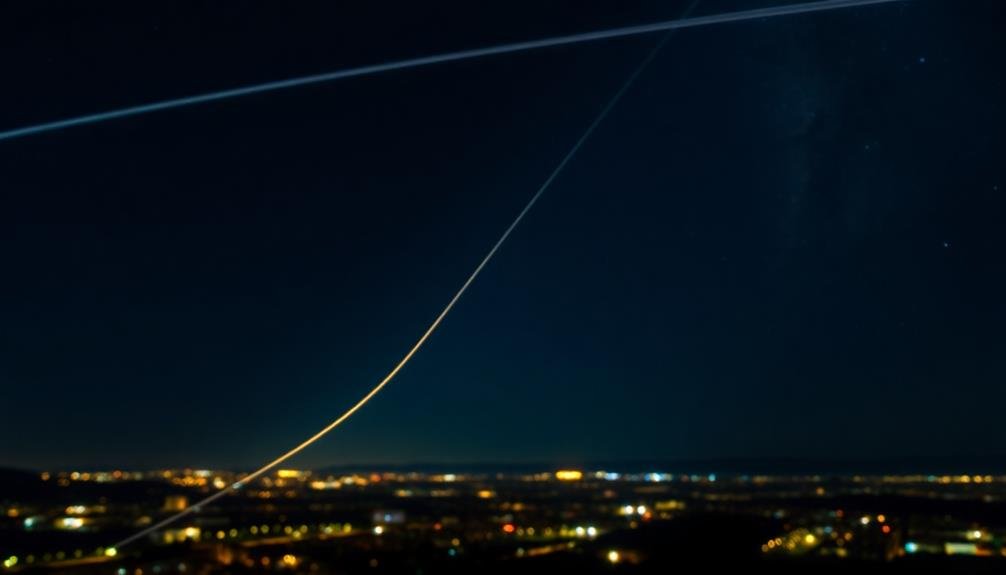
Mastering Light Trails and Streaks

Light trails and streaks can transform an ordinary nighttime scene into a mesmerizing display of motion and color. To capture these dynamic elements, you'll need to master a few key techniques.
First, choose a location with moving light sources, such as busy streets, highways, or fairgrounds. Set up your camera on a sturdy tripod and use a remote shutter release to minimize camera shake.
Start with an exposure time of 10-30 seconds, adjusting as needed based on the speed and intensity of the lights. Use a narrow aperture (f/8 to f/16) to keep the entire scene in focus and maintain a low ISO to reduce noise.
Experiment with different compositions by including stationary elements alongside the light trails for contrast. For more creative effects, try zooming your lens during exposure or using a neutral density filter to extend exposure times.
You can also combine multiple exposures in post-processing to create more complex light patterns. Remember to practice patience and take multiple shots, as capturing the perfect light trail often requires experimentation and timing.
With these techniques, you'll soon be creating stunning nighttime images that showcase the energy and movement of your chosen scene.
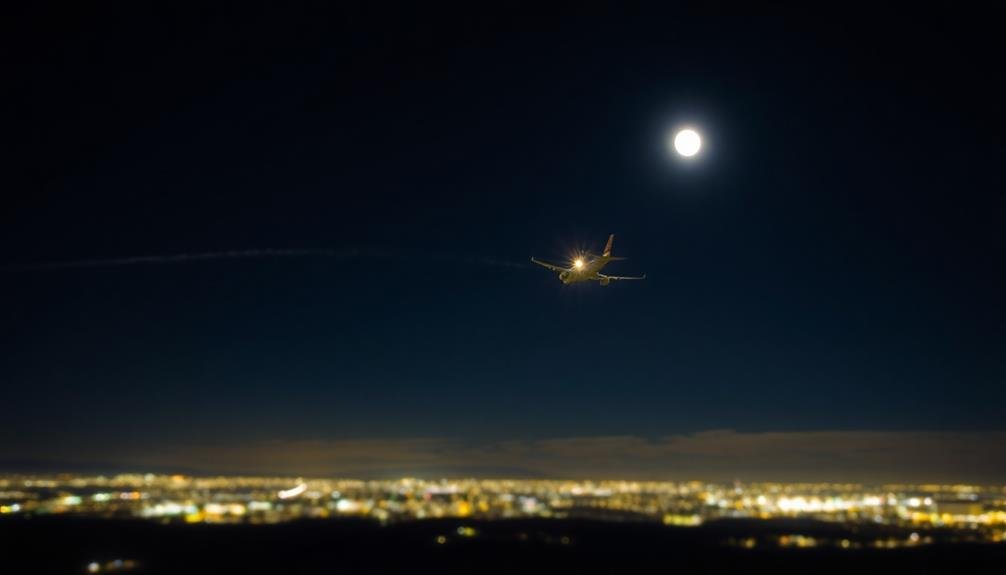
Capturing Cityscapes After Dark
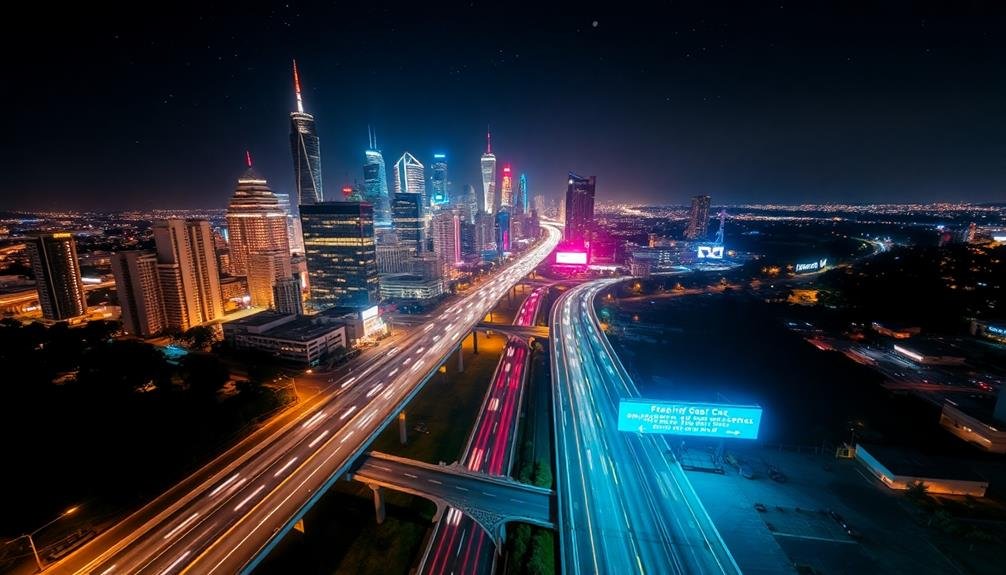
Cityscapes after dark come alive with a mesmerizing array of lights and reflections, offering photographers unique opportunities for stunning long exposure shots. To capture the essence of a city at night, you'll need to scout locations beforehand and arrive during the blue hour for ideal lighting conditions.
Set up your camera on a sturdy tripod and use a remote shutter release to minimize camera shake. Choose a narrow aperture (f/8 to f/16) to guarantee sharp focus throughout the frame and experiment with exposure times between 10 and 30 seconds. Use your camera's bulb mode for even longer exposures. To prevent overexposure, consider using neutral density filters, especially in brightly lit areas.
When composing your shot, look for:
- Leading lines created by car trails or illuminated bridges
- Reflections in water bodies or glass buildings
- Iconic landmarks or architectural features
Don't forget to include foreground elements to add depth to your images. Experiment with different focal lengths to capture both wide-angle cityscapes and intimate urban details.
Post-Processing Long Exposure Drone Images
While ground-based long exposures offer stunning cityscapes, drone photography opens up a whole new world of possibilities for capturing unique perspectives. When post-processing your long exposure drone images, you'll need to pay special attention to certain aspects to bring out the best in your aerial shots.
Start by adjusting the white balance to enhance the mood of your image. For night shots, a cooler tone often works well. Next, focus on noise reduction, as high ISO settings are common in drone photography. Use a noise reduction plugin or your editing software's built-in tools to clean up the image without losing detail.
Here's a quick guide to post-processing your long exposure drone images:
| Step | Action | Purpose |
|---|---|---|
| 1 | Adjust white balance | Set mood and tone |
| 2 | Reduce noise | Clean up image |
| 3 | Enhance contrast | Add depth and drama |
Don't forget to straighten your horizon and crop if necessary. Aerial shots can sometimes appear tilted due to the drone's position. Finally, use selective adjustments to bring out details in specific areas of your image, such as light trails or illuminated buildings.
Safety Considerations for Nighttime Operations
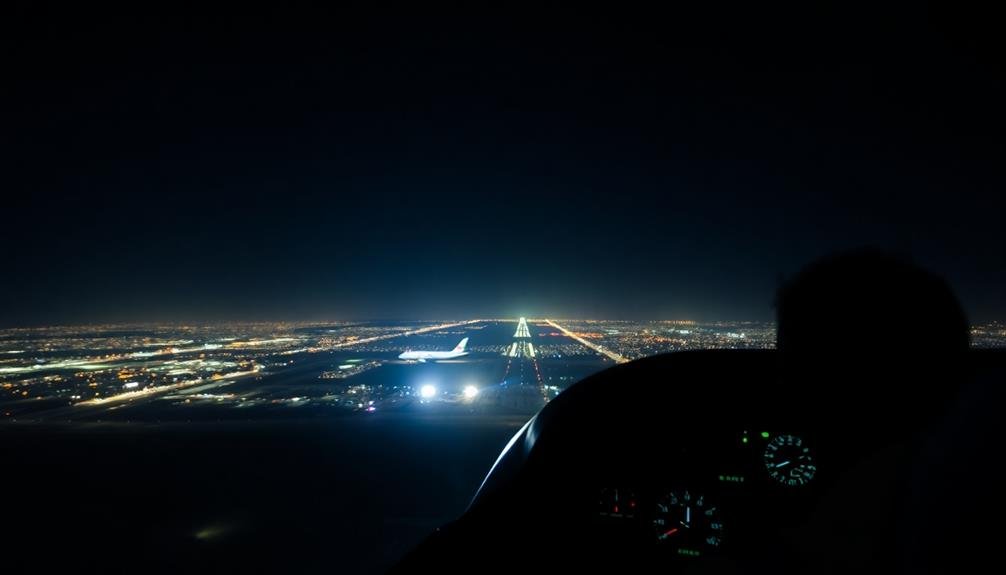
Before venturing into nighttime long exposure photography with your drone, it's crucial to prioritize safety. Darkness presents unique challenges that require careful planning and execution. First, verify you're familiar with local regulations regarding night flights. Many areas have specific rules or prohibitions for after-dark drone operations.
Equip your drone with proper lighting, including anti-collision lights visible from all directions. This helps you maintain visual contact and alerts others to your drone's presence. Always maintain a clear line of sight with your aircraft, and consider using a spotter to assist you.
Here are key safety considerations for nighttime drone operations:
- Conduct a thorough pre-flight inspection, checking all components and connections.
- Choose a well-lit takeoff and landing area to minimize risks during critical flight phases.
- Be aware of obstacles that may be harder to spot in low light, such as power lines or trees.
Weather conditions can be more challenging to assess at night. Check forecasts carefully and be prepared to abort if conditions deteriorate.
Frequently Asked Questions
How Can I Reduce Propeller Blur in Long Exposure Drone Shots?
You can reduce propeller blur in long exposure drone shots by using a faster shutter speed, increasing ISO, or opening up your aperture. You'll also want to make sure your drone's stabilization is ideal and consider using ND filters.
What's the Best Way to Stabilize a Drone for Long Exposures?
You'll want to use a sturdy tripod or landing pad for your drone. Make certain it's on a flat, stable surface. Activate the drone's built-in stabilization features and use a remote shutter release to minimize vibrations.
How Do I Capture Star Trails With a Drone?
To capture star trails with a drone, you'll need to set a long exposure time, usually 30 seconds or more. Make certain your drone's stabilization is excellent, use a low ISO, and fly in a dark area away from light pollution.
Can I Use ND Filters for Nighttime Long Exposure Drone Photography?
You don't need ND filters for nighttime long exposure drone photography. They're designed to reduce light, which isn't necessary at night. Instead, focus on adjusting your camera settings like ISO, aperture, and shutter speed for ideal results.
How Do I Avoid Light Pollution Interference in Night Sky Drone Shots?
To avoid light pollution in night sky drone shots, you'll want to fly in darker areas away from cities. Use a low ISO, adjust your white balance, and consider using light pollution filters on your drone's camera lens.
In Summary
You've now got the tools to create stunning long exposure night flight images. Remember to experiment with different settings, locations, and techniques. Don't be afraid to push your creativity and try new approaches. With practice, you'll master the art of capturing light trails and cityscapes after dark. Always prioritize safety and follow local regulations. Now it's time to take to the skies and let your imagination soar!
As educators and advocates for responsible drone use, we’re committed to sharing our knowledge and expertise with aspiring aerial photographers.


Leave a Reply