Elevate your filmmaking with these seven breathtaking establishing shots from above. Capture a sweeping city skyline to set an urban scene, or showcase a mountain range panorama for epic adventures. Reveal a coastal shoreline to build anticipation, or follow a winding river's descent for a journey narrative. Soar over a lush forest canopy to immerse viewers in nature, or pan across a vast desert expanse for isolation themes. For a unique perspective, highlight geometric patterns in agricultural fields. These aerial shots offer versatile storytelling power, enhancing your visual narrative. Discover how to master these techniques and create unforgettable cinematic moments.
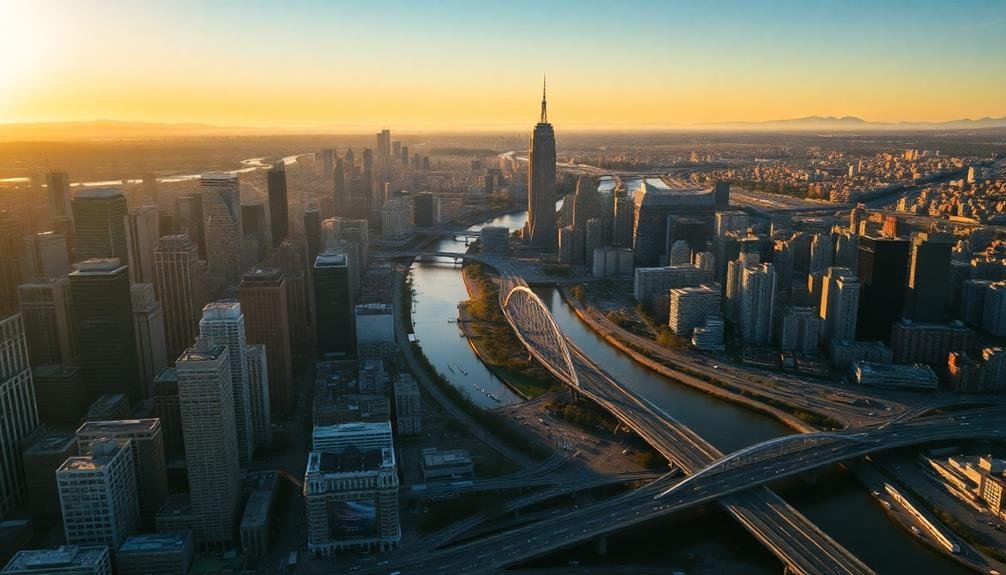
Sweeping City Skyline

Skyscrapers and shimmering lights paint an enthralling picture in a sweeping city skyline shot. As a filmmaker, you'll find this establishing shot incredibly versatile, setting the stage for urban narratives or contrasting rural storylines.
To capture the perfect skyline, timing is essential. Golden hour, just before sunset or after sunrise, bathes the cityscape in warm, dramatic light, enhancing architectural details and creating long shadows.
Position your camera on a high vantage point, such as a rooftop or nearby hill, to showcase the city's expanse. Use a wide-angle lens to encompass more of the skyline, but be mindful of distortion. A steady tripod is vital for sharp images, especially in low light conditions. Consider using a neutral density filter to balance bright skies with darker buildings.
Experiment with different weather conditions. Fog can add mystery, while clear skies emphasize the city's grandeur. Time-lapse sequences of the skyline evolving from day to night can be particularly impactful.
Don't forget to include foreground elements like trees or water to add depth and context to your shot.
Mountain Range Panorama
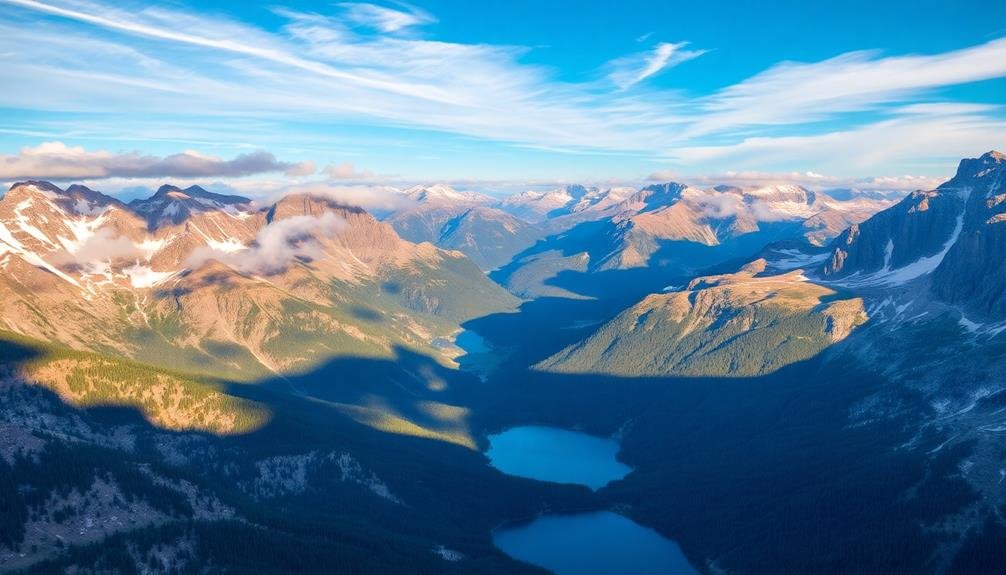
To capture a breathtaking mountain range panorama, you'll need to master aerial perspective techniques that convey depth and distance.
Effectively showcasing the scale of these majestic landscapes requires strategic composition and the use of foreground elements for contrast.
You'll find the most dramatic lighting conditions during the golden hours of sunrise and sunset, when long shadows accentuate the mountain's contours and create a sense of grandeur.
Aerial Perspective Techniques
Majestic mountain ranges offer filmmakers a stunning canvas for aerial establishing shots. To capture their grandeur from above, you'll need to master key aerial perspective techniques.
Start by choosing the right time of day, ideally during golden hour, to enhance the landscape's natural beauty with long shadows and warm light. Use a stabilized camera system, such as a gimbal or drone, to guarantee smooth footage as you glide over peaks and valleys.
Experiment with different altitudes to create varied perspectives. Lower flights can emphasize the rugged terrain, while higher altitudes showcase the vast expanse of the mountain range. Consider incorporating movement in your shot, such as a slow reveal or a gentle descent, to add dynamism to your establishing shot.
To elevate your aerial mountain shots:
- Utilize leading lines, such as rivers or ridges, to guide the viewer's eye
- Capture unique geographical features like glaciers, lakes, or volcanic calderas
- Incorporate foreground elements, like trees or rock formations, to add depth
Remember to adjust your camera settings for the high-contrast lighting conditions often found in mountain environments. Use ND filters to maintain control over your exposure and shutter speed, guaranteeing crisp, cinematic footage that will captivate your audience.
Capturing Scale Effectively
Often, capturing the sheer scale of a mountain range panorama presents a unique challenge for filmmakers. To effectively convey the magnitude of these majestic landscapes, you'll need to employ specific techniques that accentuate their vastness.
Start by choosing the right lens. Wide-angle lenses are ideal for showcasing expansive vistas, but be cautious of distortion. Position recognizable objects in the foreground to provide a sense of scale. This could be a person, vehicle, or structure that viewers can easily relate to size-wise.
Utilize aerial shots to capture the full extent of the mountain range. Drones or helicopters can offer breathtaking perspectives that ground-level shots simply can't match. Consider including movement in your shot, such as panning or flying over the landscape, to emphasize its immensity.
Lighting plays a vital role in capturing scale. Shoot during golden hour for long shadows that accentuate the mountains' contours and depth.
Alternatively, capture the interplay of light and shadow as clouds pass over the peaks, creating dynamic patterns that highlight the terrain's vastness.
Best Lighting Conditions
Three key lighting conditions stand out when capturing mountain range panoramas.
First, the golden hour provides warm, soft light that emphasizes the contours and textures of the mountains. You'll want to shoot just after sunrise or before sunset when the sun is low on the horizon, casting long shadows and creating a dramatic interplay of light and shadow.
Second, dramatic stormy conditions can yield stunning results. Capture the moment when dark clouds part, allowing shafts of sunlight to illuminate sections of the landscape. This creates a dynamic contrast between light and dark areas, adding depth and drama to your shot.
Lastly, clear blue skies with scattered clouds offer a classic, timeless look. The clouds provide points of interest and can cast interesting shadows on the mountain slopes.
To enhance your mountain range panoramas, consider these tips:
- Use a polarizing filter to deepen the sky's blue and enhance cloud contrast
- Experiment with long exposures to capture cloud movement
- Include foreground elements like lakes or trees for added depth and scale
Coastal Shoreline Reveal
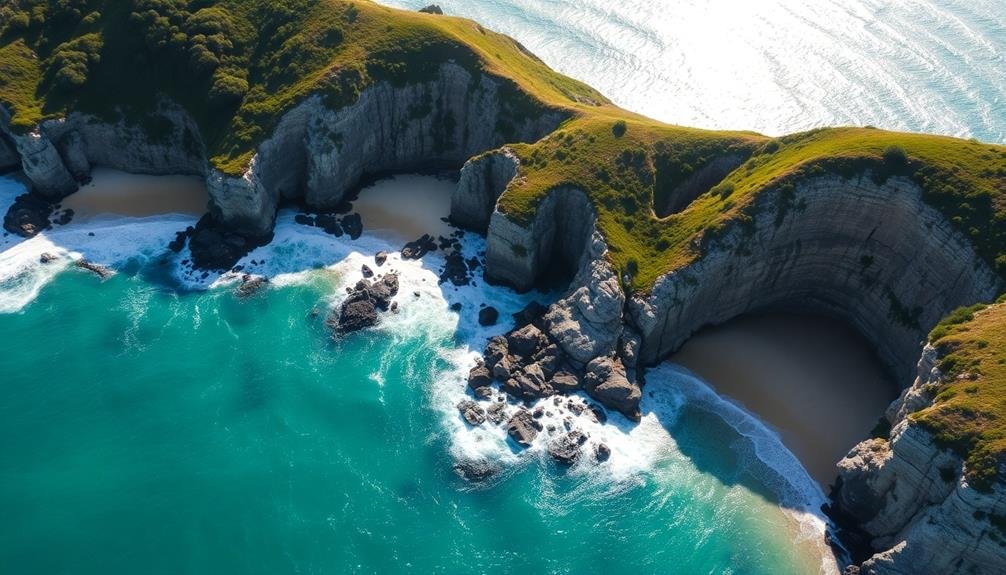
A coastal shoreline reveal can dramatically enhance your film's visual impact. Begin with an aerial shot of the open ocean, then slowly pan towards the coastline. As you approach, reveal the intricate details of the shoreline: rugged cliffs, sandy beaches, or rocky outcrops. This technique creates a sense of anticipation and establishes the setting for your audience.
To capture the perfect coastal reveal, choose your location carefully. Look for areas with diverse topography, such as a mix of cliffs and beaches, or interesting coastal features like sea stacks or lighthouses.
Time your shot to coincide with golden hour for warm, dramatic lighting that accentuates the landscape's contours.
Consider the direction of your reveal. Moving from sea to land can symbolize arrival or discovery, while land to sea might represent departure or exploration. Use slow, steady camera movement to allow viewers to absorb the scene's details.
Incorporate foreground elements like boats or seabirds to add depth and scale to your shot. Finally, guarantee your reveal aligns with your story's tone and themes, whether it's conveying isolation, adventure, or natural beauty.
Winding River Descent

While coastal reveals offer a dramatic entrance, winding river descents provide a mesmerizing journey through diverse landscapes.
You'll capture the twisting path of a river as it cuts through mountains, forests, or valleys, offering viewers a sense of exploration and discovery. As you descend, you'll reveal the river's course, its surrounding topography, and the interplay between water and land.
To execute a stunning winding river descent:
- Start high, showcasing the river's full path and its place in the broader landscape
- Gradually lower your camera, following the river's bends and curves
- Adjust your speed to match the river's flow, creating a smooth and natural progression
As you descend, focus on capturing the river's unique features: rapids, waterfalls, or calm stretches.
Highlight the changing vegetation and terrain along its banks. You can also incorporate human elements like bridges, boats, or riverside towns to add scale and context.
Remember to maintain a steady descent rate and smooth camera movement to keep your audience engaged throughout the journey. This establishing shot technique works particularly well for adventure, travel, or nature-themed productions.
Lush Forest Canopy
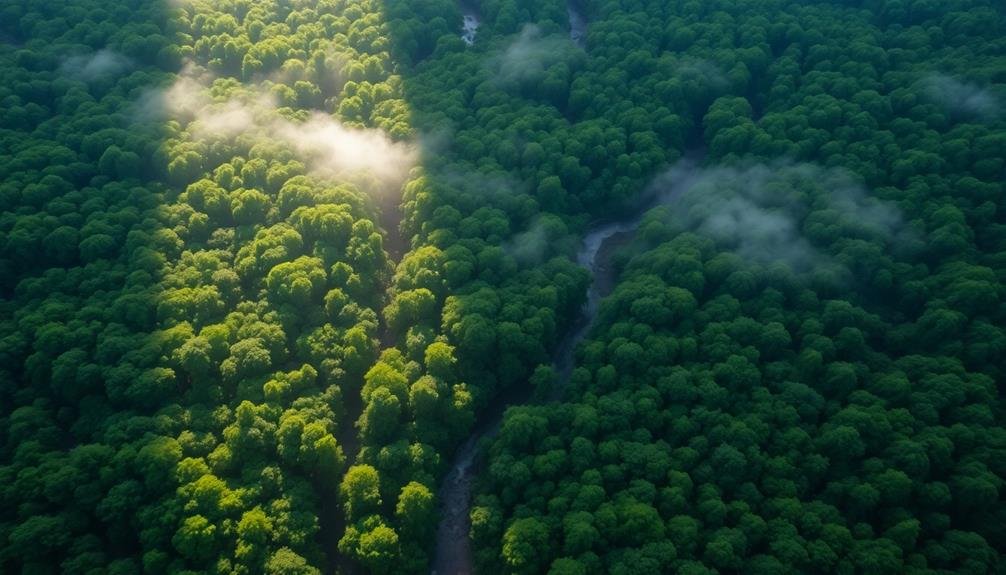
Immersing viewers in a sea of green, lush forest canopy shots offer a breathtaking perspective on nature's grandeur. As you capture this aerial view, you'll reveal an expansive tapestry of treetops stretching to the horizon.
Focus on the interplay of light and shadow as sunbeams filter through gaps in the canopy, creating a mesmerizing dance of illumination. You'll want to showcase the diverse textures and hues of different tree species, from the deep greens of evergreens to the lighter shades of deciduous trees.
Look for clearings or rivers that break up the uniformity, adding visual interest to your shot. Consider filming during different seasons to capture the changing colors of fall or the fresh growth of spring.
Use slow, sweeping movements to emphasize the vastness of the forest. You can also incorporate wildlife if you're lucky enough to spot birds or other canopy dwellers.
Remember to adjust your camera settings to handle the bright sky and darker forest floor. By mastering these techniques, you'll create an establishing shot that sets the stage for stories of adventure, mystery, or environmental awareness.
Vast Desert Expanse
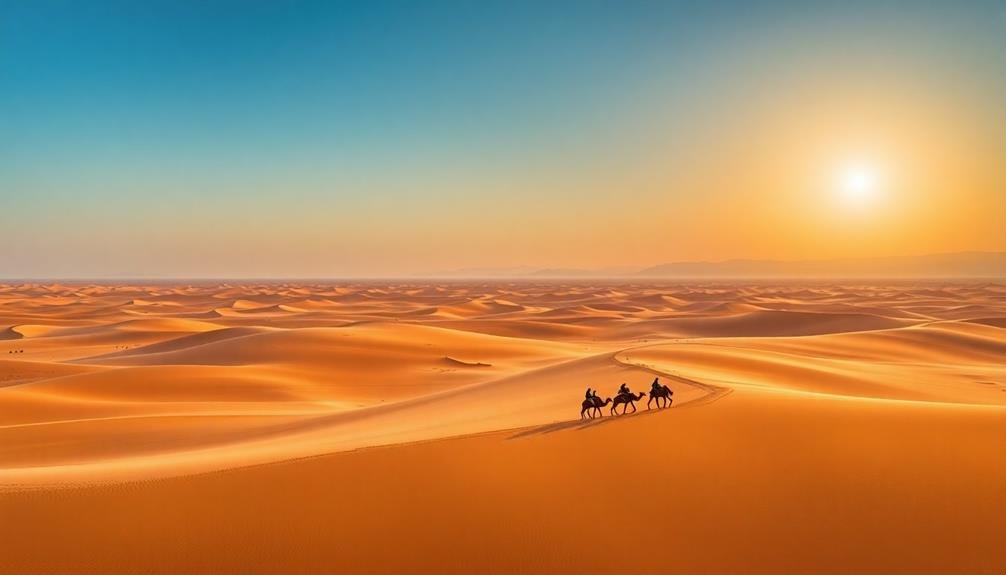
Rippling dunes and sun-baked earth stretch endlessly in a vast desert expanse, creating a powerful establishing shot for filmmakers. The sheer scale of the landscape evokes feelings of isolation, adventure, and the struggle against nature.
You'll capture the harsh beauty of the desert, with its golden sands and stark rock formations, to set the tone for your story.
When filming a desert establishing shot, consider these elements:
- Time of day: Shoot during golden hour for dramatic shadows and warm hues
- Aerial perspective: Use drones or helicopters to showcase the vastness
- Movement: Incorporate wind-blown sand or heat mirages for added dynamism
To maximize the impact of your desert establishing shot, focus on contrasts. Highlight the interplay between light and shadow, the smooth curves of dunes against jagged rock outcroppings, or the occasional oasis amid the barren expanse.
You can also use the desert's minimalist palette to your advantage, creating striking compositions that draw the viewer's eye to key elements within the frame.
Agricultural Fields Pattern
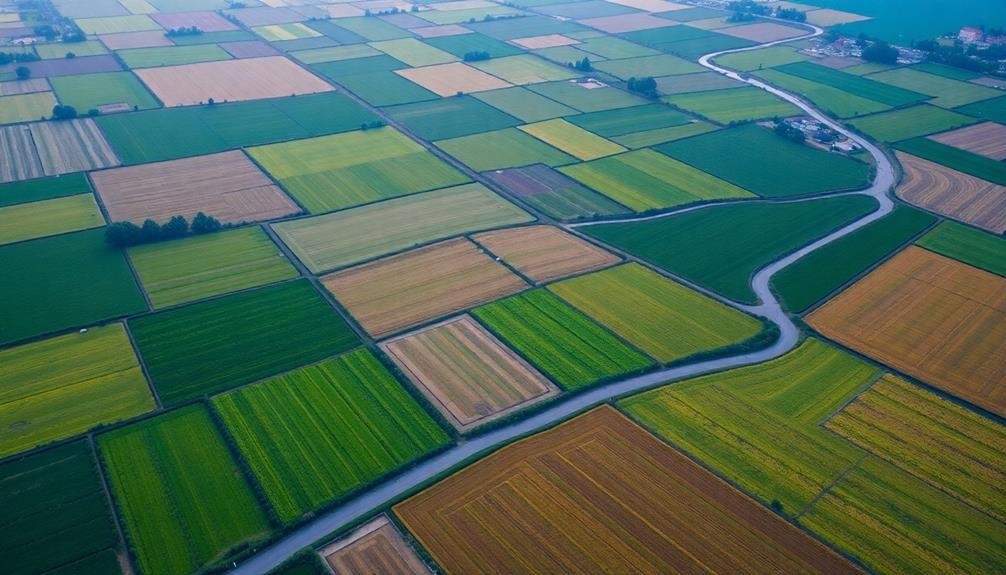
How can the geometric beauty of agricultural landscapes elevate your establishing shots? From above, vast agricultural fields create mesmerizing patterns that can instantly set the scene and mood for your film.
You'll find a rich tapestry of colors, shapes, and textures that change with the seasons, offering a dynamic canvas for your cinematography. Capture the stark contrast between lush green crops and golden wheat fields, or the intricate patchwork of differently planted plots.
Circular irrigation patterns create perfect circles amidst square fields, adding visual interest. Early morning or late afternoon light can cast long shadows, emphasizing the contours of the land and adding depth to your shot.
Consider using a drone to slowly pan across the landscape, revealing the scale and symmetry of these man-made patterns. You can also juxtapose the orderly fields with natural elements like winding rivers or forested areas to create visual tension.
Don't forget to look for unique features like lone trees, farm buildings, or tractors that can serve as focal points within the larger pattern. By carefully composing your shot, you'll transform these agricultural landscapes into stunning visual metaphors for your story.
Frequently Asked Questions
What Drone Regulations Should Filmmakers Be Aware of for Aerial Shots?
You'll need to register your drone, follow altitude limits, and avoid restricted airspace. Don't fly over people or at night without permission. Check local laws, as regulations vary by location. Always prioritize safety and respect privacy.
How Can Filmmakers Ensure Stable Footage When Shooting From High Altitudes?
To guarantee stable footage at high altitudes, you'll want to use a drone with advanced stabilization features. Invest in a quality gimbal, adjust your camera settings, and fly in calm weather conditions. Practice smooth movements and use post-production stabilization tools.
What Time of Day Is Best for Capturing Aerial Establishing Shots?
You'll get the best aerial establishing shots during the "golden hour" – just after sunrise or before sunset. The soft, warm light creates stunning visuals. Early morning can offer clearer air, while evenings often have dramatic sky colors.
Are There Specific Camera Settings Recommended for Aerial Cinematography?
For aerial cinematography, you'll want to use a fast shutter speed (1/500 or higher) to reduce blur. Set your aperture to f/5.6-f/8 for sharpness, and keep ISO low. Use ND filters in bright conditions.
How Can Filmmakers Create Depth and Scale in Aerial Establishing Shots?
You'll create depth and scale in aerial shots by using foreground elements, varying altitudes, and including recognizable objects. Fly at different speeds, utilize natural lighting, and frame your shots to showcase leading lines and patterns.
In Summary
You've now got seven stunning aerial shots to elevate your filmmaking. Whether you're capturing urban landscapes or nature's wonders, these perspectives will captivate your audience. Remember, it's not just about the visuals; it's how you use them to set the scene and tell your story. So go ahead, experiment with these shots, and don't be afraid to push creative boundaries. Your film's opening moments will leave viewers breathless and enthusiastic for more.
As educators and advocates for responsible drone use, we’re committed to sharing our knowledge and expertise with aspiring aerial photographers.


Leave a Reply