
Master the rule of thirds to transform your drone photography. Divide your frame into a 3×3 grid and place key elements along the lines or intersections. Position your drone strategically, balancing foreground and background elements. Use gridlines to align subjects and create visual interest. Incorporate leading lines like roads or rivers to guide the viewer's eye. Experiment with symmetry and asymmetry for dynamic compositions. Create depth by including foreground elements and playing with perspective. Capture contrasting elements for visual impact. Don't be afraid to break the rules creatively for unique shots. These tips are just the beginning of your journey to stunning aerial imagery.
Key Takeaways
- Divide your drone frame into a 3×3 grid to guide composition and place key elements.
- Position main subjects at intersection points of grid lines for enhanced focus and balance.
- Align horizon with top or bottom horizontal line for landscape shots to create stability.
- Place vertical elements along vertical gridlines to add structure and visual interest.
- Use off-center compositions to create dynamic and engaging drone images with visual tension.
Understanding the Rule of Thirds
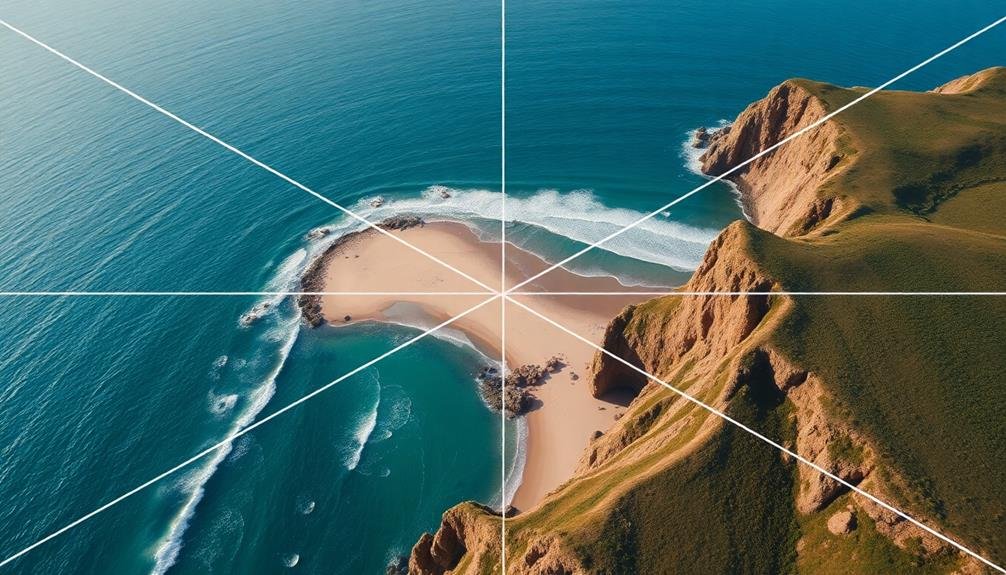
In drone photography, the rule of thirds is a fundamental composition technique you'll want to master. This principle involves dividing your frame into a 3×3 grid and placing key elements along these lines or at their intersections. By doing so, you'll create more balanced and visually appealing images.
To apply this rule, imagine two horizontal and two vertical lines equally spaced across your drone's camera view. Position your main subject at one of the four points where these lines intersect. This off-center placement creates tension and interest, drawing the viewer's eye naturally through the image.
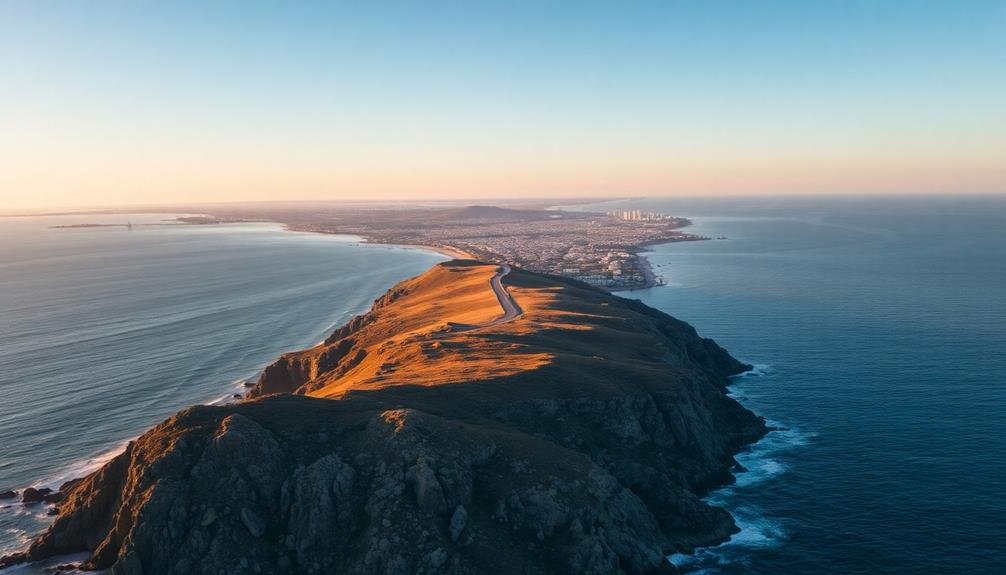
For landscape shots, align the horizon with either the top or bottom horizontal line, depending on whether you want to emphasize the sky or the ground.
When capturing structures or people, place them along the vertical lines.
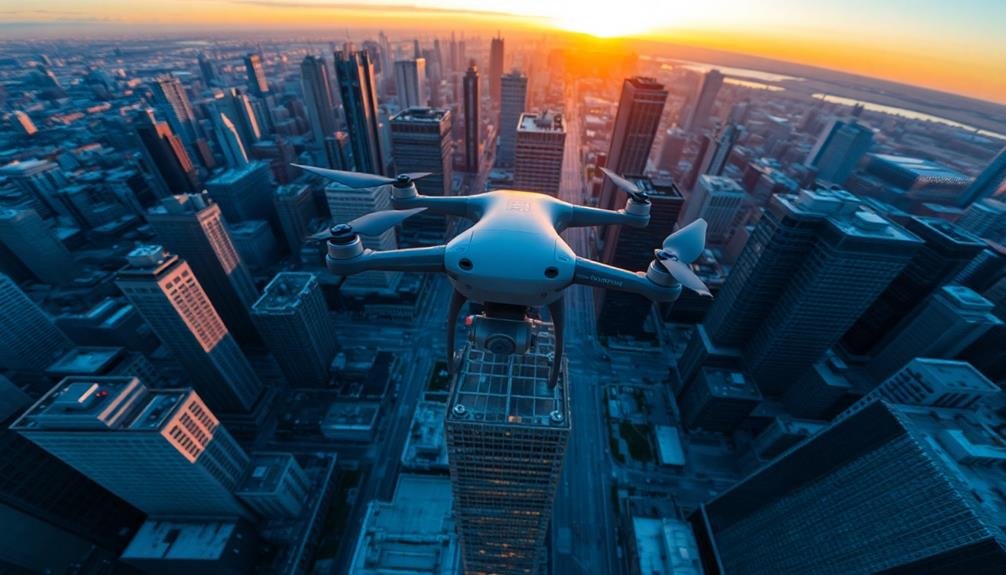
Positioning Your Drone Effectively
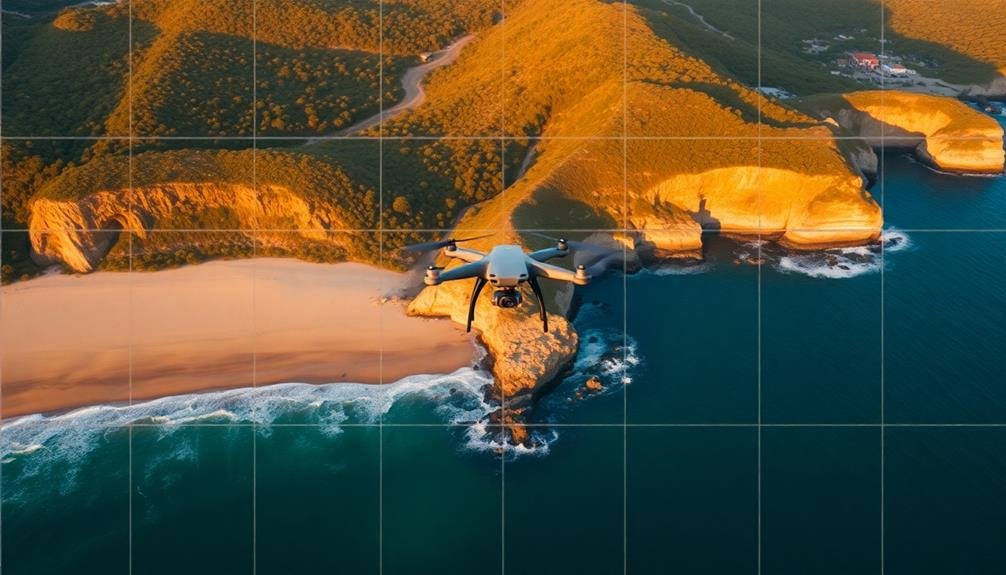
While the rule of thirds guides your composition, effectively positioning your drone is key to capturing stunning aerial shots. Consider your subject's location and the story you want to tell. For landscapes, higher altitudes offer broader perspectives, while lower flights capture intimate details.
Adjust your drone's position based on lighting conditions. Flying with the sun behind you illuminates your subject, while shooting into the sun creates dramatic silhouettes. Experiment with different angles—top-down views, side approaches, or dynamic diagonal compositions—to add variety to your shots.
Here's a quick guide to drone positioning for various subjects:
| Subject | Low Altitude | Medium Altitude | High Altitude |
|---|---|---|---|
| Buildings | Detail shots | Architectural features | Skyline views |
| Nature | Textures, patterns | Terrain contours | Vast landscapes |
| People | Portraits, activities | Group shots | Crowds, events |
| Water | Reflections, waves | Coastlines, rivers | Lakes, oceans |
Remember to maintain safe distances from obstacles and respect local regulations. Practice different positions to develop your eye for composition and create alluring aerial imagery that stands out from the crowd.
Utilizing Gridlines for Composition
Gridlines serve as powerful tools for enhancing your drone photography composition. Most drone camera apps offer a built-in grid overlay feature, typically dividing the frame into nine equal sections. By aligning key elements of your shot with these gridlines, you'll create more balanced and visually appealing images.
When composing your shot, use the gridlines to:
- Place your main subject at intersection points
- Align horizon lines with horizontal gridlines
- Position vertical elements along vertical gridlines
- Create symmetry by centering subjects between lines
Don't be afraid to experiment with off-center compositions. The rule of thirds suggests placing points of interest along gridlines or at their intersections, rather than dead center. This often creates more dynamic and engaging images.
However, remember that rules are meant to be broken. Sometimes, a perfectly centered subject can be equally impactful.
As you gain experience, you'll develop an intuitive sense of composition. The gridlines will become less of a strict guide and more of a subtle reference.
You'll find yourself naturally framing shots with balance and visual interest, even without visible gridlines. Practice regularly, and soon you'll master the art of drone composition.
Balancing Elements in Your Frame
When composing your drone shots, you'll need to contemplate how to balance elements within your frame.
Start by thinking about the relationship between foreground and background elements, and how they interact to create depth. You can experiment with both symmetrical and asymmetrical compositions, while also paying attention to the visual weight of different objects in your image to achieve a harmonious overall balance.
Foreground and Background Balance
Mastering foreground and background balance is essential for creating engaging drone compositions. When you're capturing aerial shots, you'll need to contemplate how the elements in your frame interact with each other. A well-balanced image draws the viewer's eye through the scene, creating depth and interest.
To achieve a harmonious balance between foreground and background, focus on these key aspects:
- Use leading lines to guide the viewer's gaze
- Incorporate contrasting elements for visual interest
- Play with scale to create a sense of depth
- Utilize natural frames to highlight your subject
Start by identifying a strong foreground element that can anchor your composition. This could be a striking landmark, a unique pattern, or an interesting texture.
Then, reflect on how the background complements or contrasts with this element. You'll want to ascertain that neither the foreground nor the background overpowers the other.
Experiment with different altitudes and angles to find the perfect balance. Sometimes, a slight adjustment in your drone's position can dramatically improve the composition.
Don't be afraid to try unconventional perspectives – they can often lead to the most engaging shots.
Symmetry vs. Asymmetry
As you consider the balance between foreground and background, you'll also need to decide between symmetry and asymmetry in your drone compositions. Symmetry can create a sense of order and harmony, often resulting in visually pleasing images. It's particularly effective when capturing reflections in water, architectural structures, or landscapes with naturally occurring patterns.
To achieve symmetry, position your drone so that the subject is centered in the frame, with equal elements on both sides. This technique works well for showcasing the grandeur of a location or emphasizing the perfection of a pattern.
On the other hand, asymmetry can add dynamism and visual interest to your shots. It often feels more natural and can guide the viewer's eye through the composition. To create asymmetrical balance, place your main subject off-center and use other elements in the frame to counterbalance it.
Experiment with both approaches to see which best suits your subject and intended mood. Remember that symmetry doesn't always mean perfect mirror images, and asymmetry doesn't imply chaos. The key is to find a balance that enhances your composition and effectively communicates your vision.
Visual Weight Distribution
Visual weight distribution plays an essential role in creating compelling drone compositions. When you're framing your shot, consider how different elements in the scene balance each other out. Larger objects, brighter colors, and areas of high contrast naturally draw the viewer's eye and carry more visual weight. To create a harmonious image, distribute these heavier elements across your frame strategically.
Think about your composition as a seesaw. If you place a visually heavy object on one side, balance it with another element on the opposite side. This doesn't mean your image needs to be perfectly symmetrical; rather, aim for a pleasing equilibrium that guides the viewer's gaze through the frame.
Here are some tips to help you master visual weight distribution:
- Use leading lines to connect different areas of your composition
- Incorporate negative space to give visually heavy elements room to breathe
- Experiment with diagonal compositions to create dynamic tension
- Balance color intensity across your frame to avoid overwhelming one area
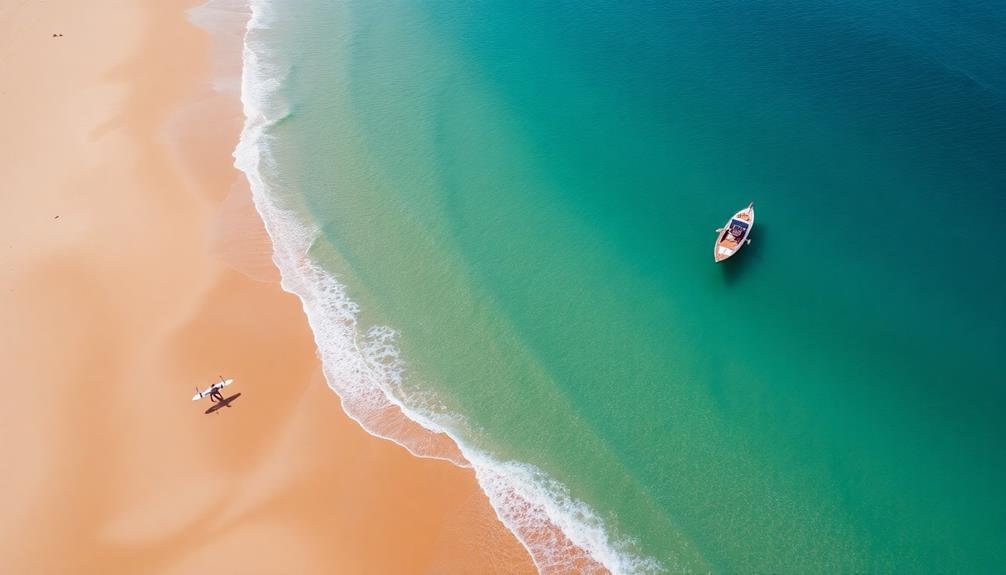
Creating Depth With Foreground Elements
One of the most effective ways to add depth to your drone shots is by incorporating foreground elements. These objects in the front of your frame create a sense of scale and dimension, guiding the viewer's eye through the image. When composing your shot, look for interesting features like trees, rocks, or structures that can serve as foreground elements.
Position your drone to capture these elements in the bottom third of your frame, allowing them to lead into the main subject. This technique creates a visual pathway, drawing the viewer's attention from the foreground to the background. It's crucial to maintain a balance between the foreground and the main subject, ensuring neither overpowers the other.
Experiment with different angles and heights to find the most compelling composition. You can fly your drone lower to emphasize foreground elements or higher to capture a broader perspective.
Use the rule of thirds grid on your drone's camera display to help position these elements effectively. By mastering this technique, you'll create more engaging and dynamic drone shots that truly showcase the depth and scale of your subjects.
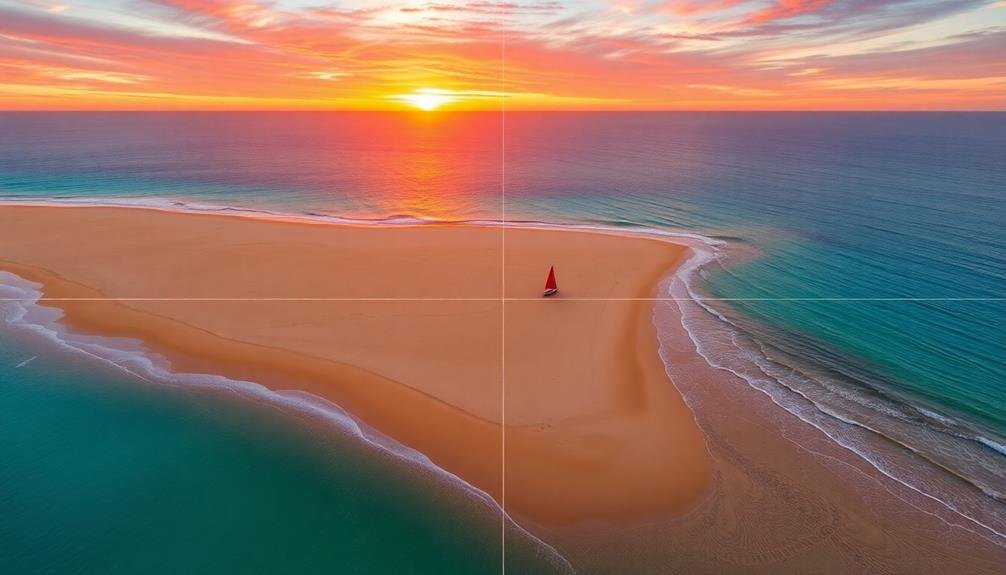
Capturing Dynamic Aerial Landscapes

When capturing dynamic aerial landscapes with your drone, you'll want to utilize natural lines to frame your shots effectively.
Look for contrasting elements within the scene to create visual interest and draw the viewer's eye.
Incorporate leading paths, such as roads, rivers, or coastlines, to guide the viewer through your composition and add a sense of movement to your aerial photographs.
Frame With Natural Lines
Natural lines in landscapes serve as powerful compositional tools for drone photographers. When framing your shots, look for roads, rivers, shorelines, or mountain ridges that create visual paths through your image. These lines can guide the viewer's eye and add depth to your aerial compositions.
To effectively use natural lines in your drone photography:
- Align your drone parallel to the line for a strong, symmetrical composition.
- Position the line diagonally across the frame for a more dynamic feel.
- Use converging lines to create a sense of perspective and distance.
- Incorporate curved lines to add a softer, more organic element to your shot.
Experiment with different altitudes and angles to find the most compelling arrangement of these natural elements. You'll often discover that slight adjustments in your drone's position can dramatically alter the impact of the lines in your frame.
Don't forget to take into account the direction of light when working with natural lines. Side-lighting can enhance the visibility of these features, casting shadows that further define the landscape's contours.
Highlight Contrasting Elements
Contrast is a powerful tool in aerial photography that can transform ordinary landscapes into enchanting compositions. When you're flying your drone, look for opportunities to highlight contrasting elements within your frame. Seek out differences in color, texture, shape, or size to create visually striking images.
You'll often find natural contrasts in landscapes, such as the meeting point of land and water, or where dense forests give way to open fields. Urban environments offer their own contrasts, with modern architecture juxtaposed against historical buildings or green spaces.
Pay attention to light and shadow, as they can create dramatic contrasts, especially during golden hour or when clouds cast interesting patterns on the ground. Experiment with your drone's altitude to emphasize these differences. Flying higher might reveal stark contrasts in land use patterns, while lower altitudes can highlight textural differences.
Don't forget about seasonal changes. Capturing the same location during different times of the year can yield stunning contrasts, like lush green summers versus snow-covered winters.
Incorporate Leading Paths
Leading paths are powerful compositional elements that guide the viewer's eye through your aerial photographs. When incorporating these paths in your drone shots, look for natural or man-made lines that draw attention to your main subject or lead to a point of interest. Rivers, roads, fences, and even shadows can serve as effective leading lines in aerial photography.
To make the most of leading paths in your compositions:
- Use diagonal lines for a dynamic feel
- Experiment with curved paths for a more organic look
- Incorporate S-curves to add depth and interest
- Try converging lines to create a sense of perspective
When framing your shot, position the leading path to start from one of the lower corners of your image. This technique will naturally draw the viewer's gaze into the scene.
You can also use leading paths to connect different elements within your composition, creating a visual narrative that tells a story.
Don't forget to take into account the direction of light when capturing leading paths. Side-lighting can enhance textures and create shadows that form additional leading lines, adding depth and dimension to your aerial photographs.
Breaking the Rules Creatively
Once you've mastered the basics of drone photography composition, it's time to break the rules creatively. While the rule of thirds and other guidelines provide a solid foundation, experimenting with unconventional approaches can lead to unique and striking images.
Try placing your subject dead center for a bold, symmetrical look, or position it at the edge of the frame for a sense of tension. Play with extreme angles by flying your drone unusually low or high, capturing perspectives that challenge viewers' expectations.
Don't shy away from negative space; sometimes, a minimalist composition can be more impactful than a busy one. Experiment with deliberate imbalance in your shots, creating visual interest through asymmetry.
Break the horizon line rule by tilting your drone or capturing diagonal landscapes. Use leading lines that lead to unexpected places or create patterns that don't follow traditional compositional grids.
Embrace imperfections like lens flares or motion blur for artistic effect. Remember, rules exist to be broken, and some of the most memorable drone photos come from pushing boundaries.
Frequently Asked Questions
How Does Weather Affect Drone Photography Composition?
Weather greatly impacts your drone photography composition. You'll need to adjust for lighting changes, consider cloud formations as elements, and be aware of wind affecting your shots. Dramatic skies can add mood and depth to your images.
What Are the Best Drone Settings for Capturing Rule of Thirds Shots?
To capture rule of thirds shots with your drone, you'll want to enable the grid overlay on your screen. Set your camera to manual mode, use a balanced aperture, and adjust shutter speed for the lighting conditions.
Can the Rule of Thirds Be Applied to Drone Video Footage?
Yes, you can apply the rule of thirds to drone video footage. It'll enhance your composition and create more dynamic shots. Use grid overlay features on your drone's camera or visualize imaginary lines dividing the frame into thirds while filming.
How Do Different Drone Altitudes Impact Composition Techniques?
You'll find that different altitudes dramatically affect your composition. At lower heights, you're capturing intimate details. As you ascend, you'll reveal broader landscapes. Experiment with various elevations to discover unique perspectives and framing opportunities.
Are There Specific Drone Models Better Suited for Rule of Thirds Photography?
You'll find that most modern drones are well-suited for rule of thirds photography. They've got grid overlays and intelligent flight modes. Focus on your skills rather than specific models; it's your eye that'll make the difference.
In Summary
You've now got the tools to elevate your drone photography. Remember, the rule of thirds is just the beginning. As you practice, you'll develop an eye for balanced compositions and dynamic landscapes. Don't be afraid to experiment and break the rules when it feels right. With these tips in your arsenal, you're ready to capture stunning aerial shots that'll make your viewers say "wow." So get out there and start creating!
As educators and advocates for responsible drone use, we’re committed to sharing our knowledge and expertise with aspiring aerial photographers.


Leave a Reply