To enhance depth in sky-high photography, you'll want to master seven key techniques. Use foreground framing to create context, and employ leading lines to guide the viewer's eye. Capture natural patterns and textures for added dimension, and leverage contrasting colors to create visual depth. Play with shadows and light interplay to add drama, and include recognizable objects for scale. Finally, utilize atmospheric haze to convey distance. By combining these methods, you'll transform flat aerial shots into stunning, multi-layered compositions. Each technique offers unique opportunities to elevate your sky-high photography to new heights.
Key Takeaways
- Utilize foreground elements to frame subjects and create depth, applying the rule of thirds for balanced composition.
- Incorporate leading lines like roads or rivers to guide the viewer's eye and establish vanishing points.
- Capture atmospheric effects, including cloud formations and haze, to add dimension and layering to sky-high images.
- Leverage contrasting colors, especially warm foregrounds against cool backgrounds, to enhance visual depth.
- Include recognizable objects or landmarks to provide scale and context, emphasizing the grandeur of aerial scenes.
Foreground Framing for Aerial Perspective
When capturing sky-high photographs, foreground framing can transform an ordinary aerial shot into an enthralling masterpiece. By strategically incorporating elements in the foreground, you'll add depth, context, and visual interest to your aerial images.
Look for natural or man-made structures that can frame your subject. Wings of an aircraft, edges of a hot air balloon basket, or even your own extended arm can serve as compelling framing devices. These elements not only provide a sense of scale but also create a visual anchor for the viewer's eye.
Consider the rule of thirds when positioning your foreground elements. Place them along the grid lines or at intersecting points to achieve a balanced composition. Experiment with different angles and perspectives to find the most engaging arrangement.
Pay attention to lighting conditions. The interplay of light and shadow on foreground elements can add drama and dimension to your sky-high shots. Use the golden hour or dramatic cloud formations to your advantage, enhancing the overall mood of your image.
Don't forget to adjust your camera settings to guarantee both foreground and background are in focus. A smaller aperture (higher f-number) will increase your depth of field, keeping more of the scene sharp.
Leading Lines in Landscape Shots

The power of leading lines in sky-high landscape photography can't be overstated. From your elevated vantage point, you'll have a unique opportunity to capture natural and man-made lines that guide the viewer's eye through your composition.
Look for roads, rivers, shorelines, or even rows of crops that create strong directional elements in your frame. When you're composing your shot, position these leading lines to draw attention to your main subject or to create a sense of depth and perspective.
You can use converging lines to create a vanishing point, which adds drama and dimension to your image. Don't forget to experiment with diagonal lines, as they can add dynamism and energy to your composition.
In urban environments, you'll find plenty of architectural elements that create powerful leading lines. Skyscrapers, bridges, and highways can all serve as compelling visual guides.
Remember to adjust your altitude and angle to maximize the impact of these lines. By carefully aligning your camera with these directional elements, you'll create images that aren't only visually striking but also tell a story about the landscape below.
Utilize Natural Patterns and Textures

When capturing sky-high images, you'll find nature's artwork in the form of cloud formations and layers.
You can enhance your shots by focusing on atmospheric haze effects, which add depth and mystery to your compositions.
Don't forget to incorporate distinctive landscape features below, as they provide context and contrast to the expansive sky above.
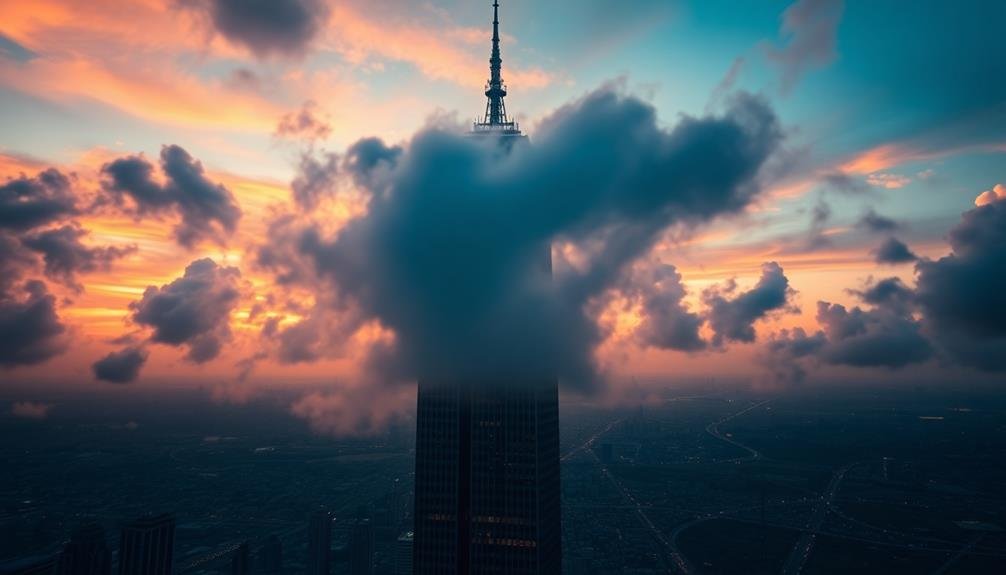
Cloud Formations and Layers
Nature's canvas unfolds in the sky, offering photographers a wealth of artistic possibilities through cloud formations and layers. To capture these ethereal elements, you'll need to master the art of composition and timing. Look for interesting cloud shapes that complement your subject or create a focal point. Cumulus clouds, with their fluffy, cotton-like appearance, can add depth and texture to your images.
Alternatively, stratus clouds create a smooth, layered effect that can add a sense of mystery or tranquility. Pay attention to the interplay between different cloud types and altitudes. Combine low-lying fog or mist with higher cloud formations to create a sense of depth and dimension.
Use the golden hour or blue hour to enhance the colors and contrast in your cloud photographs. Don't be afraid to experiment with long exposures to capture the movement of clouds, creating dreamy, streaked effects. When shooting, consider using a polarizing filter to enhance the contrast between the sky and clouds.
Remember to adjust your camera settings to prevent overexposure of bright clouds while maintaining detail in darker areas. With practice, you'll learn to harness the ever-changing sky as a dynamic element in your compositions.
Atmospheric Haze Effects
Atmospheric haze can transform your sky-high photographs, adding depth and mystery to your compositions. To capture this effect, shoot during the golden hours when sunlight travels through more atmosphere, creating a soft, diffused glow.
Use a polarizing filter to enhance or reduce haze, depending on your desired outcome. For a dreamlike quality, slightly overexpose your images to emphasize the hazy effect.
When photographing through haze, focus on layering elements in your frame. Distant objects will appear less distinct, creating a natural sense of depth. Experiment with silhouettes by placing subjects against the hazy backdrop, emphasizing their shapes and forms.
Pay attention to color shifts caused by atmospheric particles; haze often adds a blue tint to distant objects.
For aerial photography, haze can be particularly challenging. Increase contrast and adjust white balance in post-processing to cut through the haze and reveal hidden details.
Consider using a UV filter to reduce haze's impact on your lens. Remember, atmospheric haze isn't always a hindrance; it can add mood and atmosphere to your sky-high shots when used creatively.
Landscape Features Below
Aerial photography offers a unique perspective on landscape features, revealing patterns and textures often invisible from the ground. In order to capture these elements effectively, you'll need to train your eye to spot interesting formations and use them to create compelling compositions.
Look for natural patterns in rivers, forests, and fields. Meandering waterways create sinuous lines that can lead the viewer's eye through the frame. Agricultural landscapes often display geometric shapes and repeating patterns that make for visually striking images.
Pay attention to the interplay of light and shadow across varied terrain, as this can emphasize texture and depth.
Urban areas present their own set of patterns, with gridded streets, clusters of buildings, and infrastructure networks. These man-made elements can contrast beautifully with surrounding natural features.
Don't forget to take into account seasonal changes; autumn foliage, winter snow, and spring blooms can dramatically alter the landscape's appearance.
When composing your shot, use these landscape features to create a sense of scale and perspective. Include recognizable elements to give viewers a point of reference, helping them understand the vastness of the scene you're capturing from above.
Contrasting Colors for Visual Depth

To create visual depth in your sky-high photography, focus on contrasting colors.
You'll find that complementary color pairings, such as blue skies against orange landscapes, can dramatically enhance your images.
For added dimension, try capturing warm-toned foregrounds against cool-colored backgrounds, which will draw the viewer's eye through the frame.
Complementary Color Pairings
Leveraging complementary color pairings can dramatically enhance the visual depth and impact of your sky-high photographs. These pairings, which sit opposite each other on the color wheel, create a striking contrast that draws the viewer's eye and adds dimension to your images.
To utilize this technique, look for naturally occurring complementary colors in your aerial scenes. Blue skies paired with orange sunsets or landscapes create a classic, vibrant combination.
Green forests or fields contrasted against red-hued structures or terrain can produce a fascinating effect. Purple twilight skies juxtaposed with yellow city lights offer a mesmerizing urban perspective.
When composing your shot, position these complementary elements strategically within the frame. Place them in opposing thirds or use one color as a dominant background with the other as a striking focal point.
You can also enhance these pairings in post-processing by slightly boosting the saturation of complementary colors.
Warm Foreground, Cool Background
While complementary colors create striking contrasts, another powerful technique for adding depth to your sky-high shots is the warm foreground, cool background approach. This method leverages the natural tendencies of warm colors to appear closer and cool colors to recede, creating a sense of dimension in your photographs.
To implement this technique, focus on capturing warm-toned elements in the foreground of your image. Look for golden fields, reddish rock formations, or sun-drenched buildings. These warm hues will draw the viewer's eye and establish a strong focal point.
For the background, emphasize cooler tones like blue skies, distant mountains, or misty horizons.
You'll need to be mindful of your timing and positioning to maximize this effect. Early morning or late afternoon light works best, as it naturally bathes foreground elements in warm hues.
Use a polarizing filter to enhance the blue sky and increase the cool-warm contrast. Experiment with different focal lengths to adjust the balance between foreground and background elements.
Shadows and Light Interplay
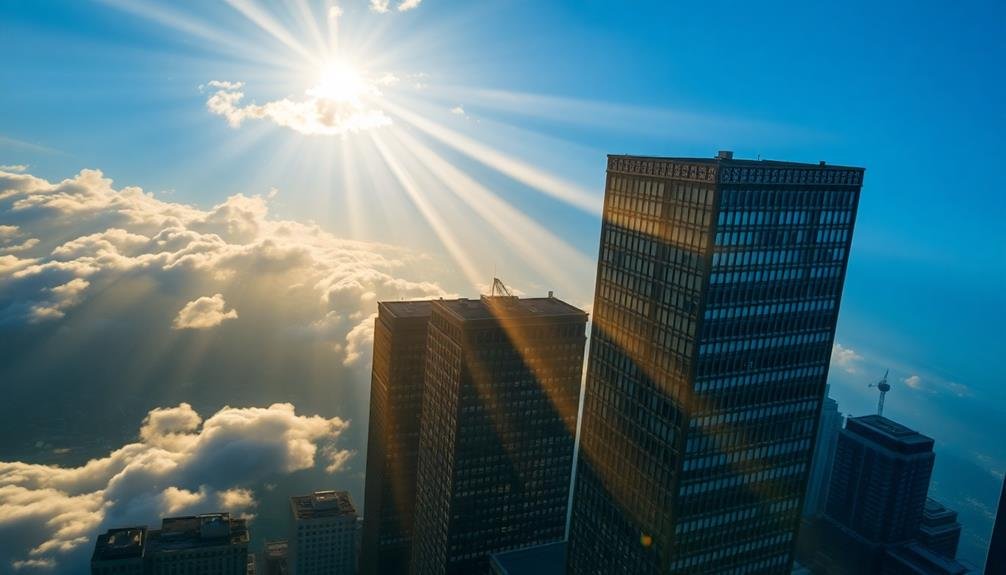
Mastery of shadows and light is essential for enchanting sky-high photography. When capturing aerial images, you'll encounter dynamic lighting conditions that can dramatically enhance your compositions. To make the most of this interplay, pay close attention to the direction and quality of light.
During golden hour, long shadows cast by buildings or natural features can create striking patterns on the ground. Use these to lead the viewer's eye through the image or to frame your subject.
In harsh midday light, look for high-contrast scenes where shadows define shapes and textures. Don't shy away from backlighting. It can create an ethereal glow around objects, adding depth and dimension to your shots.
When shooting into the sun, use spot metering to prevent overexposure and capture stunning silhouettes. Experiment with side-lighting to accentuate textures and bring out the three-dimensionality of landscapes.
This technique works particularly well with rugged terrains or cityscapes.
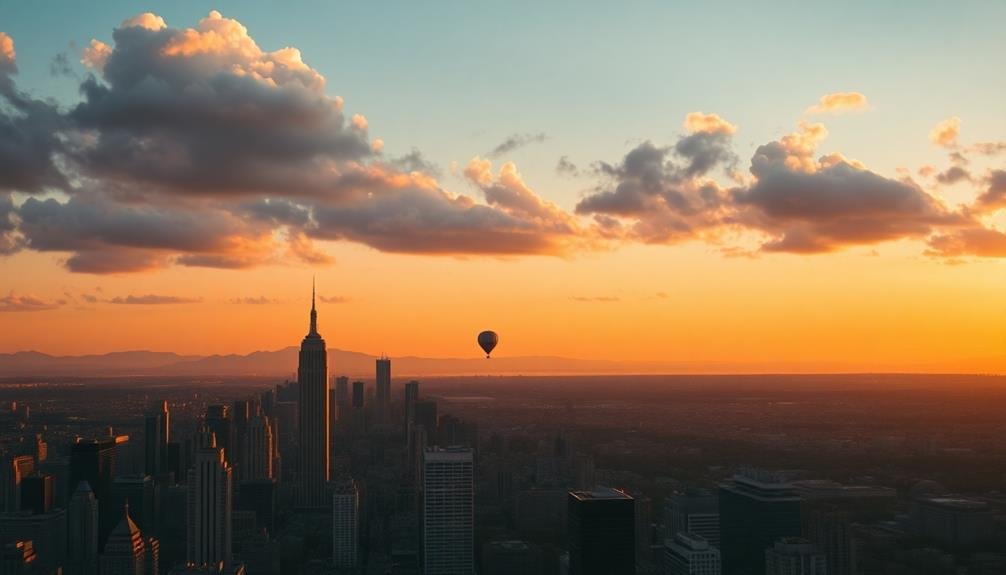
Scale With Recognizable Objects

To convey the grandeur of aerial landscapes, incorporating recognizable objects into your compositions is key. These familiar elements provide viewers with a sense of scale, helping them grasp the true magnitude of the scene. Look for roads, vehicles, buildings, or even people to include in your shots. They'll serve as visual anchors, allowing observers to relate the unfamiliar aerial perspective to their everyday experiences.
When capturing cityscapes from above, focus on iconic landmarks or well-known structures. These instantly recognizable features won't only provide scale but also help viewers orient themselves within the image.
In natural settings, seek out lone trees, rock formations, or animals to achieve the same effect. You'll find that even small objects can dramatically enhance the perceived size of vast landscapes.
Consider using a telephoto lens to compress the scene, bringing distant recognizable objects closer to the foreground elements. This technique can create striking juxtapositions and emphasize the scale contrast.
Remember to adjust your composition to maintain a balance between the familiar objects and the broader landscape, ensuring neither element overpowers the other. By mastering this technique, you'll create more impactful and relatable aerial photographs.
Atmospheric Haze for Distance Perception
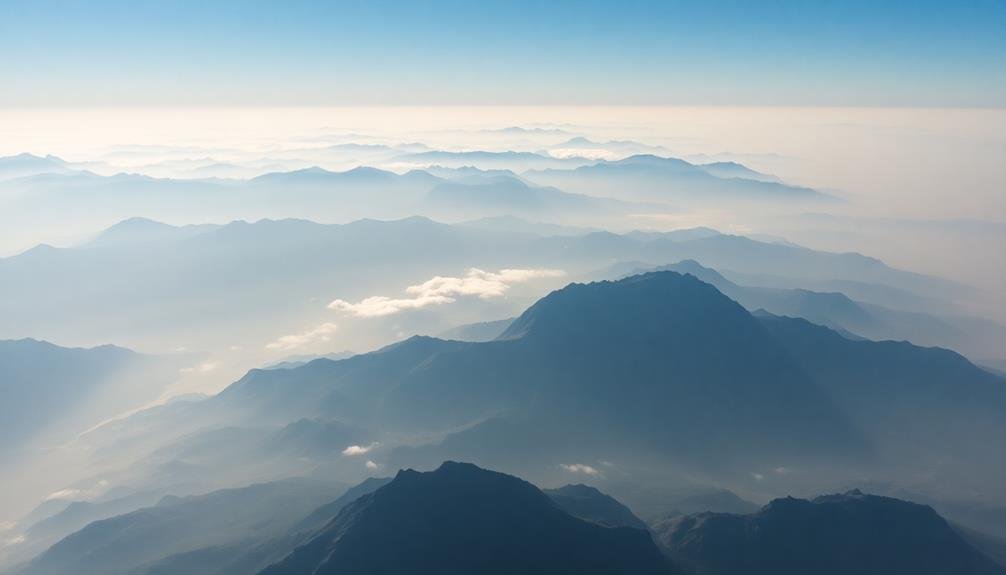
Have you ever noticed how distant mountains appear blue and hazy? This atmospheric effect, known as aerial perspective, can be a powerful tool in your sky-high photography arsenal.
When capturing images from elevated positions, you can use this natural phenomenon to convey depth and distance in your shots.
To effectively utilize atmospheric haze in your photography:
- Shoot during golden hour or blue hour for enhanced haze
- Position your camera to capture layers of landscape
- Use a polarizing filter to control haze intensity
- Experiment with different focal lengths to emphasize the effect
- Post-process to fine-tune the hazy appearance
Frequently Asked Questions
What Camera Settings Are Best for Capturing Depth in Aerial Photography?
For aerial depth, you'll want to use a wide aperture (f/8-f/11) for sharpness, a fast shutter speed to avoid blur, and a low ISO for clarity. Don't forget to focus on the foreground to enhance perspective.
How Can Drones Be Used Effectively for Sky-High Photography Techniques?
You'll find drones invaluable for sky-high photography. Use them to capture unique angles, explore inaccessible areas, and create stunning aerial perspectives. Experiment with different altitudes, camera movements, and composition techniques to enhance your shots' visual impact.
Are There Specific Weather Conditions That Enhance Depth in Aerial Shots?
You'll find that clear, sunny days with some scattered clouds can enhance depth in aerial shots. They'll create natural shadows and layers. Alternatively, early morning or late afternoon light can add dimension through long shadows and warm hues.
What Post-Processing Techniques Can Improve Depth Perception in Sky-High Images?
You can enhance depth in sky-high images by adjusting contrast, emphasizing foreground elements, using selective sharpening, and applying gradients. Don't forget to experiment with color grading and subtle vignettes to draw the viewer's eye inward.
How Do Different Altitudes Affect the Application of Depth Techniques?
As you ascend, you'll need to adjust your depth techniques. Lower altitudes require more foreground elements, while higher altitudes benefit from layering clouds and atmospheric haze. You'll also need to tweak contrast and color grading accordingly.
In Summary
You've now got a powerful toolkit for creating depth in your sky-high photography. Don't be afraid to experiment with these techniques, combining them for even greater impact. Remember, it's all about guiding the viewer's eye and creating a sense of scale and distance. With practice, you'll master these methods, elevating your aerial shots from flat to fantastically three-dimensional. So grab your camera, take to the skies, and start capturing breathtaking images with incredible depth.
As educators and advocates for responsible drone use, we’re committed to sharing our knowledge and expertise with aspiring aerial photographers.


Leave a Reply