Capture stunning ground views with these low-height camera tricks. Skim the surface by positioning your camera inches from the ground, angled upward. Use leading lines from below to enhance paths and sidewalks. Emphasize textures at ground level, especially with side lighting. Explore reflections in shallow waters for unique perspectives. Play with shadows on flat terrain during golden hour. Frame shots with low-lying objects like flowers or rocks. Amplify foreground interest to create depth. Experiment with perspective distortion for dramatic effects. Try low-angle reveal techniques for suspense. Combine these methods to transform ordinary scenes into enthralling compositions. Dive deeper to reveal even more ground-level photography secrets.
Key Takeaways
- Position the camera inches from the ground, angled slightly upward to capture unique textures and perspectives.
- Use wide-angle lenses to exaggerate size differences and create dramatic scale effects in compositions.
- Incorporate foreground elements like flowers or rocks to frame subjects and add depth to low-angle shots.
- Experiment with reflections in shallow water and use a polarizing filter to control glare and enhance colors.
- Utilize shadows and contrasts during golden hour to create striking visual effects in low-height photography.
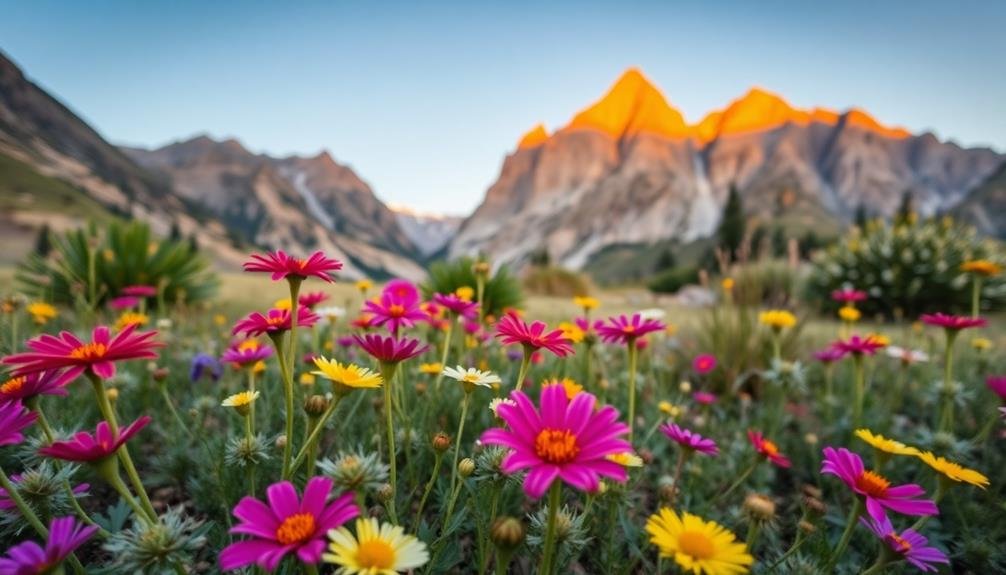
Skimming the Surface
Often, the most enchanting low-angle shots come from positioning your camera just above the ground. This technique, known as "skimming the surface," creates a unique perspective that draws viewers into the scene.
In order to achieve this effect, place your camera mere inches from the ground, angling it slightly upward. You'll capture textures, patterns, and details often overlooked from a standard height.
When skimming the surface, use a wide-angle lens to maximize the foreground's impact. This will emphasize nearby objects while still including distant elements. Experiment with different surfaces: grass, sand, water, or pavement can all yield stunning results.
For added drama, try incorporating leading lines that guide the eye through the frame.
Don't forget to evaluate your subject's placement. Position people or objects slightly higher in the frame to create a sense of scale and importance. You can also use this technique to make small subjects appear larger than life.
Remember to adjust your camera settings for the low light near the ground. Increase your ISO or use a wider aperture to maintain a fast shutter speed, especially when shooting handheld.
Leading Lines From Below

Leading lines are a powerful tool in low-angle photography, and they're even more impactful when viewed from below. When you position your camera close to the ground, you can create striking compositions by using natural or man-made lines to guide the viewer's eye through the frame.
Look for paths, sidewalks, or rows of objects that stretch out before you. These elements can serve as strong leading lines when captured from a low angle. Position your camera so that these lines begin at the bottom of the frame and extend towards your subject or the horizon. This technique adds depth and draws the viewer into the scene.
Don't limit yourself to straight lines. Curved paths or winding roads can create a sense of movement and intrigue. Experiment with different angles to find the most compelling composition. Try placing your camera off-center to create a more dynamic image.
In urban environments, use architectural features like staircases, railings, or building edges as leading lines. In nature, fallen logs, tree roots, or shorelines can serve the same purpose.
Remember to keep your aperture small for maximum depth of field, ensuring sharpness throughout the image.
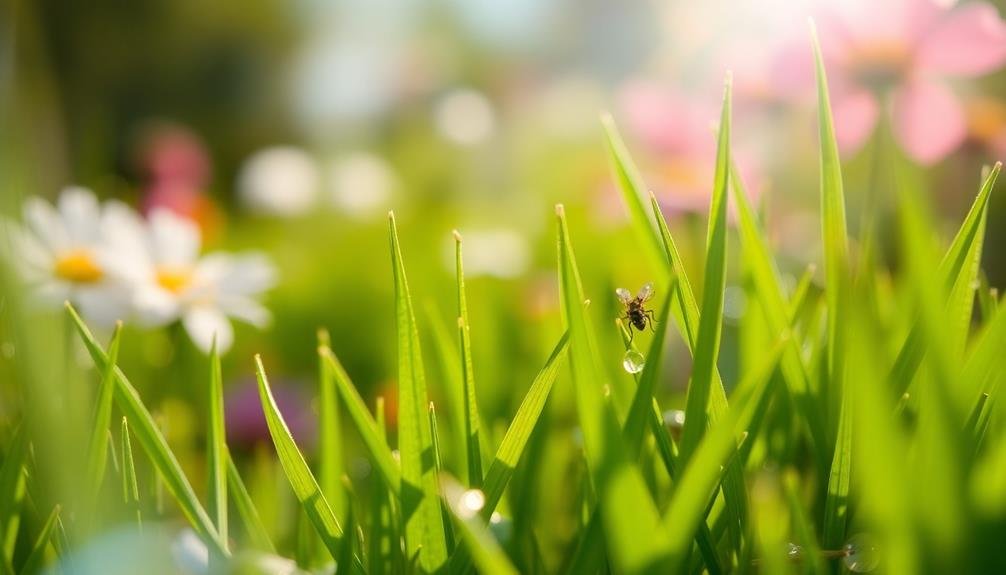
Texture Emphasis at Ground Level
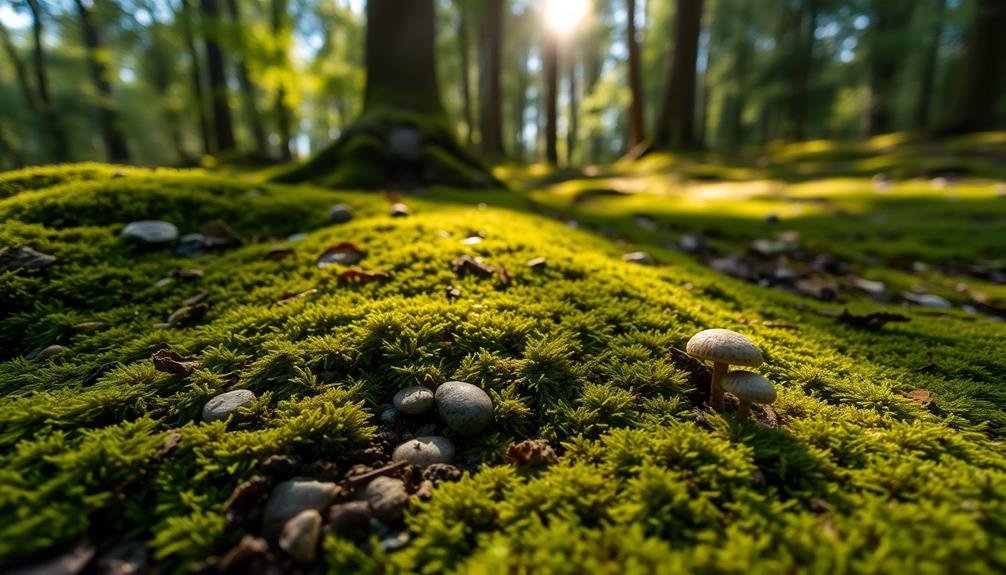
Ground-level photography offers a unique opportunity to highlight textures that often go unnoticed. When you position your camera close to the ground, you'll capture intricate details and patterns in surfaces like grass, sand, or pavement. This perspective can transform ordinary scenes into enthralling images that draw viewers in.
To emphasize texture at ground level, experiment with different angles and lighting conditions. Side lighting can accentuate texture by creating shadows that reveal depth and contours. You'll find that early morning or late afternoon light works best for this technique. Don't be afraid to get dirty; sometimes, the best shots come from lying flat on the ground.
Use a wide aperture to create a shallow depth of field, isolating textural elements against a blurred background. This technique can make even mundane surfaces appear extraordinary. Consider using a macro lens for extreme close-ups of tiny textures like pebbles or leaves.
| Surface | Texture | Emotion |
|---|---|---|
| Sand | Grainy | Serene |
| Grass | Soft | Calm |
| Rock | Rough | Rugged |
| Moss | Velvety | Tranquil |
| Gravel | Jagged | Harsh |
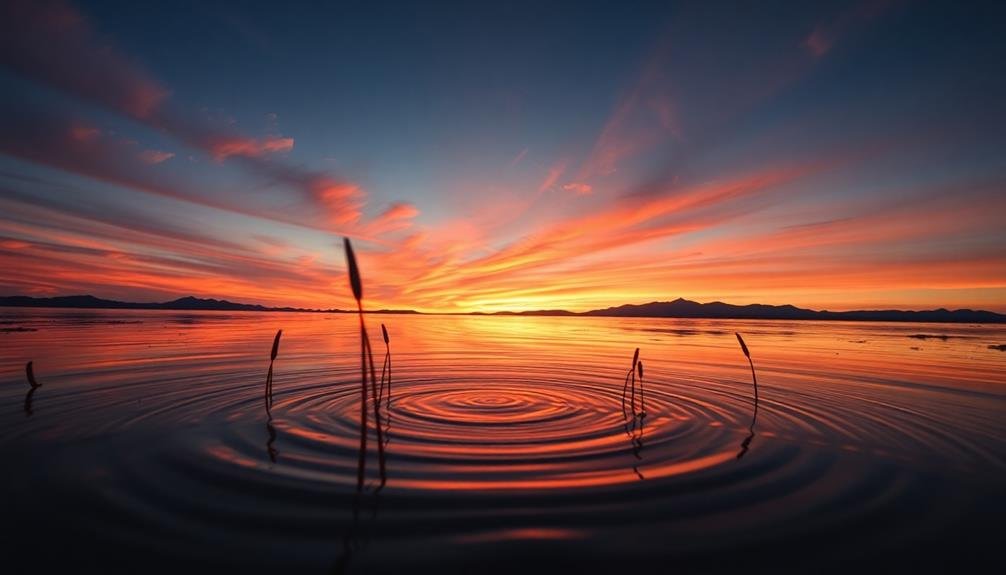
Reflections in Shallow Waters
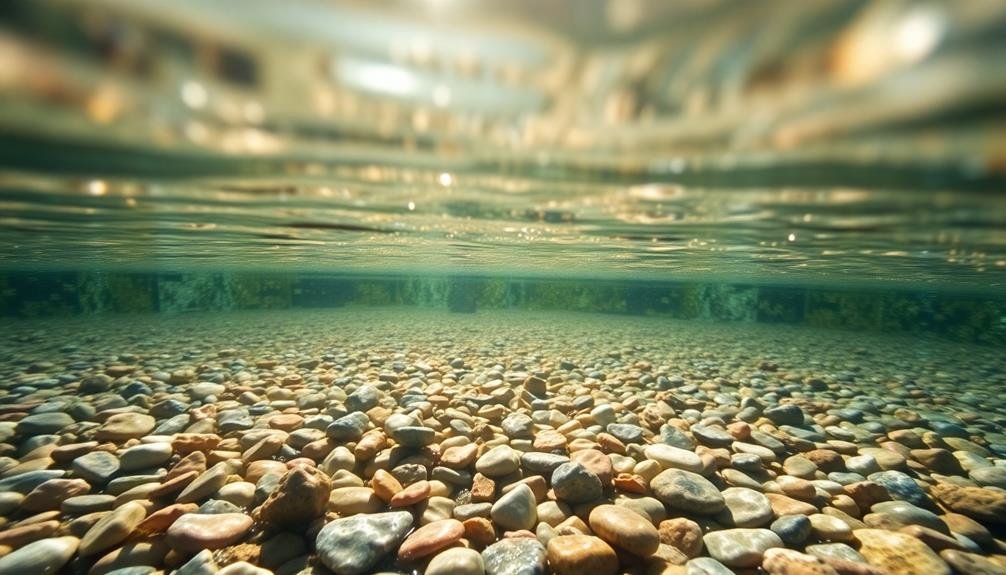
In line with ground-level photography techniques, capturing reflections in shallow waters can yield stunning results. By positioning your camera close to the surface of puddles, ponds, or even wet pavement, you'll create a unique perspective that doubles the visual interest of your subject. This approach works particularly well during golden hour or after rainfall when the light is soft and reflective surfaces are abundant.
To make the most of shallow water reflections:
- Look for still water: Calm surfaces provide the clearest reflections, so seek out sheltered areas or wait for wind to die down.
- Experiment with angles: Try different positions to find the perfect balance between the reflected image and the actual subject.
- Use a polarizing filter: This can help control glare and enhance or reduce reflections as desired.
- Consider symmetry: Align your shot to create a mirror-like effect, or intentionally offset it for a more dynamic composition.
Don't be afraid to get your gear a little wet – just verify it's weather-sealed or protected.
With practice, you'll develop an eye for spotting reflective opportunities and create enchanting low-height images that draw viewers into a magical, mirrored world at ground level.
Shadow Play on Flat Terrain
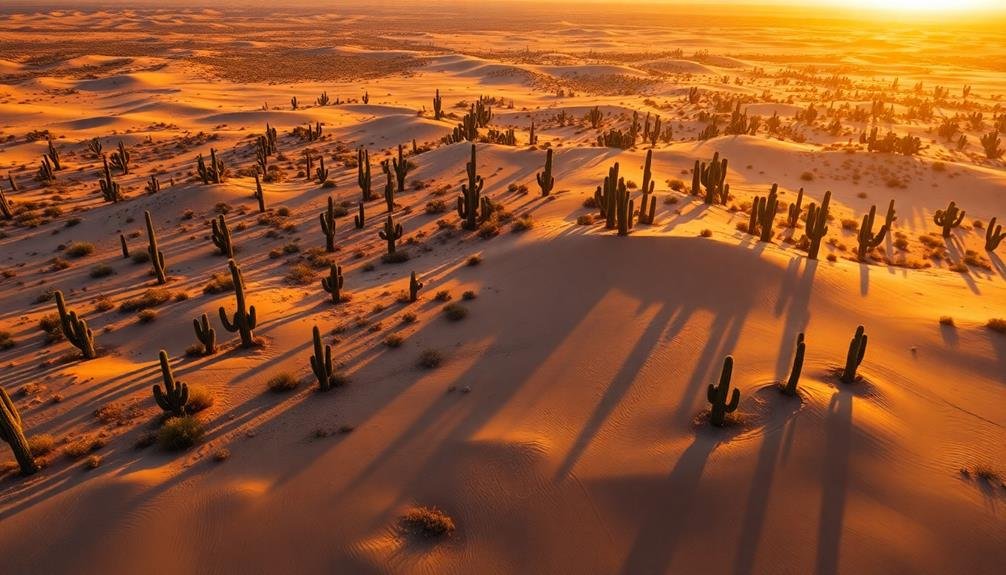
Shadows cast on flat terrain can really bring your low-height photography to life. When you're shooting close to the ground, you'll find that even small objects can create long, dramatic shadows, especially during golden hour. Position your camera to capture these elongated shapes, using them as leading lines to guide the viewer's eye through your composition.
You can experiment with various subjects to create interesting shadow patterns. Trees, fences, and even people can cast enchanting shadows on flat surfaces like beaches, deserts, or parking lots. Try placing your camera just inches from the ground to emphasize the contrast between the shadowed areas and the lit terrain.
Don't forget to play with your camera's settings to enhance the shadow effect. Increase contrast and underexpose slightly to make shadows more pronounced. You can also use a polarizing filter to deepen the sky and create more contrast with the ground.
For added interest, include the shadow-casting object in your frame. This technique creates a visual connection between the subject and its shadow, adding depth to your low-height shots.
Contrast Between Ground and Sky
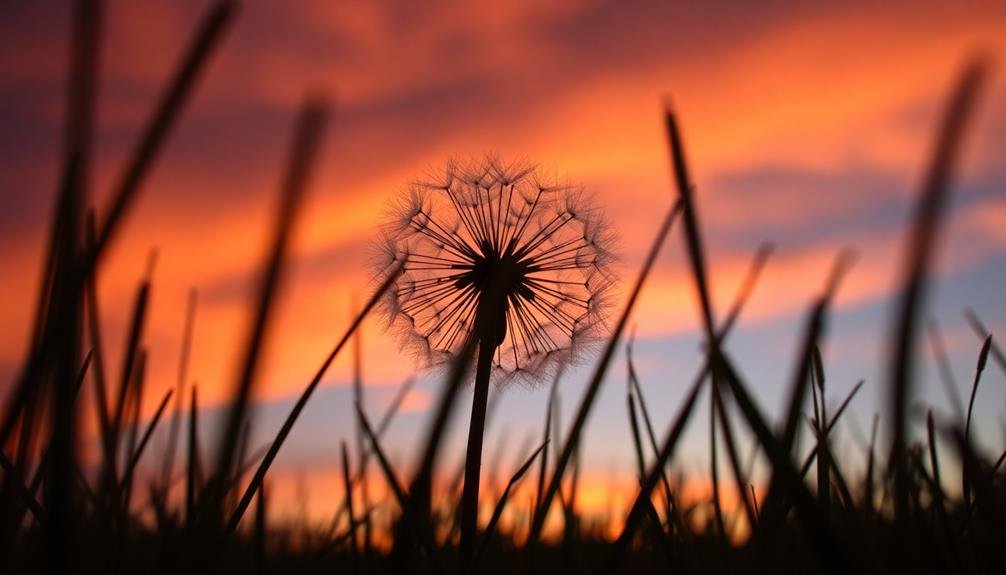
Low-height photography offers a unique opportunity to capture the striking contrast between ground and sky. By positioning your camera close to the ground, you'll create a dramatic juxtaposition between the textures and colors of the earth and the expansive sky above. This technique can transform ordinary scenes into visually compelling compositions.
To maximize the impact of ground-sky contrast, consider these tips:
- Choose the right time of day: Shoot during golden hour or blue hour for rich, warm tones on the ground and vibrant sky colors.
- Use a polarizing filter: This will enhance the sky's blue hues and reduce glare from reflective surfaces.
- Experiment with different angles: Tilt your camera slightly upward to include more sky, or downward for a ground-dominated composition.
- Play with foreground elements: Incorporate interesting textures or objects in the foreground to add depth and scale.
When framing your shot, pay attention to the horizon line. Placing it along the upper or lower third of the frame can create a more dynamic composition.
Don't forget to adjust your exposure settings to balance the bright sky with the darker ground. You may need to use graduated neutral density filters or HDR techniques for challenging lighting conditions.
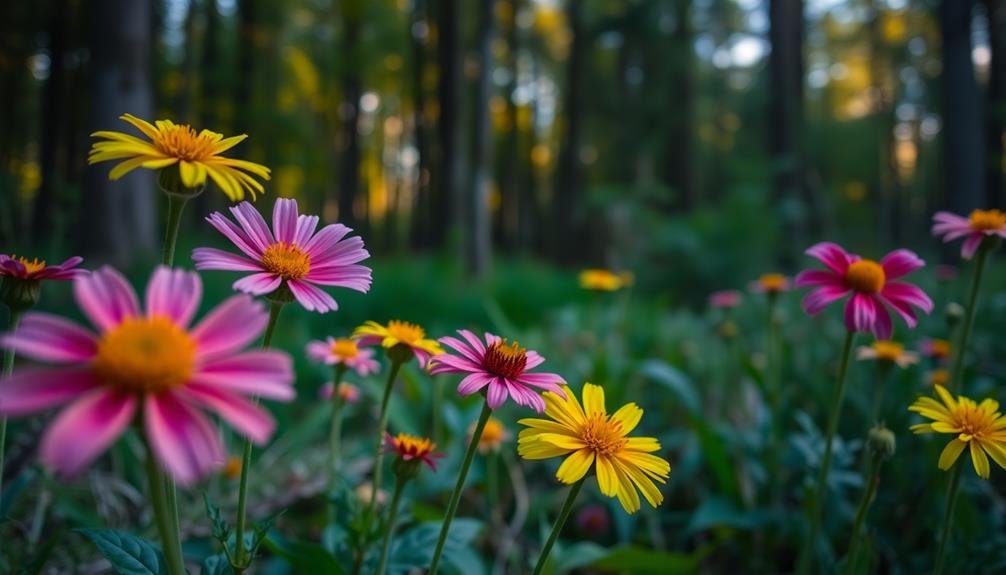
Framing With Low-Lying Objects
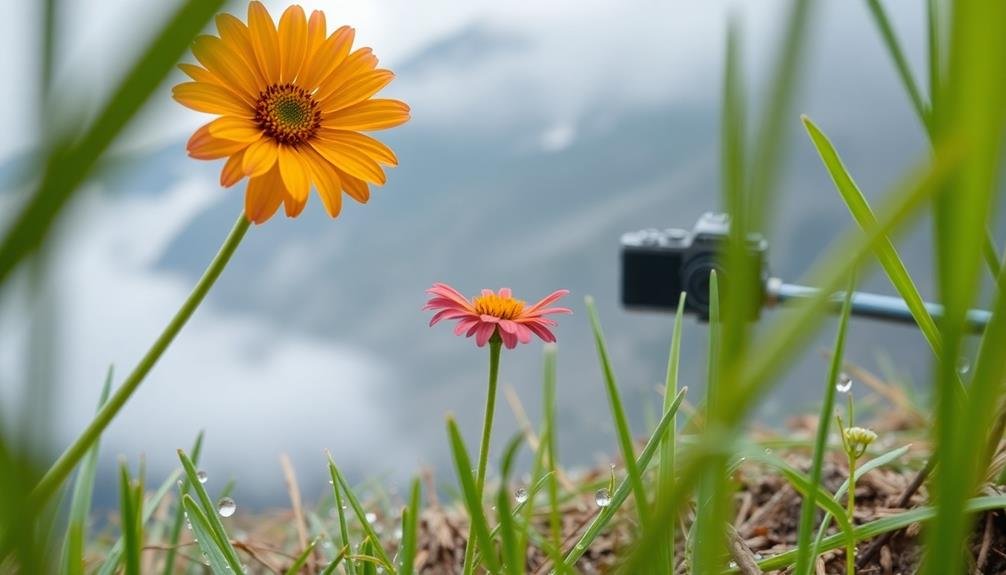
Framing with low-lying objects is another powerful technique in your low-height photography arsenal. By positioning your camera close to the ground, you can use small objects to create compelling frames that add depth and context to your images.
Look for elements like flowers, rocks, or leaves that can serve as natural frames. Position these in the foreground of your shot, allowing them to partially obscure the edges of your frame. This technique draws the viewer's eye to the main subject while adding layers to your composition.
You can also use man-made objects for framing. Try shooting through the spokes of a bicycle wheel or the gaps in a fence. These unconventional frames can add intrigue and lead the viewer's gaze to your intended focal point.
Don't be afraid to get creative with your framing objects. Even small puddles can act as reflective frames, adding a unique perspective to your low-height shots.
Remember to adjust your aperture to control the depth of field, ensuring your framing elements and main subject are both in focus if desired.
Foreground Interest Amplification
When shooting from a low angle, you'll find countless opportunities to amplify foreground interest.
Frame your subject with natural elements like flowers, rocks, or grass to add depth and context to your composition.
Frame With Natural Elements
A powerful technique for enhancing low-height shots involves using natural elements to frame your subject. By strategically positioning your camera near the ground, you can incorporate leaves, grass, flowers, or rocks to create a natural border around your main focus. This framing technique adds depth, context, and visual interest to your images, drawing the viewer's eye to the subject while providing a sense of place and atmosphere.
When framing with natural elements from a low angle, consider these tips:
- Look for symmetry: Position yourself so that natural elements create a balanced frame on both sides of your subject.
- Use contrasting colors: Choose framing elements that complement or contrast with your subject's colors to make it stand out.
- Experiment with depth of field: Adjust your aperture to control how much of the framing elements remain in focus.
- Play with perspective: Move your camera slightly to change how the framing elements interact with your subject.
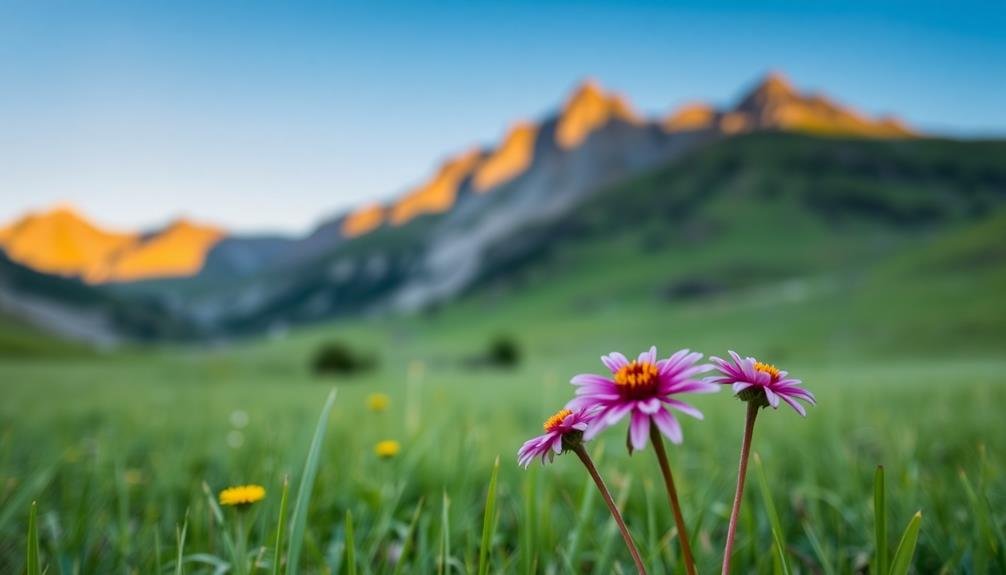
Exaggerate Size Differences
One of photography's most enthralling low-angle techniques is the exaggeration of size differences through foreground interest amplification. By positioning your camera close to the ground and using a wide-angle lens, you can create a dramatic sense of scale between foreground and background elements. This approach makes nearby objects appear larger than life while pushing distant subjects further away.
To master this technique, start by identifying an interesting foreground element – a flower, rock, or small object. Place your camera mere inches from this subject, ensuring it's in sharp focus. Then, compose your shot to include a contrasting background element, such as a mountain, building, or person. The resulting image will showcase a striking juxtaposition of sizes.
Experiment with different focal lengths to fine-tune the effect. Wider lenses (10-24mm range) will exaggerate the size difference more dramatically, while slightly longer focal lengths can create a more subtle effect.
Don't forget to adjust your aperture to maintain focus on both foreground and background elements. A smaller aperture (higher f-number) will increase your depth of field, keeping more of the scene in focus.
Create Leading Lines
Building on the concept of foreground interest amplification, you can take your low-angle shots to the next level by incorporating leading lines. These powerful compositional elements guide the viewer's eye through the image, creating depth and drawing attention to your main subject.
When shooting from a low height, you'll find that even simple ground features can become striking leading lines.
To effectively use leading lines in your low-angle photography:
- Look for natural lines: Seek out patterns in grass, cracks in pavement, or rows of pebbles that can serve as subtle guides.
- Position your camera strategically: Align your lens with the direction of the lines to maximize their impact.
- Experiment with convergence: Try capturing lines that converge towards your subject or a vanishing point for added drama.
- Use wide-angle lenses: These will exaggerate the perspective and make your leading lines more prominent.
Perspective Distortion for Impact
How can you make your low-height shots truly stand out? Embrace perspective distortion to create visually striking images that captivate viewers. By positioning your camera close to the ground and using a wide-angle lens, you'll exaggerate the size and importance of foreground elements while diminishing background objects.
To maximize this effect, get as close as possible to your main subject. You'll notice that objects near the lens appear disproportionately large, while distant elements shrink dramatically. This distortion can add a sense of drama and importance to otherwise ordinary subjects. Try photographing flowers, small animals, or even mundane objects like pebbles or leaves to see how they transform into larger-than-life focal points.
Experiment with different angles and compositions to find the most impactful arrangement. Tilting your camera slightly upward can create a towering effect, making small objects appear to loom over the viewer. Conversely, angling downward can emphasize textures and patterns on the ground.
Don't be afraid to push the distortion to its limits – sometimes, the most memorable images come from extreme perspectives that challenge our usual perceptions.
Low Angle Reveal Techniques
You can create dramatic reveals using low-angle techniques that gradually disclose your subject.
Start with a slow pan across the ground, then tilt upwards to expose more of the scene.
As you raise the camera height incrementally, you'll build anticipation and intrigue for your audience.
Slow Pan and Tilt
Mastering the slow pan and tilt technique can dramatically enhance your low-angle shots, creating enchanting reveals that draw viewers into the scene. By carefully controlling the camera's movement, you'll guide your audience's attention and build anticipation.
Start with your camera close to the ground, then slowly pan horizontally or tilt vertically to disclose your subject gradually.
To execute this technique effectively:
- Use a fluid head tripod for smooth movements
- Set a slow shutter speed (1/30 or slower) to add motion blur
- Practice consistent movement speed for a professional look
- Experiment with different focal lengths for varied effects
When panning, keep your camera level and move it steadily from side to side. For tilts, maintain a straight vertical line as you move from low to high.
You'll find that slower movements often yield more impactful results, allowing viewers to absorb details as they're revealed.
This technique works particularly well for landscapes, architecture, and revealing large subjects from unexpected angles. By combining slow pan and tilt with your low-height camera position, you'll create enchanting footage that stands out from typical eye-level shots.
Gradual Height Increase
Gradual height increase techniques offer a dynamic way to disclose subjects from a low angle, creating suspense and visual interest.
You'll start with your camera positioned close to the ground, then slowly raise it to disclose your subject. This method works particularly well for dramatic landscape shots or introducing characters in film.
To execute this technique, you'll need a sturdy tripod or camera stabilizer.
Begin by setting your camera at its lowest point, focusing on foreground elements like grass, pebbles, or floor textures. As you gradually lift the camera, maintain a smooth, controlled motion. You can use a fluid head tripod or a motorized slider for the most professional results.
Time your disclosure carefully to coincide with your subject's actions or to emphasize specific elements in your scene.
You might also combine this technique with a simultaneous forward movement to create a more complex disclosure. Experiment with different speeds and heights to find the most impactful combination for your shot.
Frequently Asked Questions
What Camera Settings Are Best for Low-Height Photography?
For low-height photography, you'll want to use a wide aperture (f/2.8-f/5.6) for a shallow depth of field. Set your ISO low and shutter speed fast to avoid blur. Use manual focus for precise control over your subject.
How Do You Protect Your Camera When Shooting Close to the Ground?
You'll want to protect your camera when shooting close to the ground. Use a waterproof case, lens filter, and camera bag. Don't forget a sturdy tripod or ground pod. Always clean your gear after each session.
Are There Any Legal Considerations When Taking Low-Angle Shots in Public Spaces?
When taking low-angle shots in public spaces, you'll need to be aware of privacy laws. Don't intrude on private property or capture people without consent. Be mindful of restricted areas and always respect local regulations.
Which Lenses Are Most Suitable for Ground-Level Photography?
You'll want wide-angle lenses for ground-level shots. They capture more of the scene and create dramatic perspectives. Consider a 14-24mm or 16-35mm lens. Don't forget macro lenses for close-up details on the ground.
How Can You Maintain Image Quality in Low-Light Conditions at Ground Level?
You'll need to increase your ISO, use a wider aperture, and slow down your shutter speed. Don't forget a tripod or stabilizer. Consider using prime lenses for better low-light performance, and try noise reduction in post-processing.
In Summary
You've now got a toolkit of low-height camera tricks to transform your photography. Don't be afraid to get down and dirty – literally! Experiment with these techniques to capture unique perspectives that'll make your images stand out. Remember, it's all about seeing the world from a new angle. So grab your camera, crouch down low, and start creating stunning ground-level shots that'll wow your viewers. Happy shooting!
As educators and advocates for responsible drone use, we’re committed to sharing our knowledge and expertise with aspiring aerial photographers.


Leave a Reply