To capture stunning sky shots with isolated subjects, you'll want to master five key techniques. First, create striking silhouettes against colorful skies by positioning your subject between you and the light source. Next, utilize negative space to emphasize your subject against expansive skies. Use leading lines like cloud formations or shorelines to draw attention to your focal point. Apply the rule of thirds for balanced compositions, placing your subject at intersecting points. Finally, frame your subject with natural elements like trees or rock formations. These methods will help you create enchanting images that truly stand out. Discover how to apply each technique for even more impressive results.
Key Takeaways
- Silhouette subjects against colorful skies by positioning them between camera and light source, exposing for the sky.
- Utilize negative space to isolate subjects against expansive skies, placing them off-center for emphasis.
- Employ leading lines from natural or man-made elements to guide viewer attention towards the subject.
- Apply the rule of thirds by placing subjects at intersecting grid points for balanced and engaging compositions.
- Frame subjects with natural elements like trees or rock formations to create visual borders and enhance focus.
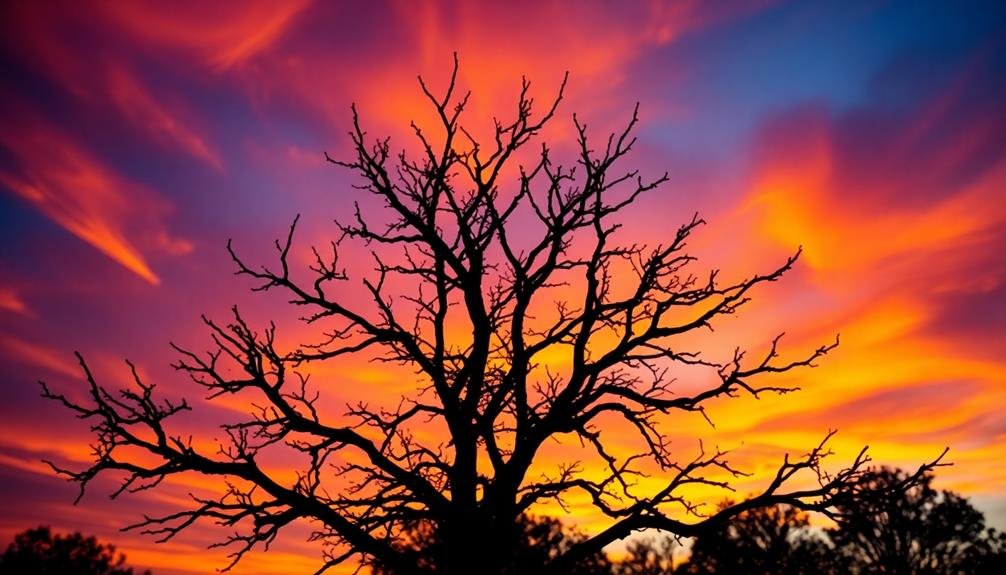
Silhouetting Against Colorful Skies
One of the most effective ways to isolate subjects in sky shots is by silhouetting them against vibrant, colorful skies. This technique creates a striking contrast between the dark, well-defined shape of your subject and the brilliant hues of the background.
To achieve this effect, position your subject between the camera and the light source, typically the sun during golden hour or blue hour. Expose for the sky, allowing your subject to fall into shadow. This will preserve the sky's colors while turning your subject into a black silhouette.
Look for subjects with distinct, recognizable shapes like trees, buildings, or people. Clean, uncluttered outlines work best for creating impactful silhouettes.
When composing your shot, pay attention to negative space. Place your subject off-center using the rule of thirds to create a more dynamic image. Experiment with different angles and perspectives to find the most interesting silhouette shape.
You can also try including multiple subjects to create layered silhouettes, adding depth to your composition.
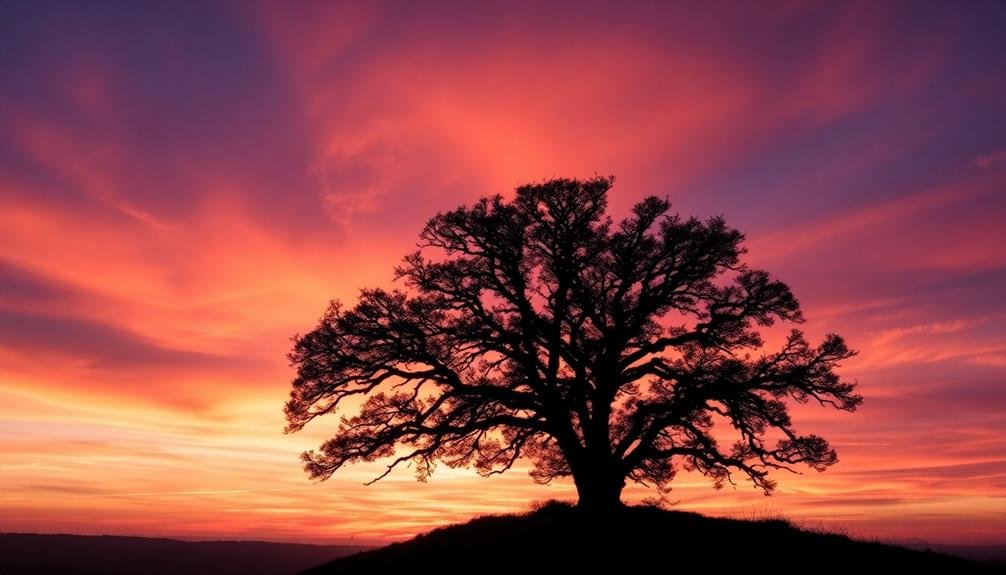
Utilizing Negative Space
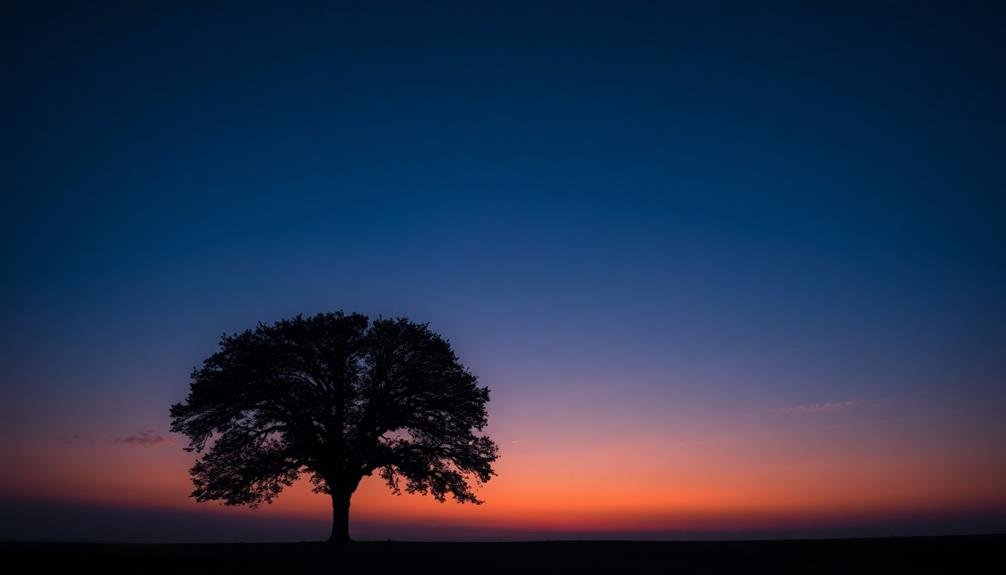
Negative space masters can harness the power of emptiness to create compelling sky shots. When you're capturing the sky, don't overlook the potential of negative space to isolate your subject and enhance your composition. Use the vast expanse of the sky as a canvas, allowing your main subject to stand out against the uncluttered background.
To effectively utilize negative space, position your subject off-center, leaving ample room for the sky to dominate the frame. This technique works particularly well with lone trees, solitary buildings, or birds in flight. You'll create a sense of scale and emphasize the subject's isolation within the expansive sky.
Experiment with different sky conditions to enhance the negative space effect. Clear blue skies offer a clean, minimalist backdrop, while dramatic cloud formations can add texture and interest without overwhelming the subject.
When shooting at sunrise or sunset, use the gradient of colors in the sky to your advantage, placing your subject where it contrasts most effectively with the background.
Don't be afraid to push the boundaries of negative space. Sometimes, allowing your subject to occupy just a small portion of the frame can create a powerful, emotive image that draws the viewer's eye and imagination.
Leading Lines to Subject

While negative space can create powerful compositions, leading lines offer another effective technique for isolating subjects in sky shots. You'll find that leading lines naturally draw the viewer's eye to your main subject, creating a sense of depth and guiding attention through the frame.
To use leading lines effectively, look for natural or man-made elements that point towards your subject. These can include:
| Natural Lines | Man-made Lines |
|---|---|
| Cloud formations | Roads |
| Shorelines | Railway tracks |
| Mountain ridges | Fences |
| Tree lines | Power lines |
| River paths | Architectural elements |
When composing your shot, position these lines to converge on your subject. You can use a wide-angle lens to exaggerate the perspective and make the lines more prominent. Experiment with different angles and viewpoints to find the most compelling composition.
Rule of Thirds Placement

The Rule of Thirds offers a classic composition technique that's particularly effective for isolating subjects in sky shots. To apply this rule, imagine dividing your frame into a 3×3 grid. Place your main subject at one of the intersecting points of these lines, rather than centering it.
When photographing sky shots, you'll often find that positioning your subject on one of these points draws the viewer's eye more effectively than placing it dead center. This technique creates a sense of balance and interest in your composition. For instance, if you're capturing a lone tree against a dramatic sky, try aligning it with the left or right vertical third line.
Don't forget about the horizontal thirds as well. You can use these to determine how much sky to include in your frame. Placing the horizon on the lower third line can emphasize a dramatic sky, while positioning it on the upper third can highlight an interesting foreground.
Framing With Natural Elements

Alongside the Rule of Thirds, framing with natural elements offers another powerful technique for isolating subjects in sky shots. You'll find that using trees, branches, rock formations, or architectural features can create a natural border around your subject, drawing the viewer's eye directly to the focal point.
To effectively frame your sky subject, look for elements that complement the scene without overpowering it. Silhouetted tree branches can add depth and intrigue to a sunset, while a rocky arch can perfectly encapsulate a full moon. When framing, make sure that the natural elements don't obstruct too much of the sky or your main subject.
You can experiment with different framing positions. Try placing your frame in the foreground for a sense of depth, or use elements on the sides to create a window-like effect. Remember to maintain balance in your composition; asymmetrical framing can add visual interest, but it shouldn't distract from the subject.
Don't limit yourself to fully enclosed frames. Partial framing, using elements on just one or two sides of the image, can be equally effective in guiding the viewer's gaze. Always consider how the framing elements interact with your sky subject to create a cohesive and visually striking image.
Frequently Asked Questions
What Camera Settings Work Best for Isolating Subjects Against the Sky?
You'll want to use a wide aperture (low f-number) to blur the background. Set a fast shutter speed to freeze motion. Lower your ISO for less noise. Adjust exposure compensation to properly expose your subject against the sky.
How Can I Balance Flash With Natural Light for Sky-Subject Isolation?
You'll want to use fill flash to balance with natural light. Set your camera to manual mode, expose for the sky, then adjust flash power. Start low and increase gradually until your subject's well-lit against the sky.
Which Lens Filters Are Most Effective for Enhancing Sky Colors?
You'll want to use polarizing filters to enhance sky colors. They'll reduce glare and deepen blue hues. Graduated neutral density filters can also help balance bright skies with darker foregrounds for more dramatic shots.
Are There Post-Processing Techniques to Improve Subject Isolation in Sky Photos?
Yes, you can improve subject isolation in post-processing. Use selective adjustments to enhance contrast, sharpen your subject, and blur the background. You'll also want to adjust exposure, color, and shadows to make your subject pop against the sky.
How Do Weather Conditions Affect Subject Isolation Techniques for Sky Photography?
Weather conditions greatly impact your subject isolation techniques. You'll find clear skies make isolation easier, while cloudy or hazy conditions can blur boundaries. Wind affects movement, and lighting changes with weather, altering your approach to isolation.
In Summary
You've now got five powerful techniques to isolate subjects and create breathtaking sky shots. Whether you're silhouetting against vibrant colors, leveraging negative space, using leading lines, applying the rule of thirds, or framing with natural elements, you're well-equipped to capture stunning images. Remember, practice makes perfect. Don't be afraid to experiment with these methods and combine them for even more striking results. Now, go out there and let your creativity soar!
As educators and advocates for responsible drone use, we’re committed to sharing our knowledge and expertise with aspiring aerial photographers.


Leave a Reply