
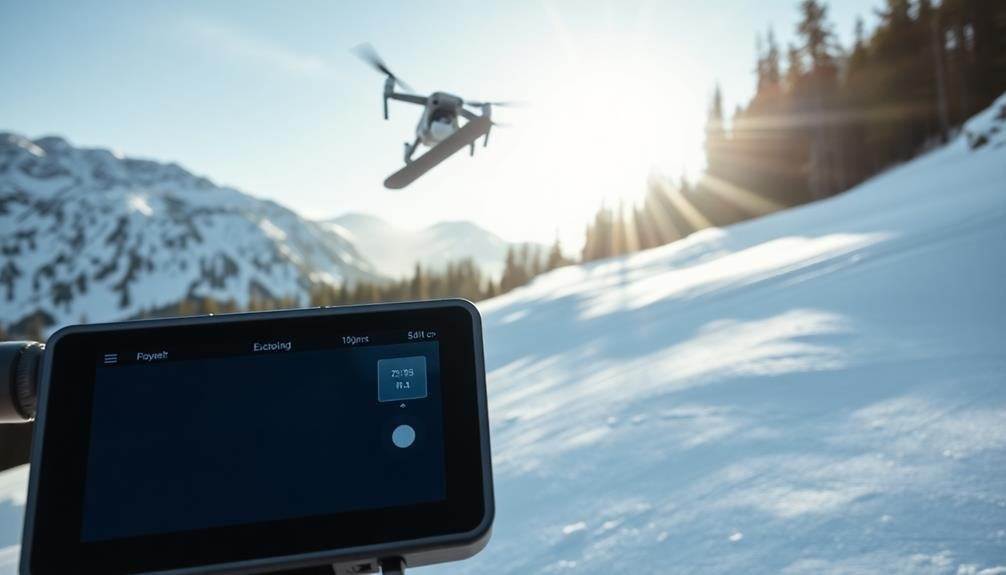
For action sports drone photography, you'll want to prioritize fast shutter speeds (1/1000s or higher) to freeze motion. Set your ISO low (100-400) in bright conditions, but be prepared to increase it in low light. Use a wider aperture (f/2.8 to f/5.6) for more light, adjusting as needed for depth of field. Enable continuous autofocus (AF-C) to track moving subjects effectively. Experiment with white balance presets or custom settings for accurate colors. Utilize burst mode for rapid-fire shots and optimize your gimbal settings for smooth footage. By mastering these key settings, you'll be well on your way to capturing stunning action sports images from the sky.
Shutter Speed for Freezing Motion

When capturing fast-paced action sports with a drone, setting the right shutter speed is essential for freezing motion and preserving sharp details. You'll want to use a fast shutter speed to prevent motion blur and capture crisp images of athletes in action. For most action sports, aim for a shutter speed of at least 1/1000th of a second or faster.
If you're shooting in bright daylight, you can push your shutter speed even higher, up to 1/2000th or 1/4000th of a second. This will help you freeze even the fastest movements, like a snowboarder mid-jump or a cyclist sprinting to the finish line.
Remember that faster shutter speeds require more light, so you may need to adjust your ISO or aperture accordingly.
For slower-moving subjects or when you want to convey a sense of motion, you can experiment with slightly slower shutter speeds around 1/500th of a second. This can create a subtle motion blur effect while still maintaining overall sharpness.
Always consider the speed of your subject and the lighting conditions when choosing your shutter speed. Don't be afraid to take test shots and adjust as needed to achieve the desired result.
ISO Sensitivity Selection

When selecting ISO for action sports drone photography, you'll need to balance several factors.
Choose a low ISO in bright conditions for the best image quality, but don't hesitate to increase it in low light or when you need faster shutter speeds to freeze motion.
Remember that higher ISO settings can introduce noise, so find the sweet spot that maintains sharpness while minimizing graininess in your shots.
Low ISO for Brightness
Two key factors influence your choice of ISO settings for action sports drone photography: light conditions and desired image quality. When shooting in bright environments, you'll want to use a low ISO setting to maintain peak image quality. Lower ISO values, typically between 100 and 400, produce less digital noise and deliver cleaner, sharper images.
In well-lit outdoor settings, such as daytime action sports events, there's usually ample natural light available. This allows you to keep your ISO low without sacrificing shutter speed or aperture. By using a low ISO, you'll capture crisp details and vibrant colors in your drone shots, enhancing the overall visual impact of the action.
However, it's crucial to balance your ISO with other camera settings. If you're shooting fast-moving subjects, you may need to increase your shutter speed to freeze the action. In such cases, you might've to bump up your ISO slightly to maintain proper exposure.
Always prioritize a fast enough shutter speed to capture sharp images, even if it means raising your ISO a bit. Remember, modern drones often have impressive low-light capabilities, so don't be afraid to push your ISO when necessary to get the shot.
High ISO for Speed
While low ISO settings are ideal for bright conditions, there are times when you'll need to crank up your ISO for action sports drone photography. High ISO becomes essential when you're shooting in low light or need faster shutter speeds to freeze fast-moving subjects.
Increasing your ISO allows you to maintain a quick shutter speed without underexposing your images. For action sports, you'll often want to keep your shutter speed at 1/1000th of a second or faster. In dimmer conditions or when shooting during golden hour, this might require bumping your ISO to 800, 1600, or even higher.
Modern drones handle high ISO surprisingly well, but you'll still need to balance image quality with speed. As you increase ISO, you'll introduce more digital noise into your photos. To mitigate this, use the lowest ISO possible that still allows for your desired shutter speed.
Experiment with different ISO settings in various lighting conditions to find the sweet spot for your drone's camera. Remember, it's better to have a slightly noisy image that's sharp and well-exposed than a blurry, underexposed one with less noise.
Balancing Noise and Sharpness
Balancing noise and sharpness is an essential skill in drone action sports photography. As you increase ISO to capture fast-moving subjects, you'll inevitably introduce digital noise. Your goal is to find the sweet spot where you have enough light sensitivity without compromising image quality.
Start by testing your drone's camera at different ISO settings. You'll notice that lower ISOs produce cleaner images but may not be fast enough for action shots. Higher ISOs allow for quicker shutter speeds but introduce more noise. Experiment to find your camera's noise threshold—the point where noise becomes unacceptable.
Consider using noise reduction software in post-processing to clean up high-ISO images. However, be cautious as excessive noise reduction can soften details. Here's a quick guide to help you balance noise and sharpness:
| ISO Range | Noise Level | Best Use Case |
|---|---|---|
| 100-400 | Low | Bright conditions |
| 800-1600 | Moderate | Low light, fast action |
| 3200+ | High | Extreme low light |
Aperture for Depth Control

Mastering aperture control is essential for capturing stunning action sports drone photography. When shooting fast-paced action, you'll want to balance depth of field with shutter speed to freeze motion while maintaining image quality.
For most action sports drone shots, you'll want to use a wider aperture (lower f-number) to allow more light into the sensor. This enables faster shutter speeds, vital for freezing motion. Aim for apertures between f/2.8 and f/5.6, depending on your drone's camera capabilities.
However, be mindful of depth of field. Wider apertures create a shallower depth of field, which can be challenging when tracking fast-moving subjects. If you need more of the scene in focus, consider stopping down to f/8 or f/11, but be prepared to compensate with higher ISO or slower shutter speeds.
Remember that drone cameras often have smaller sensors, which naturally provide a wider depth of field compared to full-frame cameras. This allows you to use wider apertures without sacrificing too much focus area.
Experiment with different apertures to find the sweet spot for your specific drone and shooting conditions.
White Balance Adjustments

With your aperture settings dialed in, it's time to focus on white balance for your action sports drone photography. White balance is vital for capturing accurate colors and creating the desired mood in your shots. For outdoor sports, you'll often encounter rapidly changing lighting conditions, so it's important to adjust your white balance accordingly.
Start by using the auto white balance (AWB) setting as a baseline. However, don't rely on it entirely, as it can sometimes produce inconsistent results. Instead, consider using preset white balance options like "daylight" for sunny conditions or "cloudy" for overcast skies. These presets can help you achieve more consistent colors across your shots.
For more precise control, use a custom white balance setting. Take a photo of a neutral gray card or white object in your shooting environment, then set this as your reference point. This method guarantees accurate color reproduction specific to your location and lighting conditions.
Remember that white balance can also be used creatively. A cooler setting can enhance the drama of winter sports, while a warmer tone might better capture the energy of summer activities.
Experiment with different settings to find what works best for your specific action sports scenario.
Focus Modes for Moving Subjects
After setting your white balance, it's crucial to choose the right focus mode for capturing fast-moving subjects in action sports drone photography.
For most action sports scenarios, you'll want to use continuous autofocus (AF-C) mode. This setting allows your drone's camera to continuously adjust focus as your subject moves, ensuring sharp images throughout the sequence.
When using AF-C, select a focus area that best suits your composition. For tracking a single athlete, use single-point AF and place the focus point on your subject.
If you're capturing a group or wider scene, consider dynamic-area AF or 3D-tracking modes, which use surrounding focus points to maintain focus on moving subjects.
Some drones offer subject-tracking features, which can be invaluable for action sports. Enable this option to let your drone's AI keep the subject centered and in focus.
For more control, switch to manual focus and set your focus to hyperfocal distance, ensuring a wider depth of field. This technique works well when subjects are maintaining a relatively constant distance from the drone.
Remember to practice and experiment with different focus modes to find what works best for your specific action sports scenario.
Exposure Compensation Techniques
When capturing fast-paced action sports with your drone, you'll need to master exposure compensation techniques to balance light and motion effectively.
You can adjust your camera's exposure settings to account for bright skies or dark backgrounds, ensuring your subject remains well-exposed.
As lighting conditions change rapidly during outdoor events, you'll want to continuously monitor and adapt your exposure compensation to maintain ideal image quality.
Balancing Light and Motion
As you immerse yourself in action sports drone photography, mastering exposure compensation techniques becomes vital for balancing light and motion.
To capture fast-moving subjects while maintaining proper exposure, you'll need to adjust your camera settings dynamically.
Start by setting your drone's camera to shutter priority mode. This allows you to control the shutter speed, which is essential for freezing action. For most action sports, you'll want a shutter speed of at least 1/1000th of a second. In bright conditions, increase it to 1/2000th or higher.
Next, adjust your ISO to compensate for the fast shutter speed. Begin with the lowest possible ISO that still allows for proper exposure. As lighting conditions change, you may need to increase ISO to maintain image quality.
Use your drone's built-in histogram to verify you're not clipping highlights or shadows. If necessary, apply exposure compensation to fine-tune your settings. Underexpose slightly to preserve highlight details, then recover shadow information in post-processing.
For scenes with high contrast, consider using your drone's HDR mode or bracketing feature. This will help you capture a wider dynamic range, guaranteeing both bright and dark areas are well-exposed.
Adapting to Changing Conditions
The key to successful action sports drone photography lies in your ability to adapt quickly to changing conditions. As light and weather shift, you'll need to adjust your camera settings on the fly. Exposure compensation is an essential technique for maintaining ideal image quality in these situations.
Use your drone's exposure compensation feature to fine-tune brightness without changing aperture or shutter speed. Increase compensation in darker conditions or when capturing subjects against bright backgrounds. Decrease it for overly bright scenes or when shooting against dark backgrounds.
Here's a quick reference guide for exposure compensation in various scenarios:
| Condition | Compensation | Effect |
|---|---|---|
| Backlit subject | +1 to +2 | Brightens underexposed subject |
| Snow or beach scenes | +1 to +1.5 | Prevents overexposure |
| Dark subject on dark bg | +1 to +2 | Reveals subject details |
| Bright subject on bright bg | -1 to -1.5 | Preserves highlights |
| Cloudy or overcast sky | +0.5 to +1 | Adds vibrancy to flat scenes |
Remember to check your histogram frequently and adjust as needed. With practice, you'll develop an intuition for exposure compensation, allowing you to capture stunning action shots in any condition.
Burst Mode Configuration

Burst mode's rapid-fire capability is essential for capturing fast-paced action sports with your drone. To configure burst mode effectively, start by setting your drone's camera to its highest frames-per-second (FPS) rate. This typically ranges from 10 to 30 FPS, depending on your drone model.
Next, consider the duration of the action you're shooting. For brief moments, like a skateboard trick, set a shorter burst of 3-5 seconds. For longer sequences, like a snowboarder's run, opt for 7-10 seconds. Adjust your drone's buffer size to accommodate these longer bursts without lag.
Don't forget about image quality. While higher resolutions yield better details, they also fill up your storage faster. Strike a balance by shooting in RAW format for maximum post-processing flexibility, but consider dropping to a lower resolution if you need extended burst durations.
Lastly, experiment with your drone's auto-exposure settings during burst mode. Some models allow you to lock exposure for consistency across all burst images, while others adjust on the fly. Choose the option that best suits your lighting conditions and subject movement.
Image Stabilization Settings

When shooting action sports with your drone, you'll need to choose between electronic and mechanical image stabilization.
Electronic stabilization uses software to reduce shake, while mechanical stabilization employs a physical gimbal.
You'll want to experiment with your drone's gimbal settings to find the ideal balance between stability and responsiveness for your specific sport and shooting style.
Electronic vs. Mechanical Stabilization
Invariably, action sports drone photographers face the challenge of capturing sharp, stable images in dynamic environments. When it comes to stabilization, you'll encounter two primary options: electronic and mechanical.
Electronic stabilization uses software algorithms to compensate for camera shake, while mechanical stabilization employs physical components like gimbals to keep the camera steady.
Electronic stabilization is often lighter and less expensive, but it can result in a slight crop of your image and may struggle in low-light conditions. Mechanical stabilization, on the other hand, provides superior results in most situations, especially when dealing with high-speed action or challenging weather conditions.
To help you decide which option is best for your needs, consider these key points:
- Electronic stabilization is ideal for smaller drones and lighter payloads
- Mechanical stabilization offers better performance in low light
- Gimbals provide smoother footage, especially during panning and tilting
- Electronic stabilization can sometimes introduce artifacts or warping
- Combining both methods can yield the best results for professional-grade footage
Ultimately, your choice will depend on your specific drone model, budget, and the type of action sports you're capturing.
Experiment with both options to find the perfect balance between stability and image quality for your unique shooting situations.
Optimal Gimbal Settings
Having decided on mechanical stabilization for your drone, it's time to fine-tune your gimbal settings for ideal image stabilization. Focus on three key aspects: pitch, roll, and yaw. Adjust the gimbal's responsiveness to match the intensity of your action sports shots.
For pitch control, set a moderate speed to allow for smooth vertical tracking. Roll should be slightly slower, maintaining horizon stability while allowing for dynamic compositions. Yaw settings depend on your shooting style; faster for following quick movements, slower for cinematic pans.
| Setting | Slow Action | Fast Action | Extreme Action |
|---|---|---|---|
| Pitch | 20°/s | 45°/s | 90°/s |
| Roll | 15°/s | 30°/s | 60°/s |
| Yaw | 25°/s | 60°/s | 120°/s |
Experiment with these settings in different scenarios. You'll find that slower gimbal movements often result in smoother footage, while faster settings capture more dynamic action. Don't forget to adjust your gimbal's end-point limits to prevent unwanted movements in your frame. Finally, enable gimbal recenter on power-up to guarantee consistent starting positions for each flight.
Resolution and Image Quality

The resolution and image quality of your drone camera play a crucial role in capturing stunning action sports shots. You'll want to aim for the highest resolution your drone can handle, typically 4K or even 8K if available. This allows for crisp, detailed images that you can crop or zoom in on later without losing quality.
Set your camera to shoot in RAW format whenever possible, as it preserves more data and gives you greater flexibility in post-processing.
Pay attention to your ISO settings; keep them as low as possible to minimize noise, especially in bright daylight conditions. Use a fast shutter speed to freeze action, usually 1/1000th of a second or faster.
Adjust your aperture to balance depth of field with light intake, typically f/2.8 to f/5.6 for most action sports scenarios.
Here are key points to remember:
- Shoot in 4K or higher resolution
- Use RAW format for maximum editing flexibility
- Keep ISO low to reduce noise
- Set fast shutter speeds to freeze action
- Adjust aperture for ideal depth of field
Color Profiles for Post-Processing

When capturing action sports with your drone, you'll want to contemplate your color profile options for post-processing flexibility.
Start by choosing between RAW and JPEG file formats, with RAW offering more editing latitude but requiring more storage space.
Set your camera to neutral color settings and use custom white balance to guarantee accurate color reproduction, giving you a solid foundation for adjusting your footage in post-production.
RAW Vs JPEG Files
Choosing between RAW and JPEG files for your action sports drone photography can considerably impact your post-processing options.
RAW files offer greater flexibility in editing, allowing you to adjust exposure, white balance, and color with minimal loss of quality. They're ideal for challenging lighting conditions often encountered in action sports. However, RAW files are larger and require more storage space.
JPEG files, on the other hand, are smaller and ready to use straight out of the camera. They're processed in-camera, which can save time if you're looking for quick results. But JPEGs offer limited editing capabilities and may lose quality with extensive post-processing.
Here's a quick comparison to help you decide:
- RAW: Higher quality, more editing flexibility, larger file size
- JPEG: Smaller file size, quicker to process, limited editing options
- RAW: Better for challenging lighting conditions
- JPEG: Ideal for quick sharing and limited storage
- RAW: Requires more post-processing time and skill
Consider your workflow, storage capacity, and editing needs when choosing between RAW and JPEG.
If you're after the highest quality and maximum editing flexibility, RAW is the way to go. But if you need quick results and have limited storage, JPEG might be more suitable for your action sports drone photography.
Neutral Color Settings
Neutral color settings play a significant role in post-processing flexibility for action sports drone photography. When shooting action sports with your drone, you'll want to capture as much raw data as possible to give yourself more options in post-production.
Set your drone's camera to a neutral color profile, which will result in a flatter, less saturated image straight out of the camera. This approach might seem counterintuitive, as the initial footage may look less vibrant. However, it preserves more detail in both highlights and shadows, allowing you to make more significant adjustments later without losing image quality.
You'll have greater control over contrast, saturation, and color grading in your editing software. Most modern drones offer various picture profiles. Look for options like "Natural," "Neutral," or "Flat" in your camera settings.
These profiles typically reduce contrast, saturation, and sharpness. If your drone has advanced settings, you can fine-tune parameters like contrast, saturation, and sharpness individually. Aim for the flattest image possible while still maintaining enough detail to work with in post-processing.
This strategy guarantees you'll capture the full dynamic range of the action, from bright skies to shadowed areas, giving you the best foundation for creating stunning action sports footage.
Custom White Balance
Beyond neutral color settings, custom white balance is another vital aspect of color management for action sports drone photography.
You'll want to set your white balance manually to guarantee accurate color reproduction in various lighting conditions. This becomes particularly significant when capturing fast-paced action in changing environments.
To achieve ideal results with custom white balance:
- Use a gray card or white balance target for precise calibration
- Adjust settings based on the current lighting conditions (sunny, cloudy, shade)
- Recalibrate when moving between different lighting scenarios
- Consider shooting in RAW format for greater flexibility in post-processing
- Experiment with different Kelvin temperatures to find the best match
Metering Modes for Action Shots

When capturing fast-paced action sports with your drone, selecting the right metering mode can make or break your shots. Different metering modes evaluate light in various ways, affecting your exposure and ultimately the quality of your action images.
For most action sports scenarios, you'll want to use either spot metering or center-weighted metering. Spot metering allows you to focus on a specific area of your frame, ensuring your subject is properly exposed even in challenging lighting conditions. Center-weighted metering is ideal when your subject remains in the center of the frame, providing a balanced exposure for the entire scene.
Here's a quick comparison of common metering modes for action sports drone photography:
| Metering Mode | Pros | Cons |
|---|---|---|
| Spot | Precise exposure on subject | Background may be under/overexposed |
| Center-weighted | Balanced exposure | Less effective for off-center subjects |
| Matrix/Evaluative | Good for complex scenes | May struggle with fast-moving subjects |
| Partial | Useful for backlit subjects | Limited coverage area |
| Highlight-weighted | Prevents blown-out highlights | May underexpose darker areas |
Choose your metering mode based on the specific action sport you're shooting and the lighting conditions you're working with. Experiment with different modes to find what works best for your style and subject matter.
File Format Selection

Choosing the right file format is another key aspect of action sports drone photography. You'll typically be deciding between RAW and JPEG formats.
RAW files offer more flexibility in post-processing, allowing you to recover details in highlights and shadows. However, they require more storage space and processing time.
JPEG files, on the other hand, are smaller and ready to use straight out of the camera, but offer less editing flexibility.
For action sports, consider shooting in RAW+JPEG. This gives you the best of both worlds: quick JPEG previews for immediate sharing and high-quality RAW files for later editing.
If you're limited on storage, prioritize RAW for the most important shots and use JPEG for the rest.
Key points to remember when selecting file formats:
- RAW files preserve more image data
- JPEGs are smaller and more convenient
- RAW+JPEG offers versatility
- Consider your storage capacity
- Match your format to your post-processing workflow
When shooting fast-paced action, you'll want to maximize your drone's buffer and shooting speed.
If you're running low on storage or need to shoot long sequences, JPEG might be the better choice.
Ultimately, your file format selection should align with your post-processing skills, available time, and the final use of your images.
Gimbal Settings for Smooth Footage

A smooth, stable shot is the hallmark of professional drone footage in action sports photography. To achieve this, you'll need to optimize your drone's gimbal settings.
Start by setting your gimbal mode to "Follow" or "FPV" for most action sports scenarios. This allows the camera to move with the drone's direction while maintaining horizon stability.
Adjust your gimbal speed to match the pace of your subject. For fast-moving sports like motocross or snowboarding, use a higher speed setting to keep up with the action. For slower activities, like mountain biking or kayaking, a lower speed will suffice.
Enable gimbal damping to reduce unwanted vibrations and sudden movements. Set it to a medium-high level for a balance between stability and responsiveness.
Use the pitch and yaw smooth track settings to create fluid camera movements. Start with values around 20-30 and adjust as needed.
For tracking shots, experiment with the gimbal's deadband setting. A smaller deadband allows for more precise control but may result in jittery movements. A larger deadband creates smoother pans but with less responsiveness.
Find the sweet spot that works best for your specific action sport and filming style.
Custom Presets for Quick Adjustments

Custom presets can dramatically streamline your workflow in action sports drone photography. By creating and saving specific combinations of settings tailored to different scenarios, you'll be ready to capture the perfect shot at a moment's notice.
Whether you're filming high-speed motocross or aerial snowboarding tricks, having presets allows you to switch between ideal configurations quickly.
To set up your custom presets, consider the following key parameters:
- Shutter speed
- ISO sensitivity
- Aperture
- White balance
- Color profile
Start by analyzing the typical conditions you encounter in your action sports shoots. Create presets for various lighting situations, such as bright sunlight, overcast days, or golden hour.
Don't forget to include presets for different types of motion, like fast-moving subjects or slower, more cinematic shots.
Once you've established your presets, assign them to easily accessible buttons on your controller or within your drone's app. This way, you can switch between settings on the fly without losing sight of the action.
Remember to regularly review and refine your presets based on your experiences and the evolving demands of your shoots.
With well-crafted custom presets at your fingertips, you'll be able to focus more on composition and timing, ensuring you capture those jaw-dropping action sports moments with precision and style.
Frequently Asked Questions
What Drone Models Are Best Suited for Action Sports Photography?
You'll want drones with high-speed capabilities and excellent stabilization. Consider models like the DJI Air 2S, Mavic 3, or Skydio 2+. They offer robust features, great image quality, and tracking modes ideal for action sports photography.
How Do Weather Conditions Affect Drone Performance During Action Sports Shoots?
You'll find weather greatly impacts your drone's performance. Wind can affect stability and flight time. Rain and humidity pose risks to electronics. Cold temperatures reduce battery life. Bright sunlight may cause glare on your camera's lens.
What Are the Legal Requirements for Using Drones in Action Sports Photography?
You'll need to register your drone with the FAA, obtain a Part 107 license for commercial use, and follow local regulations. Don't fly over people, respect privacy, and stay within visual line of sight.
How Can I Improve Battery Life While Shooting Action Sports With Drones?
You'll extend your drone's battery life by reducing flight speed, avoiding wind, using efficient flight paths, lowering camera quality, and minimizing hovering. Don't forget to carry spare batteries and plan shorter flights for action sports photography.
What Safety Precautions Should Be Taken When Flying Drones Near Athletes?
You should maintain a safe distance, keep the drone in sight, and avoid flying directly over athletes. Don't forget to alert participants about drone use. Always follow local regulations and obtain necessary permissions before flying.
In Summary
You've now got the key camera settings for capturing stunning action sports drone photography. Remember, it's all about experimenting and finding what works best for your style and conditions. Don't be afraid to push the limits and try new techniques. With practice, you'll master these settings and create breathtaking aerial shots that'll make your action sports footage stand out. Keep flying, keep shooting, and most importantly, have fun with your drone photography adventures!
As educators and advocates for responsible drone use, we’re committed to sharing our knowledge and expertise with aspiring aerial photographers.


Leave a Reply