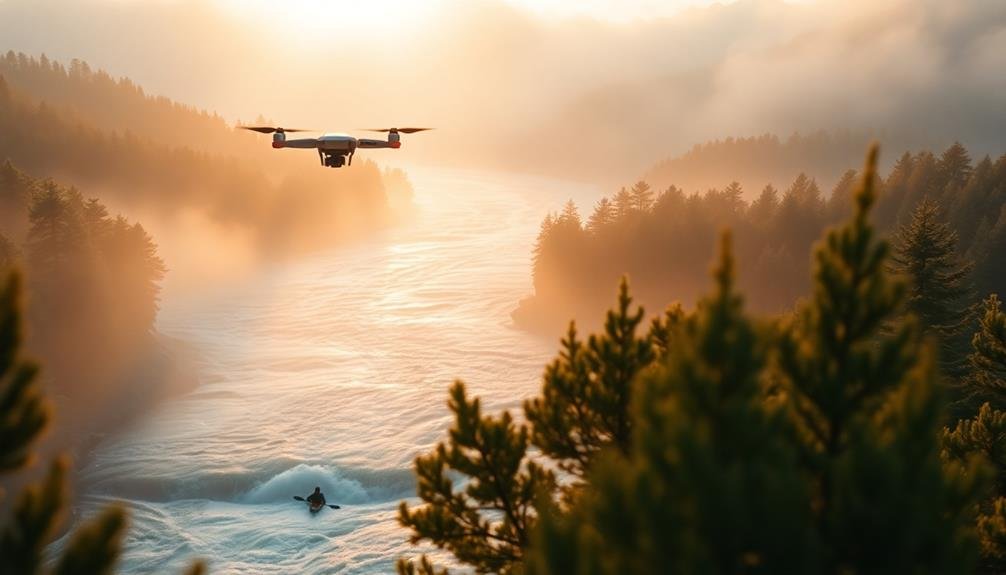
Advanced follow shot techniques can elevate your aerial cinematography to new heights. You'll master the Orbit Reveal, circling your subject for a gradual disclosure. Try Vertical Ascent Tracking to smoothly rise while keeping your focus centered. Dynamic Altitude Changes add depth by altering height during tracking. The Parallax Panning Technique creates stunning depth perception. For dramatic reveals, use the Reverse Reveal shot. Spiral Descent Tracking offers a unique perspective, while Sideways Drift Follow Shots capture parallel motion. Each technique brings a distinct emotional impact to your storytelling. Discover how these methods can transform your aerial footage into enchanting visual narratives.
Key Takeaways
- Master the Orbit Reveal Follow Shot by maintaining consistent altitude while flying in a circular path to gradually reveal the subject.
- Perfect the Reverse Reveal Shot by positioning the drone behind an obstacle and ascending while moving backward, focusing on timing and altitude control.
- Implement Vertical Ascent Tracking by smoothly ascending the drone while keeping the subject centered, starting low and close.
- Utilize Dynamic Altitude Changes by coordinating vertical movements with horizontal tracking for visually striking footage.
- Execute the Spiral Descent Tracking technique by flying in a downward spiral around a central subject, maintaining consistent distance while reducing altitude.
Orbit Reveal Follow Shot

The orbit reveal follow shot is a powerful technique that can add drama and depth to your aerial cinematography. To execute this shot, you'll start with your drone positioned behind an object, obscuring the main subject. As you begin the shot, fly the drone in a circular path around the object, gradually revealing the subject behind it.
Maintain a consistent altitude and distance from the center point as you orbit. The key is to time your reveal perfectly, exposing the subject at the most impactful moment. You can adjust the speed of your orbit to control the pacing of the reveal.
For best results, choose a foreground object that complements your subject. Natural elements like trees, rock formations, or architectural features work well. As you orbit, keep your camera focused on the subject, allowing the foreground to pass through the frame.
Practice smooth control inputs to guarantee a fluid motion. Consider using intelligent flight modes if your drone offers them. Experiment with different altitudes and distances to find the most compelling composition for your specific scene.
Vertical Ascent Tracking

Vertical ascent tracking shots can transform your aerial footage from ordinary to extraordinary. This technique involves smoothly ascending your drone while keeping the subject centered in the frame. As you rise, you'll gradually reveal more of the surrounding environment, creating a dramatic and expansive effect.
To execute this shot, start low and close to your subject. Begin ascending slowly, maintaining a consistent speed throughout the movement. Use your drone's altitude hold feature to guarantee steady vertical motion. As you climb, adjust your camera's tilt to keep the subject properly framed.
Pay attention to your surroundings and plan your ascent path carefully. Avoid obstacles like trees or buildings that might interfere with your shot. Consider the background that will be revealed as you rise – look for interesting elements that will enhance the composition.
For added impact, time your vertical ascent with action in the scene. This could be a character walking, a vehicle moving, or a natural event unfolding. The combination of upward motion and on-ground action creates a dynamic and engaging visual narrative.
Dynamic Altitude Changes

Dynamic altitude changes take your aerial cinematography to new heights – literally. This technique involves smoothly altering your drone's altitude while following a subject, creating a visually striking and immersive effect.
To master this skill, you'll need to practice coordinating your vertical movements with your horizontal tracking. Start by identifying key moments in your subject's movement where altitude changes will enhance the shot. As you follow your subject, gradually ascend or descend to reveal new perspectives or emphasize specific elements in the scene.
You'll want to maintain a consistent speed for these changes to guarantee smooth footage. Use your drone's intelligent flight modes, like ActiveTrack or Follow Me, to keep your subject centered while you focus on altitude adjustments.
Don't forget to take into account obstacles and flight regulations as you change elevation. For added impact, combine dynamic altitude changes with other techniques like orbiting or reveal shots.
Experiment with different rates of ascent and descent to create varying moods. Slow, gradual changes can build tension, while rapid altitude shifts can add excitement or urgency to your footage.
Remember to keep your movements purposeful and tied to the story you're telling.
Parallax Panning Technique

You'll master the parallax panning technique by understanding how objects at different distances move relative to each other as you pan.
Control your camera's speed to accentuate this effect, creating a more dynamic and visually interesting shot.
This technique enhances depth perception in your aerial footage, giving viewers a stronger sense of the scene's three-dimensional space.
Understanding Parallax Movement
Parallax movement is a powerful technique that adds depth and dimension to your aerial shots. It occurs when objects at different distances appear to move at different speeds relative to each other as your drone travels. To master this technique, you'll need to understand how foreground, midground, and background elements interact.
When executing a parallax shot, fly your drone sideways or forward while keeping your subject centered in the frame. As you move, closer objects will appear to move faster than distant ones, creating a dynamic sense of depth. This effect is particularly striking when you have multiple layers of scenery at varying distances.
To create emotionally impactful parallax shots, consider these elements:
- Dramatic foreground objects that frame your subject
- Midground elements that guide the viewer's eye
- A distant background that provides context and scale
- Subtle changes in elevation to enhance the 3D effect
Practice flying at different speeds and altitudes to find the sweet spot for your specific shot.
Camera Speed Control
Building on the concept of parallax movement, camera speed control is a refined technique that takes your aerial cinematography to the next level. As you maneuver your drone, you'll need to adjust your camera's speed to maintain smooth, consistent footage. This technique requires practice and finesse, as you'll be balancing the drone's movement with the camera's rotation.
To master camera speed control, focus on matching your camera's pan rate with the drone's velocity. Start by practicing at slower speeds, gradually increasing as you become more comfortable. Remember, the goal is to create fluid motion that enhances your subject's movement without introducing jarring shifts.
Here's a quick reference guide for camera speed control:
| Drone Speed | Camera Pan Rate | Effect |
|---|---|---|
| Slow | Slow | Dramatic reveal |
| Medium | Medium | Balanced tracking |
| Fast | Fast | Dynamic action |
| Variable | Constant | Dolly zoom effect |
| Constant | Variable | Emphasis shifts |
Depth Perception Enhancement
Depth perception enhancement takes aerial cinematography to new heights by leveraging the parallax panning technique. As you move your drone laterally while keeping the subject centered in the frame, you'll create a stunning sense of depth and dimensionality. This technique works best when you have multiple layers of objects at varying distances from the camera.
To master parallax panning, start by identifying a foreground element, your main subject, and a background element. As you fly, maintain a consistent speed and distance from your subject. The foreground will appear to move faster than the background, creating a mesmerizing 3D effect.
For maximum impact, consider these emotional cues:
- Anticipation: Build tension as you slowly reveal the subject
- Wonder: Showcase breathtaking landscapes with multiple layers
- Intimacy: Bring viewers closer to the action by flying through tight spaces
- Triumph: Culminate your shot by revealing a grand vista
Remember to practice smooth movements and maintain proper altitude throughout the shot. By mastering depth perception enhancement, you'll elevate your aerial cinematography and captivate your audience with immersive, dynamic footage that truly stands out.
Reverse Reveal Follow Shot

To master the reverse reveal follow shot, you'll need to focus on precise timing and altitude control.
You should carefully adjust your drone's height and speed to gradually disclose the subject or landscape.
Consider your camera angle throughout the shot, ensuring it complements the reveal and maintains visual interest as you move from a concealed to an exposed position.
Timing and Altitude Control
Mastering the reverse reveal follow shot requires precise timing and altitude control. You'll need to carefully coordinate your drone's movement with the subject's pace, ensuring a smooth and dramatic disclosure.
Start by positioning your drone behind an obstacle, then ascend while moving backward as your subject approaches. The key is to time your ascent so that the subject is disclosed at the perfect moment.
To execute this shot effectively, practice adjusting your drone's altitude in sync with its backward movement. This creates a dynamic composition that gradually reveals the scene.
Pay close attention to your surroundings and maintain a safe distance from obstacles as you ascend.
To evoke emotion in your audience, consider these four elements:
- Anticipation: Build suspense by keeping the subject hidden initially
- Revelation: Time the disclosure to coincide with a dramatic moment
- Scale: Showcase the vastness of the environment as you ascend
- Perspective: Shift the viewer's perception by changing the angle
Camera Angle Considerations
Camera angles play an essential role in executing a compelling reverse reveal follow shot. When planning your shot, contemplate starting with the camera facing away from your subject, typically pointing in the direction of travel. As you fly, gradually rotate the camera to reveal the subject behind you.
For maximum impact, begin with a low angle, tilting the camera upwards slightly. This creates a sense of mystery and anticipation. As you rotate, adjust the tilt to maintain a balanced composition. You'll want to time the reveal carefully, ensuring it coincides with an interesting moment or action from your subject.
Experiment with different heights and distances from your subject. A lower altitude can create a more intimate feel, while flying higher offers a grander, more expansive reveal.
Don't forget to contemplate the background elements that'll come into view during the rotation. Choose a flight path that incorporates visually interesting surroundings to enhance the overall composition.
Remember to keep your movements smooth and controlled. Gradual, steady rotations will result in a more polished and professional-looking shot.
Practice your timing and camera movements to perfect this advanced technique.
Spiral Descent Tracking

While executing a spiral descent, drone pilots can capture breathtaking footage that adds dynamic movement and depth to their aerial cinematography. This technique involves flying your drone in a downward spiral pattern around a central subject, creating a mesmerizing visual effect.
To master spiral descent tracking, you'll need to maintain a consistent distance from your subject while gradually reducing altitude. Start by positioning your drone above and slightly to the side of your target. As you begin your descent, adjust your yaw to keep the subject centered in your frame. Simultaneously, decrease your altitude while moving in a circular motion around the focal point.
For the most impactful spiral descent shots, consider these emotional elements:
- Anticipation: Build suspense as you reveal more of the scene
- Wonder: Showcase the grandeur of landscapes or structures
- Intimacy: Gradually close in on human subjects or intricate details
- Momentum: Create a sense of urgency or flow as you descend
Remember to maintain smooth, controlled movements throughout the maneuver. Practice this technique in open areas before attempting it in more challenging environments.
Sideways Drift Follow Shot

The sideways drift follow shot is a dynamic technique that adds a sense of motion and depth to your aerial footage. To execute this shot, you'll need to master lateral movement while maintaining focus on your subject. Start by positioning your drone parallel to the subject, then slowly drift sideways while keeping the camera locked on target.
Key to this technique is maintaining a consistent speed and distance from your subject. You'll want to practice smooth, controlled movements to avoid jerky footage. Experiment with different speeds and distances to create varying effects.
| Speed | Distance | Effect |
|---|---|---|
| Slow | Close | Intimate, detailed |
| Slow | Far | Gradual reveal |
| Medium | Close | Dynamic, engaging |
| Medium | Far | Scenic, contextual |
| Fast | Close | Intense, dramatic |
Consider the background elements as you drift. They'll create a parallax effect, enhancing the sense of movement. Use this to your advantage by choosing locations with interesting backdrops. Remember to adjust your camera settings to compensate for the motion, ensuring sharp focus on your subject throughout the shot.
Frequently Asked Questions
What Drone Models Are Best Suited for Advanced Follow Shot Techniques?
You'll want to contemplate drones with advanced tracking features. The DJI Mavic 3, Skydio 2+, and Autel EVO II Pro are excellent choices. They offer intelligent flight modes, obstacle avoidance, and high-quality cameras for smooth follow shots.
How Do Weather Conditions Affect the Execution of These Aerial Cinematography Techniques?
You'll find weather conditions greatly impact your aerial shots. Wind can destabilize your drone, affecting smooth movements. Rain and fog limit visibility. Bright sunlight causes glare. Always check forecasts and adjust your techniques accordingly.
What Are the Legal Restrictions for Using Drones in Advanced Follow Shots?
You'll need to follow strict regulations for drone use in advanced follow shots. You're required to obtain proper licenses, adhere to altitude limits, avoid restricted areas, and maintain visual line of sight with your drone at all times.
How Can Pilots Practice These Techniques Safely Without Risking Equipment Damage?
You can safely practice advanced follow shot techniques using simulators, flying in open areas, starting with basic maneuvers, and gradually increasing difficulty. Always maintain visual line of sight and follow local regulations to avoid damaging your equipment.
What Post-Production Software Is Recommended for Enhancing Follow Shot Footage?
You'll want to use professional video editing software like Adobe Premiere Pro or DaVinci Resolve for enhancing follow shot footage. They offer advanced color grading, stabilization, and tracking tools to polish your aerial cinematography and create stunning results.
In Summary
You've now mastered seven advanced follow shot techniques for aerial cinematography. By incorporating these dynamic movements into your drone flights, you'll capture stunning footage that'll wow your audience. Remember to practice each technique regularly and always prioritize safety. As you refine your skills, don't be afraid to experiment and combine different methods. With these tools in your arsenal, you're ready to take your aerial cinematography to new heights. Keep flying and creating!
As educators and advocates for responsible drone use, we’re committed to sharing our knowledge and expertise with aspiring aerial photographers.


Leave a Reply