To create stunning aerial hyperlapses, start by organizing your drone footage and importing it into your editing software. Stabilize the raw footage to smooth out any camera shake, then apply color grading and exposure adjustments to enhance the visuals. Create seamless shifts between clips and add motion blur effects for a dynamic look. Adjust playback speed to control the flow of your hyperlapse, and incorporate complementary audio to elevate the viewing experience. Finally, export your video with appropriate settings for peak quality. By following these steps, you'll be well on your way to producing enthralling aerial hyperlapses that leave viewers in awe.
Key Takeaways
- Import and organize footage, applying stabilization techniques to ensure smooth aerial shots.
- Establish a cohesive color palette and apply color grading to enhance the mood of the hyperlapse.
- Create seamless transitions between clips using cross dissolves, motion tracking, and speed ramping.
- Add motion blur effects and adjust playback speed to enhance the perception of movement and dynamics.
- Incorporate complementary audio and music, then export the final video with appropriate settings for quality retention.
Importing and Organizing Footage

The first step in creating an aerial hyperlapse is to import and organize your footage. Begin by transferring all your drone video clips to your computer. Create a dedicated project folder and sort your footage into subfolders based on location, date, or scene type. This organization will save you time during the editing process.
Next, import your clips into your preferred video editing software. Most professional editors use programs like Adobe Premiere Pro, Final Cut Pro, or DaVinci Resolve. As you import, create a new project and set up your timeline with the correct frame rate and resolution to match your footage.
Once imported, review your clips and label them with descriptive names. Use keywords or color-coding to identify your best shots quickly. Create separate sequences for different sections of your hyperlapse if you're working with multiple locations or time periods.
Consider creating proxy files for smoother editing, especially if you're working with high-resolution 4K or 8K footage. These lower-resolution copies will speed up your workflow without compromising the final output quality.
With your footage organized and ready, you're now prepared to start the creative editing process.
Stabilizing Raw Drone Footage
With your footage organized, it's time to address one of the most important aspects of aerial hyperlapse creation: stabilization. Raw drone footage often contains unwanted movement and jitters that can detract from the smooth, flowing effect you're aiming for. To combat this, you'll need to use stabilization tools in your editing software.
Start by applying warp stabilizer to your clips. This powerful tool analyzes your footage and corrects camera shake. Adjust the smoothness setting to find the right balance between stability and natural movement. If you're using Adobe Premiere Pro, experiment with the "Method" dropdown to see which option works best for your footage.
For more precise control, consider using manual keyframe stabilization. This technique involves tracking specific points in your frame and adjusting their position over time. While more time-consuming, it can yield superior results, especially for complex shots.
Don't forget to crop your footage slightly after stabilization. This removes any warping or black edges that may appear as a result of the stabilization process.
Color Grading and Exposure Adjustment
After stabilizing your drone footage, you'll want to focus on color grading and exposure adjustment.
Start by establishing a cohesive color palette that complements your aerial hyperlapse's mood and setting.
Next, fine-tune exposure levels to guarantee consistent brightness throughout your sequence, and consider applying LUTs (Look-Up Tables) to achieve a professional, cinematic look efficiently.
Establishing Color Palette
Establishing a consistent color palette is essential for creating visually stunning aerial hyperlapses. To begin, analyze your footage and identify dominant colors that naturally occur in the landscape or cityscape. Choose 3-5 complementary colors that enhance the mood and atmosphere you want to convey.
Next, adjust your primary color wheels in your editing software to emphasize these chosen colors. Fine-tune the shadows, midtones, and highlights to create a cohesive look across all frames. Don't be afraid to experiment with color temperatures, pushing cooler or warmer tones to achieve your desired aesthetic.
Consider using LUTs (Look-Up Tables) as a starting point for your color palette. Many pre-made LUTs are available, or you can create custom ones to suit your style. Apply the LUT at a reduced opacity and make further adjustments to tailor it to your footage.
Pay attention to skin tones if people are visible in your hyperlapse. Make sure they remain natural-looking while still fitting within your overall color scheme.
Adjusting Exposure Levels
Proper exposure adjustment is essential for creating a visually striking aerial hyperlapse. Begin by analyzing your footage for any overexposed or underexposed areas. Use your editing software's histogram to identify exposure issues and guarantee a balanced distribution of tones.
Start by adjusting the overall exposure of your sequence. If you're working with raw footage, you'll have more flexibility to recover highlights and shadows. Use the exposure slider to set a base level, then fine-tune with highlight and shadow adjustments.
Next, focus on individual frames that may need specific attention. Apply localized adjustments to correct for sudden changes in lighting conditions, such as when flying through clouds or shifting from day to night.
Don't forget to maintain consistency throughout your hyperlapse. Use keyframes to smoothly shift between exposure adjustments, guaranteeing a seamless flow from one frame to the next. Pay special attention to the exposure of your subject or focal point, as it should remain properly lit throughout the sequence.
Applying LUTS Effectively
With exposure levels balanced, it's time to enhance your aerial hyperlapse's visual appeal through color grading. LUTs (Look-Up Tables) offer a quick and effective way to apply professional-grade color profiles to your footage.
Start by selecting a LUT that complements your hyperlapse's mood and setting. For outdoor scenes, consider LUTs that enhance natural colors and boost contrast.
Apply the chosen LUT at a reduced opacity, typically around 30-50%, to avoid an overly processed look. Fine-tune the intensity by adjusting the LUT's strength and opacity until you achieve a balanced result. Pay close attention to skin tones and key elements in your footage to guarantee they remain natural-looking.
Experiment with layering multiple LUTs to create a unique look. Combine a creative LUT for overall style with a technical LUT for color correction. Use adjustment layers to apply LUTs selectively to specific areas of your frame, allowing for more precise control over your color grade.
Remember that LUTs are a starting point, not a final solution. After applying LUTs, make additional adjustments to contrast, saturation, and individual color channels to perfect your hyperlapse's visual aesthetic.
Creating Smooth Transitions
Mastering smooth shifts is essential for creating intriguing aerial hyperlapses. You'll want to focus on seamless changes between clips to maintain viewer engagement and flow. Start by selecting clips with similar lighting and color grading to guarantee visual consistency. Utilize cross dissolves or other blending techniques to soften the cuts between shots.
Consider using motion tracking to align key elements in consecutive frames, creating a more fluid movement. You can also experiment with speed ramping, gradually increasing or decreasing the playback speed to smooth out changes. Don't forget to pay attention to the audio alterations as well, fading sounds in and out to complement the visual shifts.
Here's a quick reference guide for change techniques:
| Technique | Difficulty | Visual Impact | Best Used For |
|---|---|---|---|
| Cross Dissolve | Easy | Subtle | Gentle scene changes |
| Wipe | Medium | Moderate | Directional shifts |
| Zoom Transition | Hard | High | Dramatic revelations |
| Match Cut | Hard | High | Thematic connections |
| Morph | Expert | Very High | Surreal transformations |
Adding Motion Blur Effects
Motion blur effects are essential for enhancing the sense of speed and fluidity in aerial hyperlapses. To add this effect, you'll need to apply it in post-processing using video editing software.
Start by selecting your hyperlapse footage and adding a motion blur effect from your software's effects library. Adjust the blur amount and direction to match your footage's movement. For horizontal motion, set the blur direction to 0 degrees; for vertical motion, use 90 degrees. Experiment with different blur lengths to find the right balance between smoothness and clarity.
If your software allows, use optical flow technology to create more accurate motion blur. This analyzes the movement between frames and applies blur accordingly, resulting in a more natural-looking effect.
For advanced users, consider using a plugin like ReelSmart Motion Blur, which offers more precise control over motion blur application.
Remember to preview your changes frequently and adjust as needed.
Adjusting Playback Speed
Why is adjusting playback speed vital for aerial hyperlapses? It's essential for creating dynamic and engaging visual experiences. By manipulating the speed, you can control the pacing of your footage and emphasize specific moments or movements.
To adjust playback speed, start by importing your footage into your editing software. Most programs offer speed adjustment tools that allow you to increase or decrease the speed of your clips. Experiment with different speeds to find the right balance for your hyperlapse.
Consider varying the speed throughout your video to add interest. You might start slow, gradually increase speed, and then slow down again for dramatic effect. Pay attention to how speed changes affect the overall flow and rhythm of your hyperlapse.
When increasing speed, be mindful of potential issues like jerky movements or excessive motion blur. To counteract these, you may need to apply stabilization effects or adjust your frame rate.
Conversely, when slowing footage down, make certain you have enough frames to maintain smooth motion.
Remember that adjusting playback speed can greatly impact your hyperlapse's duration. Plan accordingly and make sure your final video length aligns with your project goals.
Incorporating Audio and Music
The sound design of your aerial hyperlapse can make or break its impact. When incorporating audio and music, start by considering the mood you want to convey. Choose a track that complements your visuals and enhances the overall experience. Instrumental pieces often work well, as they don't compete with the visual narrative.
Once you've selected your music, adjust its volume to balance with any ambient sounds you might want to include. Subtle wind or city noises can add depth to your hyperlapse. Layer these sounds carefully, ensuring they don't overpower the main audio track.
Sync your music to key moments in your footage. Match beats or changes in the music to shifts or significant visual elements. This synchronization creates a more cohesive and engaging final product.
Consider using audio fades at the beginning and end of your hyperlapse to smooth the viewing experience. You can also experiment with audio effects like reverb or echo to create a more immersive soundscape.
Exporting Final Hyperlapse Video
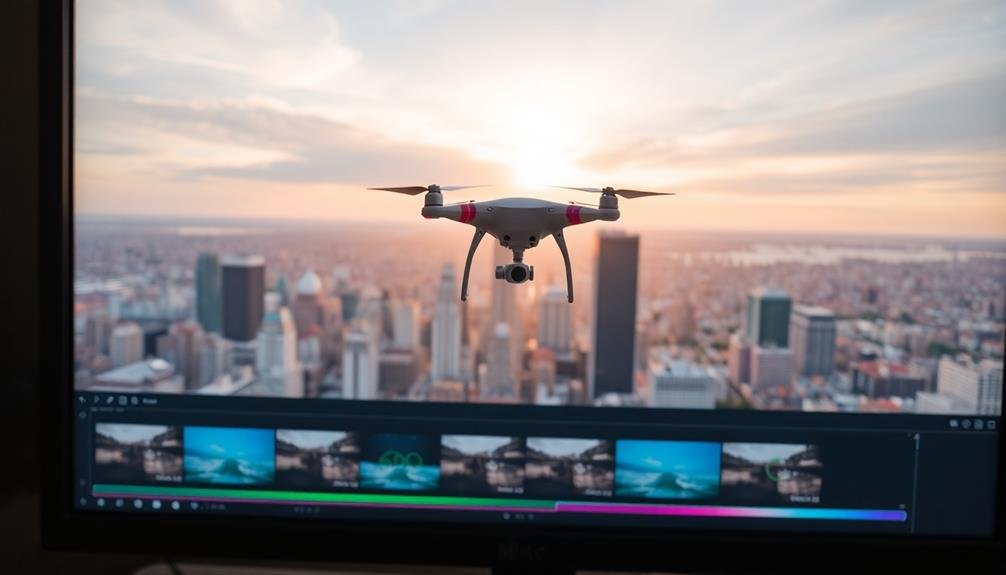
After perfecting your aerial hyperlapse, it's time to export your final video. Choose the appropriate export settings to guarantee your hyperlapse maintains its quality and meets your intended platform requirements.
Start by selecting the correct aspect ratio, typically 16:9 for most online platforms. Set your frame rate to match your project settings, usually 24, 30, or 60 fps.
For resolution, aim for at least 1080p (1920×1080) or 4K (3840×2160) if your footage allows. Select a suitable video codec, with H.264 being a popular choice for its balance of quality and file size.
Adjust the bitrate to achieve the desired balance between file size and video quality. For online sharing, a bitrate between 10-20 Mbps for 1080p or 30-60 Mbps for 4K is often sufficient.
Consider adding metadata to your video file, including title, description, and copyright information. This helps with organization and attribution.
Frequently Asked Questions
What Equipment Is Needed to Capture Aerial Footage for Hyperlapses?
To capture aerial footage for hyperlapses, you'll need a drone with a high-quality camera, spare batteries, and memory cards. Don't forget a sturdy tripod for ground shots and a powerful computer for editing your footage later.
How Long Should Each Individual Clip Be When Shooting for Hyperlapses?
When shooting for hyperlapses, you'll want to capture clips lasting 10-30 seconds each. This gives you enough footage to work with while editing. Remember, you're condensing time, so longer clips provide more flexibility in post-production.
What's the Ideal Drone Flight Speed for Capturing Hyperlapse Footage?
For aerial hyperlapse footage, you'll want to fly your drone at a moderate speed of 10-15 mph. This allows for smooth movement while capturing enough frames. You can adjust based on your desired final effect and subject.
Are There Legal Restrictions for Flying Drones to Create Aerial Hyperlapses?
Yes, there are legal restrictions for drone flights when creating aerial hyperlapses. You'll need to follow local regulations, obtain necessary permits, respect no-fly zones, and maintain visual line of sight. Don't forget to register your drone if required.
How Can I Plan My Drone Flight Path for the Best Hyperlapse Results?
You'll want to plan a smooth, linear path for your drone. Choose a clear route with interesting scenery. Use waypoints to guarantee consistent movement. Consider the sun's position and avoid obstacles for the best hyperlapse results.
In Summary
You've now mastered the art of creating stunning aerial hyperlapses. By following these steps, you'll transform your raw drone footage into an enchanting, fast-paced visual journey. Remember to experiment with different techniques and effects to develop your unique style. Don't be afraid to push creative boundaries and try new approaches. With practice, you'll craft increasingly impressive hyperlapses that'll wow your audience and elevate your aerial videography skills to new heights. Keep flying, filming, and editing!

As educators and advocates for responsible drone use, we’re committed to sharing our knowledge and expertise with aspiring aerial photographers.
Leave a Reply