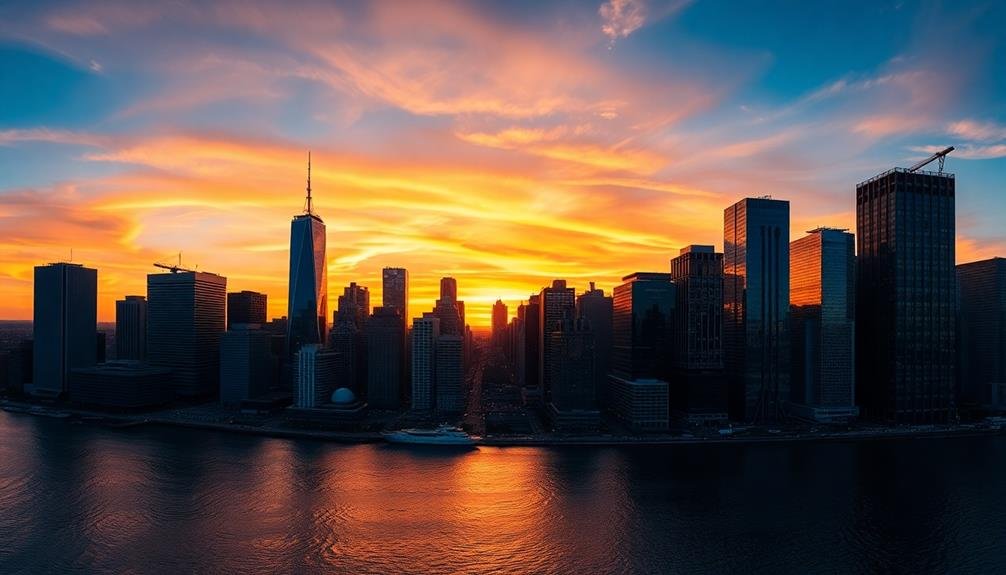
To capture stunning skyline panoramas, start by overlapping your shots by 30-50% for seamless blending. Level your drone camera using built-in horizon alignment tools and calibrate the gimbal for precise control. Maintain consistent exposure across frames by locking manual settings and using spot metering. Choose ideal camera settings, including a mid-range f-stop and manual focus. Consider both manual and automated panorama techniques based on your skill level and scene complexity. Use post-processing software to stitch and refine your images, correcting any distortions. With these techniques, you'll elevate your skyline photography to new heights. Discover more ways to perfect your panoramic cityscapes below.
Key Takeaways
- Overlap each frame by 30-50% for seamless blending, increasing to 50-60% in complex skyline scenes with foreground elements.
- Use manual mode to maintain consistent exposure, aperture, and focus settings across all shots in the panorama sequence.
- Choose a mid-range f-stop (f/8 or f/11) for optimal depth of field and sharpness in skyline photography.
- Utilize a tripod or drone with horizon alignment tools to ensure level shots and straight skyline horizons.
- Apply post-processing techniques to correct distortion, adjust color consistency, and fine-tune exposure across the stitched panorama.
Overlapping Shots for Seamless Blending

When you're capturing images for a panorama, overlapping your shots is vital for seamless blending. Aim to overlap each frame by 30-50% to guarantee you have enough matching information for the stitching software to work with. This overlap provides essential reference points and helps compensate for lens distortion at the edges of each frame.
Start by setting your camera to manual mode to maintain consistent exposure across all shots. Use a tripod and level it carefully to keep your horizon straight. If you're shooting handheld, pivot your body around your central axis to minimize parallax errors.
Begin at one end of your scene and move steadily in one direction, maintaining the same focal length and focus throughout. For vertical panoramas, use portrait orientation and overlap vertically.
In complex scenes with foreground elements, increase your overlap to 50-60% to account for potential alignment issues. Remember to capture a bit more than you think you'll need, as you can always crop the final image.
Leveling Your Drone Camera

To achieve flawless panoramas with your drone, you'll need to master camera leveling techniques.
Start by calibrating your drone's gimbal to guarantee precise control over camera angles.
You can then utilize horizon alignment tools in your drone's app and make fine adjustments using the tripod head to keep your shots perfectly level.
Gimbal Calibration Importance
Before diving into panorama capture, verifying your drone's gimbal is properly calibrated is vital. A well-calibrated gimbal stabilizes your camera, resulting in smoother footage and sharper images. It's significant for capturing seamless panoramas, as even slight misalignments can lead to stitching errors.
To calibrate your gimbal, start by placing your drone on a flat surface. Access the calibration settings in your drone's app and follow the on-screen instructions. During calibration, your drone will adjust the gimbal through various positions to guarantee accuracy across all axes.
Here's a quick guide to common gimbal issues and their solutions:
| Issue | Cause | Solution |
|---|---|---|
| Drifting | Sensor drift | Recalibrate gimbal |
| Shaking | Loose screws | Tighten connections |
| Off-center | Misalignment | Reset gimbal position |
| Unresponsive | Software glitch | Restart drone |
Regular calibration maintains your gimbal's performance and extends its lifespan. It's especially important after transporting your drone or experiencing a crash. By keeping your gimbal in top condition, you'll capture stunning panoramas with precise alignment and minimal post-processing required.
Horizon Alignment Tools
While a well-calibrated gimbal is essential, horizon alignment tools are equally important for capturing flawless panoramas. These tools help you guarantee your drone's camera is perfectly level, preventing skewed or tilted images that can ruin your stitching efforts.
Most modern drones come equipped with built-in horizon alignment features. You'll find these in your drone's camera settings or flight app. They typically display a virtual horizon line or bubble level on your control screen. Adjust your drone's position until this indicator shows a perfectly level orientation.
For more precise control, consider using third-party apps designed specifically for panorama shooting. These often offer advanced horizon alignment tools with greater accuracy. Some even provide real-time feedback and automatic adjustments.
Don't forget about post-processing options. Software like Adobe Lightroom or PTGui includes horizon straightening tools that can fine-tune your images after capture. However, it's always best to get it right in-camera to preserve image quality.
When using horizon alignment tools, take your time and make small adjustments. A perfectly level horizon will noticeably improve your panorama's overall quality and make the stitching process much smoother.
Tripod Head Adjustments
A steady, level camera is essential for capturing seamless panoramas with your drone. To achieve this, you'll need to adjust your drone's camera settings and flight controls carefully.
Start by enabling your drone's tripod mode, which reduces its speed and sensitivity, allowing for more precise movements.
Next, use your drone's built-in gimbal to level the camera. Most modern drones have a three-axis gimbal that you can adjust remotely. Confirm the roll axis is perfectly horizontal and the pitch axis is set to your desired angle. You'll want to keep the yaw axis locked to maintain consistent framing as you rotate the drone.
Check your drone's onscreen display for level indicators. Many models offer virtual horizon lines or bubble levels to help you fine-tune your camera's position. If your drone lacks these features, you can use the grid overlay in your camera app as a reference.
For added stability, consider using your drone's automated panorama mode if available. This feature will automatically rotate the drone and capture images at preset intervals, confirming consistent overlap between shots for easier stitching later.
Consistent Exposure Across Frames
Achieving consistent exposure across frames is essential for seamless panorama stitching. To guarantee uniform exposure, lock your camera's settings manually. Set the aperture, shutter speed, and ISO to fixed values that work well for the entire scene. This prevents automatic adjustments between shots, which can cause noticeable variations in the final panorama.
Use the spot metering mode to measure the light in the brightest area of your scene. Then, adjust your exposure settings accordingly. It's better to slightly underexpose than overexpose, as you can recover shadow details more easily in post-processing.
Here's a quick guide to help you maintain consistent exposure:
| Setting | Why It's Important | How to Set It |
|---|---|---|
| Aperture | Controls depth of field | Choose f/8 to f/11 for sharpness |
| Shutter Speed | Affects motion blur | Use 1/125s or faster for handheld shots |
| ISO | Determines sensor sensitivity | Keep it low (100-400) to minimize noise |
| White Balance | Guarantees consistent color temperature | Set manually based on lighting conditions |
| Exposure Comp | Fine-tunes overall exposure | Adjust as needed, typically -0.3 to -0.7 |
Remember to take test shots and review your histogram before capturing the final panorama sequence.
Optimal Camera Settings for Stitching
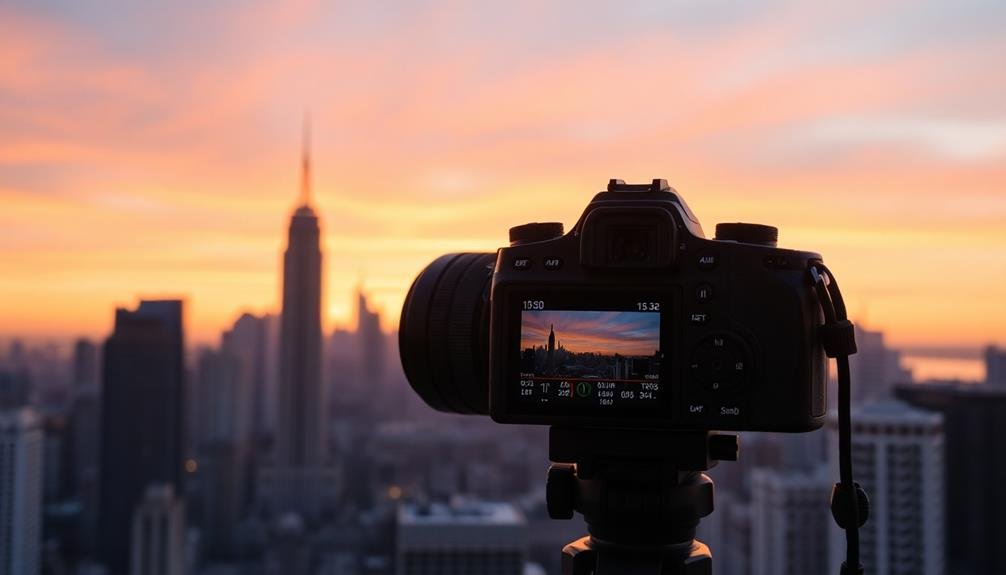
To achieve seamless panoramas, you'll need to master manual mode essentials on your camera.
Set consistent exposure settings across all frames, including ISO, shutter speed, and white balance.
Control your focus and aperture carefully, typically using a mid-range f-stop for ideal depth of field and sharpness throughout the scene.
Manual Mode Essentials
When capturing images for panorama stitching, manual mode is your best friend. It gives you complete control over your camera's settings, ensuring consistency across all shots in your panorama sequence. You'll want to maintain the same exposure, focus, and white balance throughout the series to avoid visible seams in the final stitched image.
Start by setting your camera to manual mode and adjusting these key parameters:
- Aperture: Choose a narrow aperture (high f-number) to maximize depth of field, ensuring sharpness throughout the scene.
- Shutter speed: Select a speed fast enough to prevent camera shake, typically 1/60th of a second or faster.
- ISO: Keep it as low as possible to minimize noise, adjusting only if necessary for proper exposure.
- White balance: Set a custom white balance or choose a preset that matches your lighting conditions.
Once you've dialed in these settings, don't change them between shots. Use the same focal length throughout the sequence, and avoid using polarizing filters as they can cause uneven effects across the sky.
Consistent Exposure Settings
Building on the manual mode foundation, consistent exposure settings are key to seamless panorama stitching. You'll want to maintain the same aperture, shutter speed, and ISO across all shots in your panorama sequence. This guarantees uniform brightness and depth of field throughout the final image.
Start by setting your aperture to f/8 or f/11 for ideal sharpness and depth of field. Choose a shutter speed that's fast enough to prevent camera shake but slow enough to capture sufficient light. For ISO, select the lowest value that allows for proper exposure without introducing noise.
Use your camera's spot metering mode to measure light in the brightest area of your scene. This prevents overexposure in highlights while maintaining detail in shadows. Once you've determined the ideal settings, lock them in place using your camera's AE-L (Auto Exposure Lock) function.
Don't forget to switch off auto white balance and set a fixed color temperature. This prevents color shifts between frames that could disrupt the seamless look of your panorama.
Focus and Aperture Control
Mastering focus and aperture control is essential for creating sharp, well-stitched panoramas. You'll want to guarantee consistent focus across all images in your sequence to avoid misalignment issues during stitching.
Set your camera to manual focus and choose a focal point that's about one-third into your scene. This technique, known as the hyperfocal distance method, maximizes your depth of field.
For aperture, select a value that provides sufficient depth of field without compromising image quality. Generally, an aperture between f/8 and f/11 works well for most panoramas. Remember, extremely small apertures can introduce diffraction, reducing overall sharpness.
To achieve ideal results, follow these steps:
- Switch to manual focus mode
- Set your focal point using the hyperfocal distance method
- Choose an aperture between f/8 and f/11
- Take a test shot and review for sharpness throughout the frame
Manual Panorama Vs Automated Modes

Photographers face a choice when creating panoramic images: manual stitching or automated modes.
Manual panorama techniques give you full control over every aspect of the process. You'll need to carefully plan your shots, maintain consistent settings, and overlap each frame by about 30%. This method allows for precise adjustments and can result in higher quality images, especially in challenging lighting conditions.
Automated modes, found in many modern cameras and smartphones, simplify the process. They guide you through the panning motion and automatically capture multiple frames. While convenient, these modes may struggle with complex scenes or varying light. They're best suited for straightforward panoramas in consistent lighting.
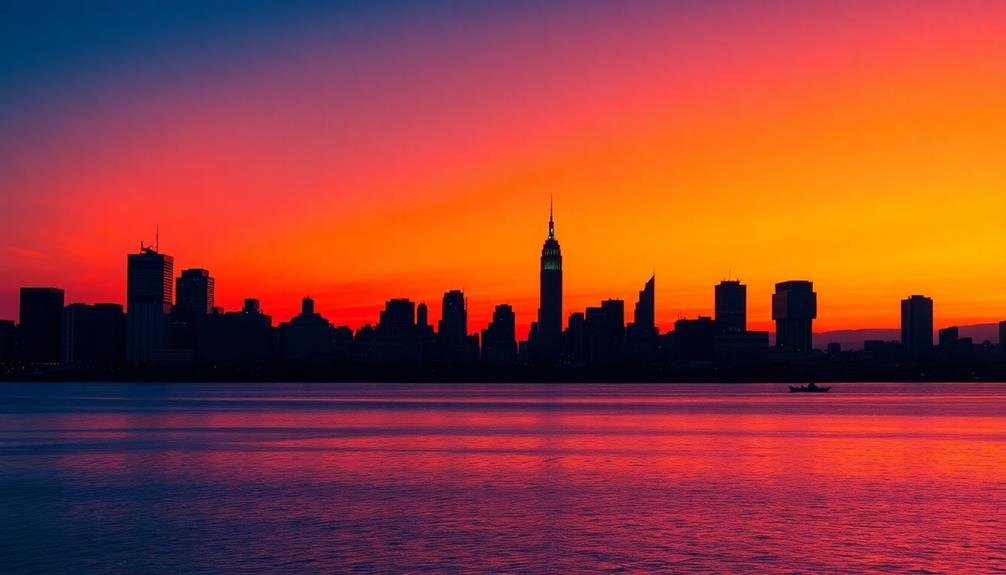
When choosing between manual and automated methods, consider your skill level and the complexity of your scene. If you're shooting a cityscape with varying light levels or intricate details, manual stitching might be your best bet.
For quick, casual panoramas, automated modes can produce satisfactory results. Remember, regardless of your chosen method, proper technique and attention to detail are essential for creating stunning panoramic images that capture the full scope of your subject.
Post-Processing Software for Panoramas

Nearly every panoramic image requires some level of post-processing to achieve the best results. While many cameras offer in-built panorama modes, dedicated software can take your images to the next level. You'll find numerous options available, from free to premium, each with its own set of features and learning curve.
When choosing post-processing software for panoramas, consider these key factors:
- Ease of use: Look for intuitive interfaces that won't overwhelm you with complexity.
- Stitching accuracy: Opt for software that can handle various types of panoramas, including 360-degree images.
- Editing capabilities: Ascertain the software offers tools for color correction, exposure adjustment, and perspective control.
- Output options: Choose software that supports multiple file formats and resolutions for different uses.
Popular choices include Adobe Lightroom, PTGui, and Hugin. Lightroom offers a user-friendly interface and seamless integration with other Adobe products. PTGui excels in complex stitching scenarios and provides advanced control. Hugin, a free open-source option, offers powerful features for those willing to invest time in learning its interface.
Experiment with different software to find the one that best suits your workflow and produces the results you're after.
Correcting Distortion in Aerial Panoramas

Aerial panoramas present unique challenges when it comes to distortion correction. When you're shooting from high altitudes, the curvature of the Earth becomes more pronounced, leading to noticeable distortion in your final image. To address this, you'll need to use specialized software tools designed for aerial panorama correction.
Start by adjusting the horizon line in your stitched image. Many panorama software packages offer a horizon straightening tool that can automatically detect and correct any tilt.
Next, focus on correcting barrel distortion, which is common in wide-angle aerial shots. Use lens correction profiles if available, or manually adjust the distortion parameters.
Pay attention to perspective distortion, which can make distant objects appear unnaturally small. Utilize perspective correction tools to maintain a more natural look across the entire panorama.
Don't forget to address color and exposure inconsistencies between individual frames, as lighting conditions can change rapidly during aerial shoots.
Frequently Asked Questions
How Many Individual Photos Are Typically Needed for a Panoramic Skyline Shot?
You'll typically need 3 to 7 individual photos for a panoramic skyline shot. However, the exact number depends on your lens's focal length, the scene's width, and how much overlap you're aiming for between shots.
Can I Create Panoramas Using a Smartphone Instead of a Drone?
Yes, you can create panoramas using your smartphone. Most modern phones have built-in panorama modes. You'll simply need to hold your phone steady and pan slowly across the scene you're capturing. It's easy and convenient.
What File Format Is Best for Saving Panoramic Images?
For panoramic images, you'll want to save in TIFF or RAW formats for the highest quality. If you're sharing online, use JPEG at a high quality setting. PNG is also good for web use without compression artifacts.
How Do I Handle Moving Objects When Shooting a Panoramic Sequence?
To handle moving objects in panoramic sequences, you'll want to shoot quickly and try to time your shots between movements. If that's not possible, you can remove or clone out the objects during post-processing.
Are There Any Legal Considerations When Capturing Aerial Panoramas in Urban Areas?
You'll need to take into account privacy laws, restricted airspace, and local regulations when capturing aerial panoramas in urban areas. Always obtain necessary permits, respect no-fly zones, and be mindful of people's privacy in residential areas.
In Summary
You've now got the tools to create breathtaking panoramic skyline shots with your drone. Remember to overlap your shots, keep your camera level, maintain consistent exposure, and use ideal settings. Whether you choose manual or automated modes, you'll be well-equipped to capture stunning vistas. Don't forget to leverage post-processing software and correct any distortion in your aerial panoramas. With practice, you'll be producing professional-quality panoramas that'll take your audience's breath away.
As educators and advocates for responsible drone use, we’re committed to sharing our knowledge and expertise with aspiring aerial photographers.


Leave a Reply