Master aerial bracketing to capture stunning sky shots with these 10 tricks. Understand exposure basics and choose the right bracket range for your scene. Adjust shutter speed to freeze or blur cloud movement. Use aperture priority mode for consistent exposures. Experiment with ISO settings to balance light and noise. Implement graduated neutral density filters for high-contrast scenes. Leverage HDR techniques for dynamic range. Time your shots during golden and blue hours for ideal light. Post-process bracketed images effectively to bring out details. Finally, practice stability techniques to guarantee sharp results. These tips are just the beginning of your journey to breathtaking aerial photography.
Key Takeaways
- Master exposure bracketing basics, capturing multiple photos at varying exposure levels to ensure details in bright and dark areas.
- Assess scene dynamic range and choose appropriate bracket ranges based on lighting conditions and contrast.
- Utilize Aperture Priority mode for consistent exposures across bracketed shots, maintaining fixed aperture and ISO.
- Experiment with shutter speeds to capture cloud movement effectively, using faster speeds for crisp details or slower for dreamy effects.
- Implement graduated neutral density filters or HDR techniques to balance exposure in high-contrast aerial scenes.
Understand Exposure Bracketing Basics
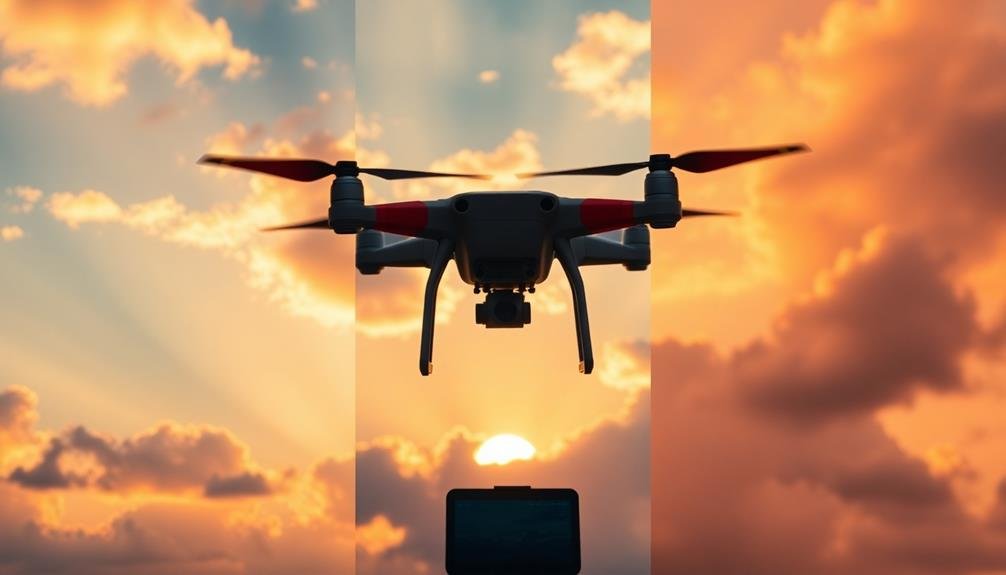
Exposure bracketing is a photographer's secret weapon for capturing stunning sky shots. It's a technique where you take multiple photos of the same scene at different exposure levels. Typically, you'll shoot one image at the camera's recommended exposure, one underexposed, and one overexposed. This guarantees you capture details in both the brightest and darkest areas of your sky.
To bracket effectively, you'll need to understand your camera's exposure compensation settings. Most cameras allow you to adjust exposure in increments of 1/3 or 1/2 stops. For aerial photography, you might want to use wider brackets, such as -2, 0, and +2 stops, to account for the extreme contrast often found in sky shots.
You can set up bracketing manually or use your camera's auto-bracketing (AEB) feature if available. When shooting manually, adjust your shutter speed to change exposure, keeping aperture constant to maintain consistent depth of field.
Choose the Right Bracket Range
When choosing your bracket range for aerial sky shots, you'll need to evaluate the scene's dynamic range carefully.
Assess the difference between the brightest and darkest areas in your composition to determine how many stops you should bracket.
Factor in the current lighting conditions, as harsh midday sun or low-light situations may require a wider bracket range to capture all the details in your sky and landscape.
Assess Scene Dynamic Range
Mastering the art of aerial bracketing begins with accurately evaluating your scene's dynamic range. This vital step determines how many exposures you'll need to capture the full tonal range of your aerial shot.
To assess the dynamic range, start by examining the brightest and darkest areas of your scene through your camera's viewfinder or live view. Pay attention to the sky's highlights and the shadows in the landscape below. Use your camera's histogram as a guide; if it shows clipping on either end, you'll need to bracket.
Next, take a test shot at your camera's base ISO using matrix metering. Review the image and its histogram. If you notice lost details in highlights or shadows, it's time to bracket.
For scenes with moderate contrast, a 3-shot bracket at -2, 0, and +2 EV might suffice. However, high-contrast scenes, like those with bright sunlit clouds and dark shadows, may require a 5-shot or even 7-shot bracket.
Consider Lighting Conditions
Various lighting conditions greatly impact your choice of bracket range for aerial photography.
When shooting in bright, harsh sunlight, you'll need a wider bracket range to capture details in both highlights and shadows. Consider using a 3-stop bracket range (-2, 0, +2) or even a 5-stop range (-3, -1.5, 0, +1.5, +3) to guarantee you capture the full dynamic range of the scene.
In overcast conditions, you can often use a narrower bracket range, as the contrast between light and dark areas is less pronounced. A 2-stop range (-1, 0, +1) might be sufficient in these situations.
During golden hour or blue hour, when the light is softer and more even, you may only need a 1-stop bracket range (-0.5, 0, +0.5) to capture the subtle variations in light.
For sunrise or sunset shots, where the sky can be much brighter than the foreground, opt for a wider bracket range to capture both the vibrant sky colors and the darker landscape details.
Always be prepared to adjust your bracket range based on the specific lighting conditions you encounter during your aerial shoot.
Adjust Shutter Speed for Movement
The dance of clouds and movement of light across the sky can make or break an aerial photograph. To capture this dynamic beauty, you'll need to adjust your shutter speed strategically. Fast-moving clouds require a quicker shutter speed to freeze their motion, typically 1/250th of a second or faster. This approach works well for dramatic, well-defined cloud formations.
For a softer, dreamier effect, slow down your shutter speed to 1/30th of a second or slower. This technique allows cloud movement to blur slightly, creating a sense of motion in your image. When shooting at sunset or sunrise, slower shutter speeds can also capture the gradual shift of light and color across the sky.
Don't forget to reflect on your camera's movement when shooting from an aircraft. Higher shutter speeds help combat camera shake, ensuring sharp images even in turbulent conditions. If you're using a slower shutter speed, stabilize your camera with a gyroscopic stabilizer or brace it against a solid surface.
Experiment with different shutter speeds to find the sweet spot that balances motion blur and sharpness for your specific scene and lighting conditions.
Utilize Aperture Priority Mode
When shooting aerial brackets, you'll find Aperture Priority mode invaluable for maintaining consistent exposures across shots.
This semi-automatic mode allows your camera to compensate for changing light conditions, ensuring your bracketed images are properly exposed.
You can quickly adjust the aperture to control depth of field while letting the camera handle shutter speed, making it easier to capture stunning sky shots in rapidly changing aerial environments.
Consistent Exposures Across Shots
For consistent exposures across multiple aerial shots, aperture priority mode is your best friend. This semi-automatic setting allows you to maintain a fixed aperture while the camera adjusts shutter speed to compensate for changing light conditions.
By keeping your aperture constant, you'll guarantee a consistent depth of field throughout your bracketed series.
When shooting aerial landscapes, start by selecting an aperture that provides the desired depth of field, typically between f/8 and f/11. As you capture your bracketed shots, the camera will automatically adjust the shutter speed to maintain proper exposure.
This approach helps you avoid unwanted variations in image sharpness or focus that might occur if you were to change apertures between shots.
To further enhance consistency, use your camera's Auto Exposure Bracketing (AEB) feature. Set it to capture three to five shots at different exposures, usually in 1-stop increments.
This technique guarantees you'll have a range of exposures to work with in post-processing, allowing you to create stunning HDR images or simply choose the best-exposed shot from the series.
Remember to keep your ISO fixed to maintain consistent noise levels across your bracketed shots.
Automatic Exposure Compensation
Photographers capturing aerial shots can leverage automatic exposure compensation in aperture priority mode to fine-tune their images. This technique allows you to maintain control over your depth of field while letting the camera adjust shutter speed for ideal exposure.
To use this feature, set your camera to aperture priority mode and select your desired f-stop. Then, use the exposure compensation dial to adjust the overall brightness of your image.
For sky shots, you'll often need to overexpose slightly to capture details in darker areas. Start by dialing in +0.3 or +0.7 exposure compensation and review your results. If the sky appears washed out, decrease the compensation. Conversely, if shadows are too dark, increase it.
Remember, you're aiming for a balance between preserving sky details and revealing ground features.
When shooting in changing light conditions, such as during sunrise or sunset, you can use exposure compensation to quickly adapt. As the light intensity shifts, adjust your compensation accordingly to maintain consistent exposures across your series of shots.
This approach guarantees you'll capture the full range of colors and tones in the sky while maintaining the flexibility to make creative decisions in post-processing.
Quick Aperture Adjustments
Building on the concept of aperture priority mode, quick aperture adjustments offer another layer of control for aerial photographers. When you're shooting sky scenes, you'll often need to adapt quickly to changing light conditions. Aperture priority mode lets you do just that, allowing you to swiftly alter the depth of field and light intake without fiddling with other settings.
To make quick aperture adjustments, familiarize yourself with your camera's control dial. Most modern DSLRs and mirrorless cameras feature a dedicated wheel for this purpose. By rotating it, you can instantly widen or narrow the aperture.
Remember, a wider aperture (smaller f-number) lets in more light and creates a shallower depth of field, while a narrower aperture (larger f-number) reduces light intake and increases depth of field.
Practice making these adjustments while keeping an eye on your exposure meter. You'll notice that as you change the aperture, your camera automatically adjusts the shutter speed to maintain proper exposure.
This interplay allows you to capture a range of creative effects, from dreamy, soft-focus cloud formations to tack-sharp landscapes with stunning detail from foreground to background.
Experiment With ISO Settings
Versatility in ISO settings can dramatically enhance your aerial bracketing technique. When shooting sky scenes, don't hesitate to push your ISO boundaries.
Start with your camera's base ISO, typically 100 or 200, for the clearest shot in your bracket. Then, incrementally increase the ISO for subsequent shots to capture more light and detail in darker areas of the sky.
For daytime aerial shots, try bracketing with ISOs 100, 400, and 800. This range allows you to maintain image quality while expanding your camera's dynamic range.
In low-light conditions or during sunset, experiment with higher ISOs like 1600 or 3200. These settings can reveal hidden colors and textures in the clouds that your eyes might miss.
Master Auto Exposure Bracketing (AEB)

Auto Exposure Bracketing (AEB) is a powerful tool in your aerial photography arsenal. It allows you to capture multiple shots of the same scene at different exposures, ensuring you don't miss the perfect shot due to challenging lighting conditions.
To master AEB, start by setting your camera to bracket mode and choosing the number of shots you want (typically three or five).
Next, select the exposure compensation range, usually in 1/3 or 1/2 stop increments. For high-contrast sky shots, try a wider range like ±2 stops.
As you're shooting, keep your drone steady and use a fast shutter speed to minimize motion blur.
When processing your bracketed images, you've got options. You can choose the best single exposure or combine them into an HDR image.
For HDR, use software like Photomatix or Adobe Lightroom to merge the exposures, then fine-tune the result.
Implement Graduated Neutral Density Filters

While Auto Exposure Bracketing is effective, Graduated Neutral Density (GND) filters offer another powerful method for capturing stunning sky shots.
These filters darken the sky while leaving the ground untouched, allowing you to balance exposure in high-contrast scenes. When implementing GND filters in your aerial photography, you'll need to choose between soft and hard edge filters based on your subject matter.
To use GND filters effectively:
- Select the appropriate strength (1-4 stops) based on the scene's contrast
- Position the filter's gradient line at the horizon
- Adjust the filter's angle to match the horizon's tilt
- Use a filter holder for easier manipulation during flight
- Combine with circular polarizers for enhanced sky saturation
Leverage HDR for Dynamic Scenes
High Dynamic Range (HDR) photography shines when capturing aerial scenes with extreme contrast. You'll find it particularly useful for balancing bright skies with darker landscapes below. To leverage HDR effectively, you'll need to shoot multiple exposures of the same scene.
Start by setting your camera to Aperture Priority mode and enabling Auto Exposure Bracketing (AEB). Typically, you'll want to capture at least three exposures: one properly exposed, one underexposed, and one overexposed. For more complex scenes, consider shooting five or seven brackets.
When shooting from a drone, it's essential to maintain stability. Use a tripod mode if available, or hover in place with minimal movement. Shoot in RAW format to preserve maximum data for post-processing.
In post-production, merge your bracketed images using HDR software or your preferred editing tool. Adjust tone mapping to achieve a natural look, avoiding the overprocessed appearance that plagues many HDR images.
Pay special attention to highlight and shadow recovery, ensuring you retain detail in both bright skies and darker ground elements.
Time Your Shots for Optimal Light
Timing is everything when it comes to capturing stunning aerial sky shots. You'll want to plan your flights around the golden hours—just after sunrise and before sunset—when the light is soft and warm.
Don't overlook the blue hour, that magical time just before sunrise or after sunset, when the sky takes on ethereal hues. Keep an eye on the weather forecast, as dramatic cloud formations can add depth and interest to your images.
Consider these factors when timing your aerial shots:
- Sun position relative to your subject
- Cloud coverage and movement
- Seasonal changes in light quality
- Local events or activities that might enhance your composition
- Potential for unique atmospheric conditions like fog or mist
Be prepared to act quickly, as ideal lighting conditions can change rapidly. You'll often have a narrow window of opportunity to capture the perfect shot.
Experiment with different times of day to understand how light interacts with your subjects. Remember, what works for one location mightn't be suitable for another.
Post-Process Bracketed Images Effectively
Once you've captured your bracketed aerial images, the real magic happens in post-processing. Start by importing your bracketed series into your preferred editing software. Choose a program that offers HDR merging capabilities, such as Adobe Lightroom or Photomatix Pro. Align your images carefully to eliminate any movement between shots, which is essential for aerial photography.
When merging, pay attention to ghosting and artifacts, especially around moving elements like clouds. Adjust your software's deghosting settings to minimize these issues.
After merging, don't settle for the default HDR look. Fine-tune the tone mapping to achieve a natural, balanced result that doesn't appear over-processed. Focus on recovering shadow details without blowing out highlights. Use local adjustments to enhance specific areas of the sky, such as boosting color saturation in sunset hues or increasing contrast in cloud formations.
Be mindful of noise in darker areas, applying selective noise reduction as needed. Finally, sharpen your image subtly to bring out texture in clouds and landscape features. Remember, the goal is to create a stunning sky shot that maintains realism while showcasing the dynamic range captured through bracketing.
Frequently Asked Questions
How Do I Handle Lens Flare When Bracketing Sky Shots?
To handle lens flare when bracketing sky shots, you'll want to use a lens hood, adjust your angle, or shade the lens with your hand. You can also embrace the flare for artistic effect if it suits your vision.
What's the Best Tripod for Aerial Bracketing in Windy Conditions?
For aerial bracketing in windy conditions, you'll want a sturdy carbon fiber tripod. Look for one with a low center of gravity, adjustable legs, and a hook for added weight. Don't forget vibration reduction features for extra stability.
Can I Use Bracketing Techniques for Night Sky Photography?
Yes, you can use bracketing for night sky photography. It's especially useful for capturing the Milky Way or star trails. You'll want to vary your exposure times to capture different levels of light and detail in the sky.
How Do I Maintain Focus Consistency Across Bracketed Shots?
To maintain focus consistency across bracketed shots, you'll want to use manual focus. Set your focus once, then lock it. Don't touch the focus ring between shots. Use a tripod for stability and avoid camera shake.
Are There Specific Camera Models Best Suited for Aerial Bracketing?
You'll find many cameras suitable for aerial bracketing. Look for models with fast continuous shooting, wide dynamic range, and good high ISO performance. Canon and Nikon DSLRs, Sony mirrorless cameras, and DJI drones are popular choices.
In Summary
You've now got a powerful toolkit for capturing breathtaking aerial sky shots. Don't be afraid to experiment with these bracketing techniques and find what works best for your style. Remember, practice makes perfect, so get out there and start shooting! With patience and persistence, you'll soon be creating stunning images that showcase the sky's ever-changing beauty. Keep pushing your boundaries, and you'll see your aerial photography skills soar to new heights.

As educators and advocates for responsible drone use, we’re committed to sharing our knowledge and expertise with aspiring aerial photographers.


Leave a Reply