
Capture breathtaking rock climbing shots with these five epic camera angles. Start with a top-down vertical perspective to emphasize the climb's height. Create energy with a dynamic diagonal ascent, showcasing the climber's path. Get up close with cliff face shots, highlighting intricate details. Step back for sweeping landscape context, framing the climb within nature's grandeur. Finally, immerse viewers with the climber's point of view using helmet-mounted cameras. Each angle offers unique storytelling opportunities, from showcasing scale to capturing raw emotion. Safety and communication are essential, so plan carefully. These techniques will elevate your climbing photography, but there's always more to explore in this thrilling genre.
Top-Down Vertical Perspective
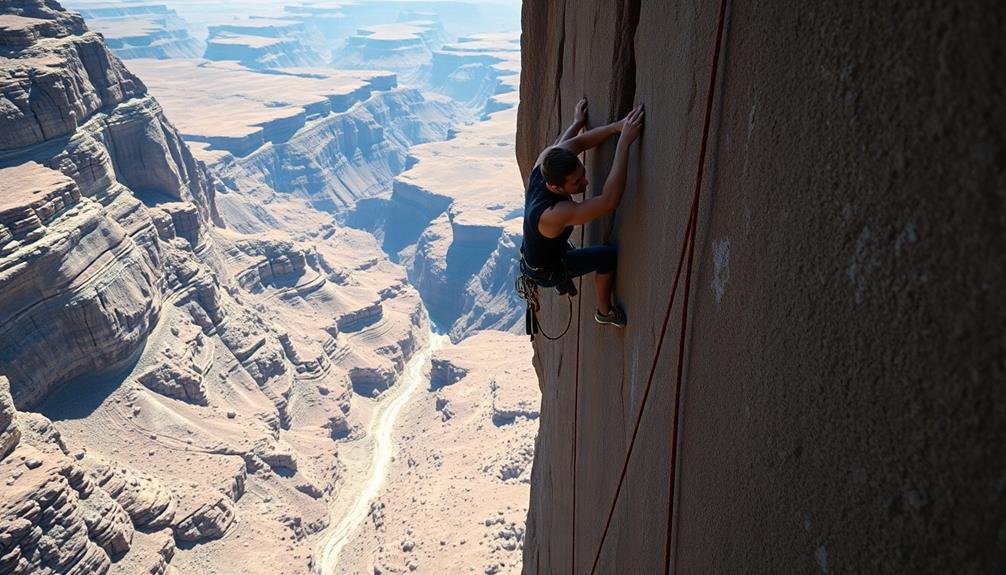
From above, the top-down vertical perspective offers a unique and dramatic view of rock climbing. This angle captures the sheer verticality of the climb, emphasizing the height and exposure faced by the climber. To achieve this shot, you'll need to position yourself directly above the climber, either by rappelling down or finding a higher vantage point.
When shooting top-down, focus on composition. Frame the climber against the rock face, highlighting the texture and features of the rock. Include the ground far below to create a sense of scale and height. Use a wide-angle lens to capture more of the scene and accentuate the vertical drop.
Timing is essential for this angle. Capture the climber mid-move, showing the tension in their body and the precariousness of their position. Pay attention to lighting; early morning or late afternoon light can create dramatic shadows and enhance the rock's texture.
Safety is paramount when shooting from above. Always use proper climbing gear and techniques, and never compromise your safety or the climber's for a shot. Consider using a drone for similar perspectives if climbing isn't feasible.
Dynamic Diagonal Ascent
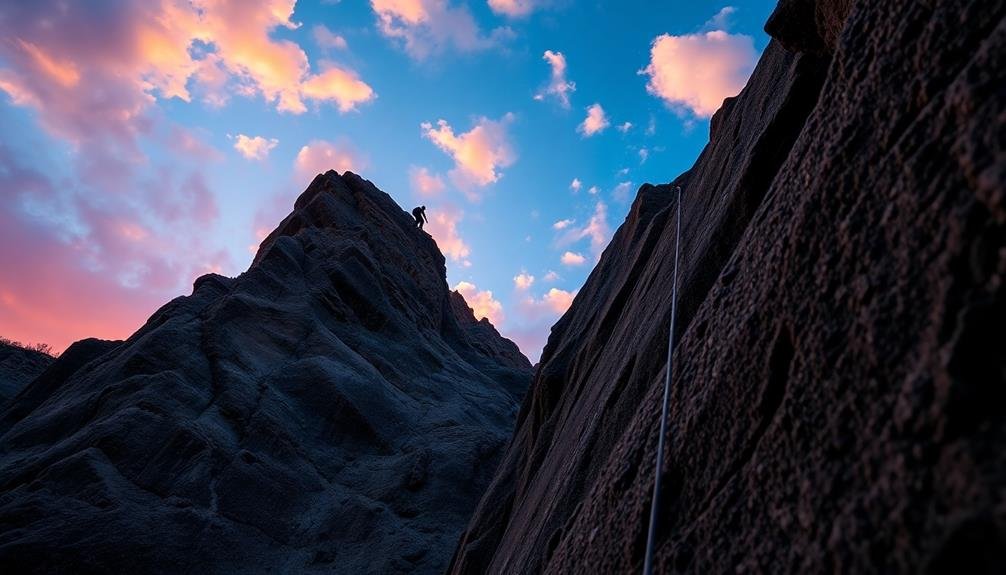
The dynamic diagonal ascent angle introduces a sense of movement and energy to rock climbing photography. By positioning your camera at a diagonal to the climber's path, you'll capture the upward motion and create a more engaging composition. This technique works particularly well when shooting lead climbers or those tackling steep, overhanging routes.
To achieve this angle, you'll need to find a vantage point that allows you to frame the climber diagonally across the frame. Look for spots where you can safely position yourself slightly below and to the side of the climber's route. This perspective emphasizes the height and difficulty of the climb while showcasing the climber's strength and determination.
When shooting with a dynamic diagonal ascent angle, keep these tips in mind:
- Use a wide-angle lens to capture more of the surrounding rock face and emphasize the scale of the climb.
- Experiment with different shutter speeds to either freeze the action or create a slight motion blur for added dynamism.
- Pay attention to the background and try to include interesting rock formations or landscapes to enhance the overall composition.
Remember to prioritize safety and communication with the climber to guarantee you get the best shots without compromising anyone's well-being.
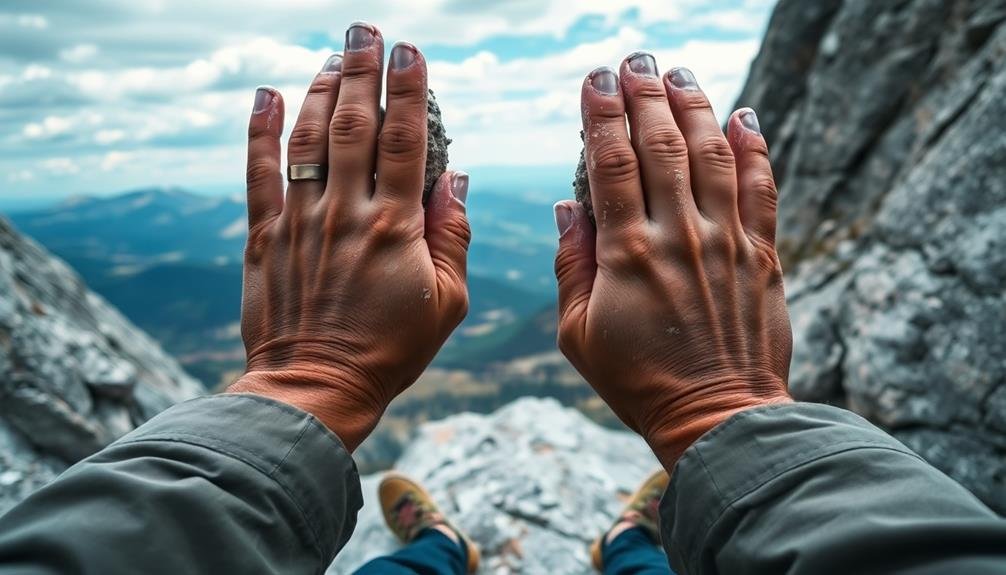
Cliff Face Close-Up
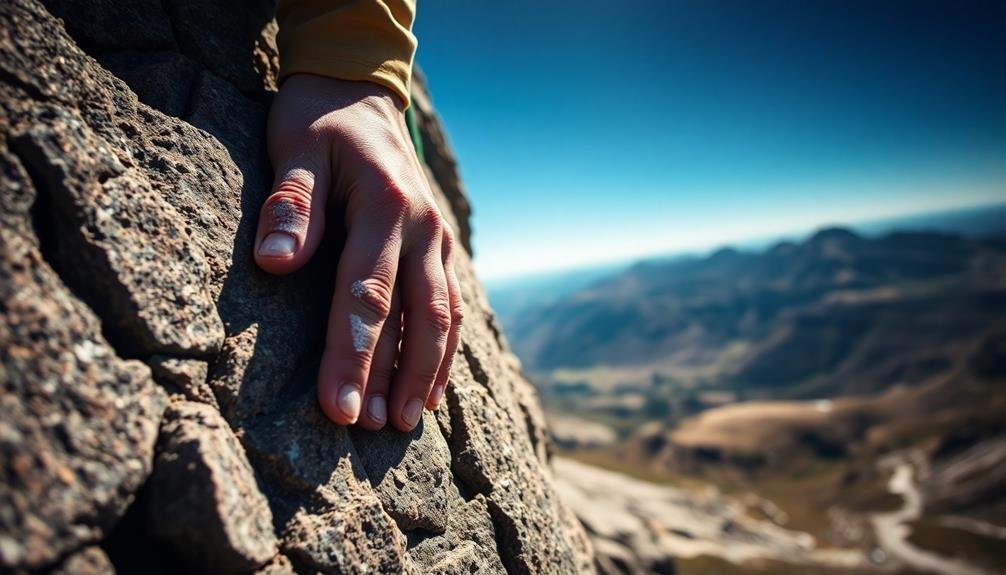
Cliff face close-ups offer a unique perspective in rock climbing photography, allowing you to capture the intricate details of the rock and the climber's interaction with it. To achieve this angle, position yourself parallel to the cliff face, either by rappelling down or using a long lens from a nearby vantage point.
Focus on the climber's hands and feet as they grip the rock. Highlight the texture of the stone, emphasizing cracks, crevices, and unique features that the climber must navigate. You'll want to use a shallow depth of field to isolate the subject from the background, creating a sense of intimacy and concentration.
Experiment with different focal lengths to vary your compositions. A wide-angle lens can capture the climber's full body in relation to the rock face, while a telephoto lens allows you to zoom in on specific details like chalked hands or tensed muscles.
Don't forget to adjust your shutter speed to freeze the action or create a slight blur for a sense of movement.
Lighting is vital for cliff face close-ups. Side lighting can accentuate the rock's texture, while backlighting can create dramatic silhouettes.
Consider using a flash to fill in shadows and reveal details in challenging light conditions.
Sweeping Landscape Context
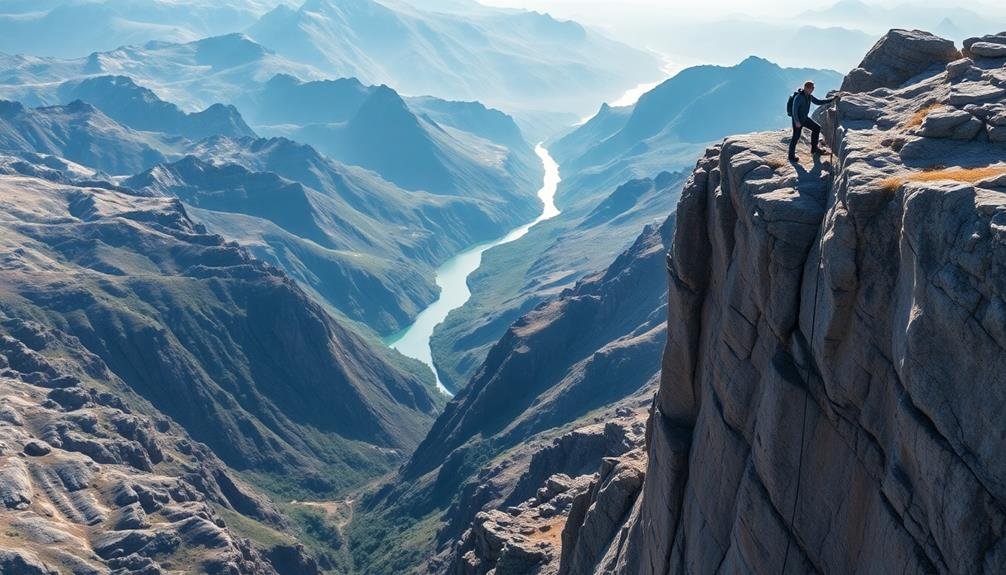
Majestic vistas provide a stunning backdrop for rock climbing photography, showcasing the scale and beauty of the natural environment. To capture sweeping landscape context, you'll need to step back and find elevated vantage points. Use wide-angle lenses to encompass the entire scene, including the climber, rock face, and surrounding terrain.
Consider the following techniques to enhance your sweeping landscape shots:
- Golden hour lighting: Shoot during sunrise or sunset for warm, dramatic lighting that accentuates the landscape's contours and adds depth to your images.
- Foreground elements: Include interesting rocks, vegetation, or other natural features in the foreground to create depth and lead the viewer's eye to the climber.
- Rule of thirds: Position the climber off-center, using the grid feature on your camera to align them with intersecting lines for a more visually appealing composition.
Don't forget to adjust your camera settings for ideal depth of field. Use a smaller aperture (higher f-number) to keep both the foreground and background in focus.
Experiment with different focal lengths to find the perfect balance between showcasing the climber and the expansive landscape. Remember, these shots tell a story of human achievement against nature's grand backdrop.
Climber's Point of View
Capturing a climber's point of view can transport viewers directly into the action, creating an immersive and thrilling experience. To achieve this perspective, you'll need to get creative with your camera placement and equipment.
Consider using a helmet-mounted camera or a chest harness to capture the climber's exact view. This setup allows you to showcase the rock face, hand placements, and the dizzying heights below. For a more stable shot, attach a small camera to the climber's harness or quickdraw.
Don't forget to capture the climber's hands and feet in the frame. These elements add depth and context to the image, helping viewers understand the challenges of each move. Experiment with different focal lengths to emphasize the texture of the rock or the expanse of the surrounding landscape.
When editing, pay attention to the horizon line. Tilting it slightly can enhance the sense of vertigo and excitement.
Remember to communicate clearly with your climbing subject, ensuring their safety while you focus on getting the perfect shot. With practice, you'll master this thrilling perspective and create unforgettable climbing images.
Frequently Asked Questions
What Safety Precautions Should Photographers Take When Capturing Rock Climbing Shots?
You should prioritize your safety first. Use proper climbing gear, secure your camera equipment, and work with experienced climbers. Don't take unnecessary risks. Always communicate with your subjects and have a clear plan in place.
How Can Photographers Minimize Their Environmental Impact While Shooting Climbing Scenes?
You can minimize your environmental impact by sticking to established trails, avoiding trampling vegetation, packing out all trash, and using leave-no-trace principles. Don't disturb wildlife or move rocks. Consider carpooling to reduce emissions when traveling to locations.
What Are the Best Weather Conditions for Rock Climbing Photography?
You'll want clear, sunny days for the best light. Avoid harsh midday sun; opt for golden hour. Overcast conditions can work for moody shots. Mild temperatures are ideal, ensuring climbers aren't uncomfortable during long shoots.
Which Camera Lenses Are Most Suitable for Different Types of Climbing Shots?
For wide-angle shots, you'll want a 16-35mm lens. Use a 24-70mm for versatile mid-range shots. For close-ups, grab a 70-200mm telephoto. Don't forget a lightweight prime lens for low-light conditions and crisp details.
How Can Photographers Effectively Communicate and Collaborate With Climbers During Photoshoots?
You'll need to establish clear communication with climbers beforehand. Discuss your vision, plan shots, and use hand signals during the climb. Be flexible, respect the climber's safety, and don't rush them. Work as a team.
In Summary
You've now got the tools to take your rock climbing photography to new heights. Whether you're shooting from above, capturing dynamic angles, or getting up close and personal, these five perspectives will elevate your images. Don't forget to experiment with landscape shots and climber's-eye views too. Remember, great climbing photos aren't just about the climb—they're about telling a story. So grab your camera, hit the rocks, and start creating epic shots!
As educators and advocates for responsible drone use, we’re committed to sharing our knowledge and expertise with aspiring aerial photographers.


Leave a Reply