
Snowboarding photos that soar above the rest combine dynamic action, stunning landscapes, and raw athletic skill. You'll need to master perfect timing and composition, capturing riders mid-trick against breathtaking mountain backdrops. Harness natural light effects, like golden hour glow or dramatic backlighting, to add depth and atmosphere. Experiment with unique perspectives, including aerial shots from drones, to showcase the terrain's scale. Focus on highlighting each athlete's individual style and technical precision. Don't forget to take into account weather conditions and post-processing techniques to enhance your images. With these elements in play, you'll be well on your way to creating truly exceptional snowboarding photographs.
Capturing Dynamic Aerial Perspectives
Soar above the slopes to capture breathtaking aerial shots of snowboarders in action. You'll need to position yourself strategically, whether on a higher vantage point or using a drone. Look for locations that offer a clear view of jumps, halfpipes, or long runs to showcase the rider's full trajectory.
When shooting from above, focus on composition. Use the snow's texture and landscape features to create leading lines that draw the eye to the snowboarder. Experiment with different angles to emphasize the height and scale of jumps or the steepness of the terrain.
Timing is essential. Anticipate the rider's movements and be ready to capture the peak of their tricks. Use burst mode to increase your chances of getting the perfect shot. Consider the lighting conditions; early morning or late afternoon sun can cast long shadows, adding depth to your images.
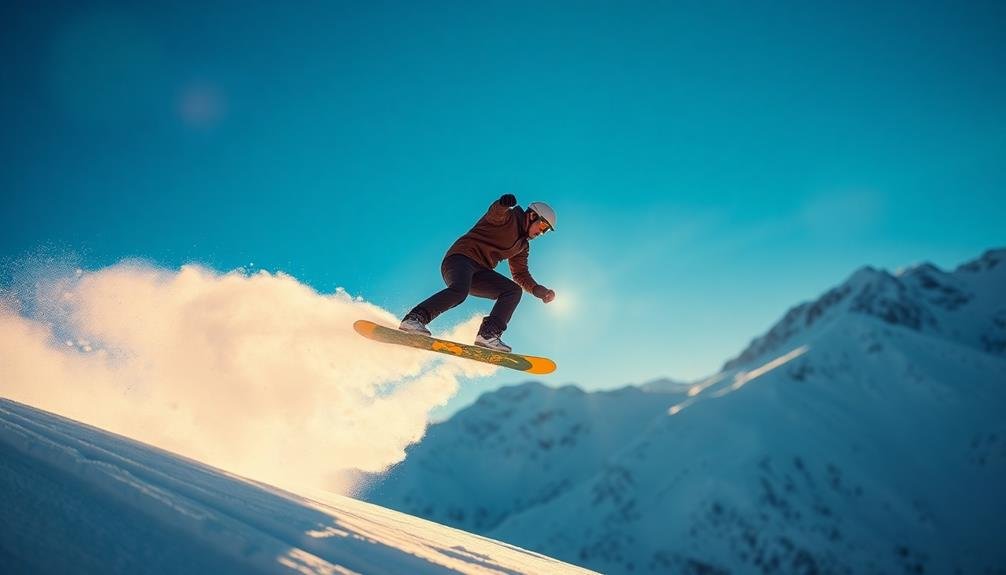
Pay attention to the snowboarder's form and style. Look for moments that highlight their technique, such as a perfectly executed grab or a spray of powder.
Don't forget to capture the surrounding environment to give context to the action.
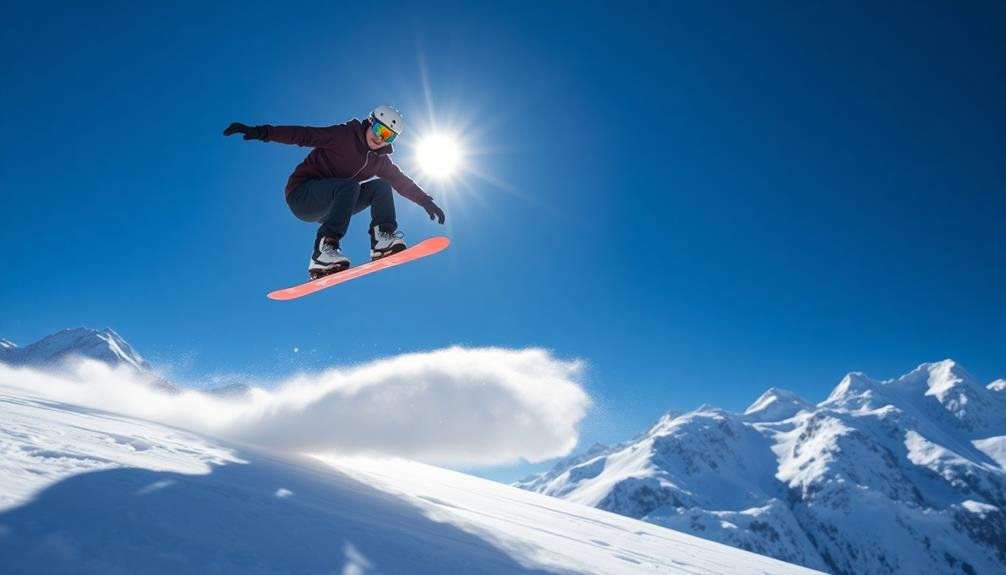
Perfect Timing and Composition
Mastering the art of snowboarding photography hinges on perfect timing and composition. You'll need to anticipate the rider's movements and capture the peak moment of action. This often means shooting just before the apex of a jump or trick, allowing for the full extension of the rider's body in the frame.
To achieve perfect composition, apply the rule of thirds. Position your subject off-center, placing them at the intersection points of imaginary grid lines. This creates a more dynamic and visually appealing image.
Don't forget to leave space in the direction the snowboarder is moving, giving the photo a sense of motion and direction. Consider the background elements as well. A clear blue sky or snow-capped mountains can provide a stunning backdrop, but be careful not to let them overpower your subject.
Use leading lines, such as the edge of a halfpipe or the trajectory of the snowboarder, to guide the viewer's eye through the image. Experiment with different angles and perspectives to add variety to your shots. Low-angle shots can make the rider appear larger and more imposing, while overhead shots can showcase the terrain and the rider's relationship to it.
Drone Technology for Snowboarding Photography
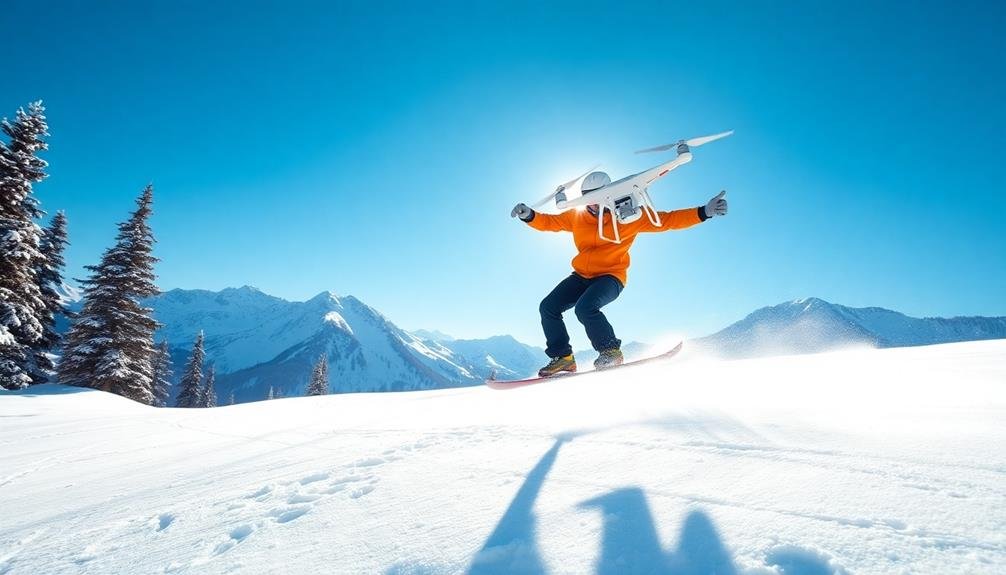
Drone technology has revolutionized snowboarding photography, offering unique perspectives that were once impossible to capture. You can now showcase riders from breathtaking aerial angles, revealing the full scope of the terrain and the snowboarder's path down the mountain.
Drones allow you to follow the action seamlessly, creating dynamic shots that convey speed and movement. When using drones for snowboarding photography, you'll need to take into account factors like battery life in cold conditions and wind resistance.
Choose a drone with high-quality stabilization to guarantee smooth footage. You'll also want to familiarize yourself with local regulations regarding drone usage in mountain areas.
To make the most of drone technology, experiment with different altitudes and angles. Capture wide, sweeping shots of the entire run, or get up close for detailed action shots.
You can even program flight paths to create consistent, repeatable shots. Don't forget to use the drone's ability to quickly change elevation, allowing you to shift from ground-level to bird's-eye views in a single, fluid motion.
With practice, you'll be able to produce stunning, professional-quality snowboarding photos that truly soar above the rest.
Showcasing Terrain and Landscape

When capturing snowboarding photos, you'll want to highlight the breathtaking terrain and landscape.
Incorporate dramatic mountain backdrops to emphasize the sport's connection with nature, and utilize natural light effects to create stunning visual contrasts.
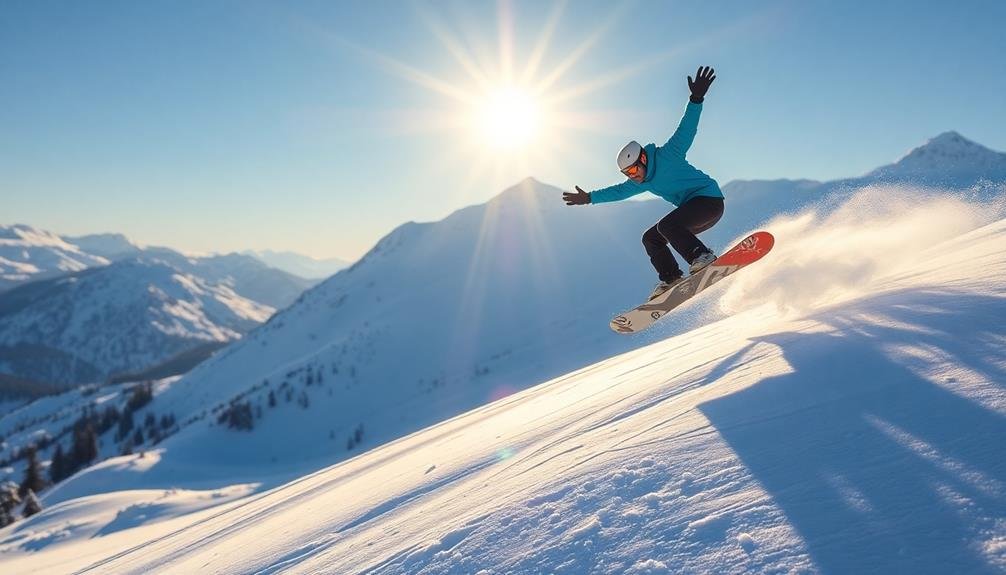
Dramatic Mountain Backdrops
As snowboarders carve their way down pristine slopes, capturing the majestic mountain terrain in the background can elevate your photos from good to breathtaking.
When framing your shots, position the rider to showcase the dramatic peaks behind them. Look for jagged ridgelines, snow-capped summits, and expansive valleys to create a sense of scale and grandeur.
Timing is essential. Shoot during the golden hours of sunrise or sunset when the mountains are bathed in warm, soft light. This creates long shadows and highlights the contours of the landscape.
Don't shy away from including clouds in your composition; they can add depth and drama to the sky.
Consider using a wide-angle lens to capture more of the mountain scenery. This technique allows you to emphasize both the rider and the vast backdrop.
Experiment with different angles, such as shooting from a lower vantage point to make the mountains appear even more imposing.
Natural Light Effects
Natural light plays a starring role in showcasing snowboarding terrain and landscape. As a photographer, you'll want to harness the sun's power to create stunning images that capture the essence of the sport and its environment.
Early morning or late afternoon light can cast long shadows across the snow, adding depth and texture to your shots. This golden hour light also bathes the scene in warm, rich tones that make your photos pop.
You'll find that backlighting can create a dramatic effect, illuminating snowflakes and powder spray as riders carve through the snow. Look for opportunities to capture sun flares peeking through trees or over mountain ridges, adding a touch of magic to your compositions.
On overcast days, you'll appreciate the soft, diffused light that eliminates harsh shadows and allows you to capture details in both bright snow and darker subjects.
Don't shy away from challenging lighting conditions. Experiment with silhouettes against a bright sky or use the stark contrast of sun and shadow to create visually striking images.
Scale and Perspective
Showcasing the grandeur of snowboarding terrain and landscapes requires mastering scale and perspective in your photography. To capture the true essence of the sport, you'll need to emphasize the vastness of the mountains and the daring nature of the riders.
Use wide-angle lenses to encompass more of the landscape, creating a sense of expansiveness. Position your subject strategically within the frame to highlight the scale of their surroundings. Shooting from a low angle can make the rider appear larger against the mountain backdrop, while a high vantage point can showcase the expanse of the terrain.
Incorporate foreground elements to add depth and dimension to your images. A nearby tree, rock formation, or snow drift can provide context and scale, drawing the viewer's eye through the frame.
Don't shy away from including other riders or lift structures to give a sense of size and distance.
Experiment with different focal lengths to compress or expand the perceived distance between elements in your shot. This technique can dramatically alter the viewer's perception of the landscape and the rider's position within it.
Highlighting Athlete Skill and Style
When capturing snowboarders' skills, you'll want to focus on mid-air tricks that showcase their athleticism and daring.
You can highlight each rider's unique style by photographing their distinctive body positions and board control during turns or jumps.
To emphasize technical precision, pay close attention to the riders' form and alignment, capturing the exact moment they execute complex maneuvers with flawless accuracy.
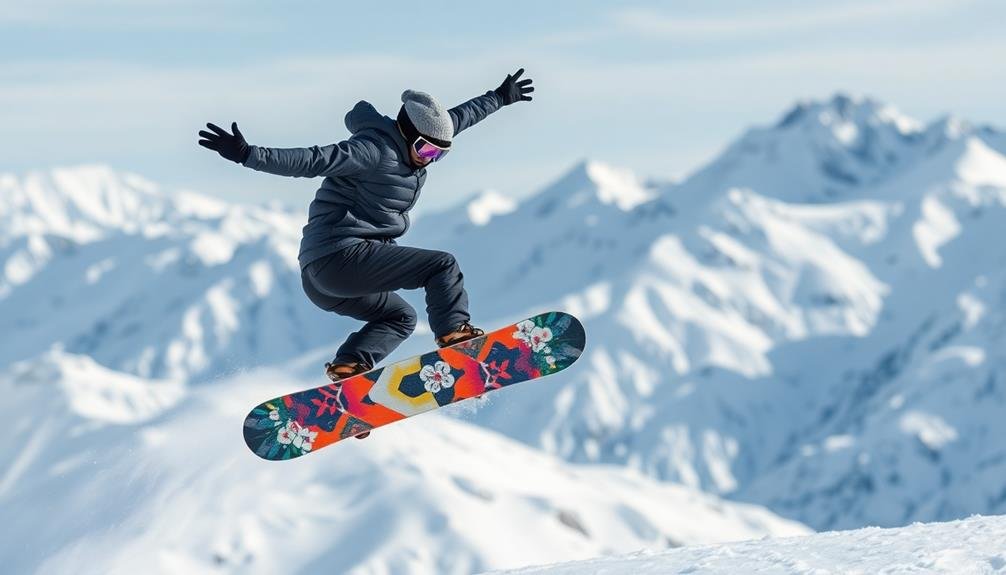
Capturing Mid-Air Tricks
For snowboarding photographers, capturing mid-air tricks is the ultimate challenge and reward. You'll need quick reflexes, expert timing, and a deep understanding of snowboarding to freeze these fleeting moments in time. As riders launch off jumps and rails, you've got mere seconds to frame the shot, adjust your settings, and click the shutter.
To truly capture the essence of mid-air tricks, focus on:
- Timing: Anticipate the peak of the trick
- Composition: Frame the rider against the sky or mountains
- Perspective: Experiment with different angles and distances
- Background: Choose a clean, contrasting backdrop
You'll want to use a fast shutter speed to freeze the action and a wide-angle lens to capture the entire scene.
Don't forget to communicate with the riders about their planned tricks and preferred angles. As you shoot, pay attention to the rider's body position, board orientation, and facial expressions. These details can make or break a mid-air shot.
Showcasing Unique Riding Styles
Every snowboarder brings their own flair to the mountain, and it's up to you to capture that unique style in your photos. To showcase individual riding styles, you'll need to observe and anticipate each rider's signature moves.
Pay attention to their body positioning, board control, and the way they approach different terrain features. Look for opportunities to highlight a rider's preferred tricks or techniques. Some may excel at carving smooth, graceful turns, while others might favor aggressive, high-speed runs.
Capture these nuances by varying your shooting angle and distance. Get low to emphasize powerful edge control or shoot from above to showcase a rider's line choice.
Don't forget to take into account the overall composition. Frame your shots to include elements that complement the rider's style, such as pristine powder for a freeride enthusiast or a well-groomed park for a freestyle specialist.
Use natural light and shadows to add depth and drama to your images.
Emphasizing Technical Precision
Technical precision forms the backbone of impressive snowboarding, and your photos should highlight the athlete's skill and style. Capturing the perfect moment when a rider executes a flawless trick or maintains impeccable form can elevate your images from good to great.
Focus on the rider's body position, board control, and the overall flow of their movements.
To emphasize technical precision in your snowboarding photos:
- Use fast shutter speeds to freeze action and show crisp details
- Position yourself to capture the full trajectory of jumps and tricks
- Zoom in on specific body parts to showcase proper technique
- Experiment with burst mode to capture split-second movements
Don't forget to reflect on the background and lighting conditions. A clean, uncluttered backdrop can help draw attention to the rider's form, while dramatic lighting can accentuate muscle definition and board edges.
By mastering these techniques, you'll be able to create images that not only look stunning but also accurately represent the skill and dedication of the athletes you're photographing.
Mastering Light and Weather Conditions

Natural light and weather conditions often pose significant challenges for snowboarding photographers. You'll need to master these elements to capture stunning images that stand out. Start by understanding how different light conditions affect your shots. Early morning and late afternoon golden hours offer warm, dramatic lighting, while midday sun can create harsh shadows. Overcast days provide soft, diffused light that's ideal for capturing detail.
Weather plays an essential role in snowboarding photography. Fresh powder creates a pristine backdrop, while stormy conditions add drama and atmosphere. You'll need to adapt your technique to each scenario:
| Weather | Challenges | Opportunities |
|---|---|---|
| Sunny | Harsh shadows, glare | Dynamic contrasts, vibrant colors |
| Overcast | Flat lighting | Soft textures, even exposure |
| Snowing | Low visibility | Atmospheric effects, unique textures |
| Foggy | Reduced contrast | Mystical ambiance, minimalist compositions |
To excel in varying conditions, you'll need to:
- Use appropriate filters and lens hoods
- Adjust your camera settings frequently
- Protect your gear from moisture and cold
- Be patient and wait for the perfect moment
Post-Processing for Stunning Results
Post-processing is often the key to transforming good snowboarding photos into exceptional ones. You'll need to master various editing techniques to bring out the best in your images. Start by adjusting the exposure and contrast to highlight the snow's texture and the rider's movements.
Don't be afraid to experiment with color grading to create a mood that matches the energy of the scene.
When editing snowboarding photos, focus on these key areas:
- Clarity and sharpness
- Color balance and saturation
- Noise reduction
- Cropping and composition
Pay attention to the details that make snowboarding photos unique. Enhance the spray of snow, emphasize the rider's stance, and accentuate the mountain backdrop.
Use selective adjustments to draw the viewer's eye to the most important elements of the image.
Frequently Asked Questions
What Camera Gear Is Essential for Beginner Snowboarding Photographers?
You'll need a weatherproof DSLR or mirrorless camera with a wide-angle lens for action shots. Don't forget a sturdy tripod, extra batteries, and memory cards. A zoom lens can be handy for capturing distant riders too.
How Can I Protect My Camera Equipment in Extreme Winter Conditions?
You'll need to shield your gear from moisture and extreme cold. Use waterproof camera bags, silica gel packets, and lens covers. Keep batteries warm in your pockets, and don't forget to acclimate your equipment gradually to avoid condensation.
Are There Specific Safety Considerations When Photographing Snowboarders?
When photographing snowboarders, you'll need to prioritize safety. Keep a safe distance, use a long lens, and stay alert. Don't obstruct runs or landings. Always communicate with riders and follow resort rules. Wear proper gear yourself.
What Are the Best Locations for Snowboarding Photography?
You'll find the best snowboarding photography spots in backcountry powder, terrain parks, and pristine mountain ranges. Look for places with stunning natural backdrops, varied terrain, and good lighting. Utah, Colorado, and the Alps are top destinations.
How Can I Network With Professional Snowboarders for Photo Opportunities?
You can network with pro snowboarders by attending competitions, following them on social media, and reaching out directly. Join local snowboarding communities, frequent popular resorts, and offer your photography services to build connections and secure photo opportunities.
In Summary
You've now got the tools to elevate your snowboarding photography. Remember, it's all about capturing that perfect moment of air, style, and terrain. Don't be afraid to experiment with drones, timing, and composition. Master the light and weather, and you'll showcase the athlete's skill like never before. With practice and post-processing finesse, you'll create images that truly soar above the rest. Now get out there and start shooting!
As educators and advocates for responsible drone use, we’re committed to sharing our knowledge and expertise with aspiring aerial photographers.


Leave a Reply