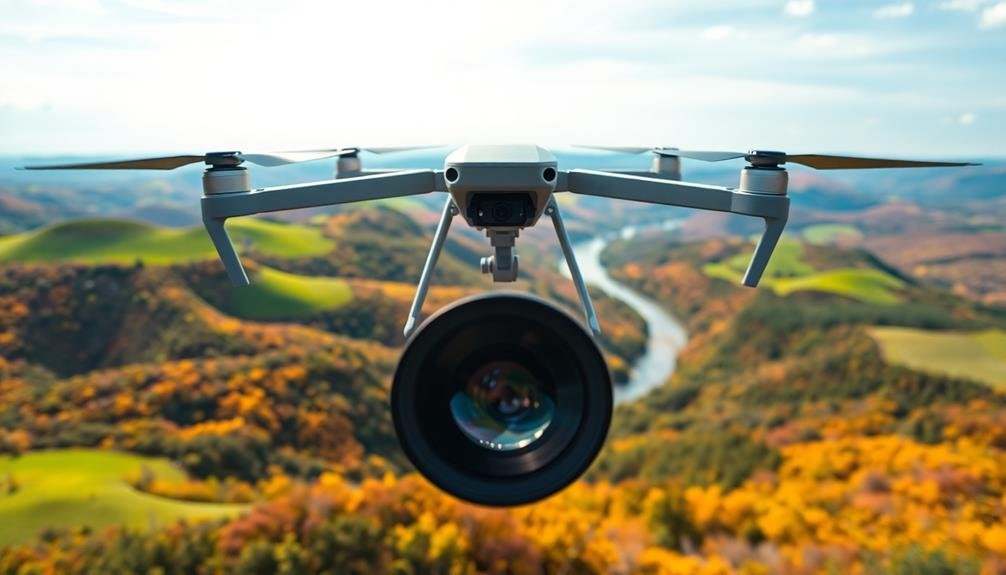
To capture stunning aerial images, master your camera's aperture settings. Use wider apertures (f/1.8 to f/4) for creative portraits that isolate subjects, and narrower apertures (f/8 to f/16) for expansive landscapes with maximum depth of field. Balance aperture with shutter speed and ISO to achieve proper exposure while minimizing motion blur. In low light, open your aperture wide and increase ISO. For drone photography, compensate for movement with faster shutter speeds. Experiment with different f-stops to find your lens's sweet spot for sharpness. By understanding how aperture affects your aerial shots, you'll reveal a world of creative possibilities in the sky.
Key Takeaways
- Use f/8 to f/16 for sweeping landscapes to maximize depth of field and overall sharpness.
- Opt for wider apertures (f/1.8 to f/4) for aerial portraits to isolate subjects against blurred backgrounds.
- Balance aperture with shutter speed (aim for 1/1000s or faster) to minimize motion blur from aircraft movement.
- Adjust aperture based on lighting conditions, using smaller apertures in bright light and wider in low light.
- Experiment with hyperfocal distance techniques to achieve optimal focus distribution throughout the image.
Understanding Aperture in Aerial Photography

When it comes to aerial photography, understanding aperture is essential for capturing stunning images from above. Aperture refers to the opening in your camera's lens that controls how much light enters the sensor. It's measured in f-stops, with smaller numbers indicating a wider aperture and larger numbers a narrower one.
In aerial photography, you'll often need to balance shutter speed and aperture to achieve sharp images while in motion. A wider aperture (smaller f-number) allows more light in, enabling faster shutter speeds to freeze motion. However, it also reduces depth of field, which can be challenging when photographing landscapes from above.
Conversely, a narrower aperture (larger f-number) increases depth of field, keeping more of the scene in focus. This is particularly useful when you want to capture expansive landscapes with detail from foreground to background. However, it requires more light, which may necessitate slower shutter speeds or higher ISO settings.
You'll need to experiment with different apertures to find the right balance for your specific aerial shooting conditions. Consider factors like altitude, aircraft speed, and desired artistic effect when choosing your aperture setting.
Balancing Aperture and Shutter Speed

When capturing aerial images, you'll need to master the exposure triangle, balancing aperture, shutter speed, and ISO.
You must consider motion blur, especially when shooting from fast-moving aircraft or in windy conditions.
Your aperture choice will also affect depth of field, influencing how much of your aerial scene remains in sharp focus.
Exposure Triangle Basics
Three key elements form the exposure triangle in photography: aperture, shutter speed, and ISO. Understanding how these components interact is essential for capturing stunning aerial images.
Aperture controls the amount of light entering your camera and affects depth of field. A wider aperture (smaller f-number) lets in more light and creates a shallower depth of field, while a narrower aperture (larger f-number) allows less light but increases depth of field.
Shutter speed determines how long your camera's sensor is exposed to light. Faster shutter speeds freeze motion, while slower speeds can create motion blur.
ISO represents your camera's sensitivity to light. Higher ISO values increase sensitivity but may introduce noise.
To achieve the perfect exposure, you'll need to balance these three elements. If you're shooting fast-moving subjects, you might opt for a faster shutter speed and compensate with a wider aperture or higher ISO.
For landscape shots, you may choose a narrower aperture for greater depth of field and adjust your shutter speed or ISO accordingly.
Motion Blur Considerations
In aerial photography, balancing aperture and shutter speed is essential for managing motion blur. As you're capturing images from a moving aircraft, you'll need to take into account the speed of your subject and the camera's movement.
To freeze action and minimize blur, you'll want to use a faster shutter speed, which may require a wider aperture to maintain proper exposure. When shooting from a helicopter or plane, aim for a shutter speed of at least 1/1000th of a second to counteract the aircraft's vibrations and movement.
If you're photographing fast-moving subjects on the ground, you might need even faster speeds, like 1/2000th or higher. Remember that wider apertures (smaller f-numbers) allow more light in, enabling faster shutter speeds.
However, be aware that very wide apertures can reduce your depth of field, potentially limiting the sharpness of your overall scene. You'll need to find the right balance between aperture and shutter speed to achieve your desired effect.
If you're after a deliberate motion blur for creative purposes, you can experiment with slower shutter speeds, but be prepared to adjust your aperture accordingly to maintain proper exposure.
Depth of Field Control
Controlling depth of field in aerial photography requires a delicate balance between aperture and shutter speed.
You'll need to evaluate your subject's distance, the desired focus range, and the available light. When shooting from the air, you're often dealing with vast landscapes or expansive cityscapes, so a larger depth of field is typically preferred.
To achieve this, you'll want to use a smaller aperture (higher f-number), but remember that this reduces the amount of light entering your camera.
To compensate, you'll need to adjust your shutter speed or ISO. However, be cautious not to slow your shutter speed too much, as this can introduce motion blur from the aircraft's movement.
Here's a quick guide to help you manage depth of field in aerial photography:
- Start with an aperture of f/8 to f/11 for a good balance of depth and sharpness
- Adjust your shutter speed to at least 1/500s to minimize motion blur
- Increase ISO if needed, but be mindful of introducing noise
- Use hyperfocal distance techniques to maximize your depth of field
Depth of Field Considerations

When capturing aerial images, depth of field plays an essential role in determining the overall sharpness and clarity of your shots.
You'll need to take into account the distance between your camera and the subject, as well as the desired area of focus within the frame. For aerial photography, you'll often want a larger depth of field to guarantee that both foreground and background elements are in focus.
To achieve this, you'll typically want to use smaller apertures (higher f-numbers) like f/8 or f/11. These settings will increase the depth of field, allowing more of the scene to be in focus.
However, be aware that using very small apertures (f/16 or higher) can introduce diffraction, which may slightly reduce overall image sharpness.
Keep in mind that your altitude and lens focal length will also affect depth of field. Higher altitudes and wider-angle lenses generally provide a greater depth of field.
If you're shooting from a lower altitude or using a longer lens, you may need to adjust your aperture accordingly to maintain the desired depth of field.
Always take into account your specific shooting conditions and artistic goals when making these decisions.
Wide Apertures for Aerial Portraits

While larger depth of field is often preferred in aerial photography, wide apertures have their place, especially for aerial portraits.
When you're capturing people from the air, using a wide aperture can create a stunning effect by isolating your subject from the background. This technique works particularly well when you're shooting from a helicopter or a drone, allowing you to blur the landscape below and focus attention on your subject.
To make the most of wide apertures for aerial portraits:
- Use an aperture between f/1.8 and f/4 for maximum background blur
- Confirm your subject is positioned against a contrasting background
- Maintain a safe distance to keep your subject in focus
- Adjust your shutter speed to compensate for any movement
Narrow Apertures for Landscape Vistas

When capturing sweeping aerial landscapes, you'll want to use narrow apertures to maximize depth of field.
By selecting f/8 to f/16, you'll guarantee that both foreground and background elements remain sharp and in focus.
You'll need to balance this choice with appropriate shutter speeds and ISO settings to maintain proper exposure while avoiding camera shake in the air.
Maximizing Depth of Field
Many aerial photographers aim to capture expansive landscape vistas with maximum sharpness throughout the frame. To achieve this, you'll need to maximize your depth of field, ensuring that both near and distant elements are in focus.
By using narrow apertures (high f-numbers), you can increase the area of sharpness in your images. When shooting from the air, consider using apertures between f/8 and f/16 to maintain ideal image quality while extending your depth of field.
Remember that extremely narrow apertures (f/22 and beyond) can introduce diffraction, slightly reducing overall sharpness.
To make the most of your aerial photography and maximize depth of field:
- Choose a narrow aperture (f/8 to f/16)
- Focus about one-third into the scene
- Use a wider-angle lens for increased depth of field
- Increase ISO if needed to maintain a fast shutter speed
Balancing Sharpness and Exposure
Striking a balance between sharpness and exposure is essential when capturing aerial landscape vistas. When shooting from above, you'll want to use narrow apertures (higher f-numbers) to guarantee maximum depth of field and overall image sharpness. Aim for apertures between f/8 and f/16, which typically provide the best balance of sharpness and diffraction control.
However, using narrow apertures reduces the amount of light entering your camera, potentially leading to underexposed images. To compensate, you'll need to adjust other exposure settings. Increase your ISO or lengthen your shutter speed to maintain proper exposure.
Keep in mind that higher ISOs can introduce noise, while slower shutter speeds may result in motion blur, especially when shooting from a moving aircraft. To mitigate these issues, consider using a stabilized lens or camera body.
If possible, shoot in RAW format to give yourself more flexibility in post-processing. You can also bracket your exposures, taking multiple shots at different settings to guarantee you capture the perfect balance of sharpness and exposure.
Aperture Priority Mode for Drones

Aperture Priority mode offers drone photographers a powerful tool for controlling depth of field in aerial shots. When you're flying your drone, this semi-automatic mode allows you to set the aperture while the camera adjusts the shutter speed to maintain proper exposure. This gives you greater creative control over your aerial images, especially when you're capturing landscapes or cityscapes from above.
To make the most of Aperture Priority mode on your drone:
- Choose a wider aperture (lower f-number) for a shallow depth of field, ideal for isolating subjects against blurred backgrounds.
- Select a narrower aperture (higher f-number) for greater overall sharpness, perfect for capturing expansive landscapes.
- Adjust your ISO to maintain an appropriate shutter speed, ensuring crisp images even in low light conditions.
- Use exposure compensation to fine-tune brightness without changing your chosen aperture.
Remember that different drones have varying aperture ranges, so familiarize yourself with your specific model's capabilities.
Hyperfocal Distance in Aerial Shots

Drone photographers aiming for tack-sharp aerial landscapes should familiarize themselves with hyperfocal distance. This concept allows you to maximize your depth of field, ensuring both near and far elements in your frame are in focus.
To calculate the hyperfocal distance, you'll need to take into account your drone camera's sensor size, focal length, and aperture setting.
When shooting from a drone, you're often dealing with vast landscapes where everything from the foreground to the horizon should be sharp. By focusing at the hyperfocal distance, you'll achieve ideal sharpness throughout your image. Use online calculators or smartphone apps to determine this distance for your specific setup.
Remember that as you increase your altitude, the hyperfocal distance changes. You'll generally have more flexibility at higher altitudes, as the relative distance between near and far objects decreases.
However, don't forget to account for your drone's legal altitude limits.
In practice, try setting your focus to infinity and then slightly adjusting it back. This technique often places you close to the hyperfocal distance, resulting in crisp aerial shots with impressive depth of field.
Managing Light With Aperture Control

Light management is essential for capturing stunning aerial images, and your aperture setting plays a key role. By controlling the amount of light entering your camera's sensor, you can effectively manage exposure, depth of field, and image sharpness.
When shooting from the air, you'll often encounter challenging lighting conditions, from harsh sunlight to rapidly changing cloud cover.
To master light management with aperture control in aerial photography, consider these key points:
- Use a smaller aperture (higher f-number) for bright daylight conditions to avoid overexposure and maintain sharpness across the frame.
- Opt for a wider aperture (lower f-number) in low-light situations to allow more light in and maintain faster shutter speeds.
- Balance your aperture choice with ISO and shutter speed to achieve the desired exposure triangle for your aerial shots.
- Experiment with different apertures to find the sweet spot that balances depth of field and overall image sharpness for your specific lens and shooting conditions.
Bokeh Effects in Aerial Photography

Crafting a dreamy, out-of-focus background in aerial photography can add depth and visual interest to your images. While bokeh effects are typically associated with portrait photography, you can leverage this technique in aerial shots to create stunning results.
To achieve bokeh in aerial photography, you'll need to use a wide aperture (low f-number) on your camera. This creates a shallow depth of field, blurring elements that aren't in focus. When shooting from above, try focusing on a specific subject in the foreground, such as a building or landmark, while allowing the surrounding landscape to blur softly.
The quality of bokeh depends on your lens characteristics and aperture shape. Lenses with more aperture blades generally produce smoother, more circular bokeh. Experiment with different lenses to find the effect you prefer.
Keep in mind that achieving bokeh in aerial shots can be challenging due to the distance between your camera and the subject. Using a longer focal length lens can help compress the scene and enhance the bokeh effect.
Additionally, consider shooting during golden hour or at night when lights create natural bokeh patterns in cityscapes.
Aperture and Image Sharpness

When shooting aerial photos, you'll need to balance depth of field control with overall image sharpness.
By adjusting your aperture, you can determine how much of your scene remains in focus, from foreground to background.
Remember that most lenses have a "sweet spot" aperture, typically between f/8 and f/11, where they produce the sharpest images across the entire frame.
Depth of Field Control
The aperture setting plays a crucial role in controlling depth of field for aerial photography. When you're capturing images from above, you'll often want to keep both foreground and background elements sharp. A smaller aperture (higher f-number) increases depth of field, ensuring more of your scene remains in focus. This is particularly useful when shooting landscapes or cityscapes from a high altitude.
Conversely, you might want to isolate a specific subject by using a larger aperture (smaller f-number) to create a shallow depth of field. This technique can be effective for highlighting architectural features or natural landmarks against a blurred background.
To master depth of field control in aerial photography:
- Experiment with different f-stops to find the ideal balance between sharpness and artistic blur.
- Consider your shooting altitude and adjust aperture accordingly.
- Use hyperfocal distance techniques to maximize sharpness throughout your frame.
- Factor in your camera's sensor size, as it affects depth of field.
Sharpness Sweet Spot
Every lens has a sharpness sweet spot, typically found in the middle range of its aperture settings. For aerial photography, you'll want to exploit this sweet spot to achieve the crispest images possible. Most lenses perform best between f/8 and f/11, but it's important to test your specific lens to determine its ideal aperture.
To find your lens's sweet spot, shoot a series of test images at different apertures, keeping other settings constant. Compare the results, paying close attention to edge-to-edge sharpness and overall clarity. Once you've identified the sweet spot, use it as your go-to aperture for aerial shots when conditions allow.
However, don't become overly reliant on this setting. Factors like available light, desired depth of field, and subject movement may require you to deviate from the sweet spot. In low-light situations, you might need to open up your aperture, while bright conditions could call for a smaller aperture to avoid overexposure.
Always prioritize proper exposure and composition over adhering strictly to the sweet spot. Remember, a slightly softer image is better than a missed shot or an improperly exposed one.
Compensating for Drone Movement

During aerial photography, compensating for drone movement is essential for capturing sharp images. Even with advanced stabilization systems, drones are susceptible to vibrations and sudden movements that can blur your photos.
To counteract these effects, you'll need to adjust your aperture settings accordingly. When dealing with drone movement, it's vital to use a faster shutter speed. This means you'll need to open up your aperture wider to allow more light in. However, you'll want to strike a balance between a wide aperture and maintaining depth of field. Generally, an aperture between f/4 and f/5.6 works well for aerial photography, providing enough light while keeping most of the scene in focus.
Here are four key tips to compensate for drone movement:
- Increase your ISO to maintain faster shutter speeds
- Use burst mode to capture multiple shots quickly
- Enable any built-in image stabilization features on your camera
- Consider using a neutral density filter to allow for slower shutter speeds in bright conditions
Low-Light Aerial Photography Techniques

Mastery of low-light aerial photography techniques can transform challenging conditions into opportunities for stunning imagery. When you're shooting in low light from a drone, you'll need to adjust your camera settings to compensate for the lack of illumination.
Start by opening up your aperture as wide as possible, typically f/2.8 or lower, to allow more light into the sensor. Increase your ISO, but be cautious not to introduce too much noise; modern drones can often handle ISO 1600 or 3200 without significant quality loss.
Slow down your shutter speed to capture more light, but be mindful of motion blur. Use your drone's stabilization features to maintain sharpness. Consider shooting in RAW format to preserve more data for post-processing.
Employ long exposure techniques for light trails and motion blur effects, using neutral density filters if necessary. Experiment with twilight hours for dramatic sky colors and city lights. Use manual focus to guarantee crisp images, as autofocus may struggle in low light.
Creative Aperture Uses in Drones

Creative aperture techniques can elevate your drone photography from ordinary to extraordinary. By experimenting with different f-stops, you'll open up new possibilities for artistic expression and visual storytelling.
Wide apertures (low f-numbers) allow you to create a shallow depth of field, isolating your subject against a beautifully blurred background. This technique works particularly well when capturing aerial portraits or highlighting specific landmarks.
Conversely, narrow apertures (high f-numbers) guarantee sharp focus throughout your frame, ideal for landscape shots or capturing intricate details in cityscapes. Don't be afraid to push the boundaries of traditional aerial photography by using creative aperture settings.
Here are four innovative ways to use aperture in your drone photography:
- Create sunbursts by shooting directly into the sun with a narrow aperture
- Use a wide aperture to emphasize foreground elements in your composition
- Experiment with bokeh effects by capturing lights at night with a wide aperture
- Employ focus stacking techniques to achieve maximum sharpness in complex scenes
Frequently Asked Questions
How Does Altitude Affect Aperture Selection in Aerial Photography?
At higher altitudes, you'll need to adjust your aperture for less light and increased depth of field. You'll want to use a smaller aperture (higher f-number) to keep more of the landscape in focus.
Can ND Filters Be Used With Different Apertures for Drone Photography?
Yes, you can use ND filters with various apertures for drone photography. They'll help you control light exposure, allowing longer shutter speeds or wider apertures. This gives you more creative flexibility in different lighting conditions.
What Aperture Settings Work Best for Capturing Moving Subjects From Drones?
You'll want to use faster shutter speeds for moving subjects. Try apertures between f/4 and f/8 to balance depth of field with light. Adjust your ISO to maintain proper exposure while keeping shutter speed high.
How Does Lens Choice Impact Aperture Selection in Aerial Photography?
Your lens choice greatly affects aperture selection for aerial shots. Wide-angle lenses let you use wider apertures, while telephoto lenses often require narrower apertures. You'll need to balance focal length with desired depth of field and shutter speed.
Are There Specific Aperture Recommendations for Infrared Aerial Photography?
For infrared aerial photography, you'll want to use smaller apertures (f/8 to f/16) to guarantee sharp images. However, don't forget to adjust for diffraction and atmospheric haze, which can affect infrared light differently than visible light.
In Summary
You've now got the tools to master aperture in aerial photography. Remember, there's no one-size-fits-all setting. Experiment with different f-stops to achieve your desired effect. Whether you're capturing sweeping landscapes or intimate portraits, your aperture choice will greatly impact your final image. Don't be afraid to push creative boundaries. With practice, you'll intuitively know which aperture to use for stunning aerial shots in any situation.
As educators and advocates for responsible drone use, we’re committed to sharing our knowledge and expertise with aspiring aerial photographers.


Leave a Reply