
To excel in aerial site planning with UAV photography, you'll need to master key aspects. Start by understanding drone regulations and selecting the right equipment. Conduct thorough pre-flight assessments and plan ideal flight paths for extensive site coverage. Capture high-quality imagery and use photogrammetry software to create detailed 3D models. Integrate UAV data with CAD for accurate site representation, and present compelling visualizations to clients. Don't forget safety protocols and ethical considerations. By following this guide, you'll transform your architectural practice, offering unique perspectives and valuable insights. The sky's the limit for enhancing your site planning capabilities.
Understanding UAV Regulations
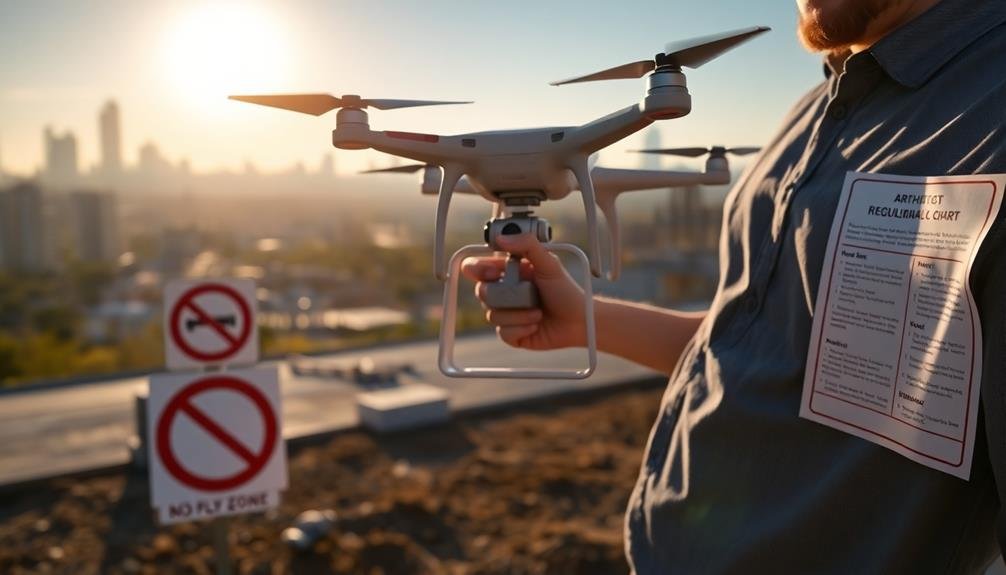
When starting on aerial site planning, understanding UAV regulations is crucial. You'll need to familiarize yourself with the rules set by your country's aviation authority, such as the FAA in the United States or EASA in Europe. These regulations cover various aspects of drone operation, including registration, pilot certification, and flight restrictions.
First, register your drone if it weighs more than 250 grams. You'll also need to obtain a remote pilot certificate by passing a knowledge test. This guarantees you're aware of airspace classifications, weather patterns, and emergency procedures.
Be mindful of airspace restrictions. You can't fly near airports, military bases, or other sensitive areas without proper authorization. Use apps like B4UFLY or AirMap to check for no-fly zones before each flight.
Adhere to visual line-of-sight rules, keeping your drone within view at all times. Fly below 400 feet AGL and respect privacy laws by avoiding flights over private property without permission. Don't operate at night or over people without specific waivers.
Stay informed about changing regulations, as drone laws evolve rapidly. Join professional organizations to keep up with industry standards and best practices for aerial site planning.
Selecting the Right Drone
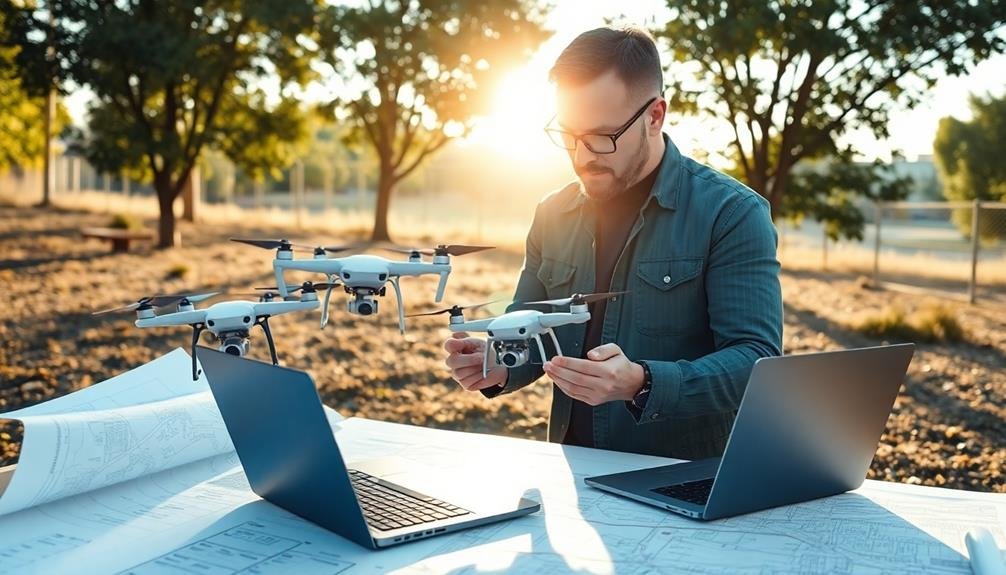
When selecting a drone for aerial site planning, you'll need to contemplate the choice between fixed-wing and multirotor drones.
Fixed-wing drones offer longer flight times and greater coverage, while multirotor drones provide better maneuverability and hover capabilities.
You'll also want to evaluate the payload capacity of each drone type to guarantee it can carry the necessary equipment for your specific site planning needs.
Fixed-Wing vs. Multirotor Drones
In light of the diverse requirements for aerial site planning, choosing between fixed-wing and multirotor drones is essential.
Fixed-wing drones excel in covering large areas efficiently, making them ideal for extensive site surveys and mapping projects. They offer longer flight times and higher speeds, allowing you to capture more ground in a single flight. However, they require open spaces for takeoff and landing, which can limit their use in confined urban environments.
Multirotor drones, on the other hand, provide greater maneuverability and hover capabilities. They're perfect for detailed inspections, close-up photography, and traversing complex architectural structures. You'll find them easier to control in tight spaces and more suitable for vertical imaging.
While they've shorter flight times and slower speeds compared to fixed-wing drones, multirotors offer the flexibility to take off and land vertically, making them versatile in various settings.
Consider your project's specific needs when selecting between these two types. If you're working on large-scale land surveys or linear infrastructure projects, a fixed-wing drone might be your best bet.
For urban planning, building inspections, or detailed site analysis, a multirotor drone will likely serve you better.
Payload Capacity Considerations
Beyond drone type, payload capacity is an essential factor in selecting the right drone for your aerial site planning needs.
Payload capacity refers to the maximum weight a drone can carry, including cameras, sensors, and other equipment. You'll need to take into account the weight of your desired camera setup and any additional tools you plan to use.
For architectural site planning, you'll typically want a drone that can carry a high-quality camera with interchangeable lenses. This allows for versatility in capturing different perspectives and details.
If you're planning to use specialized equipment like thermal cameras or LiDAR sensors, you'll need a drone with a higher payload capacity.
Remember that increasing payload affects flight time and maneuverability. Heavier payloads reduce flight duration and may impact the drone's stability in windy conditions.
It's important to strike a balance between payload capacity and overall performance.
When selecting a drone, think about future needs as well. You might start with basic aerial photography but later expand to 3D mapping or multispectral imaging.
Choosing a drone with a slightly higher payload capacity than your current requirements can provide flexibility for future projects and equipment upgrades.
Essential Equipment for Aerial Photography

Gearing up for aerial photography requires a specific set of tools to capture stunning images from above. You'll need a reliable drone equipped with a high-quality camera, capable of handling various lighting conditions and altitudes. Make sure your drone has GPS capabilities for precise positioning and stability during flights.
A remote controller with a built-in screen or smartphone mount is essential for real-time video feed and camera control. You'll also want to invest in multiple high-capacity batteries to extend your flight time and maximize shooting opportunities.
Additional must-have equipment includes:
- ND filters to manage exposure in bright conditions
- A rugged carrying case for safe transport of your drone and accessories
- A laptop or tablet for on-site image review and basic editing
Don't forget to pack spare propellers, memory cards, and a portable charger. A handheld anemometer can help you assess wind conditions before takeoff.
Pre-Flight Site Assessment

With your equipment ready, it's time to focus on the pre-flight site assessment. Begin by studying satellite imagery and topographical maps of the site to familiarize yourself with its layout and key features. Identify potential hazards, such as tall structures, power lines, or trees that could interfere with your flight path.
Next, visit the site in person to conduct a thorough ground-level inspection. Look for suitable takeoff and landing areas, making sure they're flat, clear of obstacles, and large enough for safe operations. Note any changes since the satellite imagery was captured, such as new construction or vegetation growth.
Check local weather conditions, including wind speed and direction, temperature, and precipitation forecasts. These factors can greatly impact your drone's performance and image quality.
Also, verify that you're not operating in restricted airspace by consulting aeronautical charts and drone flight apps.
Lastly, consider the sun's position throughout your planned flight time. This will help you determine the best angles for capturing shadows and highlights, enhancing the architectural features you want to showcase.
Planning Optimal Flight Paths

When planning your aerial survey flight paths, you'll need to choose between grid and circular patterns based on your site's characteristics and project goals.
You should carefully consider the ideal altitude for capturing the necessary detail while maximizing coverage efficiency.
Additionally, you'll want to adjust your drone's speed to balance image quality with mission duration, ensuring you get the best results within your operational constraints.
Grid vs. Circular Patterns
The choice between grid and circular flight patterns can greatly impact the efficiency and effectiveness of your aerial site survey.
Grid patterns are typically used for rectangular or square sites, offering systematic coverage and consistent image overlap. They're ideal for creating orthomosaic maps and 3D models.
Circular patterns, on the other hand, are better suited for capturing tall structures or circular sites, providing a 360-degree perspective.
When deciding between grid and circular patterns, consider these factors:
- Site shape and size: Grid patterns work well for large, flat areas, while circular patterns are better for compact sites or individual structures.
- Desired output: If you're aiming for a thorough site map, go with a grid pattern. For detailed views of specific features, circular patterns may be more appropriate.
- Obstacles and terrain: Grid patterns can be challenging in areas with obstacles, while circular patterns allow for more flexibility in maneuvering around obstructions.
You'll need to adjust your flight parameters based on the chosen pattern.
For grid patterns, focus on optimizing overlap and altitude.
With circular patterns, pay attention to radius and camera angle to guarantee complete coverage of your target.
Altitude and Speed Considerations
Altitude and speed are key factors in planning ideal flight paths for your aerial site survey. You'll need to balance these elements carefully to capture high-quality images while maximizing efficiency.
For altitude, consider your project's scale and required image resolution. Lower altitudes (50-100 feet) provide detailed shots of specific features, while higher altitudes (200-400 feet) offer broader site overviews. Remember that higher altitudes often mean fewer images needed to cover the area, potentially saving time.
When it comes to speed, slower flights generally produce sharper images but take longer to complete. Aim for speeds between 10-15 mph for most surveys. Faster speeds (20-30 mph) may be suitable for large sites with less detail required, but they increase the risk of motion blur.
Adjust these parameters based on your drone's capabilities, local regulations, and environmental conditions. Wind speed and direction can greatly impact your flight, so plan accordingly.
You'll also want to maintain consistent altitude and speed throughout each flight path to guarantee uniform image quality and easier post-processing.
Capturing Topographical Data
Accurately capturing topographical data is essential for effective aerial site planning. You'll need to employ specific techniques to guarantee your UAV collects precise information about the site's terrain and elevation changes.
Use a combination of photogrammetry and LiDAR technology to create detailed 3D models and contour maps of the area.
When capturing topographical data, consider these key factors:
- Flight pattern: Implement a grid or cross-hatch flight pattern to guarantee complete coverage of the site. Overlap your flight paths by at least 60% to assure sufficient data collection for accurate 3D reconstruction.
- Camera settings: Adjust your camera's settings to maintain a consistent exposure throughout the flight. Use a fast shutter speed to minimize motion blur and guarantee sharp images.
- Ground control points: Place and survey ground control points across the site to improve the accuracy of your topographical data. These reference points will help calibrate and geo-reference your aerial imagery.
Documenting Existing Structures

With topographical data in hand, your next step is to document existing structures on the site. Use your UAV to capture high-resolution images and video footage of all buildings, infrastructure, and notable features. Fly at various altitudes to get both overview shots and detailed close-ups.
Make sure to capture all sides of structures, including rooftops and hard-to-reach areas. Pay special attention to the condition of existing buildings, noting any visible damage or wear. Look for unique architectural elements, materials, and construction methods that may influence your design decisions.
Don't forget to document surrounding context, such as adjacent properties, access roads, and utility connections. As you capture imagery, create a systematic labeling system to organize your data. Consider using GPS tagging to precisely locate each structure within your site plan.
Once you've collected extensive visual data, you'll be able to create detailed 3D models and orthomosaic maps. These tools will prove invaluable during the design process, allowing you to make informed decisions about site layout, building placement, and integration with existing structures.
They'll also serve as a valuable reference for future renovations or expansions.
Aerial Photography Techniques

Mastering aerial photography techniques can take your site planning to new heights. When using UAVs for aerial photography, you'll need to take into account factors like altitude, camera settings, and flight patterns. Aim for consistent altitude to maintain scale across your images, typically between 100-400 feet depending on the site's size and local regulations.
Adjust your camera settings for best results:
- Use a fast shutter speed (1/500s or faster) to minimize motion blur
- Set a low ISO (100-400) to reduce noise in your images
- Choose a narrow aperture (f/5.6-f/8) for greater depth of field
Plan your flight pattern carefully to guarantee thorough coverage. A grid or lawn-mower pattern often works well, with 60-80% overlap between images for successful stitching later.
Take into account the sun's position to avoid harsh shadows, typically shooting early morning or late afternoon. For complex sites, you may need multiple flights at different altitudes or angles.
Don't forget to capture oblique shots for a more thorough view of vertical structures. Always prioritize safety, following local regulations and maintaining visual line of sight with your drone throughout the flight.
Post-Processing Drone Imagery
After capturing aerial imagery, post-processing is essential to transform raw data into valuable site planning tools. You'll need to import your drone footage into specialized software for stitching, color correction, and georeferencing. Start by organizing your files and selecting the best images for processing.
Next, use photogrammetry software to create orthomosaic maps and 3D models. Adjust exposure, contrast, and white balance to enhance image quality. Apply filters to highlight specific features like vegetation or topography. Don't forget to georeference your imagery to align it with existing site plans and GIS data.
Here's a quick guide to common post-processing steps:
| Step | Purpose | Software Examples |
|---|---|---|
| Stitching | Create seamless panoramas | Pix4D, DroneDeploy |
| Color Correction | Improve visual consistency | Adobe Lightroom, DxO PhotoLab |
| 3D Modeling | Generate terrain models | Agisoft Metashape, RealityCapture |
Creating 3D Site Models
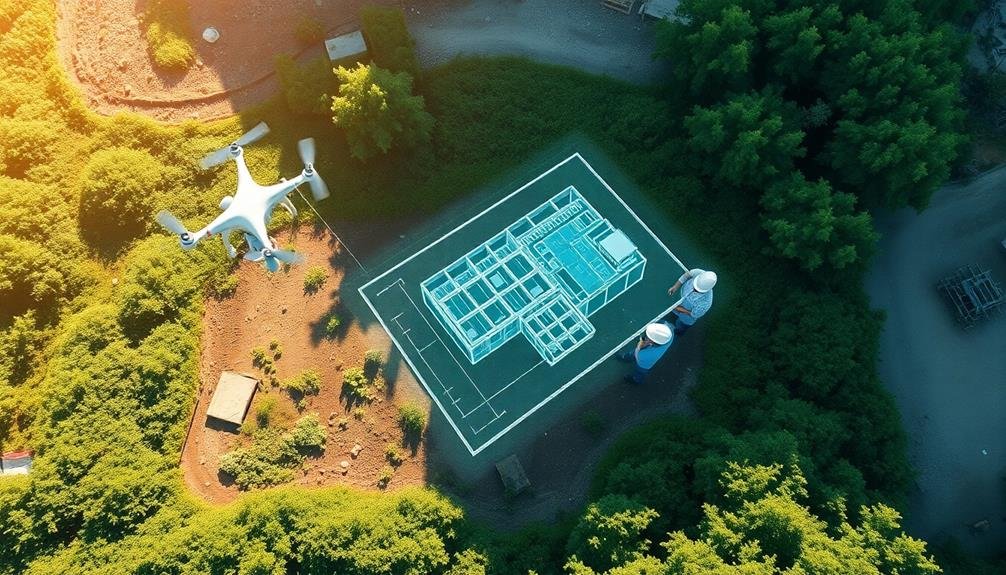
You'll need reliable photogrammetry software to transform your aerial imagery into accurate 3D site models.
Before capturing data, plan your flight path carefully to guarantee thorough coverage of the area.
Once you've collected the imagery, you'll process the data using specialized techniques to generate a detailed 3D representation of your site.
Photogrammetry Software Options
In light of the growing demand for accurate 3D site models, photogrammetry software has become an essential tool for aerial site planning.
You'll find a variety of options on the market, each with its unique features and capabilities. When selecting the right software for your needs, consider factors such as ease of use, processing speed, and output quality.
Some popular photogrammetry software options include Pix4D, Agisoft Metashape, and DroneDeploy. These programs can transform your aerial images into detailed 3D models, orthomosaics, and point clouds.
To make the most of your chosen software, follow these key steps:
- Import and align your images accurately
- Generate a dense point cloud to create a detailed representation of the site
- Build a mesh and add texture for a realistic 3D model
Flight Path Planning
Once you've selected your photogrammetry software, it's time to focus on flight path planning for creating accurate 3D site models. Your flight path will determine the quality and completeness of your 3D reconstruction, so it's vital to plan carefully.
Start by defining your area of interest and setting appropriate flight altitude. Higher altitudes cover more ground but reduce image resolution. Aim for 80% forward overlap and 60-70% side overlap between images to guarantee proper reconstruction. Use a grid or crosshatch pattern for most sites, adjusting for terrain variations or specific features you want to capture.
Consider obstacles like trees or buildings that may obstruct your drone's path or camera view. Plan multiple flights at different altitudes if necessary to capture all angles. Factor in lighting conditions, aiming for consistent illumination across your site.
Most drone apps offer automated flight planning features. Input your desired parameters, and the app will generate an ideal flight path. Review this path carefully, making manual adjustments as needed.
Remember to comply with local regulations regarding drone operations and obtain necessary permissions before flying.
Data Processing Techniques
After collecting aerial data, it's time to immerse ourselves in processing techniques for creating accurate 3D site models. You'll need specialized software to transform your raw imagery into usable 3D representations.
Begin by importing your photos and GPS data into photogrammetry software. This program will analyze the images, identifying common points to stitch them together and create a point cloud.
Next, you'll refine this initial model through a process called densification. This step adds detail and texture to your 3D representation. Once you're satisfied with the model's accuracy, export it in a format compatible with your preferred design software.
To guarantee the best results, follow these key steps:
- Calibrate your images to correct for lens distortion and camera orientation
- Set ground control points to improve geospatial accuracy
- Clean up any artifacts or errors in the point cloud manually
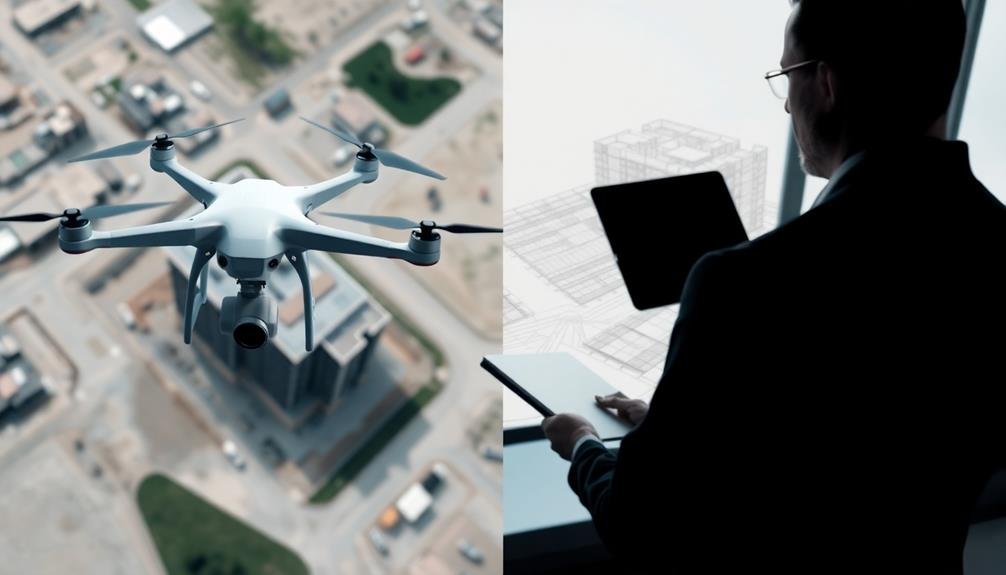
Integrating UAV Data With CAD
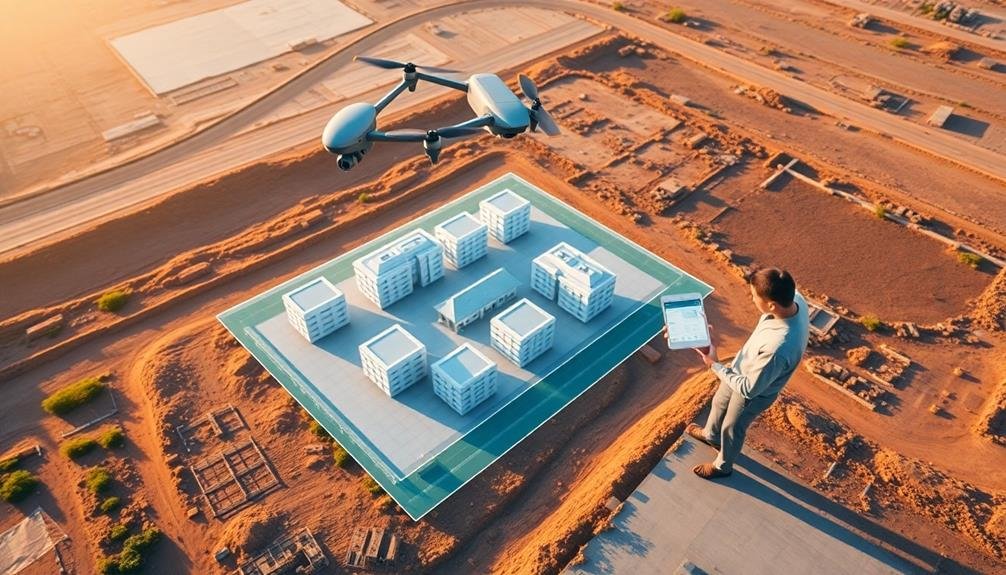
While UAV data provides valuable insights for aerial site planning, integrating this information with Computer-Aided Design (CAD) software is crucial for maximizing its utility. You'll need to convert your UAV-captured data into a format compatible with your CAD program. Most CAD software can import point cloud data, which you can generate from photogrammetry or LiDAR scans.
Once imported, you can overlay the UAV data onto existing site plans or use it as a foundation for new designs. You'll find tools within your CAD software to manipulate the data, allowing you to create accurate 3D models, contour maps, and site layouts.
Pay attention to georeferencing your UAV data to guarantee it aligns correctly with other spatial information in your CAD environment.
Don't forget to leverage the high-resolution imagery from your UAV flights. You can use these as textures for 3D models or as reference images for detailed site analysis.
Presenting Aerial Visualizations to Clients

Presenting aerial visualizations to clients is a key step in the site planning process. It's your chance to showcase the project's potential and help stakeholders envision the final result. When preparing your presentation, focus on creating a compelling narrative that highlights the site's unique features and your design solutions.
To make your aerial visualizations more impactful:
- Use a mix of static images and dynamic fly-through videos to provide an extensive view of the site.
- Incorporate annotations and overlays to explain key design elements and how they relate to the surrounding environment.
- Present before-and-after comparisons to illustrate the proposed changes and their impact on the landscape.
Remember to tailor your presentation to your audience's level of technical understanding. Use clear, jargon-free language to explain complex concepts.
Be prepared to answer questions about specific details captured in the aerial imagery. If possible, provide interactive elements that allow clients to explore the site virtually. This can include 360-degree panoramas or augmented reality experiences.
Drone Safety Protocols
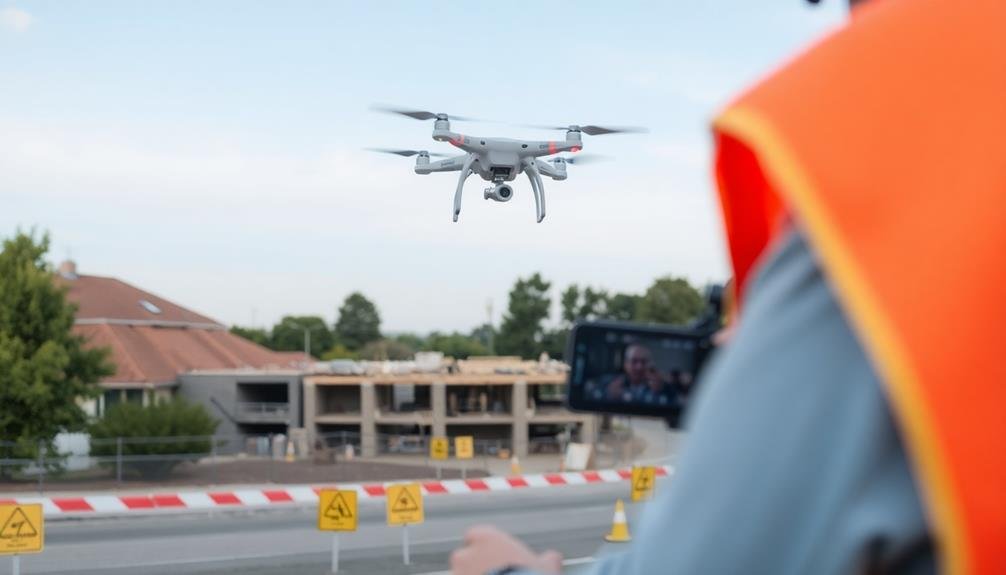
Safety protocols are paramount when it comes to operating drones for aerial site planning. You'll need to familiarize yourself with local regulations and obtain necessary permits before flying. Always conduct a pre-flight inspection of your drone, checking for any damage or loose components. Verify your batteries are fully charged and your firmware is up to date.
When on-site, establish a clear takeoff and landing zone away from obstacles and people. Be aware of your surroundings, including power lines, trees, and buildings. Don't fly in adverse weather conditions like high winds or rain. Keep your drone within visual line of sight at all times and maintain a safe distance from people, vehicles, and structures.
You should also respect privacy concerns by avoiding flights over private property without permission. Always yield the right of way to manned aircraft and never fly near airports or emergency operations. Set a maximum altitude limit and stick to it.
Ethical Considerations in Aerial Surveying

Beyond safety protocols, aerial site planning involves important ethical considerations. As an architect using drone technology, you must respect privacy rights, environmental concerns, and local regulations.
Be aware of the potential impact your aerial surveying may have on surrounding communities and ecosystems.
When planning your aerial site survey, consider these ethical guidelines:
- Obtain proper permissions: Always secure written consent from property owners and relevant authorities before flying over private or restricted areas. Respect no-fly zones and adhere to local regulations regarding drone usage.
- Protect privacy: Avoid capturing identifiable images of individuals without their consent. Be mindful of sensitive locations such as residential areas, schools, or healthcare facilities. Use discretion when sharing or publishing aerial footage that may infringe on someone's privacy.
- Minimize environmental impact: Plan your flight paths to avoid disturbing wildlife habitats, nesting areas, or sensitive ecosystems. Reduce noise pollution by flying at appropriate times and altitudes. Be cautious of your drone's effect on birds and other animals in the area.
Frequently Asked Questions
How Can Architects Integrate Aerial Photography With Virtual Reality for Immersive Site Experiences?
You can combine aerial photos with VR software to create 3D site models. Upload drone imagery to VR platforms, add interactive elements, and use VR headsets to offer clients immersive walkthroughs of proposed designs.
What Are the Best Practices for Aerial Night Photography of Illuminated Structures?
You'll want to use long exposures, a low ISO, and a stable drone. Capture multiple shots at different exposures for HDR. Focus on light patterns and contrast. Don't forget to adjust white balance for artificial lighting.
How Can Drone Imagery Be Used to Assess and Plan for Sustainable Landscaping?
You can use drone imagery to assess sustainable landscaping by capturing detailed aerial views. You'll identify water-efficient areas, map vegetation patterns, plan solar panel placement, and analyze topography for natural drainage systems. It's an efficient tool for eco-friendly design.
What Role Does Artificial Intelligence Play in Analyzing Aerial Site Photography?
AI plays an essential role in analyzing aerial site photos. You'll find it can quickly identify features, assess vegetation health, detect changes over time, and even predict potential issues. It's revolutionizing how you interpret and use this data.
How Can Architects Use Thermal Imaging Drones for Energy Efficiency Assessments?
You can use thermal imaging drones to detect heat loss in buildings. They'll show you areas of poor insulation, air leaks, and thermal bridges. You'll identify energy inefficiencies and plan targeted improvements for better building performance.
In Summary
You've now got the essentials for integrating UAV photography into your architectural practice. Remember to stay updated on regulations, choose the right equipment, and plan your flights carefully. As you incorporate aerial data into your designs and presentations, you'll open up new perspectives for your clients. Always prioritize safety and ethical considerations. With these tools and knowledge, you're ready to elevate your architectural vision to new heights.
As educators and advocates for responsible drone use, we’re committed to sharing our knowledge and expertise with aspiring aerial photographers.


Leave a Reply