Golden hour shots shine from above due to the unique lighting conditions just after sunrise or before sunset. You'll capture soft, warm glows that enhance depth and texture, with directional light creating stunning side-lighting effects. To make your aerial shots pop, adjust your drone's camera settings for ideal exposure and use composition techniques like leading lines and the rule of thirds. Timing is essential, so plan your flight carefully and choose locations with unobstructed views. Don't forget to take into account seasonal changes and wind conditions for the best results. With the right approach, you'll reveal the secrets to creating mesmerizing golden hour imagery from the sky.
Key Takeaways
- Golden hour's soft, warm light enhances depth, texture, and color saturation in aerial photographs.
- Low-angle directional light creates striking side-lighting effects and long shadows for visual interest.
- Optimal camera settings, including aperture, shutter speed, and white balance, capture the unique qualities of golden hour light.
- Composition techniques like leading lines and the rule of thirds maximize the impact of aerial golden hour shots.
- Timing flights to coincide with golden hour and adjusting for seasonal changes ensures the best lighting conditions.
Understanding Golden Hour Lighting
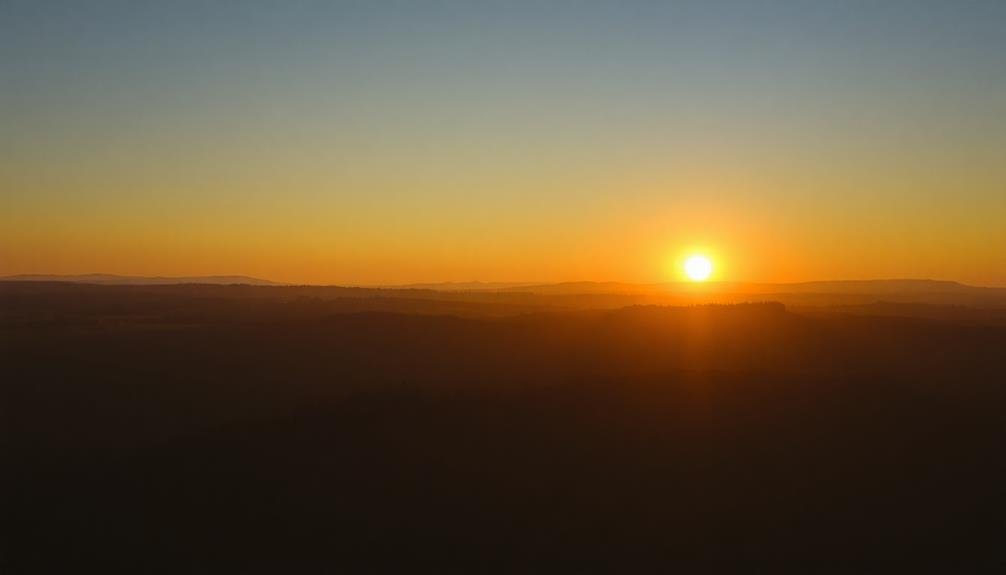
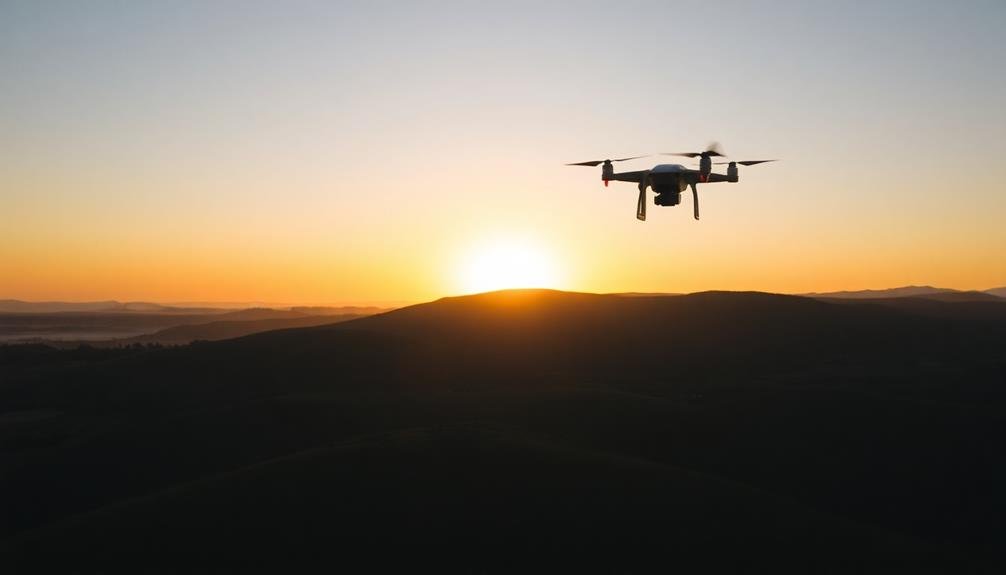
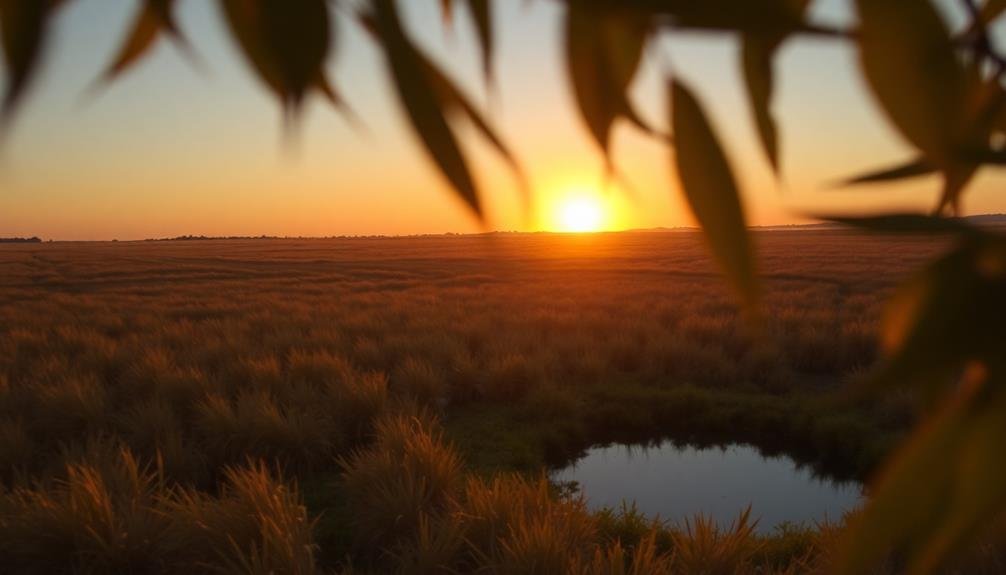
Capturing the essence of golden hour requires a keen understanding of its unique lighting conditions. During this magical time, typically occurring just after sunrise or before sunset, the sun's position creates a soft, warm glow that bathes everything in golden light.
You'll notice long shadows and a diffused quality to the light, which can dramatically enhance the depth and texture of your subjects.
To make the most of golden hour lighting, you'll need to pay attention to its characteristics. The light is directional, coming from a low angle, which can create stunning side-lighting effects.
It's also less intense than midday sun, reducing harsh contrasts and allowing for more balanced exposures. You'll find that colors appear more saturated and vibrant during this time, especially warm tones like reds, oranges, and yellows.
As you shoot, be aware that golden hour light changes quickly. The color temperature shifts as the sun's position changes, so you may need to adjust your white balance settings accordingly.
Optimal Drone Settings
To capture stunning golden hour shots with your drone, you'll need to fine-tune your camera settings.
Start by adjusting the aperture and ISO to balance light exposure.
Then consider your shutter speed to freeze or blur motion as desired.
Aperture and ISO Adjustments
During golden hour, mastering your drone's aperture and ISO settings is essential for stunning aerial photography.
You'll need to find the right balance between these two settings to capture the warm, golden light while maintaining image quality.
For aperture, aim for a wider setting (lower f-number) to let in more light and create a shallower depth of field. This can help emphasize your subject and create a dreamy atmosphere.
As for ISO, keep it as low as possible to minimize noise in your images. However, you may need to increase it slightly to compensate for the fading light.
Consider these tips when adjusting your drone's aperture and ISO:
- Start with a wider aperture (f/2.8 to f/4) to capture more light
- Keep ISO between 100-400 to maintain image quality
- Use aperture priority mode for more control over depth of field
- Experiment with different combinations to find the perfect balance
Shutter Speed Considerations
How does shutter speed affect your golden hour drone shots? During this magical time, you'll need to balance capturing the warm, soft light with the movement of your drone. A faster shutter speed will freeze motion, ensuring sharp images even with slight wind or drone vibrations. However, you might miss out on the subtle color gradients and light streaks that make golden hour so special.
For stationary landscape shots, try slower shutter speeds between 1/60 and 1/15 of a second. This allows more light to hit the sensor, enhancing the golden glow and creating a dreamy atmosphere. Use your drone's gimbal stabilization or a tripod mode if available to minimize blur.
When capturing moving subjects or flying in windier conditions, increase your shutter speed to at least 1/250 or faster. This will help maintain image sharpness while still benefiting from the golden hour's warm tones.
Experiment with different shutter speeds to achieve various effects. Long exposures can create stunning light trails from traffic or smooth out water surfaces, while faster speeds can capture crisp details in fast-moving subjects like birds or waves.
Always consider your creative vision and the specific scene you're shooting when selecting your shutter speed.
White Balance Selection
White balance selection plays an essential role in capturing the true essence of golden hour with your drone. During this magical time, the light's color temperature changes rapidly, affecting how your camera interprets colors.
To guarantee your shots accurately represent the warm, golden tones characteristic of this period, you'll need to adjust your white balance settings carefully.
Start by avoiding the auto white balance mode, as it may not consistently capture the golden hues. Instead, opt for manual white balance adjustments or use presets like "cloudy" or "shade" to enhance the warm tones. You can also create a custom white balance setting by using a gray card or a neutral surface as a reference point.
Consider these factors when selecting your white balance:
- The sun's position and intensity
- Surrounding landscape colors
- Presence of clouds or haze
- Your artistic vision for the final image
Experiment with different white balance settings to find the perfect balance between accuracy and creativity.
Remember, you can always fine-tune your images in post-processing, but getting it right in-camera will save you time and preserve image quality.
Composition Techniques for Aerial Shots
Aerial photography during the golden hour can take your shots to new heights, quite literally. To make the most of this magical time, you'll need to master specific composition techniques tailored for aerial shots.
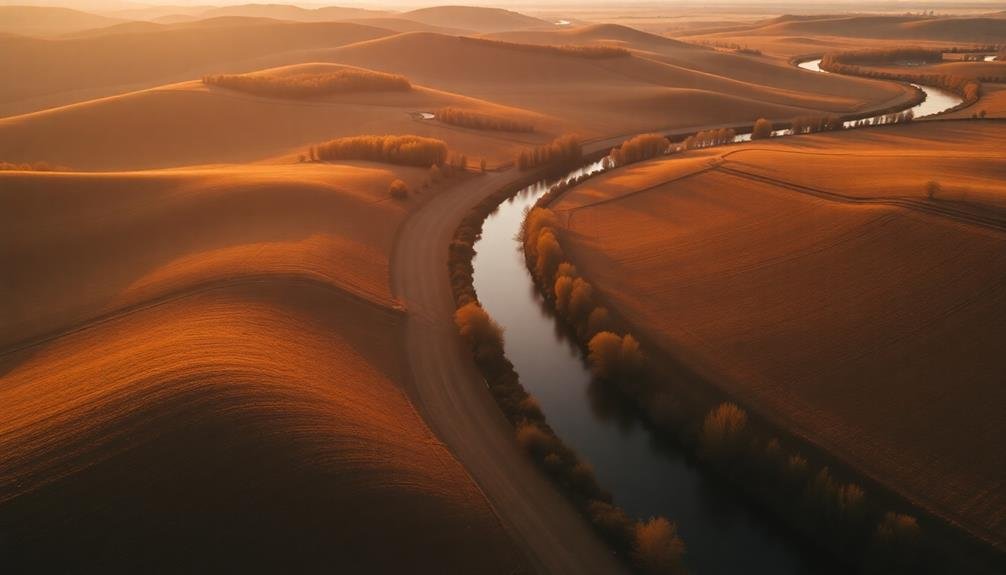
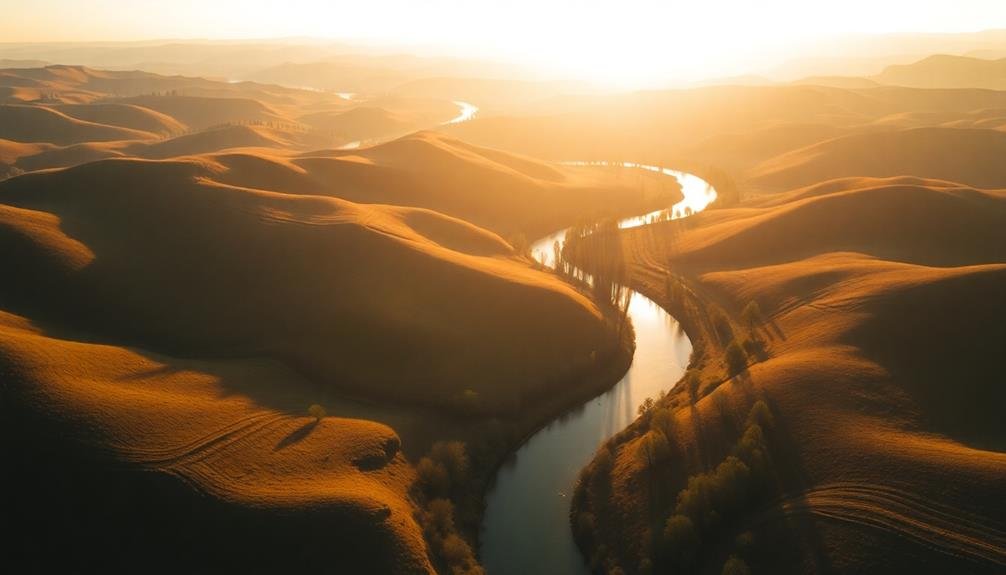
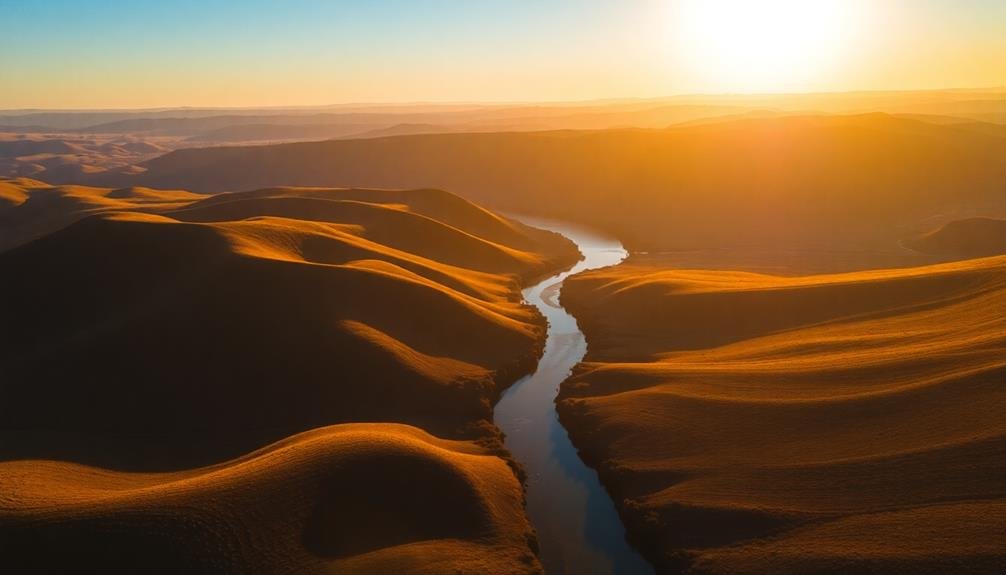
First, focus on leading lines. Rivers, roads, and coastlines bathed in golden light create natural pathways that guide the viewer's eye through your image. Use these to add depth and direction to your composition.
Next, embrace the rule of thirds. Divide your frame into a 3×3 grid and place key elements along these lines or at their intersections. This creates a balanced and visually appealing composition.
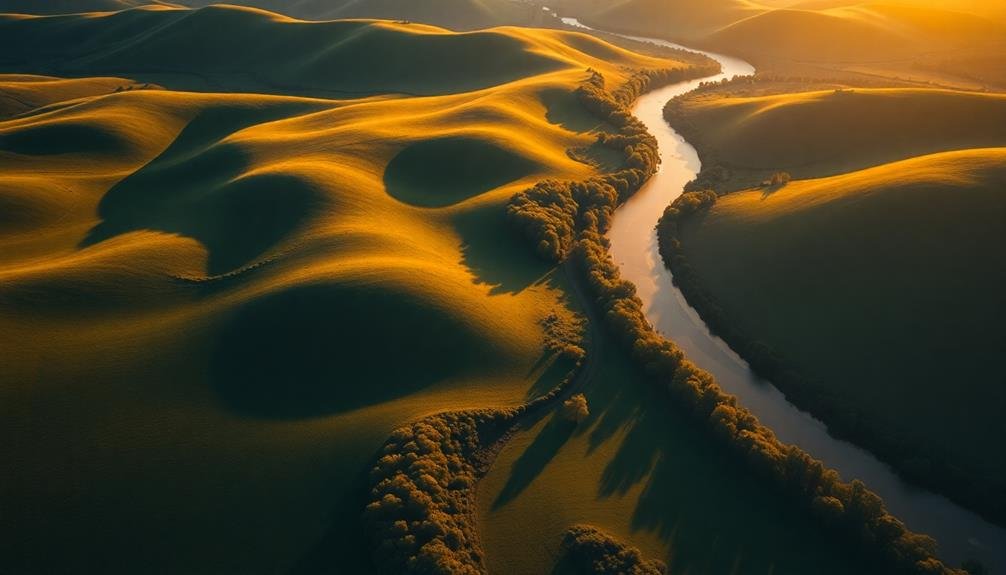
Don't forget about patterns and textures. From above, landscapes often reveal fascinating geometric shapes and repetitive elements. Highlight these to add visual interest to your shots.
Experiment with negative space. The vast sky or expansive landscapes can provide a striking contrast to your main subject, creating a sense of scale and drama.
Lastly, consider your altitude. Flying lower can capture intimate details, while higher altitudes offer sweeping vistas. Adjust your height to achieve the desired perspective and composition for your golden hour masterpiece.
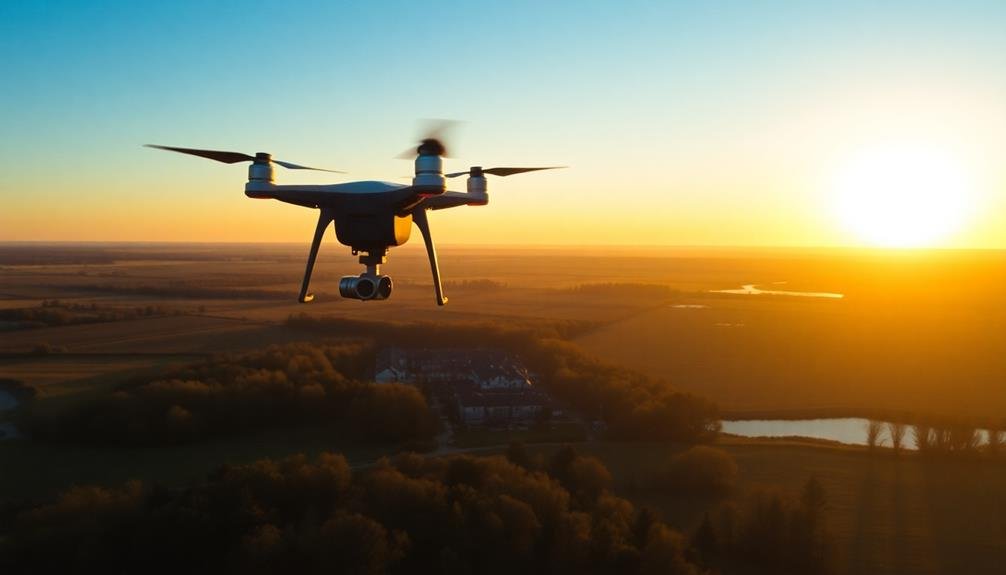
Timing Your Drone Flight
To capture stunning golden hour shots with your drone, you'll need to master the art of timing.
Start by predicting the perfect golden hour using smartphone apps or online calculators, then calculate your ideal flight duration based on your drone's battery life and desired shots.
Remember to adjust your timing for seasonal changes, as the golden hour occurs at different times throughout the year.
Predicting Perfect Golden Hour
Accurately predicting the golden hour is essential for capturing stunning drone shots. To guarantee you're in the right place at the right time, use reliable weather apps and solar calculators. These tools can help you determine the exact timing of sunrise and sunset for your specific location on any given day.
Consider factors that might affect the quality of light during golden hour, such as cloud cover, pollution levels, and local terrain. Mountains, tall buildings, or dense forests can impact how early or late the golden light appears in your shooting area.
Always scout your location in advance to identify potential obstacles and plan your flight path accordingly.
To make the most of your golden hour drone photography:
- Arrive at least 30 minutes before the predicted golden hour
- Set up your equipment and perform pre-flight checks
- Monitor changing light conditions and adjust your camera settings
- Be prepared to act quickly, as golden hour typically lasts only 20-30 minutes
Remember that golden hour occurs twice daily – shortly after sunrise and before sunset. Experiment with both times to discover which works best for your specific location and subject matter.
With practice and careful planning, you'll master the art of predicting and capturing perfect golden hour shots from above.
Calculating Optimal Flight Duration
Calculating the ideal flight duration for your golden hour drone shots is essential for maximizing your time in the air. Consider your drone's battery life, the specific shots you want to capture, and the rapidly changing light conditions. Most consumer drones have a flight time of 20-30 minutes, so plan accordingly.
Start by prioritizing your shots. List the locations and compositions you want to capture, then estimate the time needed for each. Factor in travel time between locations and any setup adjustments.
Don't forget to allocate time for unexpected opportunities that may arise. Monitor your drone's battery levels closely. It's wise to land with at least 20% battery remaining, so factor this into your calculations.
If you need more time, consider having spare batteries on hand for quick swaps. Remember that golden hour light changes quickly. You might need to work faster than usual to capture the best shots.
Practice your flight patterns and camera movements beforehand to maximize efficiency during the actual shoot. Lastly, be prepared to adapt. Weather conditions, unforeseen obstacles, or creative inspiration may require you to adjust your flight duration on the spot.
Adjusting for Seasonal Changes
Seasonal variations greatly impact golden hour timing, requiring drone pilots to adjust their flight schedules throughout the year. As the Earth's tilt changes, so do sunrise and sunset times, affecting the duration and quality of golden hour light.
You'll need to stay informed about these shifts to capture the best shots consistently. To adapt to seasonal changes, consult reliable astronomical calendars or apps that provide accurate sunrise and sunset times for your location. These tools will help you plan your flights with precision, ensuring you're in the air at the ideal moment.
Remember that golden hour isn't just about timing; it's also about the quality of light, which can vary depending on atmospheric conditions and season.
Here are key factors to take into account when adjusting for seasonal changes:
- Length of day: Summer days offer longer golden hours, while winter provides shorter windows
- Sun's position: The sun's angle changes throughout the year, affecting shadows and light intensity
- Weather patterns: Seasonal weather can impact visibility and create unique lighting conditions
- Landscape changes: Different seasons offer varied scenery, from autumn foliage to snow-covered landscapes
Choosing the Right Location
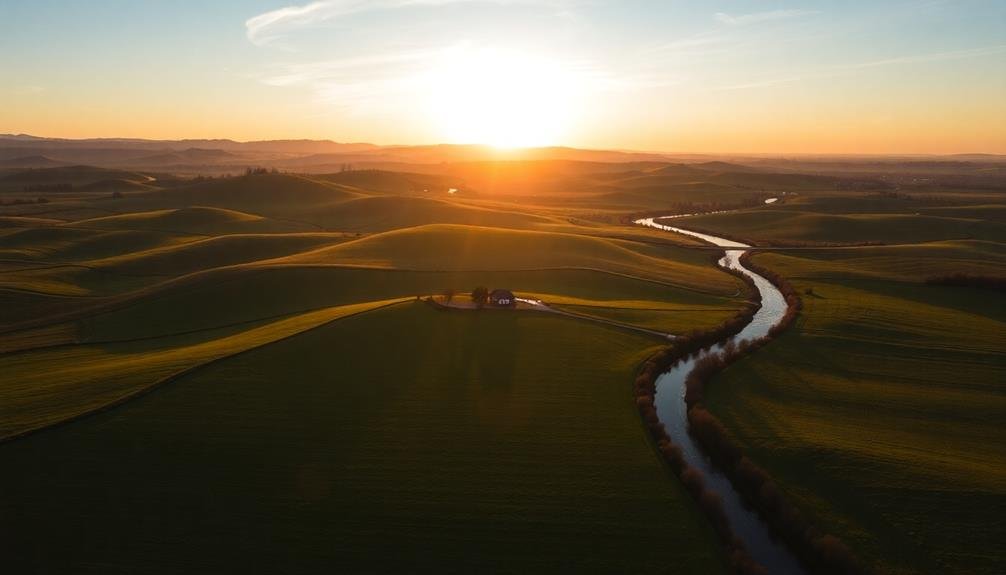
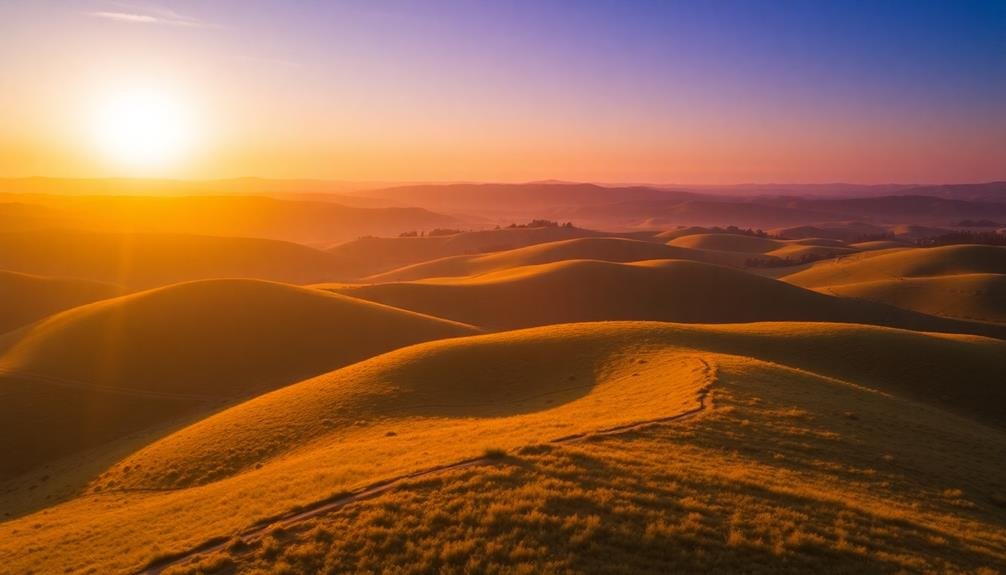
Selecting the perfect spot for your golden hour shots can make or break your photography session. Look for locations that offer unobstructed views of the horizon, allowing you to capture the full spectrum of warm, golden light.
Reflect on elevated positions like hilltops or rooftops, which can provide unique perspectives and stunning vistas. Water bodies, such as lakes, oceans, or rivers, can add a magical element to your shots by reflecting the golden light and creating mesmerizing mirror effects.
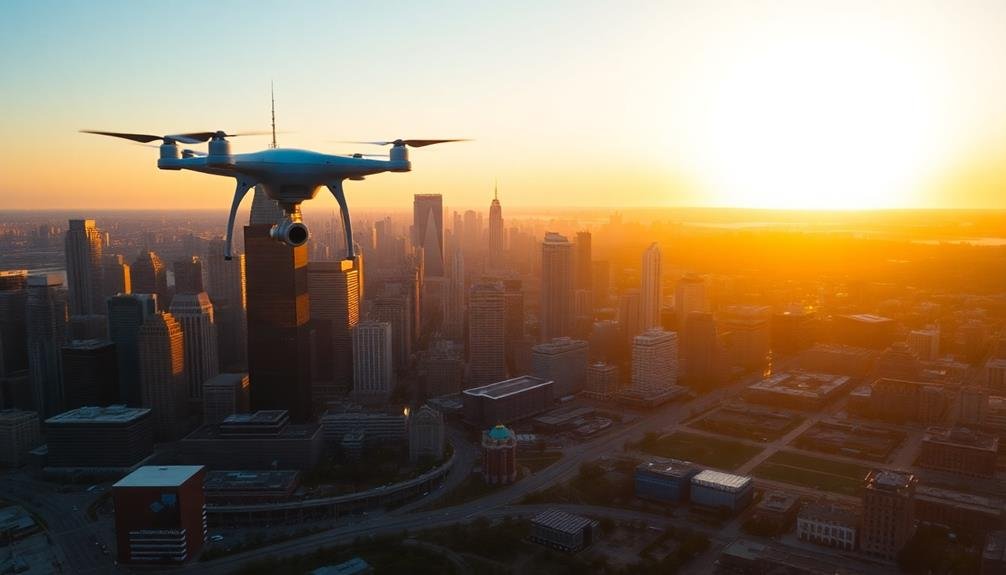
Urban environments with interesting architecture can also yield striking results, as the golden light interacts with buildings and creates long, dramatic shadows.
Don't overlook natural landscapes like fields, forests, or deserts. These settings can be transformed by the soft, warm light, creating ethereal scenes. When scouting locations, pay attention to potential foreground elements that can add depth and interest to your compositions.
Remember to reflect on accessibility and safety when choosing your spot. You'll need to arrive well before the golden hour begins, so verify you can reach the location with enough time to set up your equipment and prepare for the shot.
Utilizing Shadows and Highlights
During golden hour, you'll find that shadows and highlights play an essential role in creating depth and dimension in your photos.
By positioning your subject strategically, you can use long shadows to add visual interest and lead the viewer's eye through the image.
Additionally, you can leverage the warm, golden light to enhance the color palette of your shots, creating a rich and inviting atmosphere.
Creating Depth and Dimension
One of the most compelling aspects of golden hour photography is its ability to create stunning depth and dimension in your shots.
The low angle of the sun during this magical time casts long shadows and produces warm, directional light that can transform ordinary scenes into extraordinary images.
To enhance depth and dimension in your golden hour photographs, you'll want to:
- Use foreground elements to create layers in your composition
- Incorporate leading lines that guide the viewer's eye through the frame
- Experiment with different angles and perspectives to maximize the interplay of light and shadow
- Utilize the natural contrast between warm sunlight and cool shadows
Enhancing Warm Color Palette
The warm color palette is a hallmark of golden hour photography, and you can enhance it by skillfully utilizing shadows and highlights. During this magical time, the sun's low angle creates long shadows and soft, warm light that bathes everything in golden hues.
To make the most of this palette, expose for the highlights to preserve the rich, warm tones in the sky and bright areas. Use shadows to add depth and contrast to your images. Look for areas where shadows fall across your subject, creating interesting patterns and textures.
You can also use shadows to frame your subject, drawing the viewer's eye to the main focal point. Experiment with backlighting to create a dreamy, ethereal effect. Position your subject between you and the sun, allowing the warm light to rim their edges.
This technique can produce stunning silhouettes or add a soft glow to portraits. Don't be afraid to slightly underexpose your shots to intensify the warm colors. You can always bring out details in post-processing while maintaining the rich, golden tones that make golden hour shots so enchanting.
Color Grading Golden Hour Footage
For stunning golden hour footage, color grading plays a crucial role in enhancing the warm, ethereal glow characteristic of this magical time. You'll want to focus on accentuating the golden tones while maintaining a natural look. Start by adjusting the white balance to emphasize the warm hues, then fine-tune the highlights and shadows to create depth and dimension.
When color grading golden hour footage, consider these key elements:
- Boost orange and yellow tones in the midtones
- Slightly reduce blue saturation in the shadows
- Increase overall contrast to enhance the golden glow
- Add a subtle vignette to draw attention to the center of the frame
Don't overdo the adjustments, as you want to preserve the authentic feel of the golden hour. Experiment with different LUTs (Look-Up Tables) designed specifically for golden hour footage to streamline your workflow.
Pay attention to skin tones, ensuring they remain natural and flattering. Finally, use selective color adjustments to fine-tune specific areas of your footage, such as enhancing the warmth of a sunset sky or the golden reflections on water surfaces.
With careful color grading, you'll bring out the best in your golden hour shots, creating enchanting visuals that truly shine.
Dealing With Wind Challenges
While capturing the perfect golden glow is important, you'll often face another challenge during golden hour shoots: wind. It can wreak havoc on your footage, causing camera shake and unwanted movement in the scene. To combat this, use a sturdy tripod and consider adding weight to it for extra stability. If you're shooting handheld, activate your camera's image stabilization feature.
For aerial shots, wind poses an even greater challenge. Ascertain your drone can handle the conditions and adjust your flight patterns accordingly. Flying into the wind first will give you more control and battery life for the return trip.
Here's a quick guide to managing wind challenges:
| Wind Speed (mph) | Ground Shooting | Aerial Shooting |
|---|---|---|
| 0-5 | Minimal impact | Safe to fly |
| 6-10 | Use tripod | Caution advised |
| 11-15 | Add weight | Experienced only |
| 15+ | Reschedule | Avoid flying |
Lens Selection for Drone Cameras
Photographers often overlook the importance of lens selection for drone cameras, but it's essential for capturing stunning golden hour shots. When choosing a lens for your drone, take into account the focal length and aperture.
Wide-angle lenses are popular for their ability to capture expansive landscapes, while telephoto lenses allow you to zoom in on distant subjects. Prime lenses offer superior image quality but lack versatility, whereas zoom lenses provide flexibility at the cost of some sharpness.
For golden hour photography, you'll want to prioritize lenses with wide apertures to let in more light and create a shallow depth of field. This helps emphasize your subject and create a dreamy atmosphere.
Don't forget to take into account the weight of the lens, as it can affect your drone's flight time and stability.
Here are some key factors to take into account when selecting a lens for drone golden hour photography:
- Focal length: Wide-angle for landscapes, telephoto for distant subjects
- Aperture: Wider apertures (lower f-numbers) for better low-light performance
- Image stabilization: Helps reduce blur from drone movement
- Weight: Lighter lenses extend flight time and improve maneuverability
Post-Processing Golden Hour Imagery
Once you've captured your golden hour shots with the perfect lens, it's time to enhance their beauty through post-processing.
Start by adjusting the white balance to accentuate the warm tones characteristic of golden hour. Increase the temperature slightly to emphasize the orange and yellow hues, but be careful not to overdo it.
Next, focus on contrast and exposure. Boost the shadows to reveal details in darker areas while slightly reducing highlights to prevent overexposure of bright spots.
Use the dehaze tool sparingly to add depth and clarity to your images without losing the soft, ethereal quality of golden hour light.
Color grading is vital for golden hour imagery. Enhance the oranges and yellows in your shots, but also pay attention to complementary colors like blues in the sky.
Use split toning to add warmth to highlights and coolness to shadows, creating a balanced look.
Legal Considerations for Aerial Photography
Maneuvering the legal landscape of aerial photography can be complex, especially when capturing golden hour shots.
You'll need to be aware of various regulations and restrictions that govern airspace and privacy concerns. Before launching your drone or aircraft, research local laws and obtain any necessary permits or licenses.
When shooting during golden hour, you must be particularly mindful of time constraints and safety considerations.
Remember that flying at dusk may require special equipment or permissions. Always prioritize safety and respect for others' privacy over getting the perfect shot.
Key legal considerations for aerial golden hour photography include:
- Adhering to FAA regulations for drone flights, including altitude restrictions and no-fly zones
- Obtaining property owner permission when shooting over private land
- Respecting privacy laws and avoiding capturing identifiable individuals without consent
- Following local ordinances regarding noise and time-of-day restrictions for drone operations
Stay informed about changes in regulations, as laws surrounding aerial photography are constantly evolving.
Join professional organizations or online communities to keep up with the latest legal developments.
Frequently Asked Questions
How Does Air Pollution Affect Golden Hour Drone Photography?
You'll notice air pollution can impact your golden hour drone shots. It scatters light, creating a hazy effect and muting colors. However, it can also produce dramatic, warm-toned skies that add atmosphere to your photos.
Can Golden Hour Effects Be Simulated in Post-Processing for Non-Golden Hour Footage?
You can simulate golden hour effects in post-processing, but it's challenging to fully replicate the natural beauty. Use color grading, adjust white balance, add warm filters, and enhance shadows to create a similar look for non-golden hour footage.
What Safety Precautions Should Be Taken When Flying Drones During Golden Hour?
You'll want to be extra cautious when flying drones during golden hour. Keep an eye on your battery life, avoid flying into the sun, maintain visual line of sight, and be aware of changing light conditions.
How Do Different Seasons Impact the Quality of Golden Hour Aerial Shots?
You'll notice seasonal changes greatly affect golden hour aerial shots. In summer, you've got longer, warmer light. Fall brings rich, warm hues. Winter offers crisp, clear air. Spring showcases fresh, vibrant landscapes. Each season creates unique atmospheres.
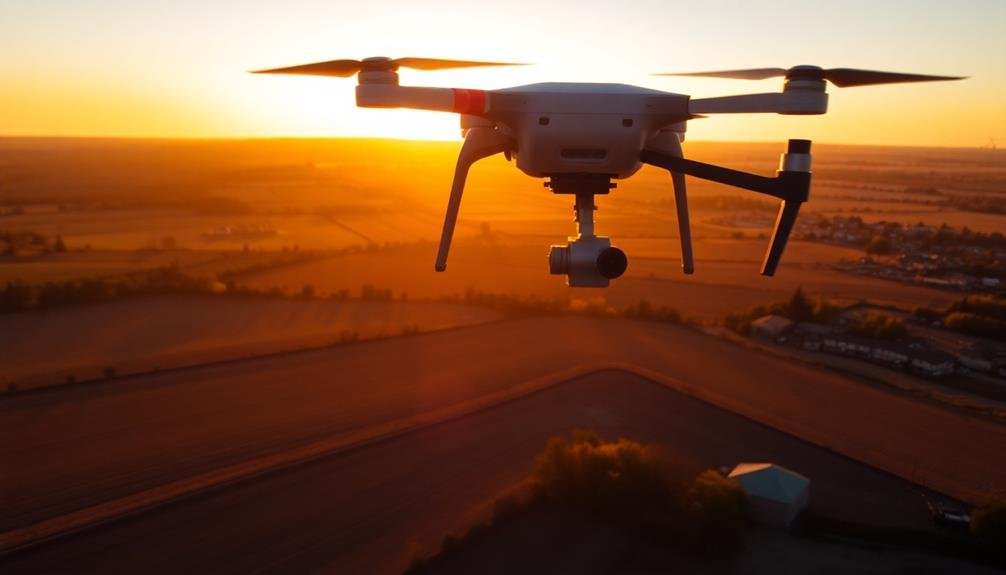
Are There Specific Drone Models Better Suited for Golden Hour Photography?
You'll find drones with larger sensors, adjustable apertures, and RAW shooting capabilities excel for golden hour photography. Models like DJI Mavic 3, Air 2S, or Autel EVO II Pro offer features that capture the warm, soft light beautifully.
In Summary
You've now got the tools to capture stunning golden hour shots from above. Remember to plan your flight, adjust your settings, and compose carefully. Don't forget to take into account the wind and legal requirements. With practice, you'll master the art of aerial golden hour photography. Keep experimenting with different locations and post-processing techniques. Your drone's unique perspective combined with golden hour's magical light will create truly breathtaking images that stand out from the crowd.
As educators and advocates for responsible drone use, we’re committed to sharing our knowledge and expertise with aspiring aerial photographers.


Leave a Reply