For stunning mirror-like reflections in sky photography, start by positioning yourself low to the water's surface. Use a drone for perfect symmetry and framing. Choose ideal times like golden or blue hour for dramatic lighting. Seek calm water conditions and remove any debris. Adjust your camera settings with narrow apertures and slow shutter speeds. In post-processing, enhance contrast and color to make reflections pop. When using drones, position them directly above the water for the best mirror effect. These techniques will elevate your sky photography, transforming ordinary scenes into enthralling symmetrical masterpieces. Explore further to reveal the full potential of reflection photography.
Key Takeaways
- Position yourself low and close to the water for maximum reflection surface area, experimenting with angles for optimal mirror effect.
- Shoot during golden or blue hour for dramatic lighting, and seek calm water conditions for clearer reflections.
- Use a narrow aperture (f/8 to f/16) and slower shutter speeds to capture sharp, smooth reflections.
- Employ a tripod and remote shutter release for stability during longer exposures, especially in low-light conditions.
- Adjust exposure, contrast, and color in post-processing to enhance the mirror-like quality of reflections.
Altitude for Perfect Reflections

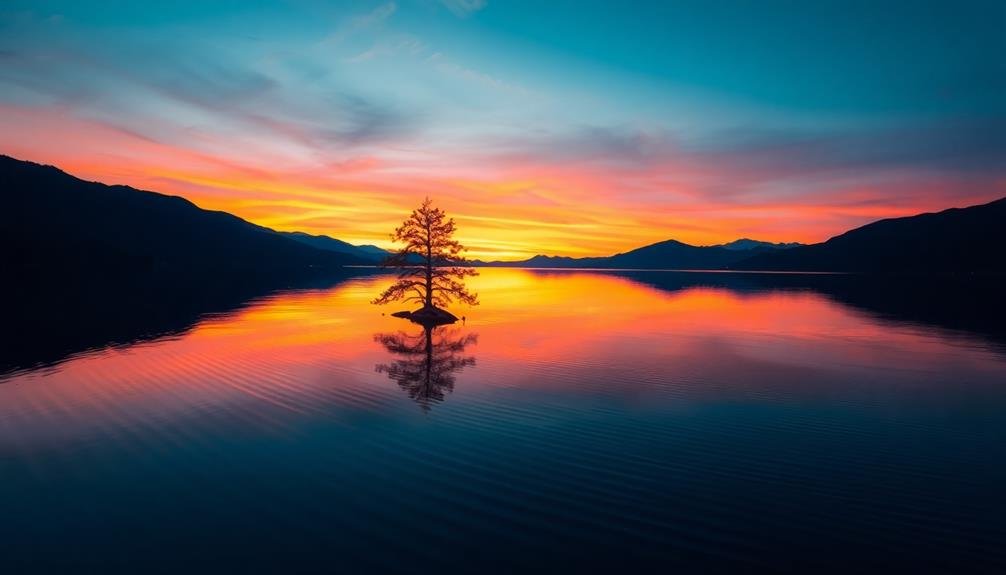
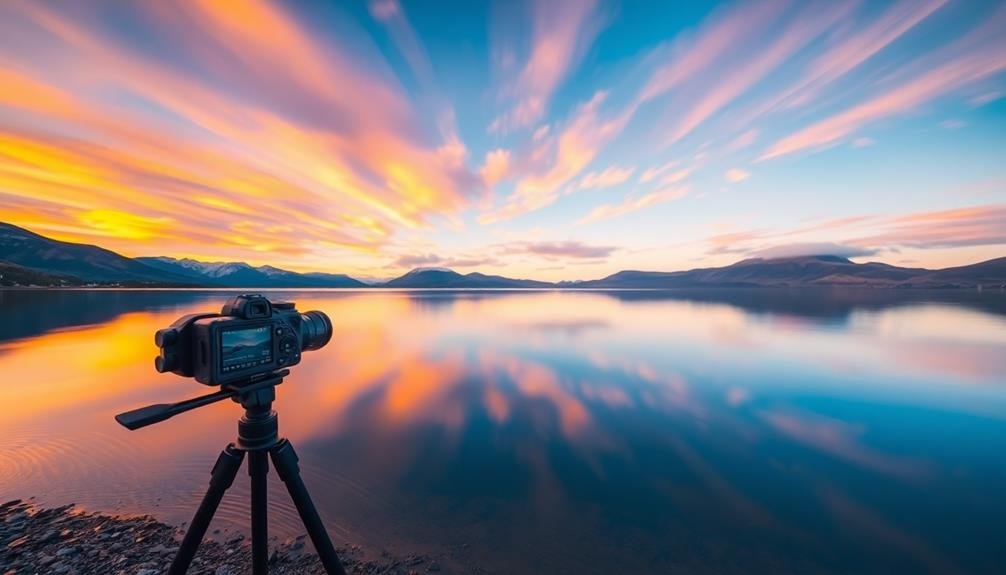
Height matters when it comes to capturing stunning sky reflections. Your position relative to the reflective surface can dramatically impact the quality of your sky photography. When you're too high, you'll miss out on the mirror-like effect you're aiming for. Instead, get low to maximize the reflection's surface area in your frame.
For best results, position yourself as close to the water level as possible. This might mean crouching, kneeling, or even lying down on the ground. By lowering your perspective, you'll create a more expansive reflection that fills a larger portion of your image. You'll also capture more of the sky's details in the reflection, enhancing the overall impact of your photo.
Don't forget to reflect on the angle of your camera. Tilt it slightly downward to emphasize the reflection and create a balanced composition. Experiment with different heights and angles to find the sweet spot that produces the most striking mirror effect.
Symmetrical Framing With Drones
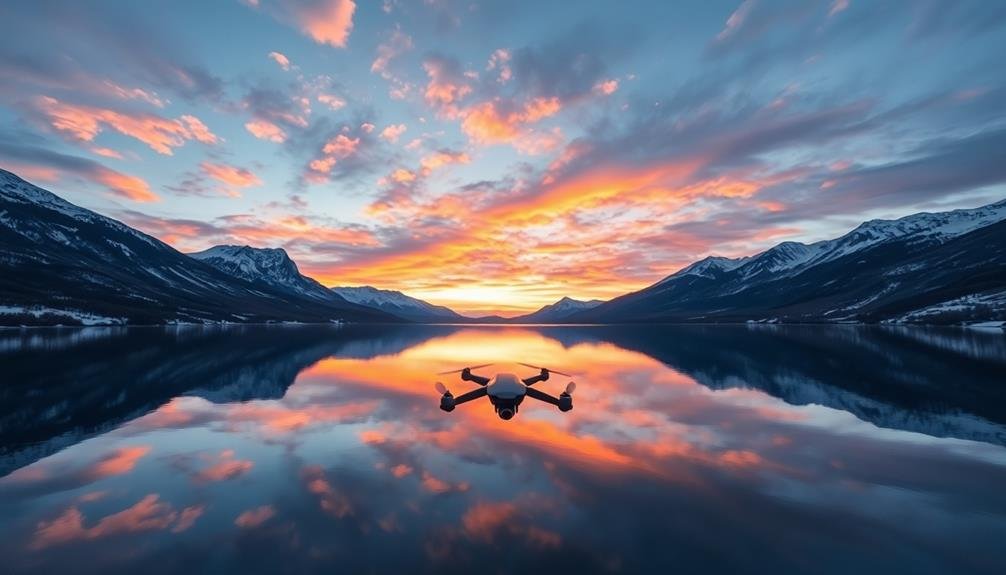
Drones have revolutionized sky photography, offering unprecedented opportunities for symmetrical framing. When capturing mirror-like reflections, you'll find that drones provide a unique vantage point for achieving perfect symmetry. Position your drone directly above the reflective surface, ensuring it's perfectly level. This bird's-eye view allows you to capture both the sky and its reflection in equal proportions.
To achieve the best results, use your drone's grid overlay feature to align the horizon precisely in the center of the frame. This will create a striking balance between the real and reflected elements. Experiment with different altitudes to find the sweet spot where the reflection appears most crisp and defined.
When framing your shot, look for natural elements that can act as leading lines or focal points on both sides of the horizon. These could be shorelines, trees, or architectural features.
Remember to adjust your drone's camera settings to accommodate for the varying light conditions between the sky and its reflection. Use bracketing or HDR modes to capture a wider dynamic range, ensuring both the sky and its mirror image are properly exposed.
Time of Day Considerations
When capturing sky photographs, timing is essential for achieving stunning results.
You'll find that the golden hour, just after sunrise or before sunset, bathes the sky in warm, soft light that's perfect for dramatic shots.
For a different mood, try shooting during the blue hour, when the sky's cooler tones can create enchanting reflections and a serene atmosphere.
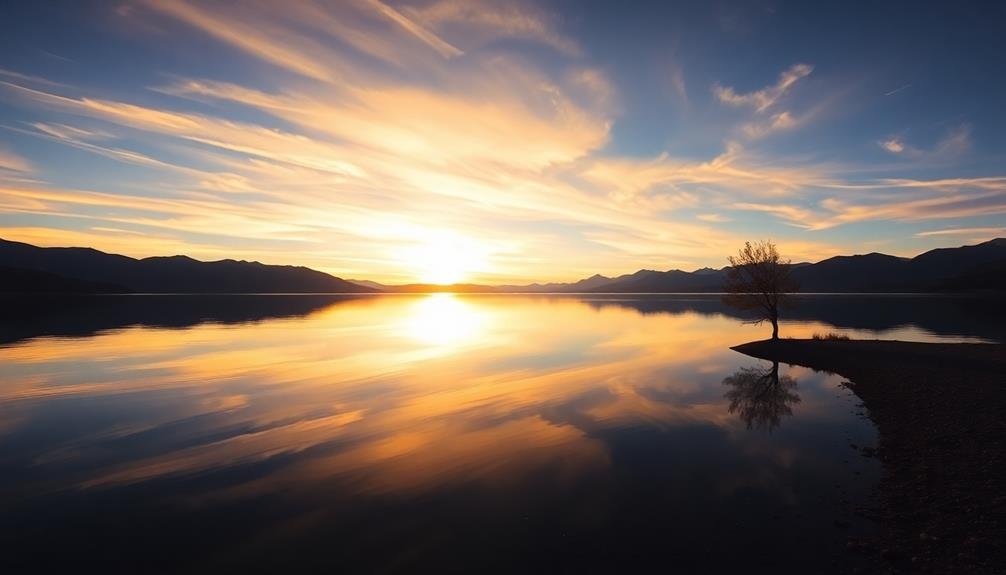
Golden Hour Magic
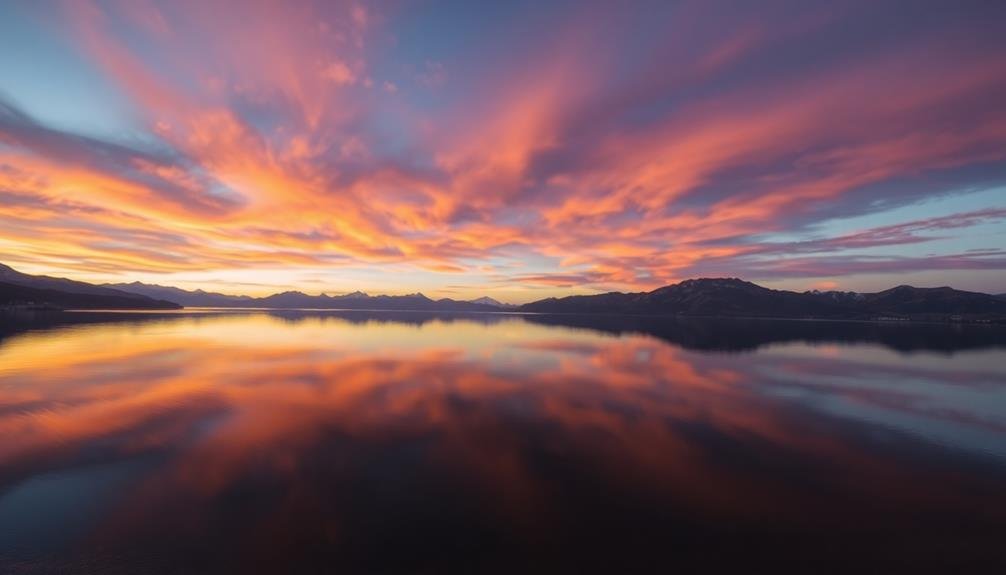
In accordance with the revered wisdom of photographers worldwide, the golden hour stands out as the prime time for capturing breathtaking sky images. This magical period occurs shortly after sunrise and before sunset, bathing the landscape in warm, golden light. You'll find that during this time, the sky's colors are at their most vibrant, creating stunning reflections on water surfaces.
To make the most of golden hour photography, you'll need to plan ahead. Scout your location in advance and arrive early to set up your equipment. Keep an eye on the weather forecast, as clear or partly cloudy skies often yield the best results. Use a tripod to guarantee sharp images, and experiment with different exposure settings to capture the perfect balance of light and color.
| Golden Hour Tips | Morning | Evening |
|---|---|---|
| Arrival Time | 30 min before sunrise | 1 hour before sunset |
| Best Conditions | Clear skies | Scattered clouds |
| Camera Settings | Low ISO, f/8-f/11 | Low ISO, f/8-f/11 |
| Compositional Focus | East-facing scenes | West-facing scenes |
| Post-Processing | Enhance warm tones | Balance cool tones |
Blue Hour Reflections
Tranquility descends as the blue hour unfolds, offering photographers a unique opportunity to capture ethereal sky reflections. This fleeting period, occurring just before sunrise or after sunset, bathes the world in a soft, blue-tinted light that's perfect for mirror-like reflections.
To make the most of blue hour reflections, you'll need to time your shoot carefully. The blue hour typically lasts 20-30 minutes, so arrive early to set up your equipment.
Look for calm bodies of water like lakes, ponds, or even puddles that can serve as natural mirrors. Position your camera low to maximize the reflection's surface area.
Use a tripod to keep your camera steady during longer exposures, which you'll likely need in the dimming light. Opt for a wide-angle lens to capture expansive sky scenes.
Set your camera to a low ISO (100-400) to minimize noise, and use a smaller aperture (f/8-f/11) for greater depth of field. Experiment with shutter speeds to achieve the desired effect, whether it's a silky smooth water surface or crisp reflections of clouds and stars.
Water Surface Conditions
The state of the water's surface plays an essential role in sky photography. You'll want to seek out calm, still water for the best mirror-like reflections. Lakes, ponds, and even puddles can provide excellent surfaces when there's no wind. However, don't dismiss slightly rippled water entirely; it can create interesting, abstract effects that add texture to your images.
To maximize your chances of finding calm water, plan your shoots for early morning or late evening when winds are typically at their lowest. If you're working with larger bodies of water, sheltered coves or inlets often offer more protection from breezes. In urban settings, fountains or artificial pools can provide controlled environments for reflections.
Keep an eye out for debris or floating objects that might disrupt the reflection. A small leaf or twig can be easily removed, but larger obstacles may require you to reposition.
If you're facing persistent ripples, try using a longer exposure to smooth out the water's surface. A neutral density filter can help you achieve this effect even in brighter conditions. Remember, the smoother the water, the more defined and crisp your sky reflection will be.
Camera Settings for Reflections
To capture stunning sky reflections, you'll want to optimize your camera settings.
Use a narrow aperture (high f-number) for sharp reflections across the entire image, and experiment with slow shutter speeds to smooth out water ripples.
Keep your ISO as low as possible to minimize noise, especially in low-light conditions.
Aperture for Sharp Reflections
When it comes to capturing sharp reflections in sky photography, your aperture setting plays a crucial role. To achieve crisp, mirror-like reflections, you'll want to use a smaller aperture, typically between f/8 and f/16. These narrower apertures increase your depth of field, ensuring both the sky and its reflection remain in focus.
Start by setting your camera to aperture priority mode (A or Av) and select an aperture of f/11 as a starting point. This setting often provides an ideal balance between sharpness and light intake.
If you're shooting in low light conditions, you might need to widen your aperture slightly to f/8 to maintain a reasonable shutter speed. Conversely, in bright daylight, you can stop down to f/16 for maximum depth of field.
Remember that using smaller apertures may require longer exposure times, so you'll need to stabilize your camera with a tripod.
If you're photographing moving water, experiment with different shutter speeds to find the right balance between sharpness and motion blur in the reflection. Don't forget to use a remote shutter release or your camera's self-timer to minimize camera shake.
Slow Shutter Speed Benefits
While aperture settings are key for sharpness, slow shutter speeds can dramatically enhance your sky reflections. By using longer exposures, you'll capture smoother water surfaces, creating a mirror-like effect that's perfect for reflecting clouds and celestial objects.
Start with shutter speeds around 1/15 to 1/4 of a second for moving water. This range often smooths ripples while maintaining some texture. For glass-like reflections, try exposures between 1 and 30 seconds. You'll need a tripod to keep your camera steady during these longer exposures.
Slow shutter speeds also help in low-light conditions, like during sunrise or sunset. They'll allow more light to hit your sensor, revealing details in both the sky and its reflection.
Use a neutral density filter if you're shooting in brighter conditions to avoid overexposure.
ISO and Noise Control
ISO settings play an essential role in capturing stunning sky reflections without compromising image quality. When shooting mirror-like reflections, you'll want to keep your ISO as low as possible to minimize digital noise in your images.
Start with the base ISO of your camera, typically 100 or 200, and adjust other settings like aperture and shutter speed to achieve proper exposure.
If you're shooting in low-light conditions, you may need to increase your ISO. However, be cautious not to push it too high, as this can introduce unwanted noise and reduce the clarity of your reflection. Modern cameras often have impressive high-ISO performance, but it's still best to stay within your camera's ideal range.
To control noise effectively while maintaining image quality:
- Use a tripod to allow for longer exposures at lower ISO settings
- Experiment with in-camera noise reduction features
- Shoot in RAW format for more flexibility in post-processing
- Consider using noise reduction software for challenging shots
Post-Processing Reflection Enhancement
In addition to capturing stunning sky reflections in-camera, post-processing techniques can greatly enhance the impact of reflected elements. You'll find that careful editing can transform a good reflection shot into an extraordinary one.
Start by adjusting the overall exposure and contrast to guarantee the sky and its reflection are well-balanced. Use the dehaze tool to reduce any atmospheric haze that might be dulling the reflection.
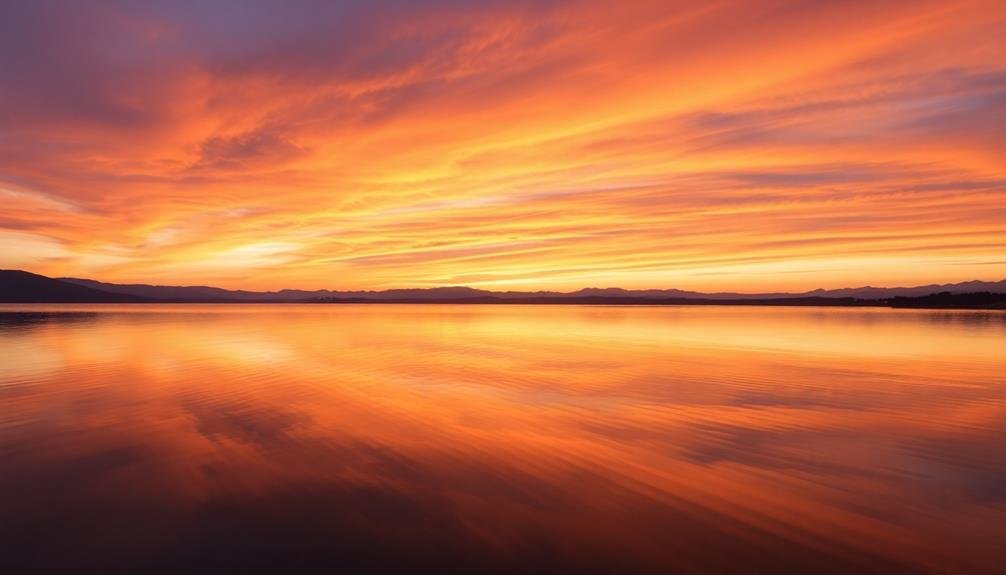
Next, focus on color grading. Boost the vibrancy of both the sky and water to make the colors pop. You can use selective color adjustments to enhance specific hues, like blues in the sky or golden tones during sunset.
Don't forget to fine-tune the white balance to achieve the most natural-looking reflection. For a mirror-like effect, you'll want to increase the clarity and sharpness of the reflected image.
Use local adjustments to brighten the water's surface slightly, making the reflection more prominent. If necessary, employ the clone stamp or healing brush to remove any distracting elements that break up the reflection.
Drone Positioning for Mirror Effects
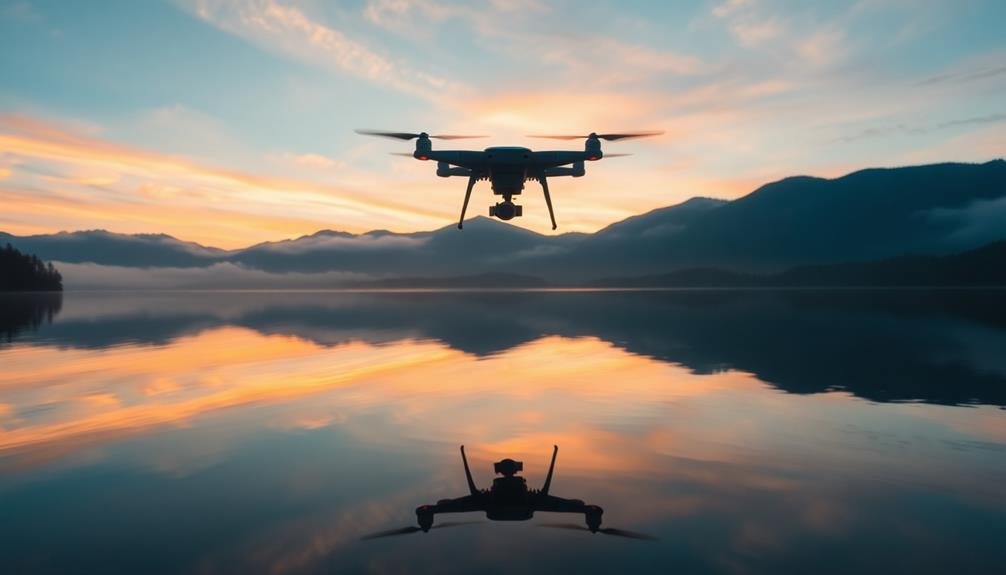
Aerial photography opens up a whole new domain of possibilities for capturing mirror-like reflections. With a drone, you can position your camera at angles and heights that were previously impossible, allowing you to create stunning mirror effects in your sky photography.
To achieve the perfect mirror-like reflection using a drone, you'll need to take into account several factors. First, make sure you're flying at the right altitude. Too high, and you'll lose the detail in the reflection; too low, and you won't capture enough of the sky.
Second, pay attention to the angle of your drone's camera. A slight tilt can make a significant difference in the final image. Third, timing is essential. Early morning or late evening often provide the best conditions for mirror-like reflections.
Here are some key tips for drone positioning:
- Maintain a steady hover to avoid blurring
- Use the rule of thirds to compose your shot
- Experiment with different heights for varied perspectives
- Think about using ND filters to balance exposure
Remember to always follow local drone regulations and prioritize safety. With practice and patience, you'll master the art of capturing breathtaking mirror-like reflections from the air.
Frequently Asked Questions
Can Reflection Photography Be Done in Urban Settings With Buildings?
Yes, you can definitely capture reflection photography in urban settings with buildings. You'll find great opportunities using glass facades, puddles on streets, or reflective surfaces like polished marble. Experiment with angles and lighting for stunning urban reflections.
How Do You Protect Camera Equipment From Water Damage During Reflection Shoots?
You'll want to protect your gear during reflection shoots. Use waterproof camera covers, rain sleeves, or plastic bags. Keep equipment elevated on tripods. Avoid splashing and carry microfiber cloths to wipe off any water droplets quickly.
Are There Specific Lenses Best Suited for Capturing Sky Reflections?
You'll find wide-angle lenses are ideal for sky reflections. They capture more of the scene and emphasize the foreground. A 14-24mm or 16-35mm lens is perfect. Don't forget to use a polarizing filter for enhanced reflections.
What Safety Precautions Should Be Taken When Using Drones for Reflection Photography?
When using drones for reflection photography, you'll need to follow local regulations, avoid flying near people or buildings, maintain visual line of sight, and be aware of weather conditions. Don't forget to secure your camera properly.
How Can You Create Artificial Reflections When Natural Water Sources Aren't Available?
You can create artificial reflections using large mirrors, reflective surfaces like glass or polished metal, or even a shallow pan of water. Experiment with angles and lighting to achieve the desired effect in your composition.
In Summary
You've now got the tools to capture stunning sky reflections in your photography. Remember to contemplate altitude, symmetry, timing, and water conditions. Adjust your camera settings and use post-processing techniques to enhance the mirror effect. With drones, you'll gain access to even more possibilities for unique perspectives. Keep practicing these techniques, and you'll soon master the art of creating mesmerizing reflected skyscapes that'll leave viewers in awe of your images.
As educators and advocates for responsible drone use, we’re committed to sharing our knowledge and expertise with aspiring aerial photographers.


Leave a Reply