To show scale in your sky-high shots, start by including people or vehicles as reference points. Use recognizable landmarks to provide context and contrast natural elements with man-made structures. Fly at different altitudes to manipulate perspective and create depth perception through leading lines. Employ the rule of thirds for balanced compositions and capture long shadows for added depth. Utilize symmetry and patterns to convey vastness, and frame your shots with foreground objects for context. Experiment with tilt-shift effects to create a miniature look. By mastering these techniques, you'll elevate your aerial photography to new heights.
Key Takeaways
- Include people or vehicles in your shots to provide a familiar point of reference for scale.
- Utilize recognizable landmarks to offer instant context for location and size comparison.
- Contrast natural elements with man-made structures to create interesting juxtapositions and highlight scale differences.
- Use foreground objects to frame the main subject and enhance depth perception in your compositions.
- Capture scenes from multiple altitudes to show a progression of scale and provide varied perspectives.
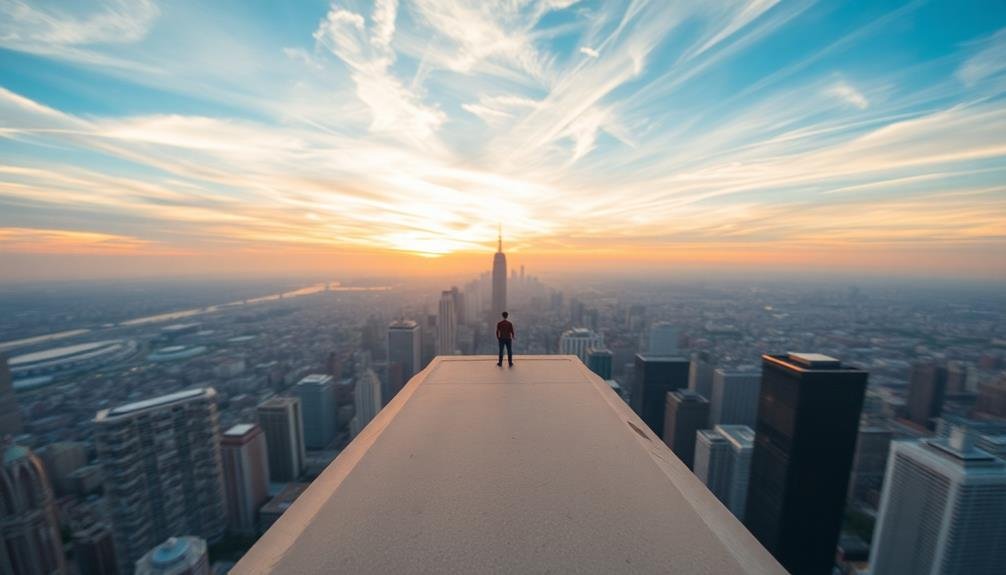
Include People or Vehicles
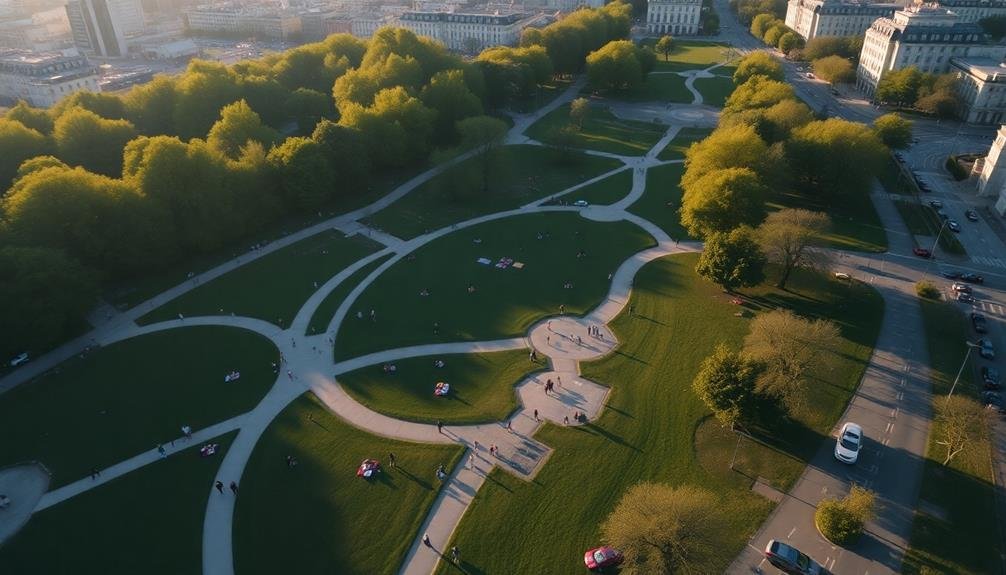
Scale becomes instantly recognizable when you incorporate people or vehicles into your sky-high shots. These familiar objects provide viewers with a point of reference, allowing them to gauge the size of surrounding elements. When capturing cityscapes or landscapes from above, look for opportunities to include pedestrians on sidewalks, cars on roads, or boats in waterways.
To effectively use people as scale indicators, try to capture them in areas where they're clearly visible, such as open plazas or rooftop terraces. If you're shooting from a great height, focus on larger groups rather than individuals to guarantee they're still discernible.
For vehicle-based scale, busy intersections or parking lots can offer excellent opportunities to showcase the relative size of buildings and infrastructure.
Remember that the placement of these scale elements is essential. Position them strategically within your composition to draw the viewer's eye and create a sense of depth. You can also use leading lines, such as roads or pathways, to guide attention towards these scale indicators.
Use Recognizable Landmarks

Three key benefits arise when you incorporate recognizable landmarks in your sky-high shots. First, they provide instant context, allowing viewers to quickly understand the location and scale of your image.
Second, landmarks act as familiar reference points, helping observers gauge the size of surrounding elements.
Third, they add visual interest and storytelling potential to your composition.
When choosing landmarks, opt for iconic structures or natural features that are widely recognizable. The Eiffel Tower, Statue of Liberty, or Golden Gate Bridge can immediately set the scene for urban shots.
In natural settings, reflect on well-known mountains, lakes, or rock formations.
Position your landmark strategically within the frame to maximize its impact. You can place it prominently in the foreground to anchor the shot or use it as a secondary element to provide scale and context.
Experiment with different angles and distances to find the most effective composition.
Remember to reflect on lighting conditions when shooting landmarks. Early morning or late afternoon light can enhance their features and create dramatic shadows, adding depth to your sky-high shots.
Fly at Different Altitudes

Flying at various altitudes offers a powerful way to manipulate scale in your sky-high shots. By adjusting your drone's height, you can dramatically change the perspective and relative size of objects in your frame.
Start low, around 10-20 feet, to capture ground-level details and textures. This approach works well for emphasizing foreground elements while still including the broader landscape.
As you ascend, experiment with different heights to find the sweet spot that best showcases your subject. Mid-range altitudes (50-100 feet) often provide a balanced view, allowing you to capture both detail and context.
For a more expansive perspective, climb higher to 200-400 feet. At this height, you'll reveal patterns and relationships between landscape features that aren't visible from the ground.
Don't forget to vary your altitude within a single shooting session. Capture the same scene from multiple heights to give viewers a sense of scale progression.
This technique is particularly effective when you're photographing tall structures or vast natural landscapes. By presenting a series of images taken at increasing altitudes, you'll help your audience grasp the true scale of the subject matter.
Incorporate Leading Lines

When shooting from above, you can use leading lines to guide your viewer's eye through the image.
These lines, such as roads, rivers, or fences, create depth perception and help establish a sense of scale in your aerial shots.
Guide Viewer's Eye
One of the most effective ways to guide a viewer's eye in sky-high shots is by incorporating leading lines. These visual pathways naturally draw attention to specific areas of your image, helping to establish scale and perspective. Look for roads, rivers, or architectural features that create strong lines leading towards your main subject. By positioning these elements strategically, you'll direct the viewer's gaze exactly where you want it to go.
When composing your shot, consider using diagonal lines for a more dynamic feel. They'll add energy to your image and create a sense of movement. Vertical lines can emphasize height, while horizontal lines can convey a sense of vastness.
Don't forget about curved lines, which can add a softer, more organic touch to your composition.
Remember to use the rule of thirds when placing your leading lines. Position them along the grid lines or at the intersections for maximum impact. Experiment with different angles and perspectives to find the most compelling arrangement.
Create Depth Perception
Creating depth perception in sky-high shots builds on the concept of leading lines to enhance scale and perspective. By strategically incorporating elements that guide the viewer's eye from the foreground to the background, you'll create a sense of depth that makes your aerial images more impactful.
Look for natural or man-made features that can serve as leading lines. Roads, rivers, fences, and even rows of trees can effectively draw the eye through the image. Position your drone to capture these elements in a way that leads from the bottom of the frame towards the horizon or main subject.
Use diagonal lines for added dynamism. They create a more engaging composition and help convey a sense of movement and scale. Experiment with different angles to find the most compelling arrangement of leading lines.
Don't forget about converging lines. As parallel lines extend into the distance, they appear to converge, reinforcing the perception of depth. Capture this effect with long stretches of highways, train tracks, or even skyscrapers in urban environments.
Lastly, consider layering elements at different distances to further enhance depth. Combine foreground, middle-ground, and background elements to create a rich, three-dimensional feel in your sky-high shots.
Emphasize Perspective
Leading lines frequently serve as powerful tools to emphasize perspective in sky-high shots. By incorporating strong linear elements into your composition, you'll guide viewers' eyes through the image and create a sense of depth and scale. Look for natural or man-made features that form distinct lines, such as roads, rivers, or rows of buildings. Position these elements so they converge towards a vanishing point, drawing attention to the vastness of the landscape below.
When shooting from above, seek out patterns and repetitive structures that form parallel or radiating lines. City grids, agricultural fields, and network of roads can all serve this purpose effectively. Angle your camera to capture these lines diagonally across the frame, enhancing the feeling of movement and depth.
Don't forget to use the horizon as a powerful horizontal line to anchor your composition.
In post-processing, you can further emphasize perspective by slightly increasing contrast along these leading lines. This will make them stand out more prominently against the background, reinforcing the sense of scale and distance in your sky-high shots.
Experiment with different angles and compositions to find the most impactful way to showcase perspective in your aerial photography.
Employ the Rule of Thirds

The Rule of Thirds can dramatically enhance your sky-high shots by adding a sense of scale and proportion. This composition technique involves dividing your frame into a 3×3 grid and placing key elements along these lines or at their intersections.
When shooting from above, use this rule to your advantage by positioning recognizable objects or landmarks at these strategic points. For instance, place a building, vehicle, or person at one of the intersection points to provide a clear reference for scale.
You can also align the horizon with either the upper or lower horizontal line, depending on whether you want to emphasize the ground or the sky. This creates a more balanced and visually appealing composition while highlighting the vastness of the scene.
Don't be afraid to experiment with different placements. Try positioning multiple elements at different intersections to create a sense of depth and scale.
You can also use leading lines, such as roads or rivers, to guide the viewer's eye through the image, placing them along the grid lines. Remember, the Rule of Thirds isn't a strict law but a guideline to help you create more compelling and scale-conscious aerial photographs.
Contrast Natural and Man-Made Elements

While the Rule of Thirds helps organize your aerial composition, juxtaposing natural and man-made elements can add another layer of scale and interest to your sky-high shots. Look for opportunities to capture both in the same frame. For instance, try positioning a winding river alongside a straight highway or a dense forest next to a sprawling urban area.
When you're flying over coastal regions, contrast the organic shapes of shorelines with the geometric patterns of harbors or seaside developments. In rural areas, capture the interplay between vast agricultural fields and small towns or isolated farmhouses. These contrasts not only provide visual interest but also help viewers gauge the size of different elements in your image.
Don't forget about vertical contrasts, too. Tall skyscrapers or communication towers can stand out dramatically against flat landscapes, giving a sense of height and scale.
Similarly, natural features like mountains or cliffs can dwarf nearby buildings, emphasizing their imposing size.
Capture Shadows for Depth

To capture shadows that add depth to your sky-high shots, you'll want to time your photography sessions strategically.
Try shooting during early morning or late afternoon when the sun is lower in the sky, creating longer shadows.
You can use these elongated shadow patterns to emphasize scale and add a dramatic dimension to your aerial images.
Early Morning, Late Afternoon
Shadows become your secret weapon during the golden hours of early morning and late afternoon. As the sun hangs low on the horizon, it casts long, dramatic shadows that can add depth and dimension to your aerial shots.
These extended shadows help emphasize the height and scale of buildings, trees, and other vertical elements in your composition.
To make the most of this lighting phenomenon, position your drone to capture the interplay between light and shadow. Look for scenes where:
- Skyscrapers cast elongated shadows across city streets
- Trees create intricate patterns on open fields
- Mountain ranges paint dark silhouettes on valleys below
- Coastal cliffs throw dramatic shadows onto sandy beaches
Emphasize Elongated Shadow Patterns
Elongated shadow patterns offer a powerful tool for emphasizing scale in your aerial photography. When shooting from above, shadows cast by buildings, trees, or other structures can create striking visual lines that draw the viewer's eye across the image. These shadows not only add depth but also provide a sense of size and proportion.
To capture the most dramatic shadow patterns, time your flights for early morning or late afternoon when the sun is low on the horizon. This angle creates longer shadows that stretch across the landscape, making even small objects appear more significant.
You'll want to position yourself so that the shadows fall diagonally across your frame, creating dynamic compositions.
Don't forget to adjust your camera settings to maintain detail in both the shadowed and lit areas. Experiment with different altitudes to find the sweet spot where shadows are most pronounced.
If you're shooting in an urban environment, look for interesting geometric patterns created by skyscrapers or city blocks. In natural settings, focus on how shadows interact with terrain features like hills, valleys, or coastlines.
Utilize Symmetry and Patterns

Symmetry and patterns often serve as powerful tools for conveying scale in aerial photography. When you're shooting from above, look for repeating elements or geometrical shapes that create a sense of order and structure. These visual cues help viewers grasp the magnitude of the scene, especially when contrasted with irregular or organic elements.
To effectively utilize symmetry and patterns in your sky-high shots:
- Capture rows of identical buildings or structures
- Find grid-like patterns in agricultural fields or city streets
- Look for radial symmetry in roundabouts or circular structures
- Seek out natural patterns like waves on a beach or tree canopies
By including these elements in your composition, you'll provide viewers with a frame of reference to understand the scale of the landscape. The repetition of shapes and lines creates a visual rhythm that draws the eye across the image, emphasizing the vastness of the scene.
Don't be afraid to experiment with different angles and altitudes to find the most striking patterns. Sometimes, slight adjustments in your position can reveal hidden symmetries or create more dynamic compositions.
Frame With Foreground Objects

While patterns and symmetry can create a sense of scale, framing your shot with foreground objects adds another dimension to your aerial photography. This technique not only provides context but also enhances depth perception in your images.
To effectively frame with foreground objects, look for elements that can partially surround your main subject. Trees, buildings, or natural formations can serve as perfect framing devices. Position your drone to capture these objects in the foreground, allowing them to create a border around the edges of your frame.
When using this technique, pay attention to the balance between the framing elements and your main subject. You don't want the foreground to overpower the focal point of your image. Experiment with different angles and distances to find the perfect composition.
Consider the color and texture of your framing objects. Contrasting elements can make your subject pop, while complementary colors can create a harmonious overall image.
Remember that foreground objects can also add a sense of location or tell a story about the environment you're capturing.
Experiment With Tilt-Shift Effect

The tilt-shift effect can dramatically alter the perception of scale in your aerial shots. By selectively blurring parts of the image, you can create a miniature-like appearance, making vast landscapes seem tiny and toy-like.
This technique works particularly well with cityscape or architectural shots taken from high altitudes.
To experiment with tilt-shift, you'll need post-processing software or a tilt-shift lens. Start by applying a horizontal band of focus across your image, keeping the center sharp while blurring the top and bottom. Adjust the width and position of this band to achieve the desired effect.
You can also increase saturation and contrast to enhance the miniature look.
Consider these scenarios where tilt-shift can be effective:
- Busy urban intersections with cars and pedestrians
- Sprawling industrial zones with factories and warehouses
- Beach scenes with umbrellas, sunbathers, and boats
- Ski resorts with slopes, lifts, and tiny skiers
Frequently Asked Questions
How Do Weather Conditions Affect the Perception of Scale in Aerial Photography?
Weather conditions greatly impact scale perception in aerial photos. You'll find fog can make objects seem larger, while clear skies might diminish size. Clouds can add depth, and lighting changes can alter shadows, affecting perceived dimensions.
What Camera Settings Are Best for Maintaining Sharpness in Sky-High Shots?
For sky-high shots, you'll want to use a fast shutter speed (1/1000s or higher) to reduce motion blur. Set a small aperture (f/8-f/11) for depth of field, and keep ISO low for clarity.
How Can I Legally Obtain Permits for Drone Photography in Restricted Areas?
You'll need to contact local authorities and aviation agencies to obtain permits for restricted areas. It's essential to research specific regulations, submit applications, and follow safety protocols. Don't forget to allow ample time for processing.
Are There Specific Post-Processing Techniques to Enhance Scale in Aerial Images?
You can enhance scale in aerial images through post-processing by adjusting contrast, sharpening details, and using selective color enhancements. Add recognizable objects for reference, and experiment with vignetting to draw attention to scale-defining elements.
What Are the Safety Considerations When Capturing Aerial Shots From Manned Aircraft?
When you're capturing aerial shots from manned aircraft, you'll need to prioritize safety. Always follow FAA regulations, secure your equipment, use a harness if necessary, and don't interfere with the pilot's operations. Communication is key.
In Summary
You've now got a toolkit of techniques to add scale and impact to your aerial photography. Don't be afraid to experiment with these tricks on your next flight. Remember, it's all about perspective and context. By incorporating these elements, you'll transform your drone shots from simple snapshots to compelling visual stories. Keep practicing, and soon you'll be capturing breathtaking images that truly showcase the grandeur of our world from above.
As educators and advocates for responsible drone use, we’re committed to sharing our knowledge and expertise with aspiring aerial photographers.


Leave a Reply