To elevate your sky-high photography, master these seven key composition rules: Rule of Thirds, Leading Lines, Symmetry and Patterns, Frame Within a Frame, Negative Space, Contrasting Colors, and Scale and Perspective. By dividing your frame into thirds, using natural pathways to guide the eye, finding balance in symmetry, framing your subject creatively, embracing empty space, playing with color contrasts, and manipulating scale, you'll create visually striking images. These techniques will help you capture depth, interest, and emotion in your aerial shots. Whether you're shooting landscapes or cityscapes, applying these rules will transform your photography from ordinary to extraordinary. Discover how each rule can revolutionize your approach to sky-high imagery.
Key Takeaways
- Apply the Rule of Thirds to create balanced and visually appealing aerial compositions.
- Utilize leading lines to guide the viewer's eye and enhance depth in sky-high photographs.
- Incorporate symmetry and patterns found in natural and man-made elements to strengthen compositions.
- Exploit cloud formations and types to add texture, mood, and visual interest to aerial shots.
- Create visual depth by using wide-angle lenses and positioning elements from foreground to background.
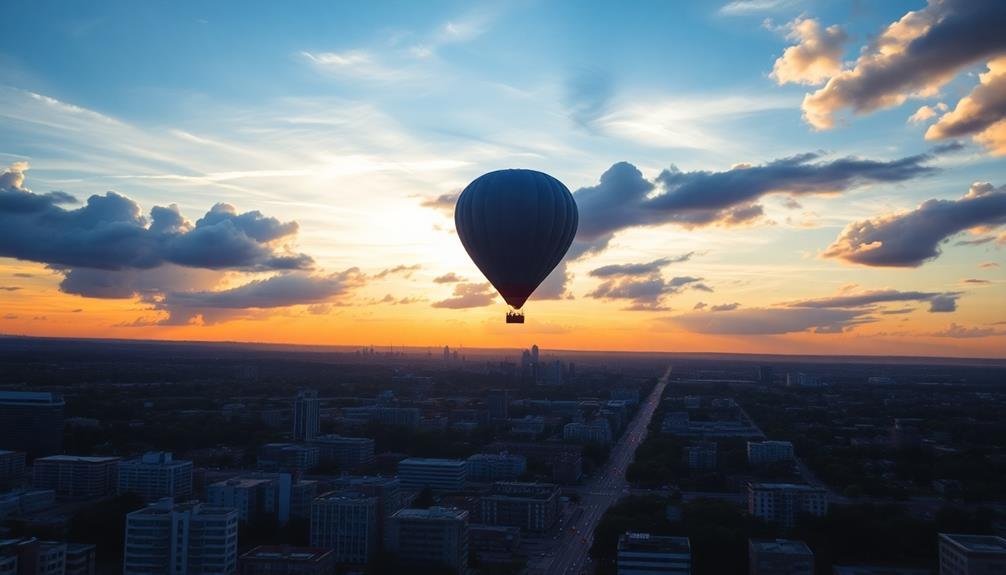
Rule of Thirds
Imagine a tic-tac-toe grid overlaid on your photo. This visualization is the foundation of the Rule of Thirds, a fundamental principle in photography composition. By dividing your frame into nine equal parts, you'll create four intersecting points that serve as focal areas for your subject.
When composing your shot, place key elements along these lines or at their intersections. This technique creates a more balanced and visually appealing image than centering your subject. For landscapes, align the horizon with the top or bottom horizontal line. In portraits, position your subject's eyes along the upper third.
The Rule of Thirds works because it mimics how our eyes naturally scan an image. It creates visual tension and interest, drawing the viewer's gaze across the frame. You'll find that off-center compositions often feel more dynamic and engaging.
While it's a guideline, not a strict rule, mastering the Rule of Thirds will greatly improve your photography. Practice by enabling the grid feature on your camera or smartphone. Soon, you'll instinctively compose shots using this principle, elevating your images from amateur to professional quality.
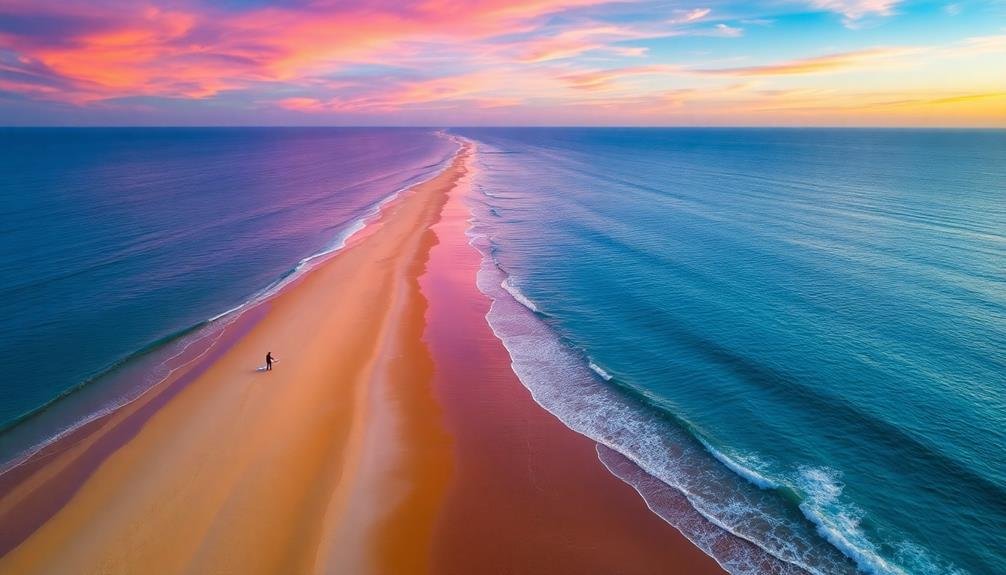
Leading Lines

Leading lines are powerful compositional tools that guide your viewer's eye through the image.
You'll find these lines naturally occurring in landscapes, architecture, and even in human-made objects.
Find Natural Pathways
One of the most powerful tools in a photographer's compositional arsenal is the use of natural pathways, also known as leading lines. These visual elements guide your viewer's eye through the image, creating a sense of depth and drawing attention to your main subject.
You'll find natural pathways everywhere: roads, rivers, fences, or even patterns in clouds or shadows.
To effectively use natural pathways, start by identifying them in your scene. Look for lines that lead towards your subject or a point of interest. Position yourself to maximize the impact of these lines, often by placing them diagonally across the frame. This creates a dynamic composition that pulls the viewer in.
Don't limit yourself to straight lines; curved pathways can be equally compelling. They add a sense of flow and can create a more organic feel to your image.
Remember, natural pathways don't always have to be obvious. Subtle lines formed by the arrangement of objects or the interplay of light and shadow can be just as effective.
Direct Viewer's Attention
Through the strategic use of leading lines, you can effectively guide your viewer's gaze to the most important elements in your photograph. Leading lines are powerful compositional tools that create a sense of depth and draw attention to your intended focal point. They can be straight, curved, or even implied, and are often found in natural or man-made structures.
To incorporate leading lines, look for roads, fences, rivers, or architectural features that point toward your subject. Position these elements so they enter the frame from the corners or edges, naturally leading the eye into the image.
When using curved lines, such as winding paths or S-shaped rivers, you'll create a more dynamic and visually interesting composition.
Don't limit yourself to obvious lines; shadows, patterns, and even the arrangement of people or objects can serve as subtle guides. Experiment with different angles and perspectives to find the most effective leading lines.
Create Visual Depth
In addition to guiding the viewer's attention, leading lines play an essential role in creating visual depth within your photographs. They act as visual pathways, drawing the eye from the foreground to the background, and establishing a sense of three-dimensionality in your two-dimensional images.
To effectively use leading lines for depth, look for natural or man-made elements that extend from the front of your frame towards the back. Roads, fences, rivers, and tree lines are excellent examples. Position these elements so they start near the bottom corners of your frame and converge towards the center or a point of interest in the distance.
When composing your shot, consider using a wide-angle lens to exaggerate the perspective and enhance the sense of depth. Experiment with different angles and viewpoints to find the most compelling arrangement of lines.
You can also use converging lines, such as buildings or street lamps, to create a strong sense of perspective and depth.
Symmetry and Patterns
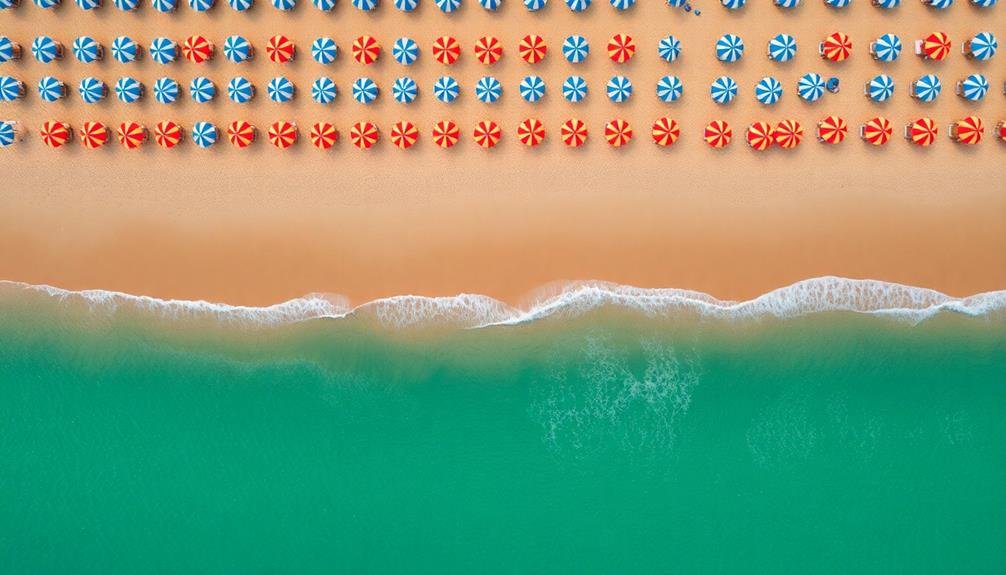
You'll find symmetry and patterns in various natural and man-made elements, creating visually striking compositions.
Look for reflections in water bodies, which can mirror landscapes or architecture to form perfect symmetry.
Don't forget to explore geometric shapes in urban environments and observe how cloud formations can add intriguing patterns to your sky shots.
Reflections in Water
Reflections in water offer photographers a unique opportunity to capture stunning symmetry and mesmerizing patterns. You'll find that still bodies of water, like lakes or ponds, can act as nature's mirror, creating perfect symmetry with the landscape above. To make the most of these reflections, position yourself low to the water's surface and use a wide-angle lens to capture both the real scene and its mirror image.
When shooting reflections, you'll need to take into account:
| Aspect | Calm Water | Rippled Water |
|---|---|---|
| Sharpness | Clear, crisp reflections | Soft, abstract patterns |
| Composition | Perfect symmetry possible | Focus on texture and mood |
| Timing | Early morning or evening | Any time of day |
Don't forget to experiment with partial reflections, where you include only a portion of the reflected image in your frame. This can create intriguing compositions that draw the viewer's eye. You can also try using a polarizing filter to control the reflection's intensity, allowing you to balance the real and reflected elements in your shot. Remember, the key to stunning reflection photography is patience and practice.
Geometric Shapes Above
While reflections create symmetry below, geometric shapes offer enchanting patterns above. In sky-high photography, you'll find an array of geometric shapes that can elevate your compositions. Look for circles, triangles, squares, and lines in clouds, buildings, or natural formations.
When you spot these shapes, use them to guide your viewer's eye through the image. Triangular cloud formations can create a sense of direction, while circular patterns might draw attention to a focal point. You'll often find symmetry in man-made structures, so align your shot to emphasize this balance.
Don't forget to play with perspective. Shooting upwards can transform ordinary objects into striking geometric compositions. Capture the converging lines of skyscrapers or the repeating patterns of windows.
Remember, contrast is key. A lone circular shape among angular structures can create visual interest. Similarly, the juxtaposition of organic cloud shapes against rigid architectural lines can be enthralling.
Experiment with different focal lengths to isolate or expand geometric patterns. Wide-angle lenses can exaggerate perspective, while telephoto lenses compress elements, creating abstract compositions of shapes and colors in the sky.
Cloud Formations' Impact
In the domain of aerial photography, cloud formations play a pivotal role in creating stunning compositions. As you frame your shots from above, pay close attention to the patterns and symmetry that clouds can offer. Cumulus clouds often create a patchwork effect, providing visual interest and depth to your images. Look for repeating shapes or linear arrangements that can guide the viewer's eye across the frame.
Stratus clouds can offer a smooth, even backdrop, allowing other elements in your composition to stand out. You'll find that these cloud types work well when you're capturing contrasting landscapes or architectural features below.
Cirrus clouds, with their wispy, feather-like appearance, can add a delicate texture to your sky shots.
Don't overlook the dramatic potential of storm clouds. Their dark, brooding presence can create a powerful mood and add tension to your photographs. Experiment with different exposures to capture the full range of tones in these dynamic formations.
Frame Within a Frame
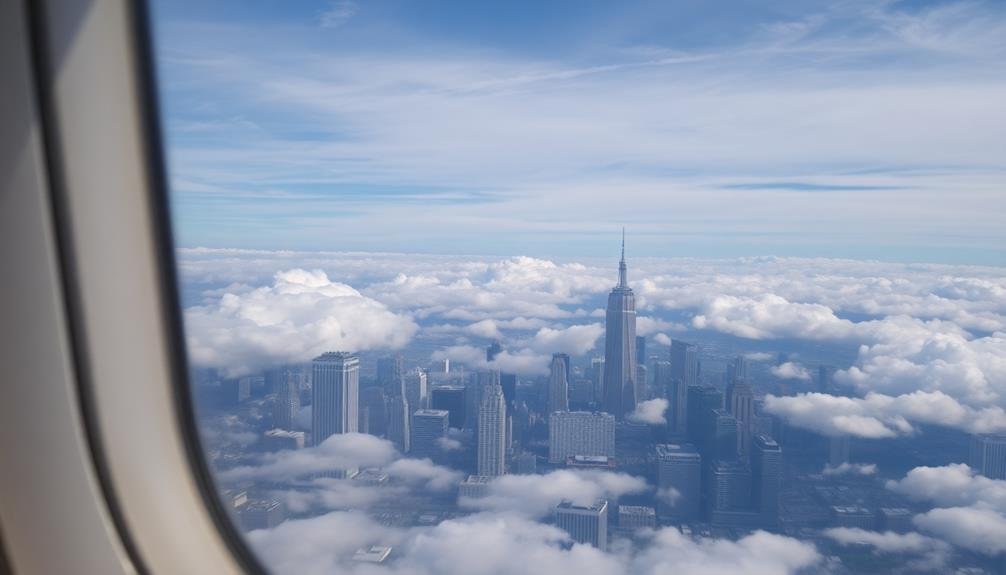
A doorway, an archway, or a window can serve as a powerful framing device in photography. This technique, known as "frame within a frame," draws the viewer's eye to the main subject while adding depth and context to your image. By incorporating natural or man-made elements as frames, you'll create a more engaging composition that tells a compelling visual story.
When using this technique, consider these elements:
- Architectural features like doorways, arches, or bridges
- Natural elements such as tree branches, rock formations, or cave openings
- Urban structures like fences, street signs, or scaffolding
- Reflections in mirrors, puddles, or windows
- Silhouettes of people or objects
To effectively use a frame within a frame, make sure that the framing element doesn't overpower your main subject. Instead, it should complement and enhance the focal point.
Experiment with different angles and positions to find the perfect balance between the frame and your subject. You can also play with depth of field to create a sense of dimension, blurring the frame slightly while keeping the subject sharp.
Negative Space

Negative space, often overlooked by novice photographers, can be a powerful tool in composition. It's the empty area surrounding your main subject, and when used effectively, it can greatly enhance your images. By incorporating negative space, you'll create a sense of balance, draw attention to your subject, and evoke emotions in your viewers.
To utilize negative space, start by identifying your main subject and the area around it. Look for clean, uncluttered backgrounds that complement your subject without overpowering it. You can use the sky, walls, or even out-of-focus elements to create negative space.
Don't be afraid to leave large portions of your frame empty; this can create a minimalist, impactful image. Experiment with different ratios of negative space to subject. You'll find that varying these proportions can profoundly alter the mood and message of your photograph.
Contrasting Colors

While negative space focuses on emptiness, contrasting colors fill your frame with vibrant energy. This powerful composition technique creates visual interest and draws the viewer's eye to key elements in your photograph. By pairing colors from opposite sides of the color wheel, you'll create striking images that command attention.
To effectively use contrasting colors in your photography:
- Seek out naturally occurring color contrasts in your environment
- Experiment with complementary color pairs like blue and orange, or purple and yellow
- Use color contrast to highlight your main subject against a contrasting background
- Consider the emotional impact of different color combinations
- Adjust your camera's white balance to enhance color contrasts
Don't be afraid to push the boundaries with bold color choices. You can create contrast through both hue and intensity, playing with warm and cool tones or saturated and muted shades.
Remember that contrasting colors don't always have to be loud; even subtle differences can create a compelling visual narrative.
As you compose your shots, pay attention to how different colors interact within the frame. By mastering the art of color contrast, you'll elevate your photography and create images that truly pop.
Scale and Perspective
Scale and perspective play essential roles in creating compelling photographic compositions. They help you convey depth, size relationships, and spatial awareness in your images. To master these elements, experiment with different angles and viewpoints. Get low to the ground or climb to a high vantage point to alter the viewer's perception of your subject.
Use foreground elements to establish scale and create a sense of depth. Including a person or familiar object in your frame can provide context for the size of landscapes or structures. Don't be afraid to play with forced perspective, creating optical illusions that challenge the viewer's expectations.
Consider these techniques to enhance scale and perspective in your photos:
| Technique | Effect | Best For |
|---|---|---|
| Wide-angle lens | Exaggerates foreground | Landscapes, architecture |
| Telephoto lens | Compresses distance | Wildlife, portraits |
| Leading lines | Guides the eye | Urban scenes, roads |
Frequently Asked Questions
What Camera Settings Are Best for Aerial Photography?
For aerial photography, you'll want to use a fast shutter speed (1/1000s or faster), a narrow aperture (f/8-f/11), and a low ISO. Don't forget to enable image stabilization and shoot in RAW format.
How Do You Handle Motion Blur in Sky-High Shots?
To handle motion blur in sky-high shots, you'll want to use a fast shutter speed. Aim for at least 1/1000th of a second. If possible, increase your ISO and open your aperture to maintain proper exposure.
Are Drones Necessary for Successful Aerial Photography?
While drones aren't absolutely necessary, they've revolutionized aerial photography. You can achieve great shots with helicopters or planes, but drones offer unparalleled flexibility and accessibility. They're often more cost-effective and allow you to capture unique perspectives.
How Can You Legally Capture Aerial Images in Restricted Airspace?
You can't legally capture aerial images in restricted airspace without proper authorization. Instead, seek permission from relevant authorities, obtain necessary licenses, or explore alternative methods like using elevated platforms or hiring licensed professionals for your aerial photography needs.
What Safety Precautions Should Be Taken When Photographing From Great Heights?
When photographing from great heights, you'll need to prioritize safety. Secure yourself with proper harnesses, use sturdy equipment, check weather conditions, and follow all safety protocols. Don't take unnecessary risks for a shot. Stay alert and focused.
In Summary
You've now got the tools to take your sky-high photography to new heights. Remember, these rules aren't rigid – they're guidelines to spark your creativity. Don't be afraid to experiment and break them when it feels right. As you practice, you'll develop an intuitive sense of composition. Keep shooting, refining your eye, and pushing your boundaries. With these techniques in your arsenal, you're ready to capture breathtaking aerial shots that'll leave viewers in awe.
As educators and advocates for responsible drone use, we’re committed to sharing our knowledge and expertise with aspiring aerial photographers.


Leave a Reply