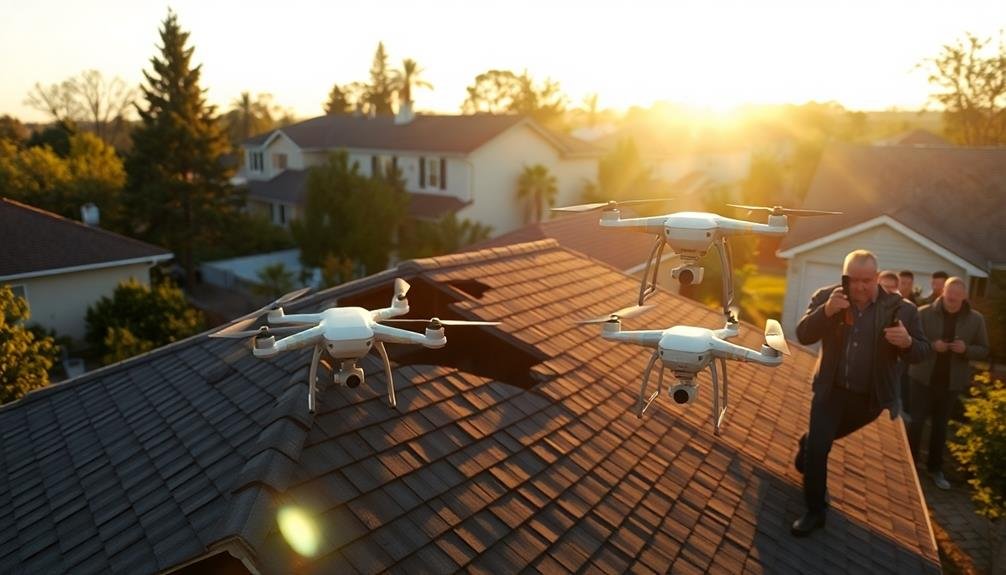
To assess property damage using unmanned aircraft, you'll need a drone equipped with high-resolution and thermal cameras. Start by understanding legal requirements and obtaining necessary certifications. Plan your flight mission carefully, considering weather conditions and airspace restrictions. Capture thorough aerial imagery using various flight patterns and camera settings. Analyze the footage for obvious damage, structural issues, and hidden problems using thermal imaging. Process the data to create detailed reports, including 3D models and orthomosaic maps. Integrate your findings with insurance claim processes for efficient resolution. By mastering these techniques, you'll reveal the full potential of drone technology in property damage assessment.
Key Takeaways
- Select a drone with high-resolution cameras and thermal imaging capabilities for comprehensive damage assessment.
- Obtain necessary certifications and comply with FAA regulations for commercial drone operations.
- Plan flight missions considering weather conditions, coverage area, and efficient flight patterns.
- Capture overlapping aerial imagery at consistent altitudes for thorough documentation of property damage.
- Process collected data to create 3D models and detailed reports highlighting structural issues and hidden damage.
Understanding Drone Technology for Assessment

Drones have revolutionized property damage assessment, offering a bird's-eye view that was once difficult and costly to obtain. To effectively use drones for this purpose, you'll need to understand the key components and capabilities of these unmanned aircraft systems (UAS).
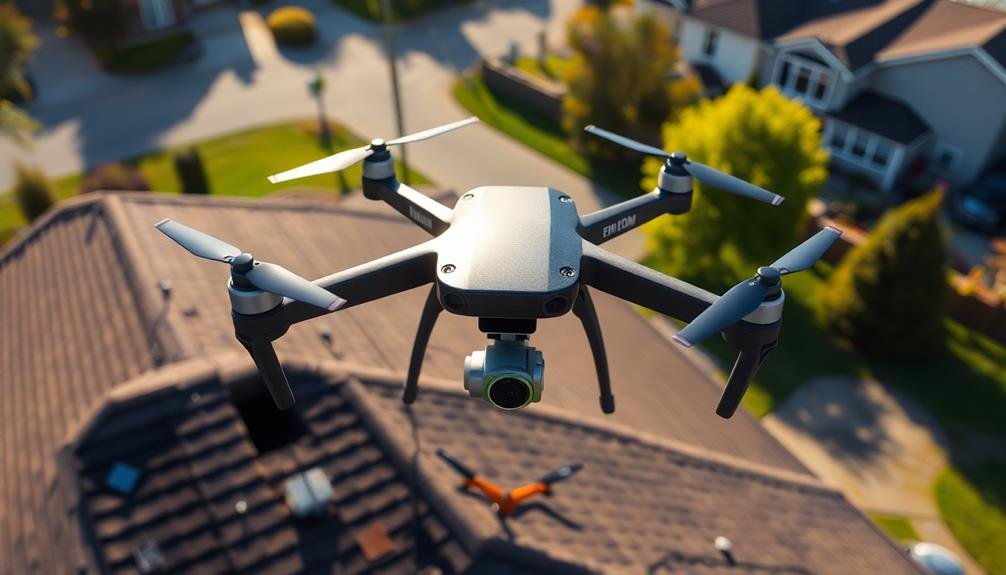
Most assessment drones are quadcopters or hexacopters, equipped with high-resolution cameras and sometimes thermal imaging sensors. They're controlled remotely using a handheld device or smartphone app. When choosing a drone, consider factors like flight time, range, camera quality, and obstacle avoidance features.
You'll also need to familiarize yourself with drone regulations in your area. In many countries, you're required to register your drone and obtain a license for commercial use. Understanding flight restrictions, such as maximum altitude and no-fly zones, is vital for legal and safe operation.
To capture useful data, learn about different flight patterns and camera angles. Grid patterns are effective for systematic coverage, while orbital flights can provide detailed views of specific structures.
Mastering manual controls allows for precise positioning and framing of shots, essential for accurately documenting damage.
Legal Requirements and Regulations
Before you take flight with your drone for property damage assessment, you'll need to navigate a complex web of legal requirements and regulations. In the United States, the Federal Aviation Administration (FAA) oversees drone operations. You must register your drone with the FAA if it weighs more than 0.55 pounds. Additionally, you'll need to obtain a Remote Pilot Certificate by passing an aeronautical knowledge test.
Familiarize yourself with airspace restrictions and no-fly zones. Use the FAA's B4UFLY app to check local flight restrictions. Always maintain visual line-of-sight with your drone and fly below 400 feet altitude. Avoid flying over people or moving vehicles, and respect privacy laws.
For commercial property damage assessment, you'll need to comply with Part 107 regulations. This includes operating during daylight hours, yielding right of way to manned aircraft, and not flying from a moving vehicle. Some situations may require waivers from the FAA, such as flying at night or over people.
Check local and state laws, as they may impose additional restrictions. Some areas require permits or have specific privacy regulations.
Stay informed about changing regulations, as drone laws are constantly evolving.
Selecting the Right Drone Equipment
When selecting a drone for property damage assessment, you'll need to prioritize camera quality and features.
Look for high-resolution cameras with zoom capabilities and thermal imaging options to capture detailed footage of damaged areas.
Additionally, consider the drone's flight time and range to guarantee you can cover larger properties or multiple locations efficiently.
Camera Quality and Features
To effectively assess property damage, selecting a drone with the right camera quality and features is vital. Look for drones equipped with high-resolution cameras, preferably 4K or higher, to capture clear and detailed images of damaged areas.
Opt for cameras with adjustable settings like ISO, shutter speed, and aperture to adapt to various lighting conditions.
Consider drones with thermal imaging capabilities, which can detect hidden moisture or heat anomalies that aren't visible to the naked eye. This feature is particularly useful for identifying water damage or electrical issues.
Choose a drone with a gimbal stabilization system to guarantee smooth, steady footage even in windy conditions.
Zoom functionality is essential for inspecting hard-to-reach areas without compromising image quality. Look for drones with optical zoom rather than digital zoom for better results.
Additionally, select a model with obstacle avoidance sensors to prevent collisions during inspections.
Confirm your drone has ample storage capacity or the ability to stream live footage to a device. This will allow you to capture and review extensive property damage without interruptions.
Flight Time and Range
For effective property damage evaluation, flight time and range are essential factors when selecting drone equipment. You'll want to choose a drone that can cover large areas without frequent battery changes or recharging. Consider models with at least 30 minutes of flight time to maximize efficiency during inspections. Extended flight times allow you to capture more data in a single session, reducing the need for multiple flights and saving valuable time.
Range is equally important, especially when evaluating widespread damage or large properties. Look for drones with a transmission range of at least 4-5 kilometers to guarantee uninterrupted communication and control. However, always adhere to local regulations regarding line-of-sight requirements.
When reviewing flight time and range, keep these factors in mind:
- Battery capacity and power efficiency
- Wind resistance and overall stability
- Payload weight, including cameras and sensors
- Operating conditions, such as temperature and altitude
Remember that actual flight time may vary depending on these factors. It's wise to have spare batteries on hand to extend your operational time.
Planning Your Flight Mission

To plan your flight mission effectively, you'll first need to define your objectives clearly.
Next, map out the survey area to guarantee thorough coverage of the property.
Don't forget to check and account for weather conditions, as they can greatly impact your drone's performance and the quality of your assessment.
Define Flight Objectives
Mapping out your flight objectives is a crucial step in planning your drone mission for property damage assessment. You'll need to clearly define what you want to achieve with your flight to guarantee you gather all necessary data efficiently.
Consider the specific areas of the property you need to inspect, the types of damage you're looking for, and any particular angles or perspectives that will be most useful for your assessment.
When defining your flight objectives, focus on these key elements:
- Coverage area: Determine the exact boundaries of the property you'll be surveying, including any specific structures or features that require detailed inspection.
- Data collection requirements: Identify the types of imagery or data you need, such as high-resolution photos, thermal imaging, or 3D mapping.
- Flight patterns: Plan your flight path to guarantee thorough coverage while avoiding obstacles and restricted airspace.
- Time constraints: Consider any limitations on flight duration, such as battery life or weather conditions, and prioritize your objectives accordingly.
Map Survey Area
With your flight objectives clearly defined, it's time to map out your survey area. Begin by obtaining a detailed aerial view of the property using satellite imagery or existing maps. Identify key features, structures, and areas of interest that require inspection. Mark these locations on your map to guarantee thorough coverage during the flight.
Next, determine the precise boundaries of your survey area. Consider any obstacles, such as tall buildings, trees, or power lines, that may impact your drone's flight path. Establish a safe perimeter around the property, taking into account local regulations and privacy concerns.
Calculate the best flight altitude based on the desired image resolution and the drone's camera specifications. Higher altitudes cover larger areas but may sacrifice detail, while lower altitudes provide more precise imagery but require more flight time.
Plan your flight pattern to guarantee efficient coverage of the entire survey area. Common patterns include grid, circular, or spiral paths. Factor in the drone's battery life and plan for multiple flights if necessary. Include predetermined waypoints for automated flight paths, guaranteeing consistent and repeatable results.
Consider Weather Conditions
Weather conditions play an essential role in the success and safety of your drone flight mission. Before launching your drone, carefully assess the current and forecasted weather. Wind speed is vital; most consumer drones can't operate safely in winds exceeding 20-25 mph. Check precipitation forecasts, as rain or snow can damage your drone's electronics and compromise image quality. Visibility is another key factor; fog, haze, or low clouds can obstruct your view and affect the drone's sensors.
Consider these weather-related factors when planning your flight:
- Temperature: Extreme heat or cold can affect battery life and drone performance.
- Humidity: High humidity may cause condensation on camera lenses or internal components.
- Sun position: Glare can interfere with your ability to see the drone or control screen.
- Atmospheric pressure: Rapid changes can affect altitude readings and flight stability.
Always prioritize safety and comply with local regulations. If weather conditions are questionable, it's best to postpone your flight.
Remember that conditions can change quickly, so monitor the weather throughout your mission and be prepared to abort if necessary. By carefully considering weather conditions, you'll guarantee a safer, more successful property damage assessment flight.
Capturing High-Quality Aerial Imagery

Soaring above the property, your drone becomes a powerful tool for capturing high-quality aerial imagery. To maximize its potential, focus on mastering your camera settings. Adjust the ISO, shutter speed, and aperture to suit the lighting conditions and desired depth of field. Use RAW format for greater post-processing flexibility.
Fly at a consistent altitude to maintain image scale across your survey. Overlap your images by at least 60% front-to-back and 30% side-to-side to guarantee complete coverage and enable accurate 3D modeling. Consider using automated flight patterns for systematic coverage.
Stabilization is essential for sharp images. Utilize your drone's gimbal and avoid sudden movements. In windy conditions, increase your shutter speed to minimize motion blur. For detailed inspections, employ the zoom function rather than flying too close to structures.
Pay attention to the sun's position to avoid harsh shadows or glare. Early morning or late afternoon light often provides the best conditions for aerial photography.
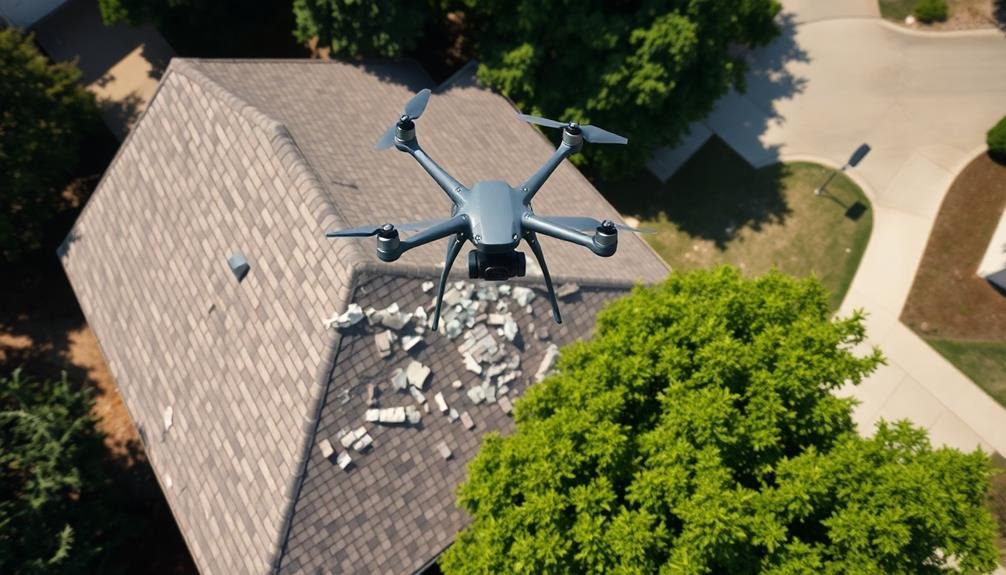
Analyzing Roof and Exterior Damage
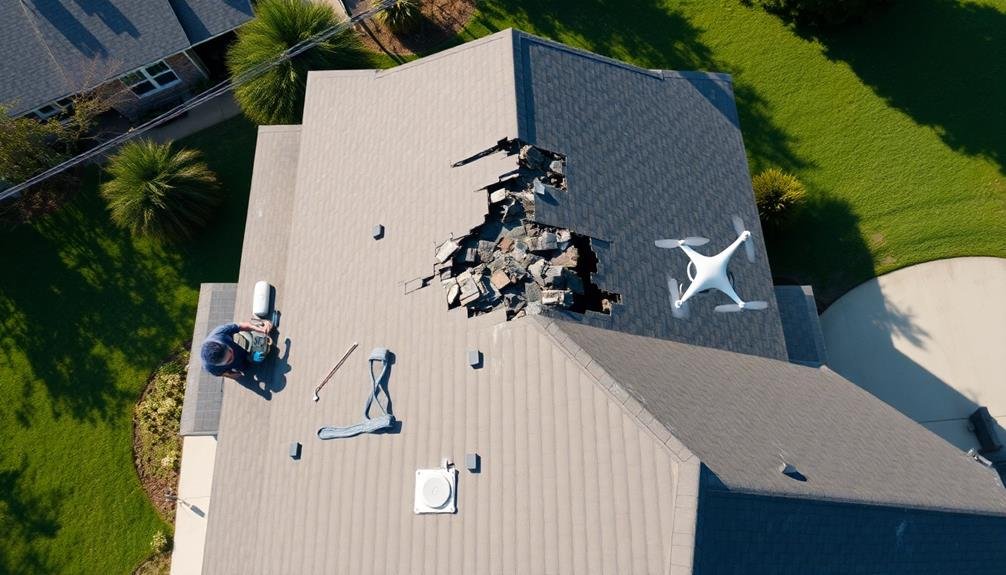
Armed with high-quality aerial imagery, you're now ready to analyze roof and exterior damage. Start by examining the overall structure for any obvious signs of damage, such as collapsed sections or missing materials.
Pay close attention to the roof, as it's often the most vulnerable part of a building during severe weather events.
When evaluating roof damage, look for:
- Missing or damaged shingles
- Dents or impact marks from hail
- Sagging or uneven areas
- Debris accumulation in valleys or gutters
Don't forget to inspect the exterior walls, windows, and doors for signs of damage. Look for cracks, holes, or areas where the siding has been torn away.
Check for broken windows or damaged frames, which can lead to water infiltration.
Use your drone's zoom capabilities to get a closer look at areas of concern. Compare your aerial images with pre-existing property records or earlier photos to identify new damage.
If you're using thermal imaging, look for temperature variations that might indicate water intrusion or insulation issues.
Remember to document all findings thoroughly, including GPS coordinates and timestamps for each image, to create a detailed damage evaluation report.
Identifying Structural Issues From Above
When using drones for property damage assessment, you'll want to focus on identifying key structural issues from an aerial perspective.
You can detect roof damage by looking for missing shingles, sagging areas, or signs of water pooling.
For exterior wall assessment, you'll need to fly your drone close to the building's facade to capture high-resolution images of cracks, bulges, or other visible signs of structural compromise.
Roof Damage Detection
Drones excel at identifying roof damage that's often invisible from the ground. Their aerial perspective allows you to spot issues like missing shingles, cracks, or water pooling that might otherwise go unnoticed.
When evaluating roof damage with a drone, focus on capturing high-resolution images and video footage from various angles.
To effectively detect roof damage using drones:
- Fly in a grid pattern: Guarantee complete coverage of the roof's surface by systematically moving your drone across the area.
- Use thermal imaging: Employ thermal cameras to detect water infiltration or insulation issues that aren't visible to the naked eye.
- Look for color variations: Discoloration or inconsistencies in roofing materials can indicate wear, damage, or potential leaks.
- Check flashing and edges: Pay close attention to areas around chimneys, vents, and roof edges where damage often occurs.
Exterior Wall Assessment
Numerous structural issues can be identified from above using drones to evaluate exterior walls. You'll be able to spot cracks, water damage, and even subtle shifts in the building's structure. Drones equipped with high-resolution cameras can capture detailed images of hard-to-reach areas, allowing you to inspect the entire exterior without risking safety or using expensive equipment like scaffolding.
When evaluating exterior walls, look for these key indicators:
| Issue | Emotional Impact |
|---|---|
| Large cracks | Concern |
| Bulging walls | Alarm |
| Water stains | Worry |
| Misaligned windows | Unease |
| Deteriorating mortar | Anxiety |
Creating 3D Models of Properties

How can you transform aerial imagery into a detailed 3D model of a property? By utilizing photogrammetry software and high-quality drone images, you'll create intricate 3D representations of damaged structures. This technology allows for precise measurements and extensive damage assessment from multiple angles.
To create accurate 3D models:
- Capture overlapping images: Fly your drone in a grid pattern, guaranteeing at least 70% overlap between photos. This redundancy helps the software align images accurately.
- Use consistent lighting: Choose a time of day with even lighting to avoid shadows that can interfere with image processing.
- Maintain a consistent altitude: Keep your drone at a steady height throughout the flight to guarantee uniform image scale.
- Process images with specialized software: Upload your photos to photogrammetry software, which will stitch them together and generate a 3D point cloud.
Once you've created the 3D model, you can analyze it for structural deformations, measure distances and areas, and even create virtual walkthroughs.
This technology greatly enhances your ability to assess property damage remotely, saving time and improving safety. It's particularly useful for hard-to-reach areas or large-scale disasters where physical access is limited.
Thermal Imaging for Hidden Damage

Thermal imaging technology frequently reveals hidden property damage that's invisible to the naked eye. When you equip your drone with a thermal camera, you can detect temperature variations that indicate underlying issues. These cameras capture infrared radiation emitted by objects, displaying hot and cold spots in vivid color contrasts.
You'll find thermal imaging particularly useful for identifying moisture intrusion, which often leads to mold growth and structural deterioration. It can pinpoint areas of poor insulation, electrical hotspots, and HVAC inefficiencies. As you fly your drone around the property, pay close attention to temperature anomalies in walls, roofs, and foundations.
To effectively use thermal imaging, you should conduct inspections during ideal conditions. Early morning or evening flights, when ambient temperatures are cooler, often yield the best results.
You'll need to interpret the thermal data correctly, understanding that different materials retain and emit heat differently. It's essential to cross-reference thermal images with visual inspections and other data to confirm your findings.
Data Processing and Report Generation

After your drone collects imagery and data, you'll need to process it into a meaningful format for analysis and reporting. Start by importing the raw data into specialized software designed for drone imagery processing. These programs can stitch together multiple images to create high-resolution orthomosaic maps and 3D models of the property.
Once you've processed the data, you'll need to analyze it for signs of damage. Look for anomalies in roof structures, water pooling, or other indicators of property damage. Use measurement tools within the software to quantify the extent of the damage accurately.
Next, compile your findings into a detailed report. Include:
- An executive summary outlining key findings
- Detailed imagery and 3D models of the property
- Specific damage assessments with measurements and locations
- Recommendations for repairs or further investigation
Ensure your report is clear, concise, and easy to understand for both insurance adjusters and property owners. Include visual aids like annotated images and diagrams to illustrate your points effectively.
Integrating With Insurance Claim Processes

Once you've compiled your detailed drone-based damage assessment report, it's time to integrate it into the insurance claim process.
Start by confirming your report meets all the requirements set by the insurance company. Most insurers now accept drone-gathered data, but it's essential to verify their specific guidelines.
Next, submit your report through the insurer's preferred channel, whether it's an online portal, email, or physical submission. Include all relevant documentation, such as high-resolution images, 3D models, and measurement data.
Be prepared to provide additional context or explanations if requested.
Many insurance companies now use AI-powered systems to process claims. Verify your data is formatted correctly for these systems to interpret. This might involve using specific file formats or tagging systems.
Follow up with the insurance adjuster to discuss your findings.
Be ready to explain your methodology and defend your assessment if questioned. Your drone-based report should provide a more thorough and accurate picture than traditional methods, potentially expediting the claim process.
Safety Considerations and Best Practices

Safety should be your top priority when using drones for property damage assessment. Always follow local regulations and obtain necessary permits before flying. Conduct a thorough pre-flight inspection of your drone, verifying all components are secure and functioning properly. Be aware of your surroundings, including obstacles, power lines, and weather conditions that could affect your flight.
Implement these best practices to guarantee safe and effective drone operations:
- Maintain visual line of sight with your drone at all times.
- Avoid flying over people or moving vehicles.
- Respect privacy by not capturing images of uninvolved properties or individuals.
- Keep your drone within the prescribed altitude limits.
Never operate a drone under the influence of drugs or alcohol. It's essential to have a clear emergency landing plan in case of unexpected issues. Always yield the right of way to manned aircraft and avoid interfering with emergency response operations.
Keep your skills sharp by regularly practicing flight maneuvers and staying updated on the latest drone technologies and regulations. By adhering to these safety considerations and best practices, you'll minimize risks and maximize the effectiveness of your property damage assessments using drones.
Frequently Asked Questions
How Long Does It Take to Become Proficient in Drone-Based Property Damage Assessment?
You'll need several months to become proficient in drone-based property damage assessment. It depends on your starting skills, practice frequency, and training quality. You'll master flight controls, damage identification, and reporting techniques as you gain experience.
Can Drones Assess Interior Damage or Only Exterior Damage?
Drones can assess both exterior and interior damage. You'll need specialized indoor drones for interior assessments. They're equipped with obstacle avoidance and can navigate tight spaces. However, you'll face limitations in areas with poor lighting or signal interference.
What Are the Cost Savings of Using Drones Compared to Traditional Assessment Methods?
You'll see significant cost savings using drones for assessments. They're faster, safer, and more efficient than traditional methods. You'll reduce labor costs, eliminate the need for scaffolding or lifts, and cover large areas quickly.
How Do Weather Conditions Affect Drone-Based Property Damage Assessments?
You'll find that weather greatly impacts drone assessments. Wind can destabilize flight, rain obscures visuals, and extreme temperatures affect battery life. It's essential to plan flights during ideal conditions for accurate and safe inspections.
Are There Any Privacy Concerns When Using Drones for Property Damage Assessment?
Yes, you'll face privacy concerns when using drones for property assessments. You're capturing images of private property, so you must obtain consent, follow local laws, and avoid capturing unnecessary footage of neighboring properties or individuals.
In Summary
You've now learned the essentials of using drones for property damage assessment. Remember to stay up-to-date on regulations, choose the right equipment, and plan your missions carefully. With practice, you'll capture high-quality imagery and generate detailed reports. Don't forget to prioritize safety and integrate your findings into insurance processes. By mastering these skills, you'll become an efficient and effective aerial property assessor.
As educators and advocates for responsible drone use, we’re committed to sharing our knowledge and expertise with aspiring aerial photographers.


Leave a Reply