To master hyperlapse cinematography, you'll need to blend technical skill with creative vision. Start by understanding the fundamentals: consistent camera movement, proper intervals, and stable exposures. Invest in quality drone equipment with features like GPS positioning and gimbal stabilization. Plan your routes carefully, considering visual appeal and potential obstacles. Perfect your camera settings for smooth motion, and practice various flight patterns to add dynamic interest. In post-production, focus on stabilization, color grading, and seamless shifts. By combining these elements, you'll create stunning aerial hyperlapses that captivate viewers. The journey to soaring cinematography is just beginning.
Key Takeaways
- Hyperlapse combines time-lapse with camera movement, requiring consistent motion between shots for smooth results.
- Proper equipment, including a stable drone with a gimbal and high-quality camera, is essential for aerial hyperlapse.
- Planning routes, mastering flight patterns, and executing dynamic camera maneuvers enhance visual impact in hyperlapse videos.
- Manual exposure control and techniques for handling changing light conditions ensure consistent, flicker-free footage.
- Post-processing, including stabilization and color grading, is crucial for polishing hyperlapse footage to professional standards.
Understanding Hyperlapse Fundamentals

At its core, hyperlapse is a time-lapse technique that incorporates camera movement. Unlike traditional time-lapse, where the camera remains stationary, hyperlapse allows you to cover vast distances and create dynamic, cinematic sequences. To master this technique, you'll need to understand its fundamental principles.
First, consider your subject and movement. Plan a route that showcases interesting elements and shifts. You'll need to move your camera consistently between shots, maintaining a fixed distance and angle relative to your subject. This creates the illusion of smooth motion when frames are combined.
Next, focus on interval and duration. Determine how frequently you'll take photos and how long your final sequence should be. A good rule of thumb is to capture one frame every 2-3 steps. For a 10-second clip at 24fps, you'll need 240 individual photos.
Stability is essential in hyperlapse. Use a tripod or stabilizer to minimize shake, and consider employing software stabilization in post-production.
Pay attention to exposure settings, keeping them consistent throughout your shoot to avoid flickering. With these fundamentals in mind, you're ready to start creating stunning hyperlapse sequences.
Essential Drone Equipment

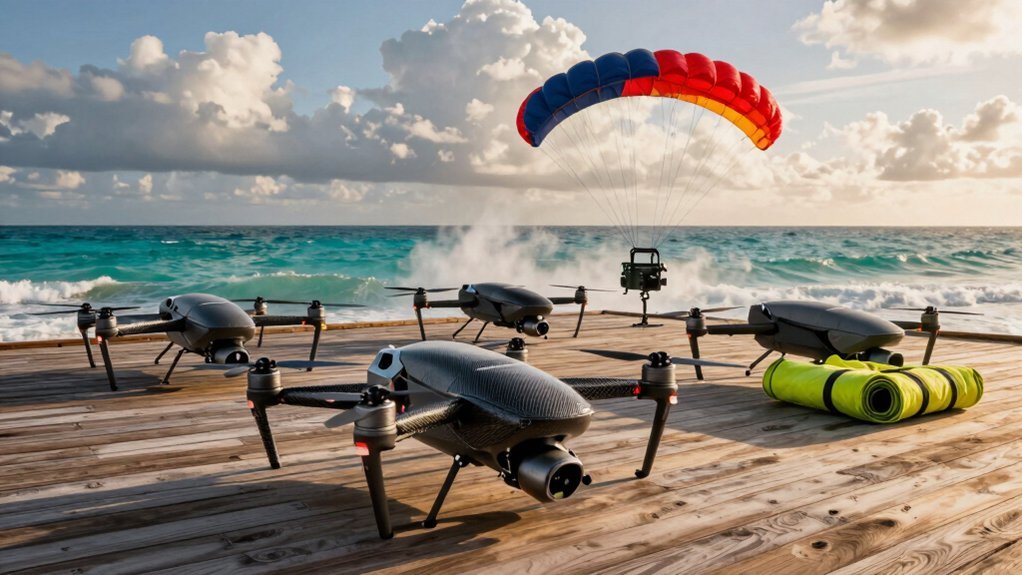
In recent years, drone technology has revolutionized hyperlapse photography, offering new perspectives and creative possibilities. To create stunning aerial hyperlapses, you'll need the right equipment.
Start with a high-quality drone capable of stable flight and precise movements. Look for models with GPS positioning, obstacle avoidance, and intelligent flight modes to guarantee smooth, consistent shots.
Your drone's camera is vital for capturing crisp, high-resolution images. Opt for a model with at least 4K video capabilities and RAW photo support. A gimbal is essential for stabilizing your shots, eliminating unwanted vibrations and movement.
Don't forget these additional items to enhance your hyperlapse experience:
- Extra batteries to extend your flight time
- ND filters to control exposure in bright conditions
- A sturdy carrying case for safe transportation
Invest in a reliable remote controller with a built-in screen or smartphone compatibility for real-time monitoring.
Planning Your Hyperlapse Route

When planning your hyperlapse route, you'll need to scout ideal shooting locations that offer visually appealing elements and unobstructed views.
You should carefully map out your camera movements, considering the path, speed, and duration of your intended hyperlapse sequence.
Scout Ideal Shooting Locations
Before commencing your hyperlapse journey, it's crucial to scout out the perfect locations for your shoot. Explore your intended route during different times of the day to identify spots with ideal lighting, interesting architecture, or unique natural features. Look for areas that offer a clear, unobstructed path for your camera movement, guaranteeing smooth shifts between frames.
Consider the following factors when scouting locations:
- Visual interest: Seek out locations with dynamic elements, such as bustling city streets, flowing water, or changing landscapes.
- Accessibility: Verify you have permission to shoot in your chosen locations and that they're safe for extended periods of filming.
- Weather conditions: Check forecasts and plan for potential weather changes that could affect your shoot.
Don't forget to take test shots at each location to evaluate composition and lighting. This will help you anticipate any challenges you might face during the actual shoot.
Pay attention to potential obstacles, like pedestrians or vehicles, that could interfere with your hyperlapse sequence. By thoroughly scouting your locations in advance, you'll be well-prepared to capture stunning hyperlapse footage that seamlessly blends movement and time.
Map Out Camera Movements
After scouting your locations, it's time to meticulously plan your camera movements. Map out your route, considering the distance between each shot and the overall path you'll take. Use landmarks or physical markers to guide your movements, ensuring consistency in your shots.
Consider the following factors when planning your hyperlapse route:
| Factor | Importance | Tips |
|---|---|---|
| Distance | High | Keep intervals consistent |
| Direction | High | Maintain a steady trajectory |
| Obstacles | Medium | Plan workarounds in advance |
| Lighting | High | Account for changes over time |
| Duration | Medium | Estimate total shooting time |
As you plan, visualize the final sequence and how each movement will contribute to the overall effect. If possible, do a dry run without your camera to get a feel for the route and identify any potential issues.
Remember to factor in the time of day and how it might affect your shots, especially for longer hyperlapse sequences. You'll want to maintain consistent lighting throughout, so plan accordingly. By thoroughly mapping out your camera movements, you'll set yourself up for a smoother shooting process and a more cohesive final product.
Camera Settings for Smooth Motion

The key to a polished hyperlapse lies in your camera settings. To achieve smooth motion, you'll need to fine-tune your camera's parameters for ideal results.
Start by setting your shutter speed to twice your frame rate. This creates a natural motion blur that helps blend frames seamlessly. For example, if you're shooting at 24 fps, use a 1/48 second shutter speed.
Next, adjust your aperture to maintain consistent exposure throughout the sequence. A wider aperture (lower f-number) allows more light in, which is particularly useful in low-light conditions. However, be mindful of your depth of field, as a too-shallow focus can make your hyperlapse appear disjointed.
To further enhance the smoothness of your hyperlapse, consider these additional techniques:
- Use manual focus to prevent unwanted focus shifts
- Enable image stabilization if your camera offers it
- Shoot in RAW format for greater flexibility in post-processing
Remember to keep your ISO as low as possible to minimize noise. If you're working in challenging lighting conditions, it's often better to underexpose slightly and correct in post-production rather than increasing ISO and introducing grain to your footage.
Flight Patterns and Movements

When creating aerial hyperlapses, you'll want to focus on smooth, fluid trajectories that enhance the visual impact of your time-lapse sequences.
You can achieve this by mastering basic flight patterns like straight lines, orbits, and reveals, gradually increasing complexity as you gain experience.
Don't forget to incorporate dynamic camera movements, such as gentle pans or tilts, to add depth and interest to your hyperlapse footage.
Smooth Aerial Trajectories
To create stunning aerial hyperlapse sequences, you'll need to master smooth flight patterns and movements. Smooth aerial trajectories are essential for capturing seamless footage that'll wow your audience.
When planning your flight path, consider the subject matter and the story you're trying to tell. Your drone's movement should complement the scene, not distract from it.
To achieve smooth aerial trajectories, focus on these key techniques:
- Gradual acceleration and deceleration
- Consistent altitude changes
- Controlled yaw movements
Start by practicing simple, linear movements before attempting more complex patterns. As you gain confidence, experiment with circular orbits, reveals, and dynamic altitude changes.
Always maintain a steady hand on the controls, using gentle inputs to avoid jerky motions. Utilize your drone's intelligent flight modes, such as waypoints or tracking, to guarantee precise and repeatable movements.
Remember to factor in wind conditions and obstacles when planning your trajectories. With practice, you'll develop an intuitive sense of how to execute smooth, cinematic movements that elevate your hyperlapse footage from ordinary to extraordinary.
Dynamic Camera Maneuvers
Dynamic camera maneuvers take your hyperlapse footage to the next level, turning simple time-lapse sequences into cinematic masterpieces. To achieve this, you'll need to master various flight patterns and movements that add depth and interest to your shots.
Start with the classic reveal, where you fly towards or away from a subject, gradually exposing more of the scene. Try orbiting around your subject, maintaining a consistent distance while circling to showcase different angles. For added drama, incorporate altitude changes during your orbit.
Experiment with parallax effects by moving past foreground objects to create a sense of depth and movement. You can also try push-in or pull-out movements, smoothly approaching or retreating from your subject. Don't forget about the power of diagonal movements, which can add dynamism to your compositions.
For more advanced techniques, combine multiple maneuvers. For example, start with a reveal, shift into an orbit, and finish with a dramatic ascent.
Remember to keep your movements smooth and controlled, maintaining a consistent speed throughout your hyperlapse to guarantee a professional-looking result.
Mastering Manual Exposure Control

Manual exposure control stands out as an essential skill for creating stunning hyperlapse videos. By mastering this technique, you'll guarantee consistent lighting throughout your sequence, avoiding the flickering effect that can occur with automatic settings. To achieve this, you'll need to lock your camera's exposure settings, including aperture, shutter speed, and ISO.
When setting up your manual exposure, consider the following:
- Aperture: Choose a narrow aperture (higher f-number) for a larger depth of field, guaranteeing more of your scene remains in focus.
- Shutter speed: Opt for a slower shutter speed to create motion blur, enhancing the sense of movement in your hyperlapse.
- ISO: Keep this as low as possible to minimize noise, adjusting only if necessary in low-light conditions.
Start by determining the best exposure for the brightest part of your scene, then maintain these settings throughout the shoot. You may need to adjust your neutral density filters as lighting conditions change.
Handling Changing Light Conditions

How can you maintain consistency in your hyperlapse when the light around you is constantly changing? The key lies in anticipating and adapting to these changes. Start by monitoring the weather forecast and planning your shoot during periods of stable light. If you're capturing a day-to-night shift, gradually adjust your camera settings to compensate for the diminishing light.
Use graduated neutral density filters to balance exposure between bright skies and darker foregrounds. When dealing with fluctuating cloud cover, consider shooting in aperture priority mode with auto ISO. This allows your camera to maintain a consistent depth of field while adjusting for light changes. Alternatively, embrace the variations by intentionally incorporating them into your narrative.
For long-term hyperlapses, such as construction projects, maintain consistent lighting by shooting at the same time each day. If you're working with artificial light, use a fixed white balance setting to prevent color temperature shifts.
Remember to check your histogram frequently and make small, incremental adjustments to maintain proper exposure. By mastering these techniques, you'll create smooth, professional-looking hyperlapses even in challenging lighting conditions.
Post-Processing Hyperlapse Footage

After capturing your hyperlapse footage, you'll need to refine it through post-processing.
Start by applying stabilization and smoothing techniques to eliminate any unwanted camera shake or jitters.
Next, enhance your footage with color grading to achieve the desired mood and visual style, and consider adding motion blur to create a more cinematic feel.
Stabilization and Smoothing
Once you've captured your hyperlapse footage, the next vital step is stabilization and smoothing. These techniques are essential for creating a professional-looking final product that's free from jarring movements and visual distractions.
You'll need to use specialized software to achieve ideal results, with popular options including Adobe After Effects, DaVinci Resolve, and Premiere Pro.
Start by analyzing your footage to identify areas that need the most attention. Focus on:
- Horizontal stabilization to eliminate side-to-side shake
- Vertical stabilization to smooth out up-and-down movements
- Rotation correction to fix any unwanted twisting or tilting
Apply warp stabilizer or a similar tool to your footage, adjusting settings like smoothness and crop margin as needed.
Don't overdo it, as excessive stabilization can create a warped or artificial look. For more precise control, consider using motion tracking or manual keyframing techniques.
Color Grading Techniques
With your hyperlapse footage stabilized, it's time to enhance its visual appeal through color grading. Start by adjusting the basic color settings: contrast, saturation, and white balance. These foundational tweaks can dramatically improve your footage's overall look.
Next, focus on color correction. Address any color casts or inconsistencies between frames, ensuring a cohesive look throughout your hyperlapse. Use tools like curves or color wheels to fine-tune specific color ranges.
For a more cinematic feel, apply a LUT (Look-Up Table) that complements your footage's mood. Experiment with different LUTs to find the perfect match for your scene's atmosphere.
Don't overlook the power of selective color grading. Isolate specific areas or objects in your frame to emphasize or de-emphasize elements, guiding the viewer's attention.
Finally, consider adding subtle vignettes or light leaks to enhance the visual interest. These effects can create depth and draw focus to the center of your frame.
Remember to maintain consistency across your entire hyperlapse sequence. Subtle, uniform color grading will elevate your footage without distracting from the mesmerizing motion you've captured.
Adding Motion Blur
Motion blur plays an essential role in enhancing the smooth, flowing feel of your hyperlapse footage. When you're dealing with rapid movement in your shots, adding motion blur can help create a more natural and cinematic look.
It's particularly useful for smoothing out any jerkiness or stuttering that might occur between frames.
To add motion blur effectively, you'll need to use post-processing software like Adobe After Effects or DaVinci Resolve. These tools offer various methods to introduce motion blur, including optical flow algorithms and frame blending techniques.
When applying motion blur, it's vital to find the right balance – too little won't have the desired effect, while too much can make your footage look unrealistic or overly stylized.
Here are three key tips for mastering motion blur in your hyperlapse:
- Experiment with different blur strengths to find the sweet spot for your footage
- Use directional blur to emphasize the movement's trajectory
- Apply motion blur selectively to specific elements in your frame for a more nuanced effect
Stabilization Techniques in Post

How can you transform shaky footage into a smooth, professional-looking hyperlapse? The key lies in post-production stabilization techniques. You'll need powerful software tools and a keen eye for detail to achieve that cinematic flow.
Start by importing your footage into your preferred editing software. Most professional suites offer built-in stabilization features. You'll want to experiment with different settings to find the right balance between smoothness and maintaining the hyperlapse's dynamic feel.
Here's a quick comparison of popular stabilization methods:
| Method | Pros | Cons |
|---|---|---|
| Warp Stabilizer | Automatic, easy to use | Can cause warping artifacts |
| Point Tracking | Precise control | Time-consuming, manual process |
| 3D Camera Tracker | Great for complex movements | Requires more processing power |
Don't forget to adjust your stabilization settings for each clip individually. What works for one shot might not suit another. Pay attention to horizon lines and keep them level throughout your sequence. If you're dealing with extreme camera shake, consider using multiple passes of stabilization, gradually increasing the intensity with each pass.
Creating Seamless Transitions

Now that you've stabilized your footage, it's time to focus on the flow between shots. Creating seamless shifts in your hyperlapse is essential for maintaining a smooth, engaging viewing experience. You'll want to carefully plan your shots and consider how they'll connect visually and thematically.
To achieve fluid shifts, try these techniques:
- Match movement: Confirm the direction and speed of motion are consistent between shots. This continuity helps the viewer's eye follow the action seamlessly.
- Use natural wipes: Incorporate objects in your environment, like buildings or trees, to create natural shifts as you move past them.
- Employ speed ramping: Gradually increase or decrease the playback speed at the end and beginning of consecutive clips to blend them together smoothly.
When editing, pay close attention to the timing of your cuts. Aim for a rhythmic flow that complements your chosen music or ambient sound.
Experiment with cross-dissolves or other subtle shift effects to further enhance the seamless quality of your hyperlapse. Remember, the goal is to create a cohesive visual journey that captivates your audience from start to finish.
Advanced Composition Strategies

While mastering the basics of hyperlapse is essential, elevating your work with advanced composition strategies can truly set your creations apart. Consider implementing leading lines to guide viewers' eyes through your shots, creating a sense of depth and movement. Experiment with framing techniques, using natural elements or architectural features to frame your subject.
Incorporate the rule of thirds to create balanced and visually appealing compositions. Place key elements along the imaginary grid lines or at their intersections. Don't be afraid to break this rule occasionally for dramatic effect.
Utilize foreground elements to add depth and context to your hyperlapse. This technique can create a sense of movement and progression as the viewer's perspective shifts.
Here's a quick reference guide for advanced composition strategies:
| Strategy | Purpose | Example |
|---|---|---|
| Leading Lines | Guide viewer's eye | Roads, railways |
| Framing | Focus attention | Archways, windows |
| Rule of Thirds | Balance composition | Horizon on lower third |
| Foreground Elements | Add depth | Trees, street signs |
| Symmetry | Create visual impact | Reflections, architecture |
Remember to experiment with different angles and perspectives to add variety and interest to your hyperlapse sequences. Low angles can create a sense of grandeur, while high angles offer unique viewpoints.
Troubleshooting Common Hyperlapse Issues

Despite careful planning and execution, you're likely to encounter some challenges when creating hyperlapses. Common issues include camera shake, inconsistent intervals, and unwanted objects in the frame. To address these problems, you'll need to troubleshoot effectively and adjust your technique accordingly.
Camera shake can ruin the smooth flow of your hyperlapse. To minimize this, use a sturdy tripod or stabilization rig, and consider adding weight to your setup for increased stability. If you're shooting handheld, practice smooth movements and use software stabilization in post-processing.
Inconsistent intervals between shots can lead to jerky or uneven motion. To avoid this:
- Use an intervalometer or dedicated hyperlapse app
- Mark your shooting positions precisely
- Maintain a consistent pace when moving between shots
Unwanted objects, such as pedestrians or vehicles, can disrupt your hyperlapse sequence. Plan your shoot during quieter times or use longer exposures to blur moving objects.
In post-processing, you can remove unwanted elements frame by frame, though this can be time-consuming. Alternatively, embrace these elements as part of the dynamic urban environment you're capturing.
Frequently Asked Questions
How Long Does It Typically Take to Create a Professional-Quality Hyperlapse Video?
Creating a professional-quality hyperlapse video can take you anywhere from a few hours to several days. You'll need time for planning, shooting, post-processing, and editing. The complexity of your project will determine the overall duration.
Are There Any Legal Restrictions for Using Drones in Hyperlapse Photography?
Yes, there are legal restrictions for using drones in hyperlapse photography. You'll need to follow local regulations, obtain necessary permits, and respect no-fly zones. Always check current laws, as they can vary by location and change frequently.
Can Hyperlapse Techniques Be Applied to Indoor Environments or Confined Spaces?
Yes, you can apply hyperlapse techniques indoors and in confined spaces. You'll need to plan your shots carefully, use smaller equipment, and consider lighting. It's a great way to showcase interior spaces and architectural details.
What Software Is Best for Creating Hyperlapses Without Using a Drone?
You'll find software like LRTimelapse, Adobe After Effects, and Microsoft Hyperlapse Pro excellent for creating hyperlapses without a drone. They offer stabilization, frame blending, and time-remapping features. Don't forget smartphones apps like Hyperlapse by Instagram for quick results.
How Do Weather Conditions Affect the Quality of Hyperlapse Footage?
Weather greatly impacts your hyperlapse quality. You'll face challenges with changing light, wind-induced camera shake, and rain damaging equipment. Clouds can create interesting effects, but they'll also affect exposure consistency throughout your footage.
In Summary
You've now revealed the secrets to creating stunning hyperlapse drone footage. Armed with these techniques, you'll soar above the competition. Remember to plan meticulously, master your equipment, and refine your post-processing skills. Don't be afraid to experiment with different angles and movements. As you practice, you'll develop your unique style. Keep pushing the boundaries of what's possible, and soon you'll be capturing breathtaking hyperlapses that leave viewers in awe.

As educators and advocates for responsible drone use, we’re committed to sharing our knowledge and expertise with aspiring aerial photographers.


Leave a Reply