
Begin your aerial photogrammetry post-processing journey by organizing your data and importing images into specialized software. Next, align your photos and calibrate camera settings to create a sparse point cloud. Generate a dense point cloud, balancing quality and processing time. Create a 3D mesh and apply textures for a realistic model. Produce digital elevation models (DEMs) from the point cloud, and stitch individual images into an orthomosaic. Throughout the process, adjust settings based on your project's needs and hardware capabilities. Don't forget to document your workflow and include key metrics in your final report. The world of aerial photogrammetry awaits your exploration.
Key Takeaways
- Import and organize raw images into photogrammetry software, ensuring metadata is correctly read.
- Align photos and generate a sparse point cloud, reviewing for accuracy before proceeding.
- Create a dense point cloud, balancing quality settings with processing time and hardware capabilities.
- Produce a 3D mesh from the dense cloud and apply textures for realistic detail.
- Generate Digital Elevation Models (DEMs) and orthomosaics, selecting appropriate resolution and export formats.
Data Import and Organization

Within this folder, establish subfolders for raw images, processed data, and final outputs.
Sort your raw images into these subfolders based on flight patterns or specific areas of interest. This organization will streamline your workflow and make it easier to locate files later.
Next, import your images into your chosen photogrammetry software. Most programs allow batch importing, saving you time.
During import, verify that the software correctly reads the images' metadata, including GPS coordinates and camera parameters.
If your drone captured additional data like flight logs or ground control point information, import these as well. They'll improve the accuracy of your final 3D model.
Image Alignment and Calibration
With your images imported and organized, it's time to align them and calibrate your camera settings. This step is essential for creating an accurate 3D model. Start by selecting all your images and choosing the "Align Photos" option in your photogrammetry software. The program will analyze each image, identifying common points to match them together.
During alignment, you'll need to set the accuracy level. Higher accuracy takes longer but produces better results. Once complete, review the sparse point cloud to verify all images are aligned correctly.
Next, calibrate your camera settings. Most software will automatically detect camera parameters, but you can fine-tune them for better results. Pay attention to focal length, principal point, and lens distortion.
| Setting | Description | Importance |
|---|---|---|
| Accuracy | Alignment precision | High |
| Key point limit | Max points per image | Medium |
| Tie point limit | Max matched points | Medium |
After alignment and calibration, you'll have a sparse point cloud and estimated camera positions. This forms the foundation for the next steps in your photogrammetry workflow. If you notice any misaligned images or errors, now's the time to address them before moving on to dense cloud generation.
Dense Point Cloud Generation

When generating a dense point cloud, you'll need to contemplate the quality settings and processing time trade-offs.
Higher quality settings produce more detailed point clouds but considerably increase processing time.
You'll want to balance the desired level of detail with your project timeline and computational resources available.
Point Cloud Quality Settings
One of the most essential steps in aerial photogrammetry post-processing is configuring the point cloud quality settings for dense point cloud generation. These settings directly impact the level of detail and accuracy in your final 3D model.
You'll need to strike a balance between quality and processing time, as higher quality settings require more computational power and time.
When adjusting point cloud quality settings, consider the following factors:
- Project requirements: Determine the level of detail needed for your specific application
- Hardware capabilities: Verify your computer can handle the chosen quality level
- Time constraints: Higher quality settings may take considerably longer to process
Start with medium quality settings and run a test on a small section of your dataset. This will give you an idea of the processing time and output quality.
If you're satisfied with the results, proceed with the full dataset. If not, adjust the settings accordingly. Remember, you can always increase the quality settings later if needed, but it's more time-efficient to get it right from the start.
Pay attention to the filtering options as well, which can help reduce noise and outliers in your point cloud.
Processing Time Considerations
Processing time for dense point cloud generation can vary considerably based on several factors. The most significant influences are your computer's hardware capabilities, the number and resolution of images, and the quality settings you've chosen.
Higher-end CPUs and GPUs will drastically reduce processing time, while more RAM allows for larger datasets to be handled efficiently.
When working with a large number of high-resolution images, expect longer processing times. You'll need to balance quality with practicality, especially if you're on a tight deadline. Consider using a lower quality setting for initial results, then increase it for final outputs if necessary.
To optimize processing time, you can:
- Use a computer with dedicated graphics card and ample RAM
- Reduce the number of images by removing unnecessary or redundant shots
- Downscale image resolution if full resolution isn't required
- Process in batches if dealing with extensive datasets
- Use cloud computing services for faster results, especially with limited local hardware
Mesh Creation and Texturing
Building upon the dense point cloud, mesh creation and texturing represent essential steps in transforming raw data into a visually coherent 3D model. In this phase, you'll create a polygonal mesh that connects the points, forming a solid surface. Most photogrammetry software offers automatic mesh creation options, allowing you to choose between high and low polygon counts based on your project's needs.
Once you've generated the mesh, it's time to add texture. This process involves mapping the original image data onto the 3D model, giving it realistic color and detail. You'll want to pay attention to texture resolution and quality settings to balance visual fidelity with file size and processing requirements.
During mesh creation and texturing, keep these key points in mind:
- Optimize mesh density for your specific use case
- Check for and repair any holes or artifacts in the mesh
- Consider using texture atlases for more efficient rendering
After completing these steps, you'll have a textured 3D model ready for further refinement or export. Remember to save your work frequently and experiment with different settings to achieve the best results for your project.
Digital Elevation Model Production
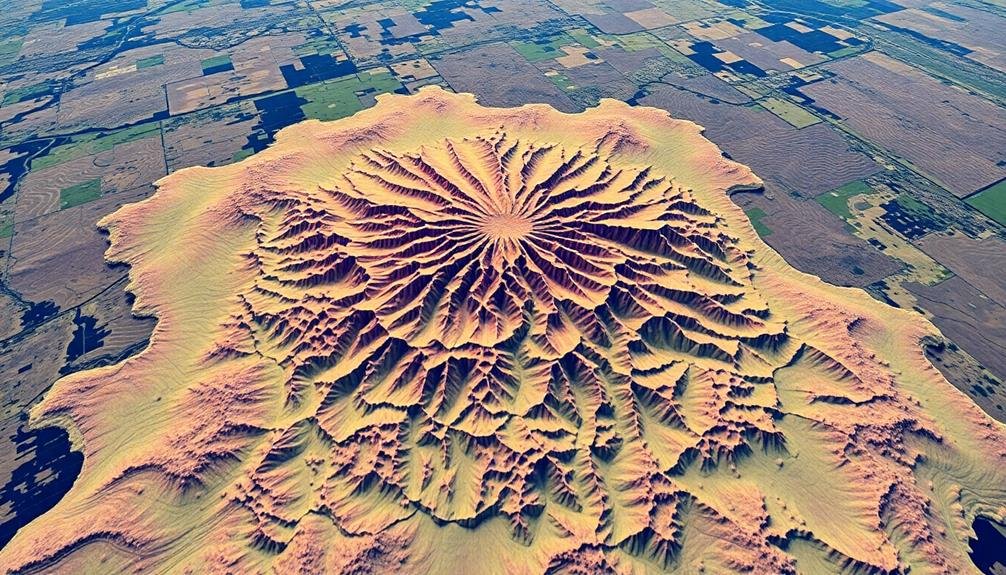
Digital Elevation Models (DEMs) represent another valuable output from aerial photogrammetry data. These 3D representations of terrain surfaces are essential for various applications, including flood modeling, urban planning, and geological studies.
To create a DEM, you'll use the dense point cloud generated earlier in the process. Start by selecting the "DEM" option in your photogrammetry software. Choose the resolution based on your project requirements and computational resources. Higher resolutions provide more detail but require more processing time.
Next, specify the coordinate system for your DEM. This is typically the same as your project's coordinate system. Select the interpolation method, with options like Inverse Distance Weighting or Kriging. These methods fill gaps in the data to create a continuous surface.
You can apply filters to smooth the DEM or remove noise. Be cautious, as excessive filtering may remove important terrain features. Once satisfied with the settings, initiate the DEM generation process.
After completion, review the DEM for accuracy. Look for artifacts or anomalies that might indicate processing errors. You can export the DEM in various formats, such as GeoTIFF or ASCII grid, depending on your intended use.
Orthomosaic and Report Generation
Generating orthomosaics and reports marks the final stage of aerial photogrammetry post-processing. An orthomosaic is a geometrically corrected aerial image that combines multiple photos into a single, seamless view. To create an orthomosaic, you'll use your photogrammetry software to stitch together the individual images and apply the geometric corrections based on the previously generated digital elevation model.
When creating your orthomosaic, pay attention to:
- Resolution: Choose an appropriate ground sampling distance (GSD) that balances detail and file size.
- Color balancing: Adjust for consistent coloration across the entire mosaic.
- Compression: Select a suitable format and compression level for your intended use.
After generating the orthomosaic, you'll need to create a thorough report. This document should include key project information, such as flight details, camera specifications, and processing parameters.
Include quality metrics like the root mean square error (RMSE) and ground control point (GCP) accuracy. Don't forget to add visual elements like the orthomosaic itself, contour maps, and 3D models to enhance your report's effectiveness.
Frequently Asked Questions
How Does Weather Affect the Quality of Aerial Photogrammetry Data?
Weather considerably impacts your aerial photogrammetry data quality. You'll find that rain, fog, and strong winds can distort images and affect drone stability. Bright sunlight may cause harsh shadows, while overcast conditions can reduce contrast and detail.
What Are the Legal Considerations for Conducting Aerial Photogrammetry Surveys?
You'll need to contemplate drone regulations, privacy laws, and airspace restrictions. Obtain necessary permits and permissions. Don't fly over sensitive areas or private property without consent. Always prioritize safety and follow local and national aviation rules.
How Can I Optimize My Drone's Camera Settings for Photogrammetry?
You'll want to optimize your drone's camera settings by using manual mode. Set a fast shutter speed, low ISO, and mid-range aperture. Confirm proper focus and use RAW format for best image quality and processing flexibility.
What Are the Best Practices for Ground Control Point Placement?
When placing ground control points, you'll want to evenly distribute them across your survey area. Aim for at least five points, including corners and center. Guarantee they're visible from above and accurately measured for best results.
How Do Different Software Packages Compare for Aerial Photogrammetry Post-Processing?
You'll find various software options for aerial photogrammetry post-processing. Agisoft Metashape, Pix4D, and DroneDeploy are popular choices. They differ in user interface, processing speed, and specific features. Consider your needs and budget when choosing.
In Summary
You've now completed the essential steps of aerial photogrammetry post-processing. From importing your data to generating the final orthomosaic, you've transformed raw images into valuable 3D models and maps. Remember, practice makes perfect. As you gain experience, you'll become more efficient and skilled at each stage. Don't hesitate to experiment with different settings and techniques to improve your results. Keep exploring the world of aerial photogrammetry and enjoy the unique perspectives it offers!
As educators and advocates for responsible drone use, we’re committed to sharing our knowledge and expertise with aspiring aerial photographers.


Leave a Reply