To capture epic mountain bike trails from above, you'll need the right drone and camera setup. Choose a drone with excellent stability, GPS features, and a high-quality 4K camera. Plan your flight path carefully, considering obstacles and scenic vistas. Scout locations in advance and time your shoots during golden hour for ideal lighting. Use composition techniques like the rule of thirds and leading lines to create visually appealing footage. Adjust camera settings for smooth motion and experiment with different angles to showcase the trail's features. Don't forget to coordinate with riders and check local regulations. With these tips, you'll be on your way to creating breathtaking aerial mountain bike videos.
Choosing the Right Drone
Many mountain bikers are surprised to learn that drones can enhance their trail experience. When selecting a drone for mountain bike trail footage, you'll want to take into account several key factors.
First, opt for a drone with a high-quality camera capable of capturing at least 4K resolution. This guarantees crisp, detailed footage of the trails and surrounding landscape.
Look for a drone with excellent flight stability and wind resistance, as mountain environments can be unpredictable. GPS-enabled models with return-to-home features are vital for safety in remote areas.
Battery life is another important factor; choose a drone that can fly for at least 20-30 minutes on a single charge.
Portability is essential for bikers, so select a compact, foldable drone that's easy to carry in your backpack. Advanced features like obstacle avoidance and automated flight modes can help you capture smooth, professional-looking shots while focusing on your ride.
Lastly, verify your chosen drone complies with local regulations and has a decent range to follow you along the trails. With the right drone, you'll be able to document your mountain biking adventures from breathtaking new perspectives.
Essential Camera Settings
Capturing stunning mountain bike trail footage requires mastering essential camera settings. You'll need to adjust your drone's camera to achieve the best results in varying conditions.
Start by setting your camera to shoot in RAW format, which allows for more flexibility in post-processing. Next, choose a frame rate that suits your desired outcome—typically 24fps for a cinematic look or 60fps for smooth slow-motion shots.
Exposure is vital when filming trails. Use neutral density (ND) filters to maintain proper shutter speed in bright conditions. Set your shutter speed to roughly double your frame rate for natural-looking motion blur. Adjust your ISO to the lowest possible setting that allows for proper exposure, minimizing noise in your footage.
For composition and focus, consider these key points:
- Enable grid lines to help with framing and alignment
- Use auto-focus for tracking moving subjects
- Set your aperture wide for a shallow depth of field
- Experiment with different picture profiles for color grading
- Enable image stabilization for smoother footage
Planning Your Flight Path
Carefully planning your flight path is essential for capturing compelling mountain bike trail footage. Begin by scouting the area and identifying key points of interest along the trail. Look for natural features, jumps, or technical sections that'll make for exciting shots. Consider the direction of sunlight to guarantee ideal lighting conditions for your footage.
Map out your flight path, taking into account any obstacles like trees or power lines. Plan for smooth, cinematic movements that'll showcase the trail's flow. Decide on your starting and ending points, as well as any waypoints in between. Factor in your drone's battery life and plan for multiple shorter flights if necessary.
Consider the rider's speed and trajectory when plotting your path. You'll want to anticipate their movements to keep them in frame. Plan for a mix of shot types, including wide establishing shots, close follow shots, and dramatic reveal shots. Don't forget to include shots that highlight the surrounding landscape for context.
Lastly, guarantee your planned flight path complies with local drone regulations and respects private property boundaries. Always prioritize safety for both the rider and your equipment.
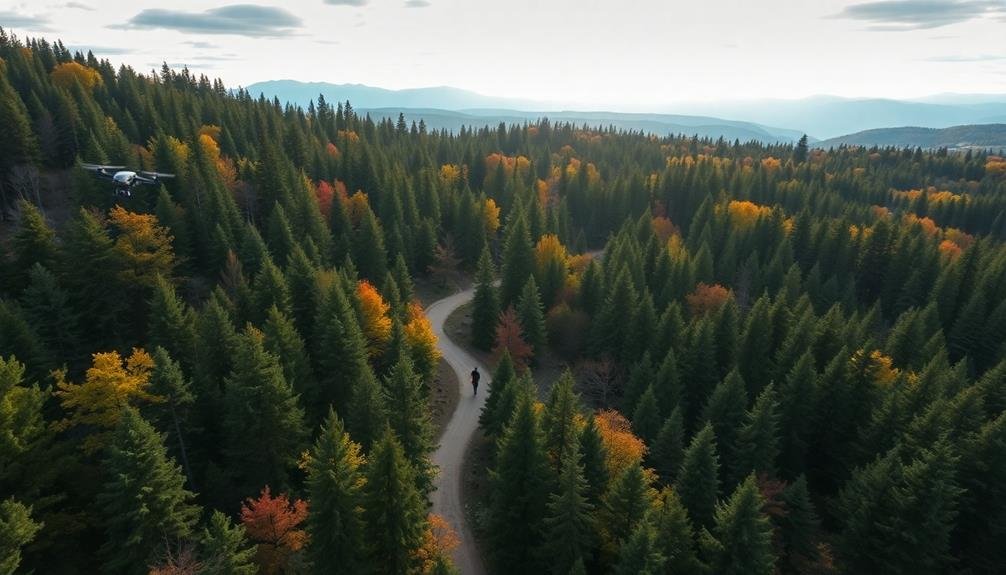
Scouting Locations for Aerial Shots
To scout ideal locations for aerial shots of mountain bike trails, you'll want to start with a thorough topographical map analysis.
Study the contours, elevations, and notable landscape features to identify potentially dramatic vantage points.
Combine this research with your local trail knowledge, considering popular routes, technical sections, and scenic areas that would translate well to aerial footage.
Topographical Map Analysis
Topographical maps serve as an aerial scout's best friend when planning mountain bike trail photography. They provide a wealth of information about terrain, elevation changes, and geographical features that can help you identify potential shooting locations. By studying these maps, you'll gain insights into the trail's layout and surrounding landscape before even setting foot on the ground.
When analyzing topographical maps for mountain bike trail photography, focus on:
- Elevation contours to spot steep climbs or descents
- Natural features like ridges, valleys, and water bodies
- Trail intersections and switchbacks
- Open areas that offer clear views of the trail
- Nearby access points for drone launching
Look for areas where the trail weaves through interesting terrain or offers dramatic elevation changes. These spots often provide the most visually appealing shots.
Pay attention to the contour lines' spacing, as tightly packed lines indicate steeper slopes, which can create dynamic imagery.
Don't forget to reflect on the sun's position and how it might affect lighting at different times of day.
Local Trail Knowledge
While topographical maps provide valuable insights, nothing beats first-hand local trail knowledge when scouting locations for aerial shots. You'll want to tap into the expertise of local riders, trail builders, and mountain bike clubs. They can point you towards the most photogenic sections of trail, hidden gems, and unique features that mightn't be apparent on a map.
Spend time riding the trails yourself to get a feel for the terrain and identify potential shooting locations. Look for areas with interesting landscapes, natural obstacles, or technical features that'll make for compelling aerial footage.
Pay attention to the light at different times of day, as this can dramatically affect the mood and quality of your shots.
Don't overlook local regulations and land ownership. Some trails may have restrictions on drone usage or require special permits for commercial photography. Building relationships with land managers and property owners can help you gain access to restricted areas and guarantee you're operating within legal boundaries.
Lastly, consider seasonal changes. Certain trails may look vastly different throughout the year, offering unique opportunities for capturing diverse imagery.
Timing and Light Considerations
When planning your mountain bike trail shoot, you'll want to harness the golden hour's magical light for stunning visuals.
Consider how weather patterns and seasonal changes can dramatically alter the trail's appearance and riding conditions.
You can also experiment with shadow play techniques to add depth and interest to your shots, especially during mid-day rides.
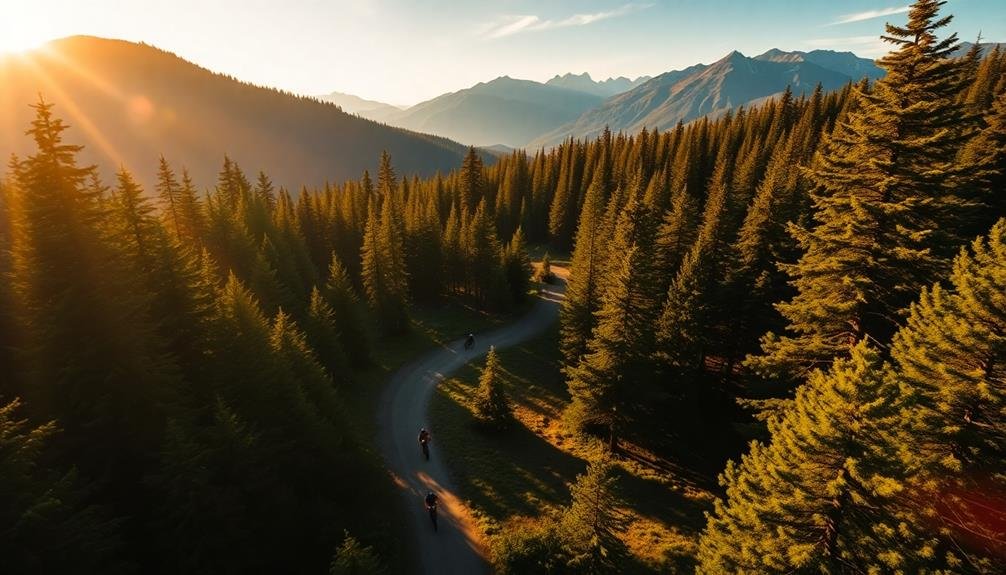
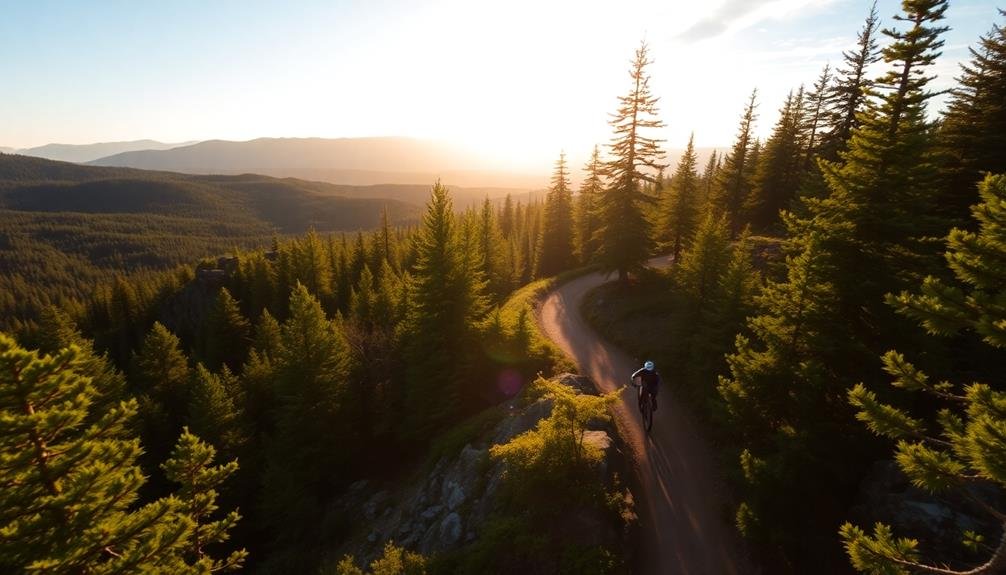
Golden Hour Magic
The golden hour's soft glow transforms mountain bike trails into magical landscapes, offering riders a unique visual experience. As the sun dips low on the horizon, you'll witness an enchanting interplay of light and shadow that can elevate your ride to a memorable adventure.
During this fleeting period, you'll encounter:
- Long, warm shadows that accentuate trail features
- A golden hue that bathes the surrounding landscape
- Dramatic silhouettes of trees and rock formations
- Enhanced contrast that highlights trail textures
- A softer, more forgiving light for photography
To make the most of the golden hour, plan your ride to coincide with sunrise or sunset. You'll need to time your ascent or descent carefully, ensuring you're in the right position when the light is at its best.
Remember, the golden hour's duration varies depending on your location and the time of year, so research local conditions beforehand.
Consider bringing a lightweight camera or smartphone to capture the stunning visuals. The golden hour's gentle light is ideal for photography, allowing you to document your ride without harsh shadows or overexposed areas.
Don't forget to pause occasionally, soak in the atmosphere, and appreciate the ephemeral beauty of this magical time on the trails.
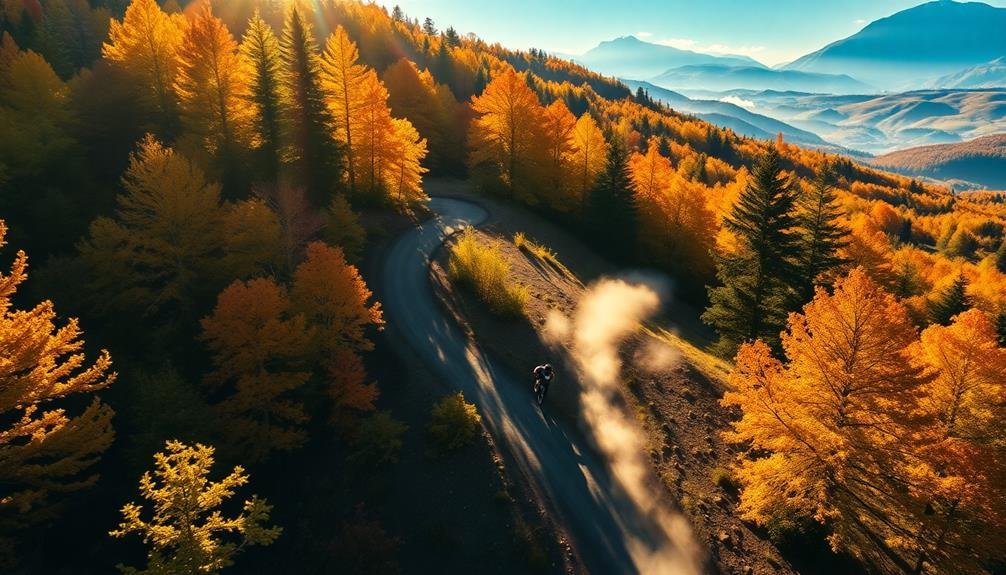
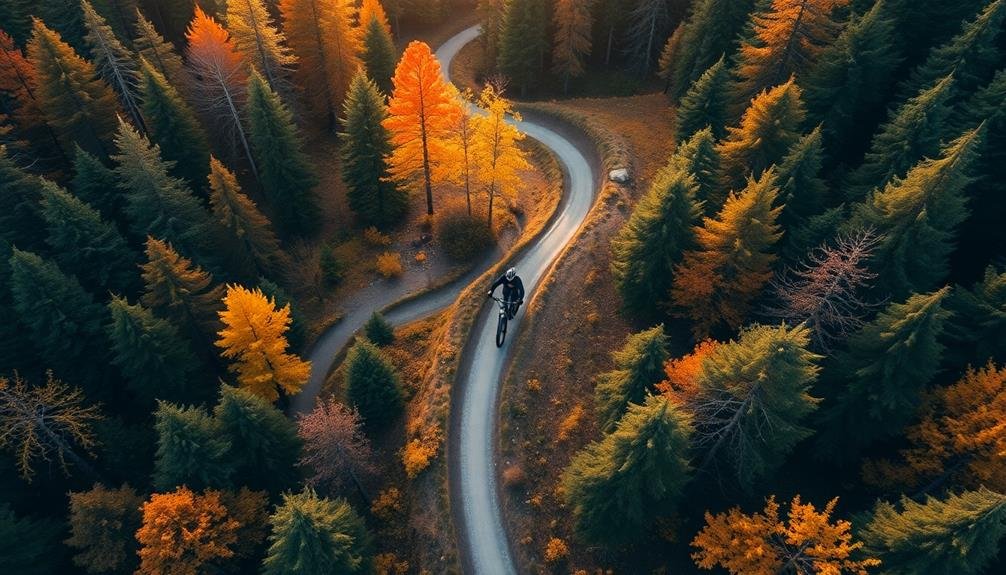
Weather and Seasons
Seasons paint mountain bike trails with ever-changing palettes, transforming your riding experience throughout the year. Spring brings vibrant greens and wildflowers, creating a lush backdrop for your rides.
Summer offers long days and warm temperatures, perfect for extended adventures. Fall showcases a stunning array of reds, oranges, and yellows, making it a photographer's dream. Winter, though challenging, presents unique opportunities with snow-covered landscapes and crisp air.
Weather conditions play an essential role in your trail experience. Sunny days provide ideal lighting for capturing clear, vivid images. Overcast skies offer soft, diffused light that can enhance details and reduce harsh shadows.
Rainy conditions create dramatic scenes with glistening trails and moody atmospheres. However, be cautious of slippery surfaces and potential equipment damage.
When planning your ride, check local weather forecasts and trail conditions. Consider how different weather patterns affect the terrain and adjust your gear accordingly.
Early morning or late afternoon rides often yield the best lighting for photography. Don't shy away from inclement weather – it can lead to unique and intriguing shots that stand out from the typical sunny day images.
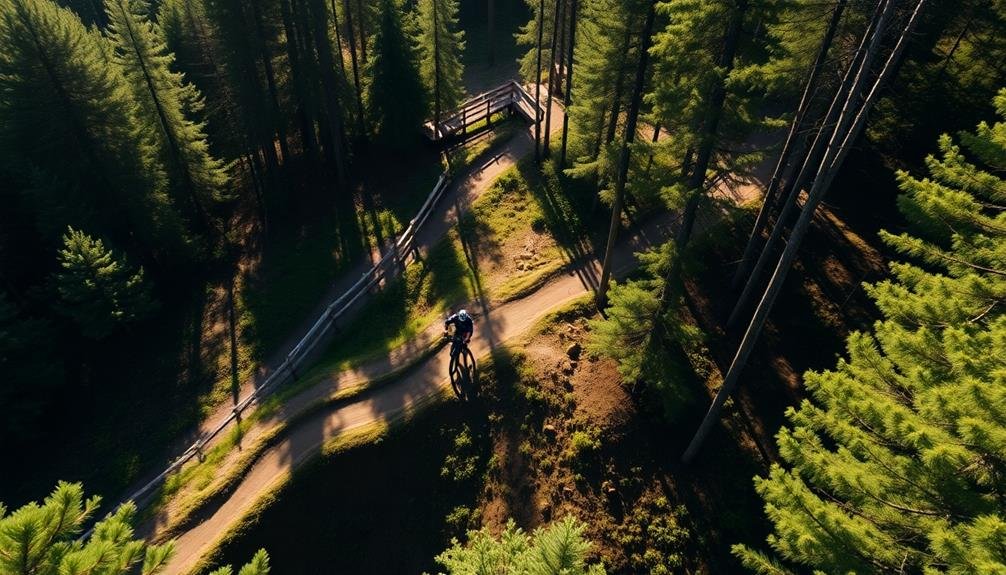
Shadow Play Techniques
Shadows, the unsung heroes of mountain bike trail photography, can transform ordinary shots into enchanting masterpieces. As you plan your aerial shots, consider the sun's position and how it casts shadows across the landscape. Early morning or late afternoon light will create longer, more dramatic shadows that accentuate the trail's contours and add depth to your images.
To make the most of shadow play techniques:
- Scout locations in advance to identify the best times for ideal lighting
- Use the golden hour for warm, soft shadows that enhance the trail's features
- Experiment with backlighting to create silhouettes of riders against the trail
- Look for natural elements like trees or rock formations that cast interesting shadows
- Pay attention to the direction of the shadows to lead the viewer's eye along the trail
Don't be afraid to wait for the perfect moment when shadows align with your composition. You'll find that patience often pays off with stunning results.
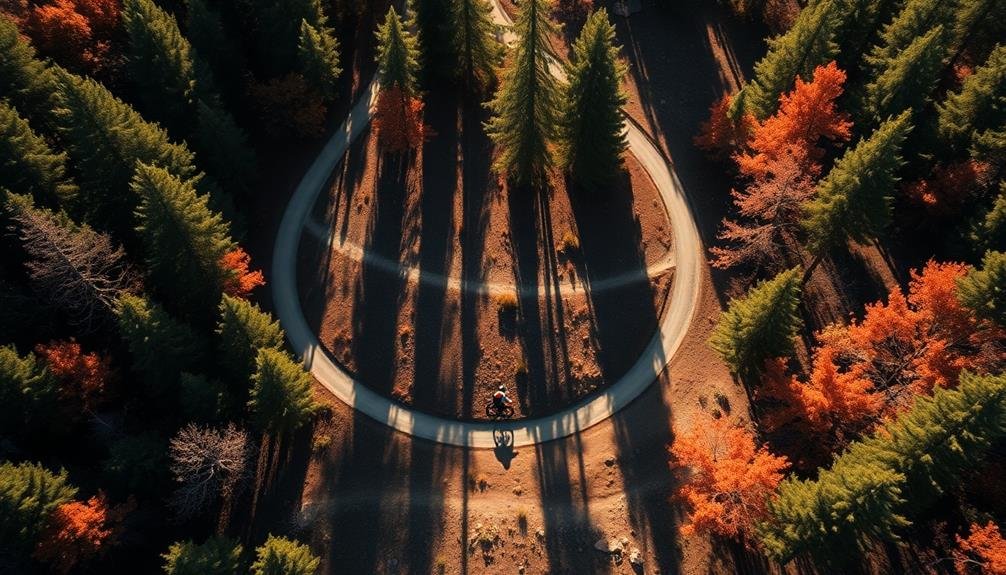
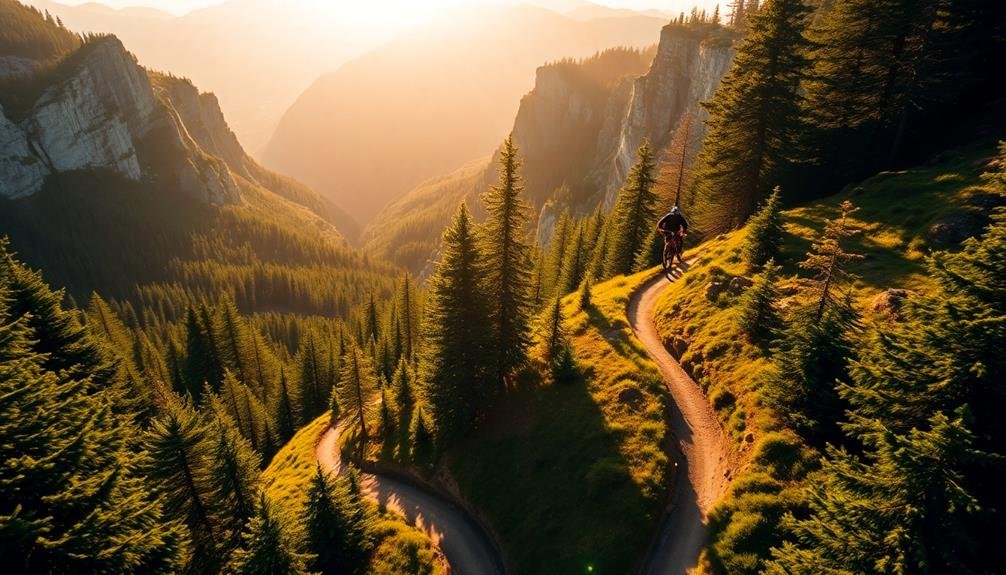
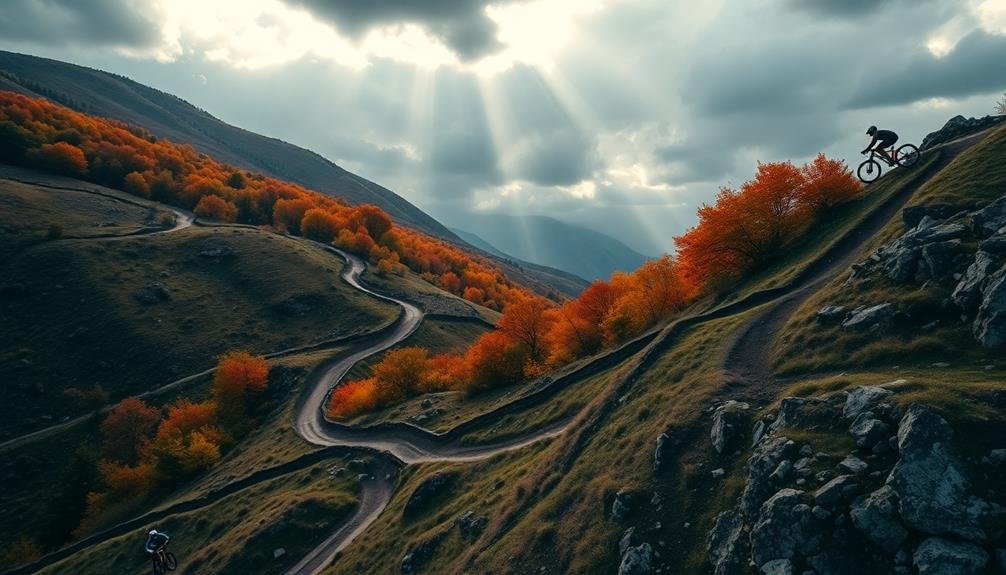
Composition Techniques for Trail Photography
Capturing stunning trail photography requires mastering several key composition techniques. First, use the rule of thirds to create balanced and visually appealing images. Place the trail or rider along the imaginary grid lines or at their intersections.
Don't forget to incorporate leading lines, using the trail itself to draw the viewer's eye through the frame. When shooting from above, pay attention to patterns and textures in the landscape. Look for interesting shapes formed by the trail as it winds through the terrain.
Use aerial perspective to your advantage, capturing layers of depth as the trail disappears into the distance. Include elements of scale to emphasize the trail's length or the surrounding landscape's vastness. This can be achieved by including a rider or recognizable object in the frame.
Experiment with different angles and heights to find the most dynamic composition. Consider the background carefully, ensuring it complements rather than distracts from the trail. Use natural framing techniques, such as overhanging branches or rock formations, to add depth and context to your shots.
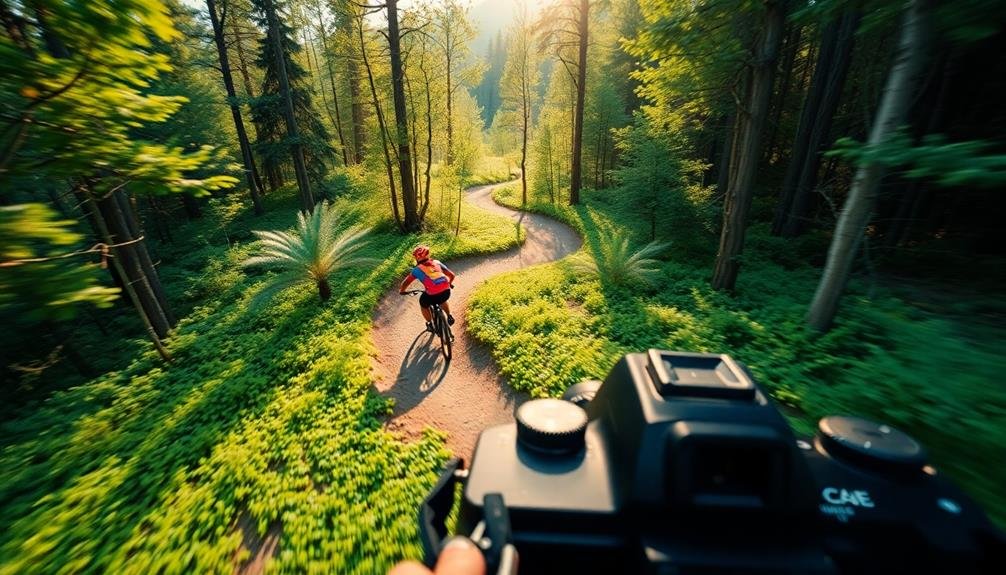
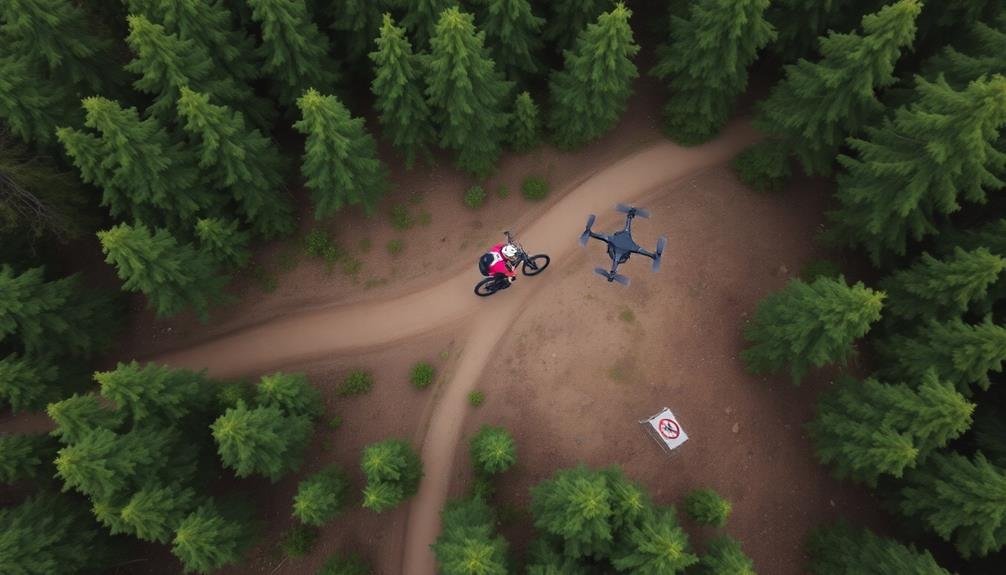
Capturing Motion From Above
While ground-level shots can be impressive, aerial perspectives offer a unique way to showcase motion on mountain bike trails. You'll capture the full scope of a rider's journey, highlighting the terrain's challenges and the biker's skill. To get these shots, contemplate using drones or finding elevated vantage points.
When shooting from above, focus on:
- The trail's winding path through the landscape
- The contrast between the rider and surrounding nature
- The bike's interaction with different terrain features
- The rider's body position and technique
- The sense of speed and momentum
You'll want to experiment with different angles and heights to find the most dynamic compositions. Try following the rider with your drone, or set up a static shot where they'll pass through the frame. Use a fast shutter speed to freeze the action, or try a slower speed for motion blur effects.
Don't forget to contemplate lighting conditions. Early morning or late afternoon sun can create long shadows, adding depth to your images.
Remember to respect local regulations and the environment when using drones or accessing elevated areas for your shots.
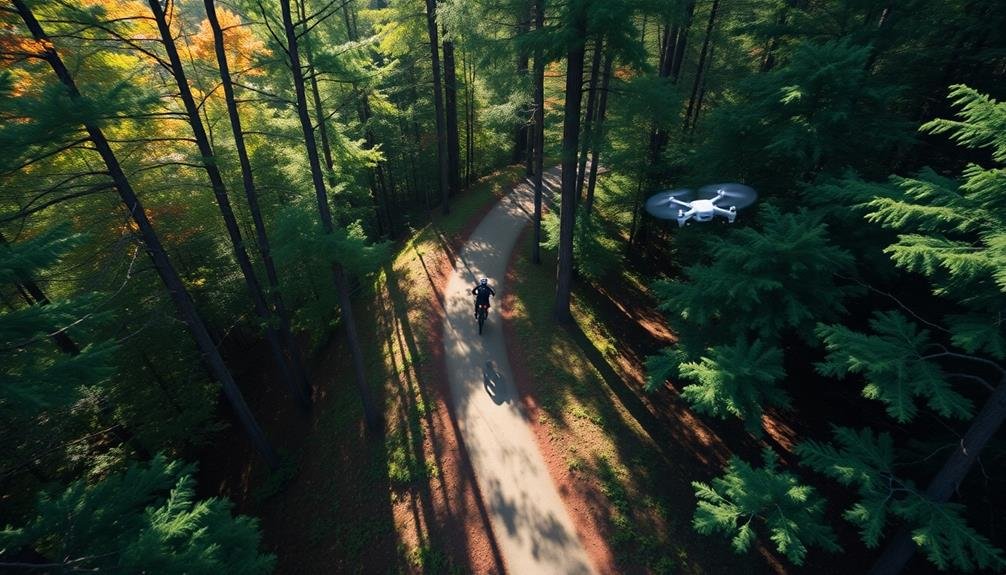
Drone Safety on Mountain Trails
When flying your drone on mountain bike trails, prioritize wildlife safety by maintaining a respectful distance from animals and nesting areas.
You'll need to carefully navigate through tree canopies, keeping your drone within sight and avoiding branches that could cause a crash.
Remember to follow local regulations and be considerate of other trail users who may not appreciate the buzzing sound of your drone.
Avoiding Wildlife Disturbance
Drones have become popular tools for capturing stunning mountain bike trail footage, but their use can greatly disturb wildlife. As a responsible drone operator, you must prioritize the well-being of animals in their natural habitat.
Before flying, research the area's wildlife and their breeding seasons. Avoid known nesting sites, dens, or feeding grounds.
When operating your drone, keep these guidelines in mind:
- Maintain a safe distance from animals, at least 100 meters for most species
- Fly at higher altitudes to reduce noise and visual disturbance
- Avoid sudden movements or loud noises that may startle wildlife
- Never chase or pursue animals with your drone
- If you notice signs of distress, land immediately and leave the area
Navigating Tree Canopies Safely
Flying drones on mountain bike trails often involves maneuvering through dense tree canopies, which presents unique challenges.
You'll need to be extra cautious and develop specific skills to navigate safely. First, always maintain a line of sight with your drone, even in thick foliage. If you can't see it, you can't control it effectively.
Use your drone's obstacle avoidance features if available, but don't rely on them entirely. Trees and branches can be unpredictable, so stay alert. Keep your speed low when flying through canopies to give yourself more reaction time.
It's also wise to practice flying patterns that minimize your time in dense areas.
Before takeoff, scout your surroundings and plan your flight path. Look for natural openings in the canopy and use them to your advantage. If possible, fly above the treeline for a clearer view, then descend carefully to capture your shots.
Post-Processing Aerial Trail Footage
Nearly every piece of aerial trail footage requires some level of post-processing to truly shine. Once you've captured your mountain bike trail footage from above, it's time to transform it into a visually stunning masterpiece.
Start by importing your raw footage into your preferred editing software. Trim out any unnecessary parts, focusing on the most dynamic and exciting sections of the trail.
Color correction is essential to enhance the natural beauty of the landscape. Adjust the white balance, exposure, and saturation to create a cohesive look throughout your video.
Don't forget to stabilize shaky footage using built-in tools or third-party plugins for smoother results.
Consider adding these elements to elevate your aerial trail footage:
- Slow-motion effects for dramatic moments
- Dynamic shifts between shots
- Subtle sound design to enhance the viewer's experience
- Text overlays for trail names or location information
- Color grading to create a specific mood or atmosphere
Showcasing Trail Features
Rocks, roots, and ridgelines are the stars of the show when showcasing trail features. You'll want to highlight these elements in your aerial footage to give viewers a true sense of the trail's character. Focus on capturing unique obstacles, technical sections, and flow elements that make the trail stand out.
Use your drone's camera angles to emphasize the trail's difficulty and excitement. Fly low and close to showcase steep descents, or pull back for a wider view of sweeping berms and jumps. Don't forget to capture the surrounding landscape, as it provides context and adds to the overall appeal of the trail.
Consider these key trail features and how to best showcase them:
| Feature Type | Camera Angle | Flying Technique |
|---|---|---|
| Rock Gardens | Low and Close | Slow, Steady Pass |
| Berms | Wide Angle | Follow Curve |
| Jumps | Side View | Match Rider Speed |
| Switchbacks | Top-Down | Hover and Pan |
Remember to respect local drone regulations and obtain necessary permits before flying. By showcasing trail features effectively, you'll create compelling footage that excites riders and promotes the trail system.
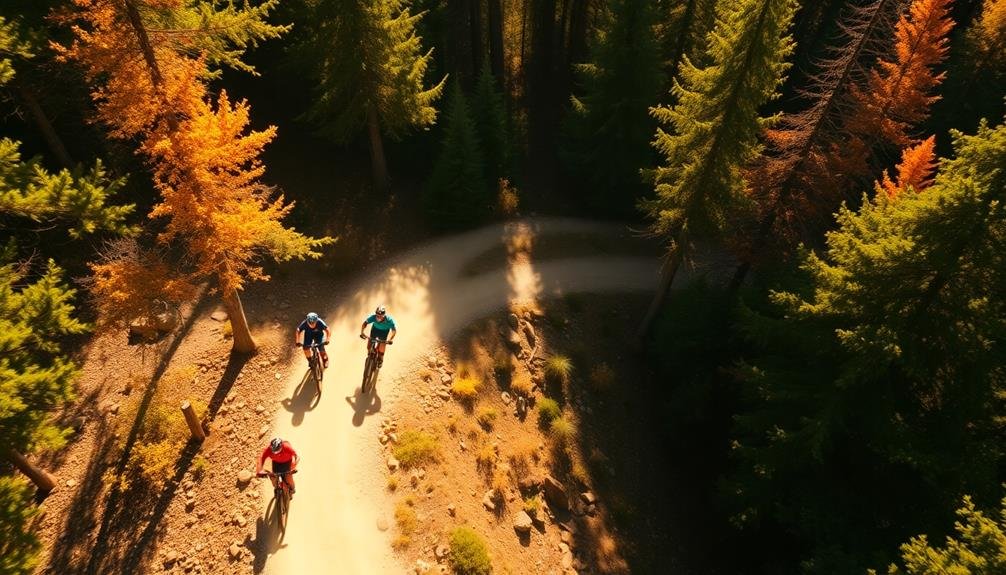
Coordinating With Riders
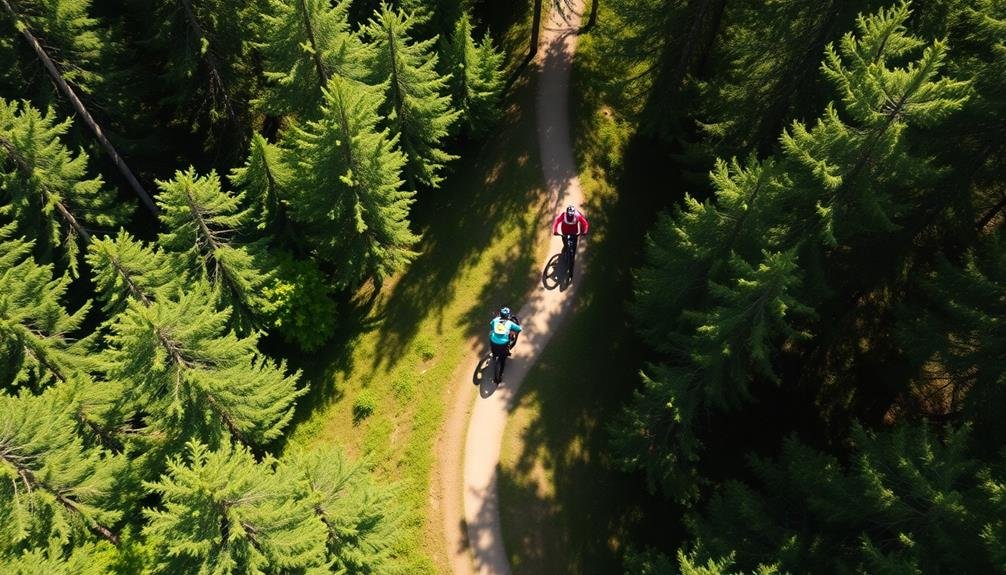
While capturing trail features is important, collaborating with riders adds a dynamic element to your mountain bike trail footage. You'll want to coordinate with experienced riders who can showcase the trail's potential and add excitement to your shots. Communicate your vision clearly, explaining the types of shots you're aiming for and any specific maneuvers you'd like them to perform.
Before filming, scout the trail together to identify prime locations for action shots. Discuss safety precautions and establish a clear system of communication to guarantee everyone's well-being during the shoot.
Remember, timing is vital when capturing riders in motion, so practice your drone piloting skills to nail those perfect shots.
To create a seamless collaboration with riders:
- Brief them on the drone's capabilities and limitations
- Agree on hand signals or radio communication methods
- Plan multiple takes for each shot to increase chances of success
- Allow riders to warm up and familiarize themselves with the terrain
- Encourage their input on creative ideas for showcasing the trail
Weather Challenges in Mountain Terrain
Due to the unpredictable nature of mountain weather, you'll face unique challenges when filming mountain bike trails. Rapid changes in conditions can affect your equipment and the quality of your footage. You'll need to be prepared for sudden temperature shifts, which can cause lens fogging or battery drainage in cold environments.
Mountain terrain often experiences microclimates, with different weather patterns in various elevations or aspects. This means you might encounter sunny conditions in one area and dense fog or rain in another. Wind is another significant factor, potentially destabilizing your drone or causing unwanted camera shake.
To mitigate these challenges, always check local weather forecasts and bring appropriate gear. Use UV filters to protect your lenses from moisture and dust. Consider using polarizing filters to reduce glare from wet surfaces or snow.
Pack extra batteries and keep them warm in cold conditions. Be ready to adjust your filming schedule based on weather patterns, and have a plan B for shots that might be compromised by poor visibility or precipitation.
Legal Considerations for Drone Use
Maneuvering the legal landscape of drone use is essential when filming mountain bike trails. You'll need to familiarize yourself with local, state, and federal regulations to guarantee you're operating legally. In the United States, the Federal Aviation Administration (FAA) oversees drone operations. You must register your drone if it weighs over 0.55 pounds and obtain a Remote Pilot Certificate if you're flying for commercial purposes.
Before launching your drone, consider these key legal points:
- Always keep your drone within visual line of sight
- Fly below 400 feet above ground level
- Respect privacy and property rights
- Avoid flying near airports or restricted airspace
- Follow all local and state laws regarding drone use
You'll also need to be aware of specific regulations for flying in national parks or forests, as many mountain bike trails are located in these areas. Some parks may require special permits or completely prohibit drone use.
Additionally, you should consider liability insurance to protect yourself in case of accidents or property damage. By staying informed and following the rules, you'll be able to capture stunning aerial footage of mountain bike trails while avoiding legal troubles.
Frequently Asked Questions
How Can I Stabilize Footage in Windy Mountain Conditions?
You can stabilize windy mountain footage by using a gimbal or image stabilization software. Employ a weighted drone or increase camera weight. Shoot in higher frame rates and use slower movements. Consider post-processing stabilization techniques for smoother results.
What Insurance Options Are Available for Drones Used in Mountain Biking Photography?
You'll want to contemplate liability insurance and equipment coverage for your drone. Check with specialized drone insurers or add-ons to your existing policies. Don't forget to factor in location-specific risks when choosing your coverage.
How Do I Handle Unexpected Wildlife Encounters During Drone Flights?
When encountering wildlife during drone flights, you should immediately fly away to avoid disturbing animals. Don't chase or harass them. Keep your distance, and if necessary, land your drone safely to prevent any potential conflicts or accidents.
What Are the Best Practices for Drone Battery Management in Cold Temperatures?
To manage drone batteries in cold temperatures, you'll want to keep them warm before flight, use insulated covers, and avoid full discharge. You should also reduce flight time, monitor voltage closely, and land when battery levels drop faster.
How Can I Incorporate Local Mountain Culture Into My Aerial Trail Photography?
You can showcase local mountain culture by capturing trailside art, highlighting unique trail features, and including riders wearing regional gear. Don't forget to film local events, capture the surrounding landscape, and feature iconic landmarks in your shots.
In Summary
You've now got the tools to capture stunning aerial footage of mountain bike trails. Remember to prioritize safety, respect local regulations, and always fly responsibly. With practice, you'll master the art of showcasing trails from unique perspectives. Don't be afraid to experiment with different angles and techniques. Your drone footage will bring trails to life, inspiring riders and showcasing the beauty of mountain biking. Now get out there and start filming!
As educators and advocates for responsible drone use, we’re committed to sharing our knowledge and expertise with aspiring aerial photographers.


Leave a Reply