To capture epic slow-motion scenes from above, you'll need a high-quality drone with a capable camera and stabilization. Plan your shots carefully, considering location, timing, and safety regulations. Aim for ideal weather conditions with minimal wind and peak lighting. Adjust your camera settings for high frame rates and appropriate shutter speeds. Master smooth flight techniques and composition rules to create visually stunning footage. In post-production, fine-tune your slow-motion effects and color grading. Don't forget to comply with local drone regulations. By combining technical know-how with creative vision, you'll be on your way to producing breathtaking aerial cinematography. The sky's the limit for what you can achieve.
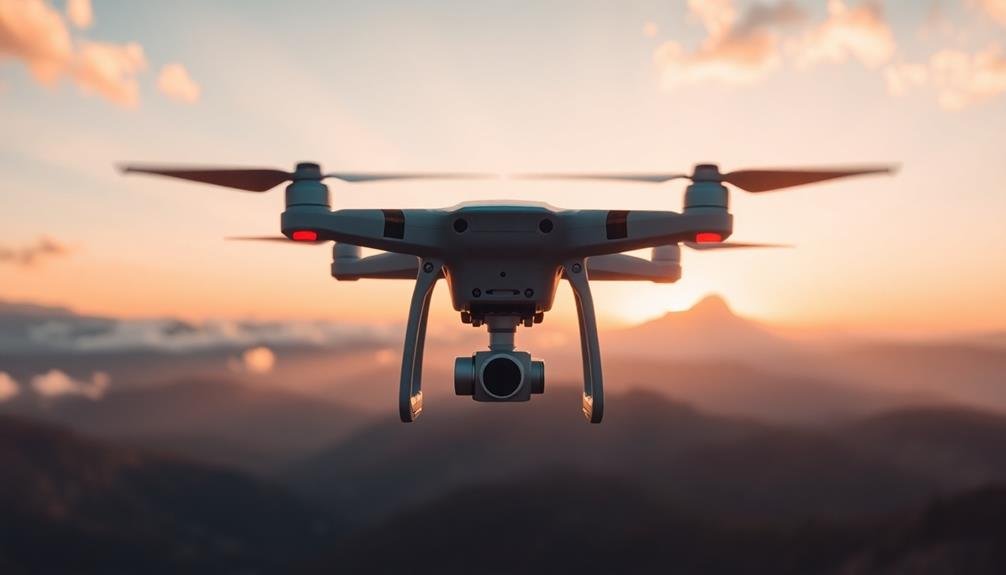
Essential Equipment for Aerial Cinematography

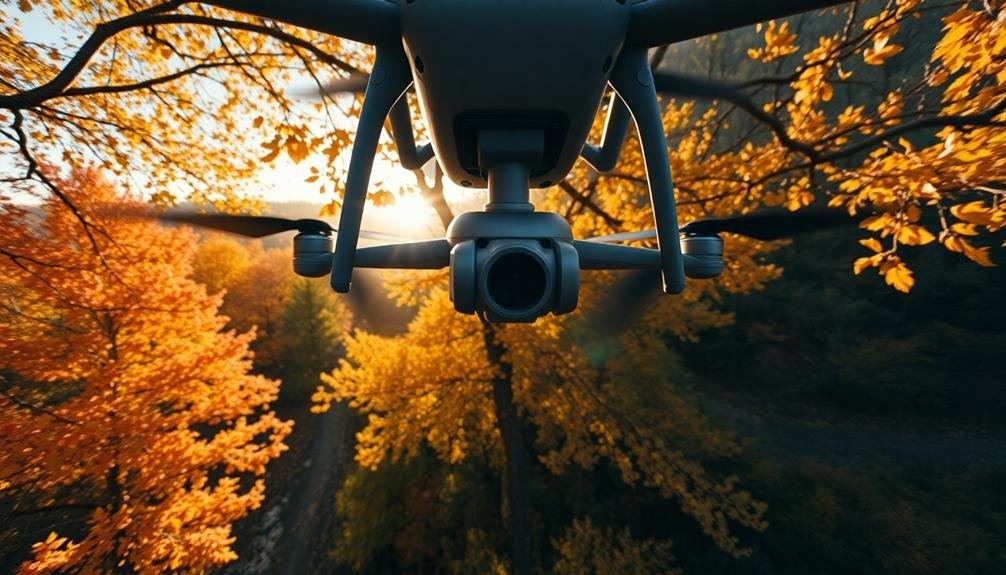
When diving into aerial cinematography, you'll need a solid foundation of essential equipment. The cornerstone of your setup will be a high-quality drone capable of carrying your camera payload. Look for models with stable flight characteristics and advanced features like obstacle avoidance and return-to-home functionality.
Your camera choice is vital. Opt for a lightweight, high-resolution camera that can shoot in slow motion. Many professionals use action cameras or compact mirrorless cameras for their excellent image quality and portability.
Don't forget to invest in multiple batteries and memory cards to extend your shooting time.
A gimbal is indispensable for smooth, steady footage. It compensates for the drone's movements, guaranteeing your shots remain level and shake-free. Consider a 3-axis gimbal for maximum stability.
You'll also need a robust remote controller with a built-in or attachable screen for real-time video feed. FPV (First Person View) goggles can provide an immersive piloting experience, helping you frame your shots more accurately.
Lastly, don't overlook safety equipment. Propeller guards, landing pads, and a hardshell carrying case will protect your investment and guarantee safe operations.
Planning Your Slow-Motion Drone Shots
To capture stunning slow-motion drone footage, you'll need to carefully select your filming locations.
Look for areas with interesting visual elements that will enhance the dramatic effect of slow-motion, such as waterfalls, bustling cityscapes, or sports arenas.
Don't forget to factor in weather conditions, as wind, rain, or extreme temperatures can affect your drone's performance and the quality of your shots.
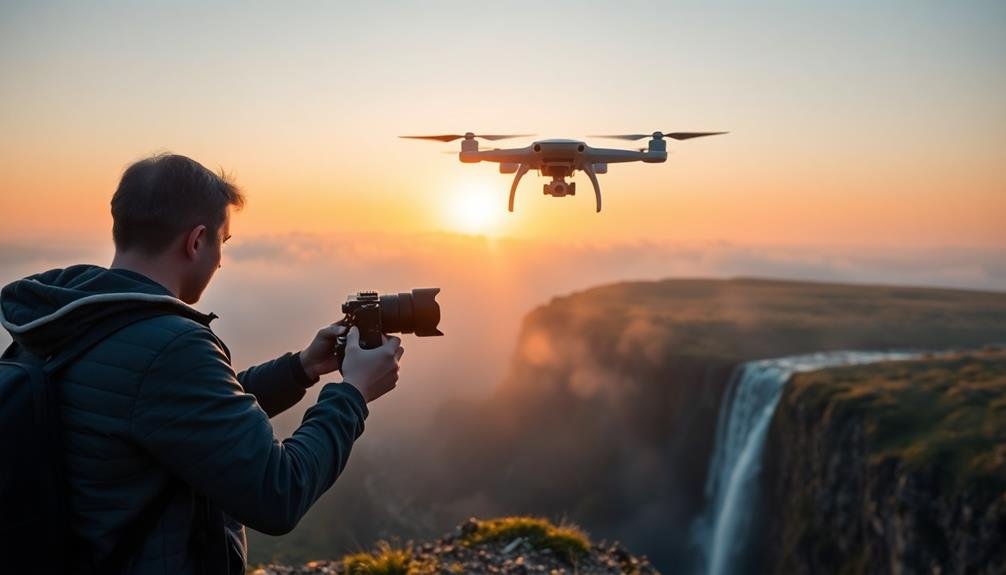
Choose Ideal Filming Locations
Where you choose to film can make or break your slow-motion drone shots. Look for locations that offer visual interest and movement, as these elements will be amplified in slow motion. Consider places with natural or man-made features that create dynamic scenes when viewed from above.
When scouting for ideal filming locations, keep these factors in mind:
- Open spaces with minimal obstacles for safe drone operation
- Areas with interesting textures, patterns, or color contrasts
- Locations with moving subjects, like water, traffic, or crowds
- Places that offer unique perspectives or unexpected viewpoints
- Environments that complement your story or theme
Once you've identified potential locations, visit them at different times of day to assess lighting conditions. Golden hour often provides the best natural light for slow-motion footage, enhancing colors and creating dramatic shadows.
Don't forget to check local regulations and obtain necessary permits before flying your drone.
Consider the direction of movement in your chosen location. Filming perpendicular to the main action often yields the most striking slow-motion results.
Consider Weather Conditions
Weather plays a significant role in capturing stunning slow-motion drone footage. You'll need to take into account various atmospheric conditions to guarantee the best results. Wind speed is vital, as strong gusts can destabilize your drone and ruin your shots. Aim for calm days with wind speeds below 10 mph for ideal control and stability.
Lighting conditions are equally important. Overcast skies provide soft, diffused light that's ideal for slow-motion footage, reducing harsh shadows and glare. However, golden hour lighting can create breathtaking effects, especially for landscape shots. Rain and fog can add drama to your footage but may pose risks to your equipment.
| Weather Condition | Effect on Footage | Precautions |
|---|---|---|
| Wind | Shakiness | Fly in calm conditions |
| Overcast | Soft lighting | Adjust exposure settings |
| Golden hour | Warm, dramatic | Plan timing carefully |
Temperature can affect your drone's battery life and performance. In cold weather, keep spare batteries warm and limit flight times. Hot conditions may cause overheating, so provide shade for your drone between flights. Always check local weather forecasts and regulations before flying, and be prepared to adapt your plans if conditions change unexpectedly.
Ideal Weather Conditions
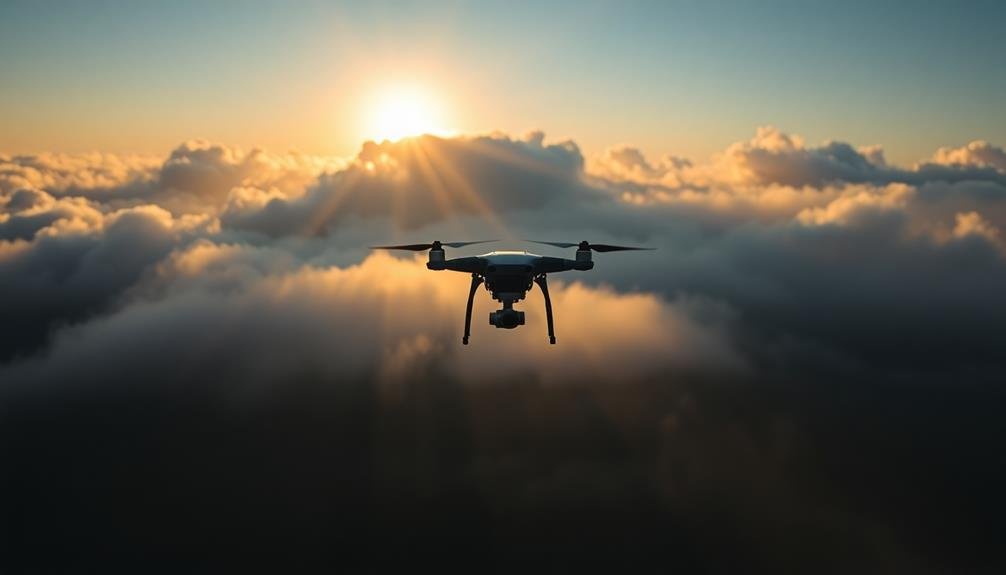
When capturing slow-motion scenes with your drone, you'll want to prioritize clear skies for the best visual results.
You should also pay close attention to wind speeds, as excessive gusts can disrupt your drone's stability and affect the smoothness of your footage.
For the most flattering lighting conditions, try to time your shoots during the golden hours of early morning or late afternoon when the sun casts a soft, warm glow.
Clear Skies Preferred
Ideal conditions for capturing slow-motion scenes often involve clear, bright skies. You'll want to aim for days with minimal cloud cover and excellent visibility.
Clear skies provide consistent, natural lighting that enhances the quality of your slow-motion footage. They also allow for better contrast and more vibrant colors in your shots.
When planning your shoot, check weather forecasts and aim for days with high-pressure systems, which typically bring clear, stable conditions. Early morning or late afternoon hours often offer the best lighting, with softer shadows and warmer tones.
However, midday sun can work well for certain scenes, especially those involving water or reflective surfaces.
Clear skies offer several advantages for slow-motion cinematography:
- Improved visibility for aerial shots
- Consistent lighting throughout the day
- Enhanced depth and dimension in your footage
- Better color saturation and contrast
- Reduced risk of sudden light changes disrupting your shots
Wind Speed Considerations
While clear skies provide ideal lighting, wind speed plays a crucial role in capturing slow-motion scenes. You'll need to take wind conditions into account carefully, as they can affect both your drone's stability and the movement of subjects in your shot.
For the smoothest footage, aim to fly in winds below 10 mph. Light breezes (0-5 mph) offer optimal conditions, allowing for steady drone control and minimal disturbance to your subjects. Moderate winds (5-10 mph) are manageable but may require more skill to maintain stable flight.
As wind speeds increase, you'll face greater challenges. Winds of 10-15 mph can cause noticeable camera shake and affect your drone's responsiveness. Above 15 mph, it becomes increasingly difficult to capture smooth slow-motion footage, and you risk losing control of your drone.
Always check local weather forecasts and use a wind meter app before flying. If possible, schedule your shoots during the calmest parts of the day, typically early morning or late evening.
Soft Light Timing
Choosing the right time of day for soft light is essential for capturing stunning slow-motion drone footage. The golden hours, just after sunrise and before sunset, offer the most flattering light for aerial cinematography. During these periods, the sun's low angle creates long shadows and warm, diffused light that adds depth and dimension to your scenes.
Overcast days can also provide excellent soft light conditions throughout the day. The cloud cover acts as a natural diffuser, eliminating harsh shadows and reducing contrast. This even lighting is ideal for slow-motion shots, as it allows for smoother changes and more consistent exposure across your footage.
To make the most of soft light timing, consider these factors:
- Monitor weather forecasts to plan shoots on partly cloudy or overcast days
- Use apps that predict golden hour times for your specific location
- Arrive early to set up and test your equipment before the best light window
- Be prepared to work quickly, as golden hour lighting changes rapidly
- Have a backup plan for indoor or artificially lit scenes if weather conditions change
Camera Settings for Slow Motion
The key to capturing stunning slow-motion footage lies in mastering your camera's settings. Start by selecting a high frame rate, typically 60fps or higher, depending on your camera's capabilities. This allows you to slow down the footage in post-production without losing smoothness.
Next, adjust your shutter speed to match your frame rate. A good rule of thumb is to use a shutter speed that's double your frame rate (e.g., 1/120 for 60fps).
Set your ISO as low as possible to minimize noise, especially in bright conditions. If you're shooting in low light, you may need to increase it, but be cautious of graininess.
Choose a wide aperture (low f-number) to let in more light and create a shallow depth of field, which can enhance the dreamy effect of slow motion.
For aerial slow-motion shots, enable any built-in stabilization features your camera offers. This will help counteract drone movement and produce smoother footage.
Flight Techniques for Smooth Footage

To achieve smooth slow-motion footage with your drone, you'll need to master key flight techniques.
Start by practicing controlled descents and ascents, maintaining a steady speed throughout the movement.
You can also explore circular flight patterns, which create flowing, cinematic shots that look particularly impressive in slow motion.
Controlled Descents and Ascents
Mastering two essential flight techniques will elevate your slow-motion aerial footage: controlled descents and smooth ascents.
When descending, maintain a steady, gradual pace to capture fluid motion. Start higher than your intended shot and slowly lower your drone, keeping your subject in frame.
For ascents, begin below your desired final position and rise slowly, ensuring your camera's movement matches the drone's ascent.
To achieve cinematic results, consider these tips:
- Use manual flight mode for precise control
- Adjust your drone's settings for slower movements
- Practice with different descent and ascent speeds
- Experiment with various angles during your flight
- Incorporate natural elements like clouds or birds for added depth
Circular Flight Patterns
With a graceful arc, circular flight patterns create mesmerizing slow-motion footage that enchants viewers. To execute this technique, you'll need to master smooth, consistent movements with your drone.
Start by selecting a central point of interest and plan your circular path around it. Maintain a constant altitude and distance from the subject throughout the flight.
Begin your circular pattern at a slow speed, gradually increasing it as you become more comfortable. Use your drone's yaw control to keep the camera focused on the central point while flying sideways. This creates an enchanting orbiting effect that's especially striking in slow motion.
Experiment with different radii and altitudes to vary your shots. Tighter circles can emphasize details, while wider orbits showcase the broader landscape. You can also try ascending or descending slightly during the circular flight for added dynamism.
For the smoothest footage, use your drone's intelligent flight modes if available. Many models offer preset circular flight patterns, allowing you to focus on framing and adjusting camera settings.
Remember to account for wind conditions, adjusting your flight speed and direction as needed to maintain a steady path.
Composition Rules for Aerial Scenes

How do you create stunning aerial compositions that fascinate viewers? When shooting from above, traditional composition rules still apply, but with a unique twist. The bird's-eye perspective offers new opportunities to play with shapes, patterns, and scale.
Remember these key principles for compelling aerial compositions:
- Rule of thirds: Divide your frame into a 3×3 grid and place points of interest along the lines or intersections.
- Leading lines: Use roads, rivers, or other linear elements to guide the viewer's eye through the image.
- Symmetry and patterns: Look for repeating shapes or symmetrical layouts that create visual harmony.
- Negative space: Incorporate empty areas to highlight your main subject and create balance.
- Scale: Include recognizable objects to provide context for the scene's size.
When framing your shot, consider the altitude and angle of your drone. Lower altitudes can emphasize textures and details, while higher altitudes reveal larger patterns and landscapes.
Experiment with different angles, from straight down to slightly tilted, to find the most engaging perspective. Don't forget to adjust your camera settings for the best exposure and sharpness in varying light conditions.
With practice, you'll develop an eye for spotting fascinating aerial compositions that showcase the world from a fresh perspective.
Lighting Considerations for Drone Filming
Lighting plays a pivotal role in capturing stunning aerial footage. When filming with a drone, you'll need to take into account both natural and artificial light sources to achieve the best results. The golden hour, just after sunrise or before sunset, offers warm, soft light that can transform your scenes.
During midday, harsh sunlight can create strong shadows and overexposed areas, so you'll want to use filters or adjust your camera settings accordingly.
Pay attention to the direction of light and how it interacts with your subject. Side-lighting can add depth and texture to landscapes, while backlighting can create dramatic silhouettes.
For urban scenes, think about how artificial lights from buildings and streets affect your shots. You might need to adjust your white balance to compensate for different color temperatures.
When filming slow-motion scenes, you'll typically need more light to maintain a high frame rate and avoid motion blur. If you're shooting in low-light conditions, consider using a drone with a larger sensor or a camera with better low-light performance.
Don't forget to monitor your drone's shadow, as it can inadvertently appear in your shots, especially during golden hour flights.
Post-Production Slow-Motion Effects

Many filmmakers enhance their slow-motion scenes during post-production, even if they've captured footage at high frame rates. You can apply various techniques to create stunning slow-motion effects that captivate your audience. Start by importing your footage into your preferred video editing software, then experiment with time remapping tools to adjust the playback speed.
To achieve smooth, cinematic slow-motion, you'll want to:
- Use frame blending or optical flow interpolation
- Apply motion blur effects for a more natural look
- Adjust the playback speed gradually for dramatic impact
- Fine-tune color grading to enhance the mood
- Add sound design elements to complement the visuals
When working with drone footage, pay close attention to stabilization during post-production. Even slight camera movements can become exaggerated in slow-motion, so use warp stabilizer or similar tools to smooth out any unwanted jitters.
Don't forget to export your final video at the appropriate frame rate to maintain the slow-motion effect. With practice, you'll master the art of creating breathtaking slow-motion scenes that elevate your drone cinematography to new heights.
Legal Regulations for Drone Cinematography

While mastering slow-motion techniques can elevate your drone cinematography, it's equally important to understand the legal landscape. You'll need to comply with local, state, and federal regulations to guarantee your aerial footage is obtained legally and safely.
First, register your drone with the FAA if it weighs over 0.55 pounds. You'll also need to obtain a Remote Pilot Certificate if you're flying for commercial purposes. Always keep your drone within visual line of sight and avoid flying over people or moving vehicles.
Be aware of airspace restrictions and no-fly zones. Use apps like B4UFLY to check for temporary flight restrictions before each flight. Respect privacy laws and don't film people or private property without permission.
| Regulation Type | Examples |
|---|---|
| Federal | FAA registration, Part 107 certification |
| State | Privacy laws, park restrictions |
| Local | City ordinances, event-specific rules |
| Airspace | Airports, national parks, military bases |
Storytelling Through Aerial Slow Motion
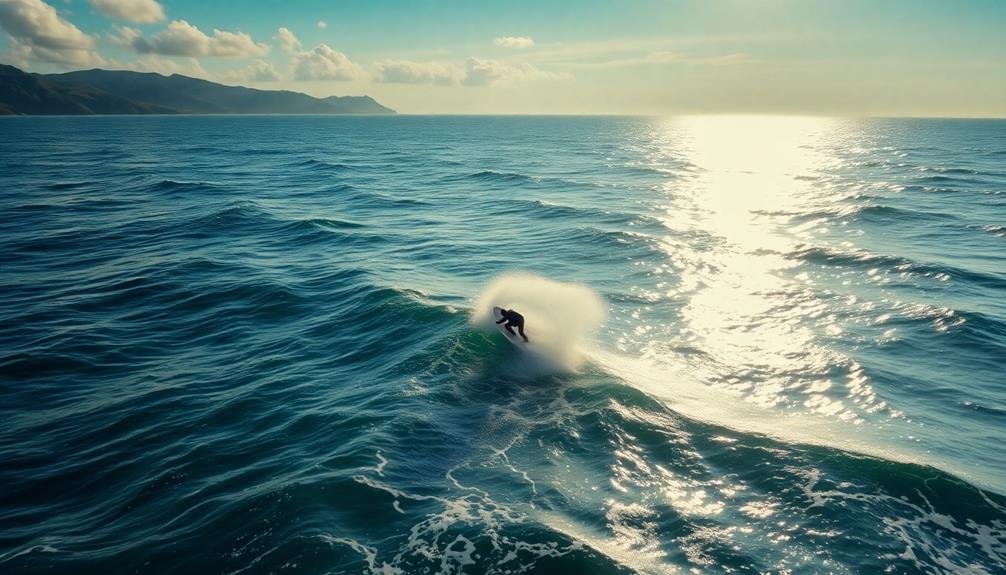
Harnessing the power of aerial slow motion can transform your storytelling capabilities. By combining the unique perspective of drone footage with the enchanting allure of slow-motion imagery, you'll create visually stunning narratives that engage your audience on a deeper level.
When planning your aerial slow-motion shots, consider the following elements:
- Movement: Capture graceful, flowing motions that benefit from deceleration
- Contrast: Juxtapose fast and slow elements within the same frame
- Scale: Showcase vast landscapes or intricate details from above
- Emotion: Evoke feelings through the deliberate pacing of your footage
- Changes: Use slow motion to seamlessly connect different scenes
To maximize the impact of your aerial slow-motion storytelling, focus on subjects that naturally lend themselves to this technique. Water, for instance, becomes mesmerizing when filmed in slow motion from above.
Similarly, crowds, wildlife, and natural phenomena like storms or volcanic eruptions can be particularly striking. Remember to vary your shot composition and duration to maintain viewer interest.
Frequently Asked Questions
How Do I Sync Audio With Slow-Motion Aerial Footage?
To sync audio with slow-motion aerial footage, you'll need to record separate audio. Slow down your audio to match the footage's speed, then align it in your editing software. Use markers or waveforms for precise synchronization.
What Software Is Best for Stabilizing Shaky Drone Slow-Motion Shots?
For stabilizing shaky drone slow-motion shots, you'll find Adobe After Effects and DaVinci Resolve excellent choices. They offer powerful stabilization tools. Alternatively, try dedicated software like ReelSteady GO or Mercalli. These options will smooth out your footage effectively.
Can I Achieve Slow-Motion Effects With Budget Drones?
You can achieve slow-motion effects with budget drones, but they'll be limited. Many affordable models offer basic slow-mo features. You'll need to shoot at higher frame rates and slow down footage in post-processing for best results.
How Do I Maintain Focus on Moving Subjects in Aerial Slow-Motion Shots?
To maintain focus on moving subjects in aerial slow-motion shots, you'll want to use tracking modes, pre-focus on your subject, adjust your drone's gimbal settings, and practice smooth flying techniques. Don't forget to anticipate the subject's movement.
What Frame Rates Work Best for Different Types of Slow-Motion Aerial Scenes?
For slow-motion aerial scenes, you'll want to use higher frame rates. Try 60fps for subtle slow-mo, 120fps for smooth action, and 240fps or higher for dramatic ultra-slow-motion. Match your frame rate to the subject's speed.
In Summary
You've now got the tools to create breathtaking aerial slow-motion footage. Remember, it's not just about the gear; it's how you use it. Plan carefully, master your drone's controls, and always prioritize safety. Experiment with different angles and movements to tell your story. Don't forget to stay up-to-date on local regulations. With practice, you'll be capturing stunning slow-motion scenes from above that'll leave your audience in awe.
As educators and advocates for responsible drone use, we’re committed to sharing our knowledge and expertise with aspiring aerial photographers.


Leave a Reply