
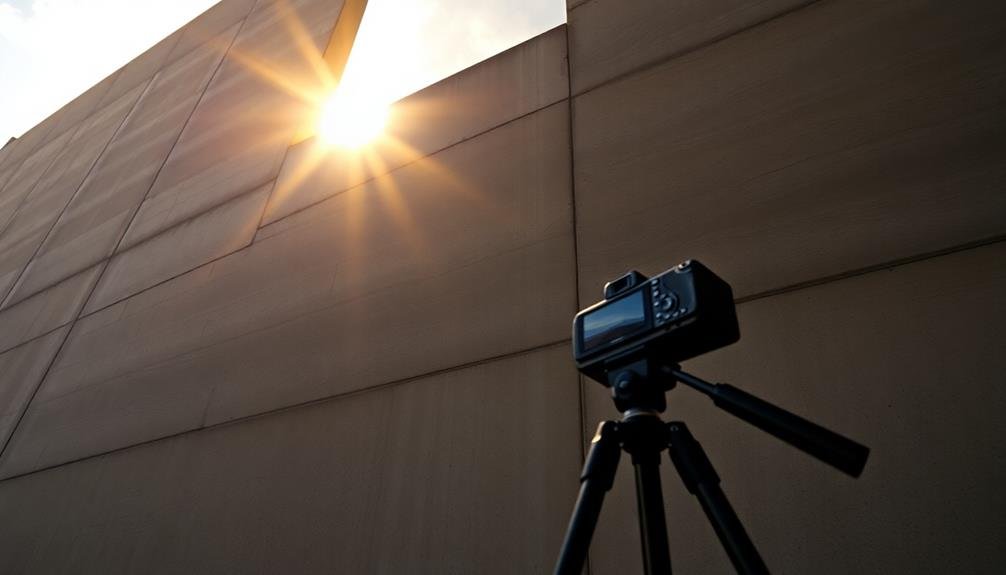
To elevate your tilt-up shots, master the mechanics of vertical camera rotation and build anticipation through a sense of reveal. Use a sturdy tripod with a fluid head for smooth movement, and practice your timing to determine the ideal speed. Pay attention to camera settings: adjust shutter speed for natural motion blur, manipulate aperture for depth of field control, and manage ISO for peak exposure. Plan your composition using the rule of thirds and leading lines to guide the viewer's eye. Consider lighting conditions, aiming for golden hour or diffused light for stunning visuals. With these pro tips, you'll be on your way to creating cinematic masterpieces.
Key Takeaways
- Master smooth ascent techniques using sturdy tripods with fluid heads for stable, consistent movements.
- Control shot speed for impact, experimenting with slow and rapid tilts to enhance emotional storytelling.
- Plan composition carefully, utilizing the rule of thirds and leading lines to guide viewer attention.
- Leverage natural light, especially during golden hour, and use diffusion techniques for harsh sunlight.
- Fine-tune camera settings, balancing shutter speed, aperture, and ISO for optimal image quality and desired effects.
Understanding Tilt-Up Shot Mechanics

In order to master tilt-up shots, you'll need to grasp the mechanics behind this dynamic camera movement. Tilt-up shots involve rotating the camera vertically on its horizontal axis, typically starting from a low angle and moving upward. This technique creates a sense of reveal, building anticipation and emphasizing the subject's height or grandeur.
To execute a smooth tilt-up, start by securing your camera on a sturdy tripod with a fluid head. Confirm the tripod's legs are level and locked in place. Loosen the tilt drag on your fluid head to allow for smooth movement, but maintain enough tension for controlled motion.
Practice the movement before filming to determine the ideal speed and endpoint. When shooting, begin with your framing set at the lowest point of interest. Slowly and steadily tilt the camera upward, maintaining a consistent speed throughout the movement.
Pay attention to your subject's positioning within the frame as you tilt. For added impact, consider starting with a close-up and gradually revealing more of the scene as you tilt upward. This creates a dramatic effect, especially when showcasing tall structures or expansive landscapes.
Selecting the Right Drone
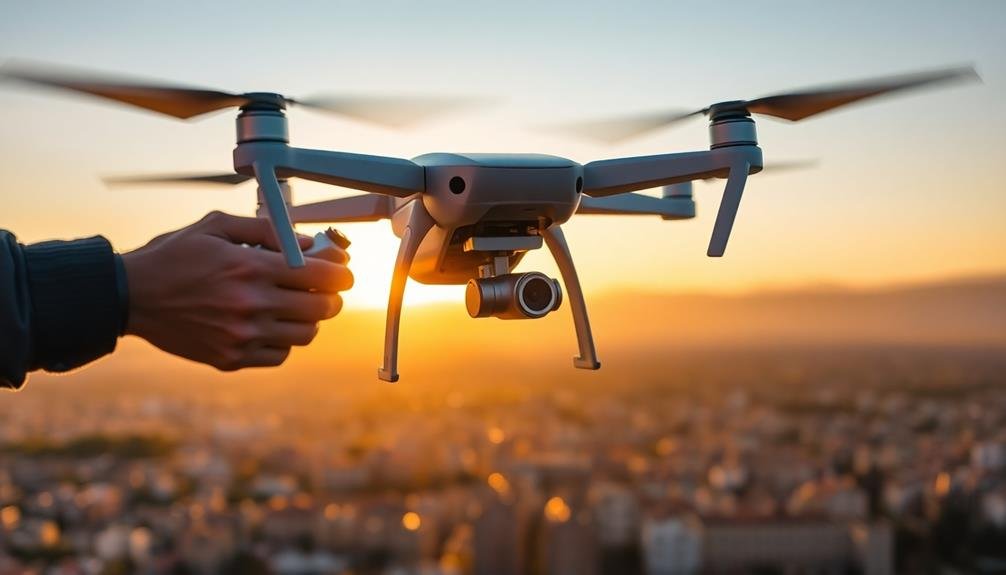
When it comes to selecting the right drone for cinematography, you'll need to weigh several factors. Consider the drone's camera quality, flight time, range, stability, and payload capacity. High-resolution cameras with adjustable settings will give you more flexibility in post-production.
Longer flight times allow for extended shooting sessions, while greater range lets you capture sweeping vistas. Stability is essential for smooth footage, so look for drones with advanced stabilization systems.
Don't forget about portability and ease of use. Compact, foldable drones are ideal for on-the-go filmmakers, while larger models may offer more features. Check for intelligent flight modes, obstacle avoidance, and return-to-home functions to enhance safety and creativity.
To create stunning aerial cinematography, envision these possibilities:
- Soaring over a misty mountain range at sunrise
- Tracking a speeding car along a winding coastal road
- Revealing a hidden waterfall in a lush rainforest
- Capturing a bird's-eye view of a bustling city skyline
- Following a lone kayaker through a serene, mirror-like lake
Choose a drone that aligns with your specific needs and budget, and always prioritize safety and local regulations when flying.
Essential Camera Settings

To master pro-level cinematography, you'll need to understand three essential camera settings.
Start by grasping how shutter speed affects motion blur and the overall feel of your footage.
Next, learn to manipulate aperture for controlling depth of field, and finally, master ISO to balance image brightness and noise levels in your shots.
Shutter Speed and Motion
Three essential elements control motion in cinematography: shutter speed, frame rate, and motion blur. When shooting tilt-up shots, understanding how these factors interact is vital for achieving your desired aesthetic.
Shutter speed, typically set at double your frame rate (e.g., 1/48th for 24fps), creates a natural-looking motion blur. However, you can adjust this for creative effects.
Faster shutter speeds will create crisper, more staccato motion, while slower speeds increase blur and smoothness. For tilt-up shots, consider the movement speed of your subject and the overall mood you're aiming to convey. A faster shutter might emphasize the vertical ascent, while a slower one could create a dreamy, floating effect.
Experiment with different shutter speeds to create various moods:
- 1/50th: Standard, natural-looking motion
- 1/100th: Slightly crisper movement, good for fast action
- 1/25th: Increased blur, ethereal quality
- 1/1000th: Sharp, freeze-frame-like effect
- 1/6th: Extreme blur, abstract motion trails
Aperture for Depth
Mastery of aperture is essential for controlling depth of field in cinematography. When shooting tilt-up shots, you'll want to take into account how much of the scene you'd like in focus. A wide aperture (low f-number) creates a shallow depth of field, isolating your subject from the background. Conversely, a narrow aperture (high f-number) keeps more of the scene in focus, ideal for landscape or architectural shots.
Experiment with different apertures to achieve the desired effect. Remember, your choice of lens focal length also affects depth of field. Here's a quick reference guide:
| Aperture | Depth of Field | Effect |
|---|---|---|
| f/1.4 | Very Shallow | Strong subject isolation |
| f/2.8 | Shallow | Moderate background blur |
| f/5.6 | Moderate | Balanced focus |
| f/11 | Deep | Most elements in focus |
| f/22 | Very Deep | Maximum sharpness across scene |
When executing tilt-up shots, take into account starting with a shallow depth of field to draw attention to a specific element, then gradually increase the aperture as you tilt up to reveal more of the scene in focus. This technique can create a dynamic and visually engaging shot that guides the viewer's eye through the frame.
ISO and Noise Control
Controlling ISO sensitivity is essential for managing image noise in your cinematography. As you raise the ISO, you'll increase your camera's light sensitivity, allowing you to shoot in darker conditions. However, higher ISO values also introduce more digital noise, potentially degrading image quality.
To maintain the best balance between exposure and noise, start with the lowest ISO possible for your shooting conditions and lighting setup.
When executing tilt-up shots, you'll often encounter varying light levels. Adjust your ISO accordingly as you move from darker to brighter areas, or vice versa. If you're using a camera with dual native ISO, take advantage of this feature to minimize noise at higher sensitivity settings.
Consider these imagery-evoking scenarios when managing ISO and noise:
- A dimly lit alleyway gradually revealing a bustling city street
- Shadows retreating as you tilt up from a forest floor to sunlit treetops
- A dark stage slowly illuminated by spotlights during a concert
- Shifting from a submarine's murky depths to the ocean's surface
- A cave's inky blackness giving way to a sunlit entrance
Planning Your Shot Composition

Crafting compelling visuals begins with thoughtful shot composition. When planning your tilt-up shots, consider the rule of thirds to create balanced and visually appealing frames. Divide your frame into a 3×3 grid and place key elements along these lines or at their intersections.
Start by identifying your focal point—the main subject or object you want to highlight. Position this element strategically within your frame, considering how it'll move as you tilt up. Think about leading lines that can guide the viewer's eye through the shot, such as architectural features or natural landscape elements.
Pay attention to foreground, midground, and background elements. Use these layers to add depth and dimension to your tilt-up shot. Consider incorporating interesting textures or patterns that'll enhance the visual interest as the camera moves.
Don't forget about negative space—areas without significant visual elements. This can create contrast and draw attention to your main subject.
As you plan your composition, think about how the shot will unfold over time. Consider the pacing and rhythm of your tilt-up, ensuring a smooth and engaging visual journey for your audience.
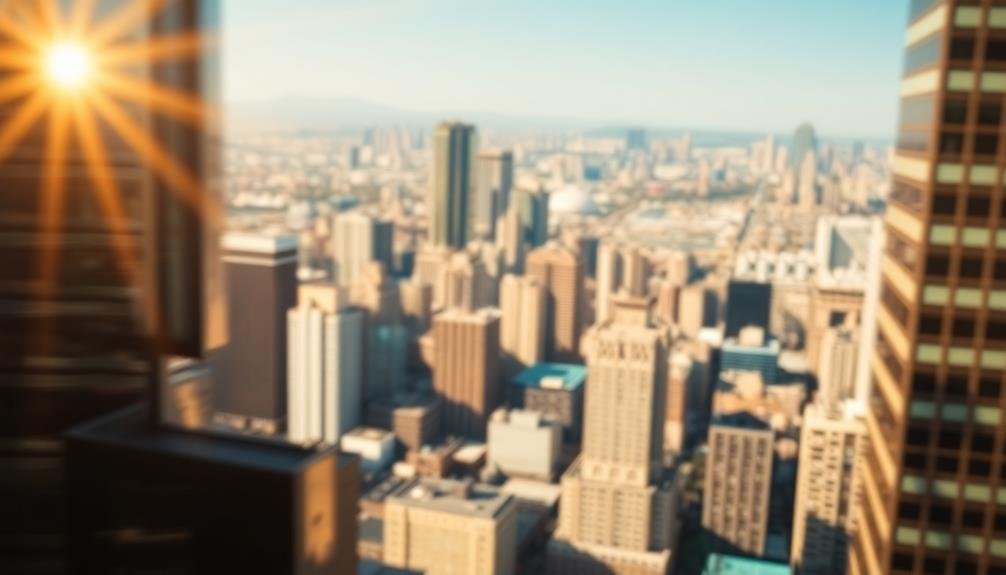
Optimal Weather Conditions

Weather plays an essential role in cinematography, especially for tilt-up shots. When planning your shoot, consider the atmospheric conditions that'll enhance your scene's mood and visual impact. Overcast skies can provide soft, diffused light that's ideal for capturing subtle details and textures.
On the other hand, clear, sunny days offer dramatic contrasts and long shadows, perfect for creating striking silhouettes or emphasizing architectural features.
For tilt-up shots, you'll want to pay attention to wind speed and direction. Gentle breezes can add life to your scene, while strong gusts might disrupt your camera's stability. Time of day also matters; golden hour lighting can bathe your subject in warm, flattering tones.
If you're shooting in urban environments, consider how different weather conditions interact with reflective surfaces like glass or water.
To create vivid imagery, keep these weather elements in mind:
- Misty fog rolling over a landscape at dawn
- Sunbeams piercing through storm clouds
- Raindrops glistening on leaves and petals
- Snow-capped mountains against a crisp blue sky
- Lightning illuminating a dramatic nighttime cityscape
Mastering Smooth Ascent Techniques

When you're aiming for smooth ascent shots, your gear selection can make or break the final result.
You'll need to practice fluid movements repeatedly, focusing on maintaining a steady pace and minimizing jerky motions.
Remember that timing is essential; plan your ascent to coincide with the action or mood you're trying to capture in your scene.
Gear Selection Matters
For mastering smooth ascent techniques, your gear selection plays an essential role. Choose a sturdy tripod with fluid head capabilities to guarantee stability and smooth panning. Invest in a high-quality motorized slider for consistent, controlled movements.
Don't overlook the importance of a balanced camera setup; distribute weight evenly to prevent sudden jerks or tilts. Consider using a jib arm for more dynamic ascent shots, allowing you to achieve sweeping vertical movements with ease.
For handheld ascents, a gimbal stabilizer can work wonders, providing that professional, floating effect. Remember, it's not just about the big-ticket items; smaller accessories like counterweights and quick-release plates can make a significant difference in your setup's efficiency.
To create vivid imagery in your audience's mind, imagine:
- A soaring eagle, gracefully ascending against a crimson sunset
- A delicate bubble floating upwards through a sunlit forest
- An elevator smoothly rising in a glass-walled skyscraper
- A hot air balloon gently lifting off from a misty field
- A spacecraft launching into the starry night sky
Practice Fluid Movements
Mastering fluid movements is the cornerstone of smooth ascent techniques. To achieve seamless tilt-up shots, you'll need to practice consistently and develop muscle memory.
Start by setting your camera on a sturdy tripod with a fluid head. Adjust the tension on your pan and tilt locks to find the perfect balance between stability and smooth motion.
Begin with slow, controlled movements. Place your hand on the pan bar and apply gentle, even pressure as you tilt upward. Keep your eyes on the viewfinder or monitor to maintain proper framing throughout the shot.
As you improve, gradually increase your speed while maintaining precision. Incorporate breathing techniques to steady your movements. Inhale deeply before starting the tilt, then exhale slowly as you execute the motion. This helps reduce shaky hands and promotes a smoother ascent.
Experiment with different speeds and rhythms to add variety to your shots. Practice shifting from slow to fast movements and vice versa. Use visual markers in your frame to guide your tilt, ensuring you hit key compositional points at the right moments.
Timing Is Crucial
Now that you've honed your physical technique, let's focus on the art of timing in smooth ascent shots. Timing is the backbone of a well-executed tilt-up, transforming a simple camera movement into a fascinating visual narrative.
Start by planning your shot's duration, considering the subject's height and the story you're telling. Begin slowly, gradually increasing speed as you ascend, then decelerate as you approach the final frame. This creates a natural, organic feel that guides the viewer's eye effortlessly.
Practice varying your timing to achieve different emotional impacts:
- Slow, steady ascent: builds suspense and anticipation
- Quick, energetic rise: conveys excitement or urgency
- Rhythmic, pulsing movement: adds dynamism to static subjects
- Pause mid-ascent: creates a moment of reflection or emphasis
- Sudden acceleration: surprises the audience, shifting focus
Controlling Speed for Impact
Speed manipulation is a powerful tool in a cinematographer's arsenal. When executing tilt-up shots, you'll want to master the art of controlling speed to enhance the impact of your footage.
Start by experimenting with different pacing options. A slow, steady tilt can create suspense and anticipation, gradually revealing the subject. Conversely, a rapid tilt can startle viewers or convey urgency.
Consider varying the speed within a single shot. Begin with a slow tilt and accelerate towards the end, or vice versa. This technique can add dynamism and visual interest to your composition.
Use a fluid head tripod to achieve smooth, consistent motion. For manual tilts, practice your hand movements to maintain an even pace.
Don't shy away from using speed ramping in post-production. This allows you to fine-tune the timing and create dramatic effects.
Remember, the speed of your tilt-up should complement the subject matter and overall mood of your scene. Fast tilts work well for action sequences, while slower movements suit contemplative moments.
Coordinating Gimbal Movement

Gimbals have revolutionized the world of cinematography, offering smooth, stabilized movement for cameras. When coordinating gimbal movement for tilt-up shots, you'll need to master precise control and timing.
Start by practicing slow, controlled movements to build muscle memory. As you become more comfortable, experiment with varying speeds and directions to add dynamism to your shots.
To create compelling tilt-up shots, consider the following techniques:
- Disclose: Slowly tilt up from a low angle to gradually reveal a scene
- Follow: Track a subject's movement from bottom to top
- Shift: Use a tilt-up to seamlessly move between different elements in a scene
- Dramatic effect: Combine a tilt-up with a dolly or tracking shot for added impact
- Perspective shift: Start with a close-up and tilt up to reveal a wider context
When coordinating gimbal movement, pay attention to your surroundings and any potential obstacles. Plan your path beforehand and communicate clearly with your team.
Remember to maintain proper posture and grip to guarantee smooth, steady movement throughout the shot. By mastering these techniques, you'll elevate your tilt-up shots and create visually stunning cinematography that captivates your audience.
Leveraging Natural Light
Natural light can be your greatest ally in cinematography when you know how to harness it effectively.
You'll want to master Golden Hour lighting techniques, learn to diffuse harsh sunlight, and develop strategies for reflector placement.
These skills will elevate your shots, allowing you to create stunning visuals without relying heavily on artificial lighting setups.
Golden Hour Lighting Techniques
As the sun dips towards the horizon, cinematographers enthusiastically anticipate the golden hour—that magical time when natural light bathes everything in a warm, ethereal glow.
To capture this fleeting moment, you'll need to act quickly and decisively. Position your camera to take advantage of the long shadows and soft, directional light. Use a wide aperture to create a shallow depth of field, emphasizing your subject against the golden backdrop.
Consider using a diffuser to soften the light further, creating a dreamy atmosphere. If you're shooting people, position them so the golden light illuminates their faces, adding a natural, flattering glow.
Don't forget to adjust your white balance to capture the warm tones accurately.
To evoke the essence of golden hour in your audience's mind, imagine:
- Sunbeams filtering through leaves, creating dappled light on the ground
- A silhouette of a person against a vibrant orange sky
- Long shadows stretching across a field, adding depth and texture
- Lens flares creating starbursts in the corner of the frame
- Golden light reflecting off water, creating a shimmering surface
Diffusing Harsh Sunlight
While golden hour offers ideal lighting conditions, you'll often find yourself shooting in harsh midday sun. To combat this, you'll need to diffuse the light effectively. Start by positioning your subject in a shaded area, such as under a tree or awning. If natural shade isn't available, create your own using diffusion materials like silks or scrims.
For larger scenes, consider using a butterfly frame with diffusion fabric. This setup allows you to control the light's intensity and direction. When working with reflective surfaces, use polarizing filters to reduce glare and enhance color saturation.
Here's a quick guide to common diffusion materials and their effects:
| Material | Light Reduction | Softness |
|---|---|---|
| 1/4 Stop Silk | 25% | Subtle |
| 1/2 Stop Silk | 50% | Moderate |
| Full Stop Silk | 75% | Significant |
Remember to adjust your camera settings accordingly when diffusing light. You'll likely need to increase your ISO or open up your aperture to compensate for the reduced light. By mastering these techniques, you'll be able to create stunning shots even in challenging lighting conditions.
Reflector Placement Strategies
Reflectors are invaluable tools for cinematographers looking to harness and shape natural light. When placing reflectors, consider the sun's position and your subject's location. For tilt-up shots, position the reflector below the subject to fill in shadows and create a soft, flattering light.
You can also use multiple reflectors to bounce light from different angles, adding depth and dimension to your shot. Experiment with different reflector materials to achieve various effects. Silver reflectors produce a cooler, more intense light, while gold reflectors add warmth. White reflectors offer a softer, more natural look.
Don't forget to adjust your reflector's angle throughout the day as the sun moves across the sky. To create striking visuals with reflectors, try these techniques:
- Place a reflector just out of frame to create a rim light
- Use a large reflector as a makeshift diffuser for softer light
- Position reflectors behind subjects for dramatic backlighting
- Bounce light off colored surfaces for unique tints
- Combine reflectors with negative fill to sculpt light and shadow
Post-Production Enhancements

Post-production enhancements often make the difference between good and great cinematography. When working on your tilt-up shots, focus on color grading to enhance the mood and atmosphere. Adjust contrast, saturation, and white balance to create a cohesive look that matches your artistic vision.
Don't shy away from using LUTs (Look-Up Tables) to quickly apply a specific style or emulate a particular film stock.
Pay attention to stabilization in post. Even if you've used a tripod or gimbal, subtle digital stabilization can smooth out any remaining imperfections. Use warp stabilizer or similar tools in your editing software to achieve a polished result.
Consider adding subtle camera movements in post to enhance the dynamism of your tilt-up shots. A slow push-in or gentle pan can add depth and interest to static scenes.
Be careful not to overdo it, as the goal is to complement, not overshadow, your original footage.
Overcoming Common Tilt-Up Challenges

When executing a tilt-up shot, you'll face three primary challenges: stabilizing camera movement, controlling exposure changes, and maintaining subject focus.
To stabilize your camera, you'll need to master fluid head tripods or invest in a quality gimbal system.
You'll also need to anticipate and adjust for exposure shifts as you tilt from darker to lighter areas, while simultaneously ensuring your subject remains crisp and in focus throughout the movement.
Stabilizing Camera Movement
Mastering tilt-up shots can be challenging for even experienced cinematographers. To stabilize your camera movement and achieve smooth, professional-looking tilt-ups, you'll need to focus on technique and equipment.
Start by investing in a sturdy tripod with a fluid head, which will allow for smoother vertical pans. Practice your hand movements to maintain a consistent speed throughout the shot, avoiding jerky motions that can ruin the effect.
For handheld tilt-ups, consider using a shoulder rig or stabilizer to reduce camera shake. You can also try employing image stabilization features in your camera or lens.
When executing the shot, breathe steadily and use your entire body to create a fluid motion, rather than relying solely on your arms.
To create compelling tilt-up shots, visualize:
- A towering skyscraper revealing itself from street level
- A majestic redwood tree, slowly disclosing its full height
- A character's face, gradually coming into view from feet to head
- A rocket launch, following its ascent into the sky
- A waterfall, starting at the base and rising to its origin point
Controlling Exposure Changes
While stabilizing your camera movement is key, another challenge in tilt-up shots is managing exposure changes. As you tilt from a darker foreground to a brighter sky, you'll need to adjust your exposure to maintain proper balance throughout the shot.
One effective technique is using a graduated neutral density filter. This filter darkens the upper portion of the frame, reducing the brightness difference between sky and ground. You can also employ a variable ND filter, adjusting it as you tilt up to maintain consistent exposure.
Another approach is to use your camera's auto-exposure lock. Set your exposure for the midpoint of your tilt, then lock it in place. This guarantees a balanced exposure throughout the shot, though you may lose some detail in highlights or shadows.
For more control, consider manual exposure adjustments during the shot. Practice smooth aperture or ISO changes as you tilt, matching the changing light conditions. Alternatively, use shutter angle adjustments on cinema cameras for subtle exposure tweaks without affecting motion blur.
Lastly, don't forget about post-production. Shooting in a flat color profile or RAW format gives you more latitude to balance exposure in editing, allowing for smoother shifts between bright and dark areas.
Maintaining Subject Focus
Focus management in tilt-up shots can be a significant challenge for cinematographers. As you move from one element to another, maintaining crisp focus on your subject is essential. To overcome this, practice smooth focus pulls and consider using a follow focus system for precise control. You'll need to anticipate focus changes and execute them fluidly as the camera tilts upward.
When shooting tilt-ups, remember these key points to keep your subject in focus:
- Use a depth of field calculator to determine ideal aperture settings
- Mark focus points on your lens for quick reference during the shot
- Employ focus peaking on your camera's LCD or external monitor
- Consider using a motorized focus system for complex shots
- Practice the movement repeatedly before filming to perfect your technique
Don't forget to communicate clearly with your camera operator if you're working as a focus puller. Timing is everything in tilt-up shots, so make sure you're in sync with the camera's movement.
If possible, use a higher f-stop to increase your depth of field, giving you more leeway in maintaining focus throughout the shot. With practice and the right tools, you'll master the art of keeping your subject sharp in even the most challenging tilt-up shots.
Advanced Tilt-Up Variations
Elevating your tilt-up shots can transform ordinary scenes into dynamic visual narratives. To achieve this, experiment with different speeds and rhythms. Start with a slow, deliberate tilt-up, then suddenly accelerate midway through the shot. This creates tension and draws attention to specific elements in your frame.
Try combining tilt-ups with lateral movements. As you tilt up, slowly track left or right to reveal additional layers of your scene. This technique adds depth and complexity to your composition.
For a more immersive effect, use a wide-angle lens and position your camera close to the ground. As you tilt up, you'll capture a dramatic shift in perspective.
Incorporate foreground elements to enhance depth. Begin your tilt-up with a close-up of an object, then reveal the broader scene behind it. This technique creates a sense of discovery and guides the viewer's eye.
Don't shy away from unconventional angles. Tilt up diagonally or even start upside-down and rotate as you tilt. These unexpected movements can disorient viewers in an engaging way, perfect for dream sequences or subjective point-of-view shots.
Legal Considerations for Drone Filming

In light of the growing popularity of drone cinematography, it's crucial to understand the legal landscape surrounding aerial filming. You'll need to familiarize yourself with local, state, and federal regulations to guarantee compliance and avoid hefty fines or legal issues.
First, you must obtain a Remote Pilot Certificate from the FAA if you're flying commercially. Register your drone and follow weight restrictions. Be aware of no-fly zones, such as airports, military bases, and national parks. Always maintain visual line of sight with your drone and fly below 400 feet.
When filming with drones, consider privacy laws. Don't capture footage of people or private property without consent. Respect noise ordinances and time restrictions in residential areas. Obtain necessary permits for commercial shoots, especially in public spaces.
- A drone soaring over a bustling cityscape
- A pilot carefully maneuvering around tall buildings
- A production team reviewing flight plans and permits
- A drone capturing a sweeping shot of a natural landscape
- An operator maintaining visual contact with their drone
Stay informed about evolving drone regulations, as laws can change rapidly. Join professional organizations to stay updated on industry standards and best practices.
Incorporating Tilt-Ups in Storytelling
Mastering the tilt-up shot can dramatically enhance your storytelling capabilities. This technique involves starting with the camera pointed downward and gradually tilting upward, disclosing more of the scene. It's an effective way to build suspense, introduce characters, or showcase environments.
To incorporate tilt-ups effectively, consider the emotional impact you want to convey. Use slower movements for contemplative moments or to create tension. Faster tilts can generate excitement or urgency. Plan your shots carefully, ensuring the disclosed elements contribute to your narrative.
When introducing characters, start with a detail like their feet or hands, then tilt up to reveal their face. This creates intrigue and draws viewers in. For landscapes, begin with ground-level details before disclosing the broader vista, emphasizing scale and grandeur.
Combine tilt-ups with other camera movements for added dynamism. A tilt-up paired with a dolly-in can create a powerful sense of revelation. Experiment with different lenses to alter the perceived speed and impact of your tilt-ups. Wide-angle lenses exaggerate movement, while telephoto lenses compress the scene, offering a more subtle effect.
Frequently Asked Questions
How Do Tilt-Up Shots Differ From Other Aerial Cinematography Techniques?
You'll find tilt-up shots are unique among aerial techniques. They start at ground level and move upward, revealing the scene gradually. Unlike other aerial shots, you're not capturing from a constant high altitude perspective.
What Budget-Friendly Alternatives Exist for Achieving Tilt-Up Effects Without Drones?
You can achieve tilt-up effects without drones by using a jib arm, dolly, or even a simple handheld gimbal. Try mounting your camera on a monopod or using a slider for smooth vertical movements on a budget.
Can Tilt-Up Shots Be Effectively Combined With Other Camera Movements?
Yes, you can effectively combine tilt-up shots with other movements. Try pairing them with dolly shots, pans, or zooms. You'll create dynamic sequences that add depth and interest to your footage. Experiment to find unique combinations.
How Do Tilt-Up Shots Impact Viewer Emotion and Perception Differently?
Tilt-up shots can dramatically shift your emotions and perception. They'll often make you feel small or overwhelmed as the camera reveals more. You'll experience a sense of anticipation, wonder, or even dread as the scene unfolds vertically.
Are There Specific Genres or Types of Content Best Suited for Tilt-Up Shots?
You'll find tilt-up shots work well in horror, suspense, and action genres. They're great for revealing tall structures, creating anticipation, or emphasizing a character's power. Use them in documentaries to showcase landscapes or architecture too.
In Summary
You've now got the tools to take your tilt-up shots to new heights. Remember, practice makes perfect. Don't be afraid to experiment with different angles, speeds, and compositions. As you refine your technique, you'll create more dynamic and engaging footage. Always prioritize safety and legality when flying your drone. With these pro tips in your arsenal, you're ready to elevate your cinematography and captivate your audience with stunning tilt-up shots.
As educators and advocates for responsible drone use, we’re committed to sharing our knowledge and expertise with aspiring aerial photographers.


Leave a Reply