To achieve smooth tracking shots, start by using a gimbal system for effective stabilization. Plan your flight path carefully, anticipating direction shifts and obstacles. Adjust camera settings appropriately, focusing on shutter speed and ISO for peak image quality. Utilize intelligent flight modes on drones for automated movement. Maintain steady speed during filming, practicing smooth control inputs to avoid jerky motions. Develop fluid body movement techniques when operating handheld equipment. Finally, apply post-production stabilization techniques to refine your footage. By mastering these tips, you'll elevate your tracking shots to professional levels. There's even more to explore in the world of stabilization techniques.
Key Takeaways
- Utilize a gimbal system with proper camera balancing and regular calibration for effective shot stabilization.
- Plan your flight path by visualizing and mapping the intended camera movement, marking the path on the ground.
- Adjust camera settings appropriately, following the 180-degree shutter rule for natural motion blur.
- Practice smooth control inputs and fluid body movements to reduce abrupt camera movements during flight.
- Master gradual speed changes and utilize intelligent flight modes like ActiveTrack for automated subject following.
Use a Gimbal System

When it comes to tracking shot stabilization, using a gimbal system is arguably the most effective method. A gimbal utilizes motorized axes to counteract unwanted camera movements, resulting in smooth, fluid footage. To get the most out of your gimbal, you'll need to master proper technique and balance.
Start by carefully balancing your camera on the gimbal. This process may take some time, but it's vital for peak performance. Once balanced, practice walking techniques that minimize body movement. Keep your arms close to your body and use your legs to absorb shocks as you move.
Familiarize yourself with the gimbal's different modes, such as follow mode, lock mode, and POV mode. Each serves a specific purpose and can enhance your tracking shots in various scenarios.
Don't forget to calibrate your gimbal regularly, especially when changing environments or after long periods of storage.
For longer shots, consider using a body-mounted support system to distribute the weight and reduce fatigue.
Plan Your Flight Path
For successful tracking shots, planning your flight path is vital. Before you start filming, take the time to visualize and map out your intended camera movement. Walk through the scene multiple times, noting any obstacles or potential issues along the way. This preparation will help you anticipate challenges and adjust your path accordingly.
Consider the story you're trying to tell with your shot. Your flight path should complement the narrative and enhance the viewer's experience. Think about the starting and ending points, as well as any key elements you want to highlight during the movement. If possible, mark your path on the ground with tape or chalk to guarantee consistency across takes.
Practice your movement without the camera first, then add the equipment and rehearse several times. This will help you refine your technique and identify any areas that need adjustment. Pay attention to your pacing, as consistent speed is essential for smooth tracking shots.
If you're working with actors, coordinate their movements with your camera path to create a seamless interaction. By thoroughly planning your flight path, you'll greatly increase your chances of capturing smooth, professional-looking tracking shots.
Adjust Camera Settings Appropriately

To stabilize your tracking shots, you'll need to fine-tune your camera settings.
Start by setting your shutter speed to roughly double your frame rate, ensuring smooth motion blur.
Next, adjust your ISO sensitivity to maintain proper exposure while keeping noise levels in check, balancing image quality with the necessary shutter speed for your shot.
Optimal Shutter Speed Settings
Selecting the right shutter speed is essential for achieving stable tracking shots. When you're moving with the camera, a faster shutter speed can help freeze motion and reduce blur, but it may result in choppy footage. Conversely, a slower shutter speed can create smoother motion but might introduce too much blur.
To find the ideal balance, follow the 180-degree shutter rule: set your shutter speed to double your frame rate. For example, if you're shooting at 24fps, use a 1/48 or 1/50 shutter speed. This rule provides a natural-looking motion blur that's pleasing to the eye. However, you may need to adjust based on your specific shooting conditions and creative goals.
Consider these factors when setting your shutter speed:
- Lighting conditions: Brighter environments may require faster shutter speeds to avoid overexposure.
- Subject movement: Fast-moving subjects might benefit from slightly faster shutter speeds to reduce motion blur.
- Stabilization method: If you're using a gimbal or other stabilization device, you might have more flexibility with slower shutter speeds.
Adjust ISO Sensitivity
ISO sensitivity plays an essential role in achieving stable tracking shots. When you're moving with the camera, you'll need to balance your ISO setting with other factors to maintain image quality while reducing motion blur. Start with the lowest possible ISO to minimize noise, but be prepared to increase it if necessary.
Consider your lighting conditions and desired depth of field when adjusting ISO. In bright environments, you can keep the ISO low while maintaining a fast shutter speed. For low-light situations, you'll need to bump up the ISO to avoid underexposure. Remember, higher ISO values introduce more noise, potentially affecting the smoothness of your tracking shot.
Here's a quick guide to help you choose the right ISO:
| Lighting Condition | Recommended ISO Range | Impact on Stability |
|---|---|---|
| Bright Daylight | 100-400 | Excellent |
| Cloudy/Shade | 400-800 | Very Good |
| Indoor | 800-1600 | Good |
| Low Light | 1600-3200+ | Challenging |
As you increase ISO, pay attention to your camera's noise reduction capabilities. Some cameras handle high ISO better than others, so test your equipment's limits beforehand. By finding the right balance between ISO, shutter speed, and aperture, you'll capture smoother, more professional-looking tracking shots.
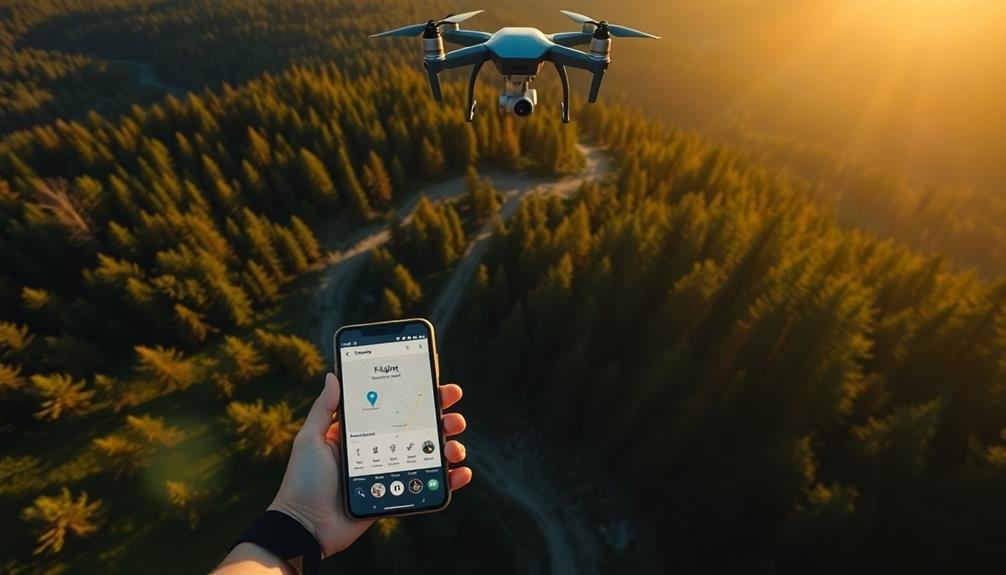
Utilize Intelligent Flight Modes

Drone pilots can take advantage of intelligent flight modes to achieve smoother tracking shots. These automated features allow your drone to follow predetermined flight paths or subjects, reducing the need for manual control and minimizing human error.
By utilizing intelligent flight modes, you'll capture more stable footage while focusing on composition and creativity.
Many modern drones offer a variety of intelligent flight modes tailored for tracking shots. Here are three popular options to evaluate:
- ActiveTrack: This mode allows your drone to automatically follow a selected subject, maintaining a consistent distance and angle. It's ideal for capturing moving targets like vehicles, athletes, or wildlife.
- Waypoints: Set multiple points along a desired flight path, and your drone will autonomously navigate between them. This mode is perfect for complex tracking shots or when you need precise, repeatable movements.
- Point of Interest: Your drone will orbit around a specified subject or location, maintaining a constant altitude and distance. This mode is excellent for creating dynamic 360-degree shots of stationary objects or landscapes.
When using intelligent flight modes, always monitor your drone's surroundings and be prepared to take manual control if necessary.
Practice with each mode to understand its capabilities and limitations, ensuring you can maximize their potential for smooth, professional-looking tracking shots.
Maintain Steady Drone Speed

While intelligent flight modes can greatly enhance your tracking shots, maintaining a steady drone speed is equally important for smooth, professional-looking footage. Inconsistent speed can result in jerky movements and disorienting shifts, detracting from the overall quality of your video.
To maintain a steady speed, start by practicing your throttle control. Aim for gentle, gradual adjustments rather than sudden bursts of acceleration or deceleration. Use your drone's speed settings to your advantage, selecting a consistent speed that matches the pace of your subject or scene.
When tracking moving subjects, try to match their speed as closely as possible. This will help create a natural, fluid motion in your footage. For stationary subjects, maintain a slow, constant speed to achieve a cinematic effect.
Wind can greatly impact your drone's speed and stability. Always check weather conditions before flying and compensate for any gusts by adjusting your controls accordingly.
If possible, plan your shots with the wind direction in mind to minimize its effects on your speed and trajectory.
Practice Smooth Control Inputs

To achieve smooth control inputs, you'll need to focus on developing fluid body movements when operating your drone.
Master the art of gradual speed changes, ensuring your shifts are seamless and barely noticeable.
Always anticipate direction changes, preparing your inputs well in advance to maintain a steady and professional-looking tracking shot.
Develop Fluid Body Movement
Mastering fluid body movement is essential for achieving smooth tracking shots. Your body acts as a natural stabilizer, so learning to move gracefully can greatly enhance your footage quality.
Start by practicing walking techniques that minimize vertical bouncing. Keep your knees slightly bent and roll your feet from heel to toe with each step. This creates a more level plane for your camera to travel on.
Next, focus on your core strength and posture. A strong core helps maintain balance and reduces unwanted camera shake. Keep your back straight, shoulders relaxed, and arms close to your body while holding the camera.
Practice these movements without the camera first, then gradually incorporate your equipment.
To further refine your fluid body movement, consider these key points:
- Breathe steadily and rhythmically to maintain a consistent pace
- Use your hips and legs to absorb shock and create smooth shifts
- Develop a sense of spatial awareness to navigate obstacles effortlessly
Master Gradual Speed Changes
Building on your fluid body movement skills, the next step in perfecting tracking shots is mastering gradual speed changes. This vital aspect of camera operation guarantees your footage remains smooth and professional throughout the shot.
Start by practicing slow, controlled accelerations and decelerations. Begin with your camera at a complete stop, then gradually increase your speed over several seconds. Reverse the process to slow down, maintaining a steady hand throughout. Use visual markers or a metronome to help you maintain consistent pacing.
Focus on applying gentle pressure to your equipment's controls. Whether you're using a dolly, slider, or handheld rig, aim for subtle adjustments rather than abrupt movements. This technique helps minimize jarring shifts that can distract viewers.
Experiment with different speed variations within a single shot. Try starting slow, building to a moderate pace, then decelerating towards the end. This dynamic approach can add visual interest to your footage.
Remember to adapt your speed to the subject matter. Faster movements may suit action scenes, while slower, deliberate motions can enhance dramatic moments. Always consider how your camera's speed impacts the emotional tone of the scene.
Anticipate Direction Shifts
While maintaining smooth speed changes is essential, anticipating direction shifts takes your tracking shots to the next level. As you move through your scene, be prepared for sudden changes in your subject's path. Keep your eyes focused ahead, scanning for potential obstacles or turns. This foresight allows you to make gradual adjustments rather than abrupt movements that can jar your audience.
Practice smooth control inputs by gently easing into direction changes. Start your turn slightly before you need to, allowing for a more natural and fluid motion. Remember that your body's movement affects the camera, so maintain a steady posture and use your core to stabilize yourself.
To master direction shifts, focus on these key points:
- Develop spatial awareness: Constantly assess your surroundings and potential paths.
- Use subtle body language: Slightly lean into turns before executing them.
- Coordinate with your subject: Communicate non-verbally to anticipate their movements.
Post-Production Stabilization Techniques

In the domain of post-production, stabilization techniques can salvage shaky footage and elevate your tracking shots. You'll find several software options available, ranging from built-in features in editing suites to specialized stabilization programs.
Start by importing your footage into your chosen software and analyzing the motion. Most tools will track the movement automatically, but you may need to set tracking points manually for complex shots.
Once the analysis is complete, adjust the smoothness settings to find the right balance between stability and natural movement. Be cautious not to overcompensate, as this can result in a warped or artificial look. You'll often need to crop the edges of your frame to remove the shifting borders caused by stabilization.
For more advanced techniques, consider using optical flow or rolling shutter repair to address specific issues. These methods can help reduce distortion and wobble in your footage.
Don't forget to preview your stabilized shots at full resolution to guarantee the quality hasn't been compromised. If you're dealing with extreme camera shake, you might need to combine multiple stabilization passes or use keyframing to achieve the desired result.
Frequently Asked Questions
How Does Wind Speed Affect Tracking Shot Stabilization?
Wind speed can greatly impact your tracking shot stability. You'll notice increased camera shake and movement as wind speeds rise. Use wind shields, adjust your grip, and consider lower angles to minimize wind's effects on your footage.
Can Tracking Shots Be Stabilized Effectively Without Expensive Equipment?
Yes, you can stabilize tracking shots without costly gear. Use your body as a gimbal, practice smooth movements, and employ DIY rigs like PVC stabilizers. In post-production, you'll find free or low-cost software for additional stabilization.
What Role Does Lens Choice Play in Achieving Smooth Footage?
Lens choice plays an essential role in smooth footage. You'll want to use wider lenses for more stable shots. They're less affected by camera shake. Longer lenses amplify movement, so you'll need extra stabilization when using them.
Are There Specific Editing Software Features for Enhancing Tracking Shot Stability?
You'll find several editing software features to enhance tracking shot stability. Use warp stabilizer, motion tracking, or optical flow tools. They'll analyze your footage, smooth out camera movements, and reduce unwanted shake in post-production.
How Do Different Terrains Impact the Difficulty of Tracking Shot Stabilization?
You'll find that terrain greatly affects tracking shot stability. Smooth surfaces like concrete are easiest, while uneven ground, stairs, or rough terrain pose challenges. Grass and sand can dampen footsteps but may cause wobbles. Adjust your technique accordingly.
In Summary
You've now got the tools to capture silky-smooth tracking shots with your drone. Remember, it's all about combining the right gear, careful planning, and skillful piloting. Don't forget to fine-tune your camera settings and take advantage of intelligent flight modes. With practice, you'll master smooth control inputs and steady speeds. And if you need that extra polish, post-production stabilization can work wonders. Now get out there and start creating stunning, professional-looking footage!
As educators and advocates for responsible drone use, we’re committed to sharing our knowledge and expertise with aspiring aerial photographers.


Leave a Reply