To capture mesmerizing vertigo effects, start by choosing the right location with striking features. Plan your flight path carefully, considering obstacles and shifts. Set up your drone, ensuring proper calibration and accessories. Configure camera settings for manual control and slower shutter speeds. Master the dolly zoom technique, coordinating drone movement with lens adjustments. Experiment with different speeds to enhance the effect. Try various angles and compositions, including low perspectives and tilted horizons. Refine your post-processing workflow to perfect the look. Practice consistently and persevere through challenges. The journey to creating stunning vertigo effects is just beginning.
Choose the Right Location

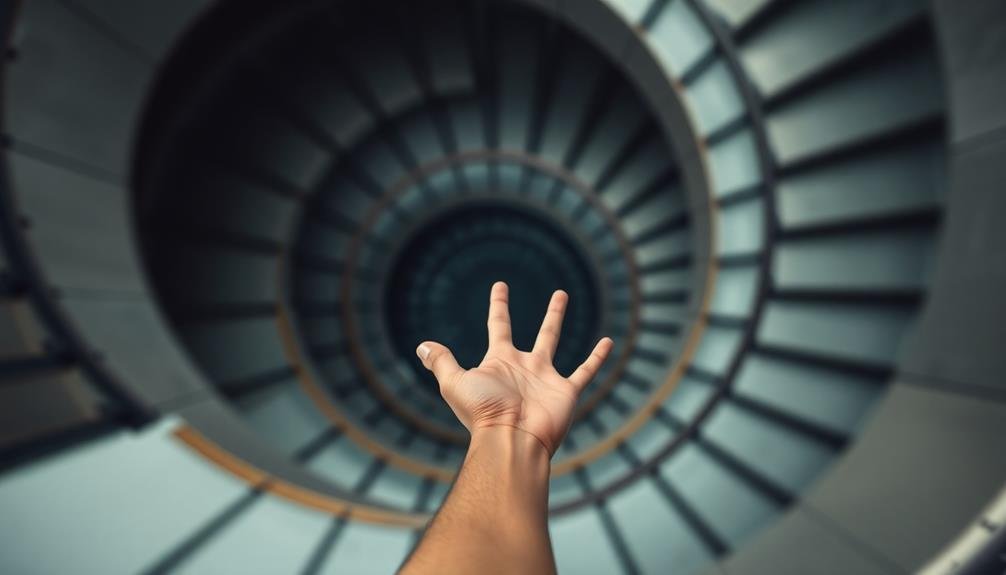
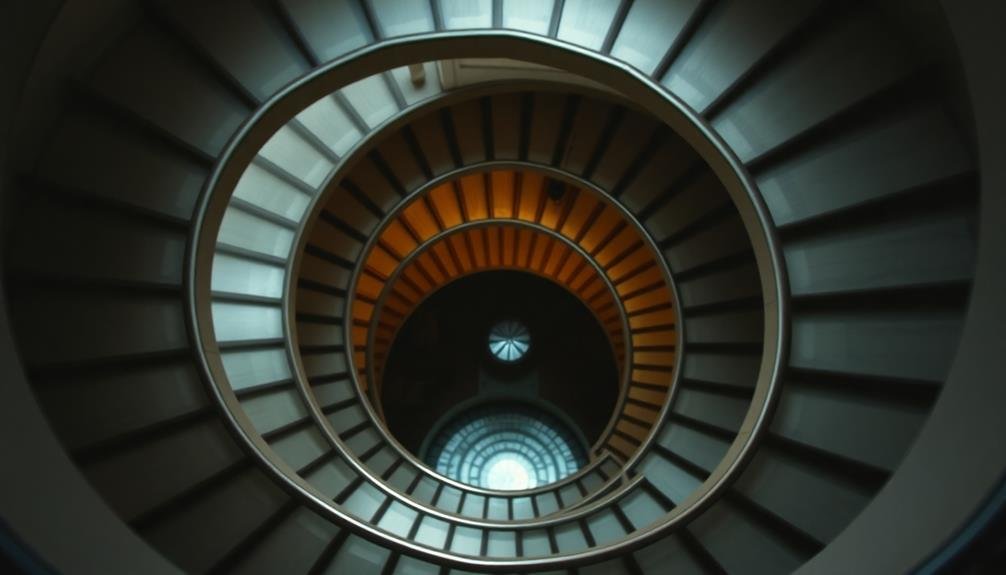
Skyscrapers and towering structures offer the perfect canvas for creating mesmerizing vertigo effects. When choosing your location, look for buildings with unique architectural features, such as spiral staircases, glass elevators, or observation decks. These elements can enhance the dizzying sensation in your photos.
Consider the time of day and lighting conditions. Early morning or late afternoon can provide dramatic shadows and contrast, intensifying the vertigo effect. If you're shooting indoors, seek out locations with interesting patterns on floors or ceilings, like intricate tile work or geometric designs.
Don't limit yourself to man-made structures. Natural formations like cliffs, canyons, or waterfalls can also create powerful vertigo effects. Look for locations that offer multiple levels or vantage points, allowing you to experiment with different angles and perspectives.
Safety should be your top priority. Verify you have permission to access the chosen location and follow all safety guidelines. If you're shooting from heights, use proper equipment and harnesses.
Plan Your Flight Path

To create truly enchanting vertigo effects, you'll need to plan out your flight path carefully. Consider the focal point of your shot and how you want the viewer's eye to move through the frame. Start by deciding on your initial altitude and position, then map out a smooth course that will create the desired vertigo effect.
Think about incorporating spiral movements, gentle ascents or descents, and gradual changes in perspective. You might want to circle around a central object or structure, or move from a wide-angle view to a close-up shot. Experiment with different speeds and directions to find the most engaging motion.
Don't forget to account for obstacles and potential hazards in your flight path. Scout the area beforehand to identify any power lines, trees, or other obstructions that could interfere with your drone's movement. Plan alternative routes in case you need to adjust mid-flight.
Consider the duration of your shot and verify your flight path allows for a smooth change between the beginning and end of the sequence. Practice your planned route several times before capturing the final footage to perfect your timing and movements.
Set Up Your Drone

To create mesmerizing vertigo effects, you'll need to start by choosing a suitable drone model that can handle the required maneuvers.
Once you've selected your drone, make certain it's properly calibrated for peak performance and stability during flight.
Don't forget to install any necessary accessories, such as specialized cameras or gimbals, to capture the vertigo-inducing footage you're aiming for.
Choose Suitable Drone Model
Selecting the right drone is vital for capturing mesmerizing vertigo effects. You'll want a model that offers stability, smooth flight control, and high-quality camera capabilities. Look for drones with GPS positioning and altitude hold features, as these will help you maintain steady shots during your vertigo effect flights.
Consider models with obstacle avoidance sensors to prevent accidents while flying in tight spaces or near structures. Opt for drones with gimbal-stabilized cameras, preferably with 4K resolution, to guarantee crisp, shake-free footage.
Battery life is significant, so choose a drone that can stay airborne for at least 20-30 minutes, giving you ample time to perfect your shots.
Popular drone models suitable for vertigo effects include the DJI Mavic series, Autel EVO II, and Parrot Anafi. These drones offer a good balance of features, portability, and image quality. If you're on a budget, the DJI Mini series provides excellent capabilities in a compact form.
Remember to check local regulations regarding drone weight and registration requirements before making your purchase. Ultimately, select a drone that matches your skill level and filming needs while providing the necessary features for capturing stunning vertigo effects.
Ensure Proper Calibration
Once you've chosen your drone, proper calibration is the next step in achieving mesmerizing vertigo effects. Start by finding a flat, stable surface away from magnetic interference. Turn on your drone and controller, confirming both have fully charged batteries.
Begin with compass calibration. Most drones require you to rotate the aircraft horizontally and vertically. Follow your drone's specific instructions, as the process may vary between models.
Next, calibrate the IMU (Inertial Measurement Unit) to guarantee stable flight. This usually involves placing the drone on a level surface and following prompts in the app.
Don't forget to calibrate the gimbal, which is essential for smooth footage. Many drones have an auto-calibration feature for the gimbal, but manual adjustments may be necessary for peak performance. Check that the camera is level and moves smoothly through its full range of motion.
Lastly, perform a GPS calibration to improve positioning accuracy. This typically involves walking with the drone or rotating it in specific patterns.
Once all calibrations are complete, do a quick test flight to verify everything's working correctly before attempting any vertigo effect shots.
Install Necessary Accessories
Accessory installation plays a fundamental role in achieving stunning vertigo effects with your drone. To start, you'll need to attach a high-quality camera gimbal to guarantee smooth, stable footage. Choose a 3-axis gimbal for maximum control and vibration reduction.
Next, install propeller guards to protect your drone and increase safety during complex maneuvers.
Don't forget to equip your drone with ND filters. These are significant for managing light exposure and achieving the desired shutter speed for your vertigo shots.
You'll also want to add landing gear extensions to provide extra clearance for your camera when taking off and landing.
For extended flight times, consider installing a larger capacity battery. This will allow you to capture more footage and attempt multiple takes of your vertigo effect.
Finally, add LED lights to your drone for improved visibility and the option to create interesting light effects in your shots.
Remember to securely fasten all accessories and double-check their compatibility with your specific drone model. With these essential add-ons in place, you're now ready to start capturing mesmerizing vertigo effects that will leave your audience in awe.
Configure Camera Settings

To achieve stunning vertigo effects, you'll need to fine-tune your camera settings. Start by switching your camera to manual mode, giving you full control over exposure parameters.
Set your aperture to a mid-range value (f/8 to f/11) to guarantee a good depth of field. Choose a slower shutter speed, typically between 1/15 and 1/4 second, to capture motion blur effectively.
Adjust your ISO to the lowest possible setting to minimize noise, usually around 100 or 200. If you're shooting in low light conditions, you may need to increase it slightly. Set your focus manually to maintain consistency throughout the sequence.
For the zooming effect, use a zoom lens with a focal range of at least 24-70mm. Begin with the widest angle and gradually zoom in as you rotate the camera. Alternatively, for the dolly zoom effect, start zoomed in and physically move backwards while zooming out.
Enable your camera's intervalometer or connect an external trigger to capture a series of images at consistent intervals. This will help create a smooth shift when you compile the images into a final vertigo effect sequence during post-processing.
Master the Dolly Zoom Technique

The dolly zoom technique, also known as the Vertigo effect, can really elevate your photography and videography. To master this effect, you'll need to simultaneously move the camera while adjusting the zoom lens.
Start by positioning your subject in the frame and choosing your initial focal length. As you physically move the camera backwards, zoom in on your subject. Alternatively, move the camera forwards while zooming out.
The key is to maintain your subject's size in the frame while the background appears to stretch or compress. Practice smooth, steady movements to achieve the best results. Use a dolly or slider for more controlled motion, or try handheld for a more organic feel.
Experiment with different speeds to find the right balance between camera movement and zoom adjustment. For best results, choose a location with depth and interesting background elements. Urban environments with long streets or natural settings with expansive vistas work well.
Remember to focus on your subject throughout the movement to keep them sharp. With practice, you'll be able to create stunning vertigo effects that add drama and visual interest to your work.
Coordinate Drone Movement and Zoom

To create enchanting vertigo effects with a drone, you'll need to coordinate its movement with your camera's zoom function.
Start by synchronizing your drone's flight path with the zoom's rate of change, ensuring you've planned the route meticulously to achieve the desired visual impact.
As you execute the effect, be prepared to adjust your zoom speed dynamically, responding to the drone's movement and environmental factors for a seamless, disorienting result.
Synchronize Drone and Zoom
Synchronization lies at the heart of creating a mesmerizing vertigo effect with drones. You'll need to coordinate your drone's movement with the camera's zoom function to achieve a seamless and impactful result. Start by planning your shot, considering the subject, background, and desired effect. As you begin filming, initiate the drone's movement and zoom simultaneously.
For a classic vertigo effect, fly the drone backwards while zooming in, or move it forward while zooming out. The key is to maintain a consistent speed for both actions. Practice this technique to find the right balance and timing. Remember, even slight misalignments can disrupt the illusion.
| Drone Movement | Zoom Direction | Effect |
|---|---|---|
| Backward | In | Subject grows, background shrinks |
| Forward | Out | Subject shrinks, background expands |
| Upward | In | Vertical stretch effect |
Experiment with different combinations of movement and zoom to create unique vertigo effects. You can try spiral patterns, diagonal movements, or even combine multiple drones for complex shots. Always prioritize safety and adhere to local drone regulations while capturing these stunning visuals.
Plan Flight Path Carefully
How can you guarantee your vertigo effect is both safe and stunning? It all comes down to meticulous flight path planning. Before you take off, scout your location thoroughly. Look for potential obstacles, restricted areas, and the best angles for your shot. You'll want to choose a path that allows for smooth, continuous movement while maintaining a clear line of sight to your subject.
When planning your flight path, consider these key factors:
- Altitude changes: Gradually increase or decrease altitude for a more dramatic effect
- Speed consistency: Maintain a steady pace to avoid jerky movements
- Subject framing: Keep your focal point centered throughout the flight
Start by mapping out your route on paper or using drone flight planning software. This will help you visualize the path and make any necessary adjustments before taking to the air.
Practice your planned route several times without recording to perfect your movements and timing. Remember to factor in wind conditions and battery life when finalizing your flight plan.
Adjust Zoom Speed Dynamically
During your vertigo effect shot, coordinating your drone's movement with the camera zoom is essential for achieving a seamless and immersive result. As you execute the shot, you'll need to adjust your zoom speed dynamically to match the drone's movement.
Start with a slow zoom and gradually increase the speed as the drone moves faster. This synchronization creates the illusion of the background shifting while the subject remains stable.
Pay attention to your drone's altitude changes and adjust the zoom accordingly. If you're ascending, zoom out slightly faster to enhance the vertigo effect. When descending, slow down the zoom-out speed. Use your drone's controller to fine-tune the movement speed, ensuring it complements the zoom rate.
Practice smooth shifts between zoom speeds to avoid jarring changes. You can use keyframes in post-production to refine these shifts further.
Experiment with different zoom speeds and drone movements to find the perfect balance for your desired effect. Remember, the goal is to create a seamless, mind-bending visual that captivates your audience.
With practice and precision, you'll master the art of dynamically adjusting zoom speed for mesmerizing vertigo effects.
Adjust Speed for Optimal Effect

The speed of your vertigo effect plays a crucial role in its overall impact. You'll need to experiment with different speeds to find the ideal balance for your specific shot. Start with a moderate speed and adjust from there, paying close attention to how it affects the viewer's perception of the scene.
When adjusting the speed, consider the following factors:
- Subject matter: Slower speeds work well for static subjects, while faster speeds can enhance the dynamism of moving objects.
- Emotion: Slower speeds can create a dreamlike, surreal atmosphere, while faster speeds can induce a sense of urgency or disorientation.
- Duration: Longer shots may benefit from slower speeds to maintain viewer engagement, while shorter clips can handle faster speeds without overwhelming the audience.
Remember that the best speed may vary throughout your shot. You can gradually increase or decrease the speed to build tension or create a more dramatic effect.
Don't be afraid to try extreme speeds, but be mindful of potential motion sickness in your viewers. Always preview your work on different screens to guarantee the effect translates well across various devices.
Experiment With Different Angles
Try incorporating overhead shots to create a dizzying sense of height and scale in your vertigo effects.
You can also experiment with low-angle perspectives to make subjects appear more imposing and disorienting.
Don't forget to play with tilted horizon lines, which can instantly throw off the viewer's sense of balance and enhance the vertigo sensation.
Overhead Shots
Creativity soars when you experiment with overhead shots to create mesmerizing vertigo effects. Position yourself directly above your subject, looking straight down to capture a unique perspective that disorients viewers. This technique works exceptionally well for architectural shots, staircases, or bustling city streets.
To achieve the perfect overhead shot, you'll need to find an elevated position. Consider using a drone, if permitted, or access rooftops, balconies, or bridges. Verify you're safely secured when shooting from high vantage points.
As you frame your shot, pay attention to symmetry and patterns that emerge from this bird's-eye view.
To enhance the vertigo effect in your overhead shots:
- Use a wide-angle lens to exaggerate the sense of height and depth
- Include a human element or recognizable object for scale
- Experiment with long exposures to create motion blur in dynamic scenes
Don't be afraid to push boundaries and try unconventional compositions. Rotate your camera slightly off-axis to add an extra layer of disorientation.
Low-Angle Perspectives
Perspective shifts dramatically when you explore low-angle shots, offering a unique and often overlooked viewpoint. To capture mesmerizing vertigo effects from below, position your camera near the ground, pointing upwards. This technique exaggerates height and creates a sense of towering structures or subjects.
Experiment with different focal lengths to enhance the vertigo effect. Wide-angle lenses will emphasize distortion and make objects appear larger than life, while telephoto lenses can compress the scene and create a dizzying stack of elements. Don't be afraid to tilt your camera for added drama and disorientation.
Consider these low-angle techniques for various subjects:
| Subject | Technique | Effect |
|---|---|---|
| Architecture | Frame buildings against the sky | Emphasizes scale and grandeur |
| Nature | Shoot upwards through foliage | Creates a canopy effect |
| People | Capture from ground level | Portrays power or dominance |
Remember to use leading lines and patterns to guide the viewer's eye upwards. Incorporate foreground elements to add depth and context to your low-angle shots. By mastering these techniques, you'll create vertigo-inducing images that captivate and disorient your audience, adding a powerful dimension to your photography.
Tilted Horizon Lines
While low-angle shots can create vertigo effects, tilting your horizon line offers another powerful tool for disorienting viewers. By deliberately skewing the horizontal plane, you'll challenge your audience's perception of balance and stability. This technique works particularly well in urban environments, where straight lines and right angles are abundant.
To effectively use tilted horizon lines:
- Start with subtle tilts of 5-10 degrees to create a sense of unease without being too obvious.
- Experiment with more extreme angles (30-45 degrees) for a more dramatic, dizzying effect.
- Combine tilted horizons with other vertigo-inducing techniques, such as leading lines or forced perspective.
When composing your shot, pay attention to strong vertical elements like buildings, trees, or poles. These will contrast sharply with your tilted horizon, amplifying the disorienting effect.
You can also use diagonal lines within the frame to guide the viewer's eye and enhance the sense of imbalance.
Don't forget to contemplate your subject's placement within the tilted frame. Positioning them off-center or at an unexpected angle can further heighten the vertigo effect, creating a truly mesmerizing image that captures attention and evokes a visceral response.
Refine Your Post-Processing Workflow
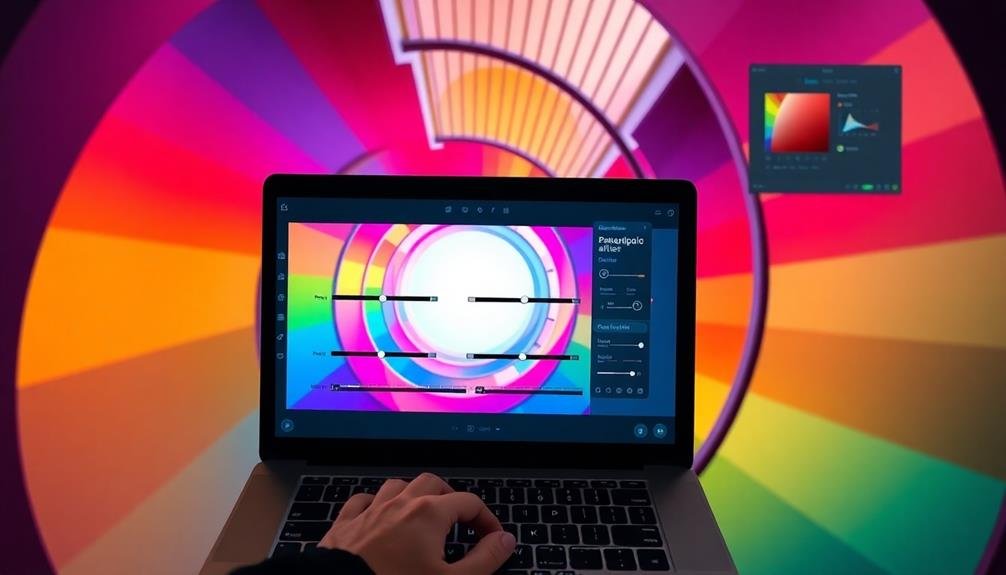
After capturing your vertigo-style images, it's time to refine your post-processing workflow. Start by importing your photos into your preferred editing software. Analyze each image carefully, looking for areas that need enhancement to accentuate the vertigo effect.
Focus on adjusting contrast, saturation, and sharpness to make your subject pop against the background. Use radial filters or graduated filters to draw attention to specific areas of the image. Don't forget to straighten any unintentional tilts that may have occurred during shooting.
Here's a quick guide to refining your vertigo effect in post-processing:
| Step | Action | Purpose |
|---|---|---|
| 1 | Crop | Emphasize composition |
| 2 | Adjust exposure | Balance light and dark areas |
| 3 | Increase contrast | Enhance depth |
| 4 | Boost saturation | Make colors pop |
| 5 | Apply sharpening | Improve details |
Experiment with different presets or create your own to streamline your workflow. Remember, subtlety is key – don't overdo the effects. Finally, export your images in high resolution, ready for sharing or printing. With practice, you'll develop a efficient post-processing routine that brings out the best in your vertigo-style photographs.
Practice and Persevere

With any creative technique, mastering vertigo-style photography takes time and dedication. As you experiment with different locations, camera settings, and post-processing techniques, you'll gradually refine your skills and develop your unique style.
Don't get discouraged if your initial attempts don't meet your expectations; even experienced photographers face challenges when creating vertigo effects.
To improve your vertigo photography skills, focus on these key areas:
- Consistent practice: Set aside regular time to shoot and edit vertigo-style images, even if it's just a few hours each week.
- Analyze your work: Critically evaluate your photos, identifying areas for improvement and noting successful techniques.
- Seek feedback: Share your images with other photographers or online communities to gain valuable insights and constructive criticism.
Remember that each attempt is a learning opportunity. Pay attention to the details that make some images more impactful than others, such as composition, lighting, and post-processing techniques.
As you persist in your efforts, you'll notice steady improvements in your work. Stay patient, remain open to new ideas, and continue pushing your creative boundaries to capture truly mesmerizing vertigo effects.
Frequently Asked Questions
What Safety Precautions Should Be Taken When Filming Vertigo Effects With Drones?
When filming vertigo effects with drones, you'll need to prioritize safety. Get proper training, follow local regulations, use spotters, avoid crowded areas, and maintain visual line of sight. Don't fly in adverse weather conditions or near airports.
How Do Weather Conditions Affect the Quality of Vertigo Effect Shots?
Weather substantially impacts your vertigo effect shots. Wind can destabilize your drone, affecting smoothness. Rain or fog may obscure visibility. Bright sunlight can cause glare. You'll get the best results on calm, clear days with even lighting.
Are There Specific Drone Models Better Suited for Capturing Vertigo Effects?
You'll find drones with advanced stabilization and zoom capabilities are ideal for vertigo effects. Look for models like DJI Mavic 3 or Autel EVO II Pro. They offer smooth flight control and high-quality cameras for stunning results.
What Legal Considerations Should I Be Aware of When Filming Vertigo Effects?
You'll need to reflect on drone regulations, privacy laws, and property permissions. Check local airspace restrictions, obtain necessary licenses, and respect no-fly zones. Always prioritize safety and get consent when filming people or private property.
How Can I Incorporate Vertigo Effects Into Narrative Storytelling or Documentaries?
You can use vertigo effects in storytelling to convey disorientation, anxiety, or altered states. Incorporate them during pivotal moments, character transformations, or to emphasize emotional turmoil. They're especially effective for POV shots and dream sequences.
In Summary
You've now got the tools to create stunning vertigo effects with your drone. Remember, it's all about practice and experimentation. Don't be discouraged if your first attempts aren't perfect. Keep refining your technique, trying new locations, and pushing your creative boundaries. With time, you'll master the art of capturing dizzying, mesmerizing shots that'll leave your audience spellbound. So get out there, take to the skies, and start creating your own vertigo-inducing masterpieces!
As educators and advocates for responsible drone use, we’re committed to sharing our knowledge and expertise with aspiring aerial photographers.


Leave a Reply