To achieve dynamic balance in aerial photography, apply the rule of thirds and golden ratio for pleasing compositions. Use leading lines like roads or rivers to guide the viewer's eye. Play with symmetry and asymmetry to create tension or harmony. Incorporate foreground elements for depth and scale. Utilize negative space to emphasize your subject. Look for patterns and textures from above to add visual interest. Frame your main subject within natural elements. Manipulate scale and perspective by adjusting altitude and angle. Finally, experiment with color contrasts and lighting to enhance your shots. These techniques will elevate your aerial photography to new heights.
Key Takeaways
- Utilize the Rule of Thirds and Golden Ratio to create visually appealing compositions with balanced element placement.
- Incorporate leading lines and foreground interest to add depth and guide the viewer's eye through the image.
- Balance symmetry and asymmetry to create visual tension and dynamism in aerial compositions.
- Use color contrast and patterns to enhance visual interest and create rhythm in the photograph.
- Manipulate scale and perspective by adjusting altitude and angle to alter the viewer's perception of size and depth.
Rule of Thirds in Flight

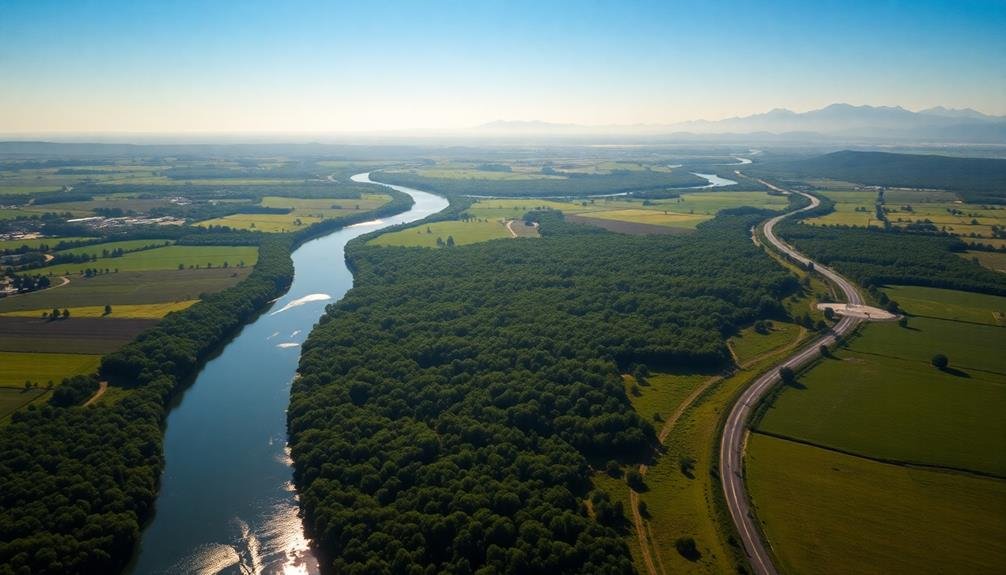
Frequently, aerial photographers apply the rule of thirds to create visually appealing compositions while in flight. This technique involves mentally dividing your frame into a 3×3 grid and placing key elements along these lines or at their intersections.
When you're shooting from above, you'll find that this rule can help you balance your shots and draw the viewer's eye to important features. As you're flying, look for natural lines in the landscape that align with your imaginary grid.
Rivers, roads, or coastlines can serve as powerful leading lines when placed along the thirds. You'll want to position your main subject at one of the grid's intersections, creating a sense of tension and interest. This could be a landmark, a vehicle, or a distinctive geographical feature.
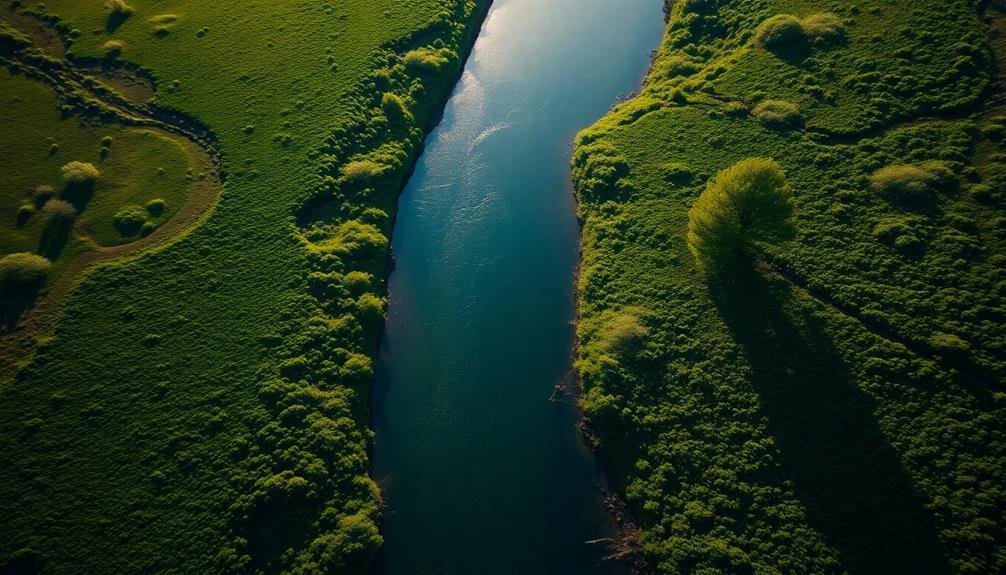
Leading Lines From Above
Leading lines take on a whole new dimension when viewed from above. From an aerial perspective, you'll discover unique opportunities to capture natural and man-made lines that guide the viewer's eye through your composition. Look for roads, rivers, coastlines, and even shadows cast by tall structures to create compelling visual pathways.
When composing your shot, position these leading lines to draw attention to your main subject or to create a sense of depth and scale. Experiment with different angles and altitudes to find the most effective arrangement of lines. You can use converging lines to create a sense of perspective or parallel lines to emphasize patterns and repetition.
Don't limit yourself to straight lines; curved roads, meandering rivers, and winding paths can add a dynamic element to your aerial photographs.
Consider how these lines interact with other elements in your frame, such as the horizon or prominent landmarks. By carefully incorporating leading lines into your aerial compositions, you'll create visually engaging images that guide viewers through the scene and highlight the unique perspective that aerial photography offers.
Symmetry vs. Asymmetry

When composing aerial shots, you'll need to decide between balanced and unbalanced compositions.
Symmetrical layouts can create a sense of order and stability, while asymmetrical arrangements often introduce visual tension and dynamic energy.
Your choice between these approaches will considerably impact the mood and message of your aerial photograph.
Balanced vs. Unbalanced Compositions
In aerial photography, the choice between balanced and unbalanced compositions can dramatically affect the visual impact of your images.
Balanced compositions create a sense of harmony and stability, distributing visual elements evenly across the frame. They're often pleasing to the eye and can convey a feeling of calm or order.
Unbalanced compositions, on the other hand, introduce tension and dynamism, drawing the viewer's attention to specific areas of the image.
When deciding between balanced and unbalanced compositions, consider your subject matter and the message you want to convey.
Here are three key points to keep in mind:
- Use balanced compositions for landscapes that emphasize symmetry or patterns.
- Opt for unbalanced compositions to highlight contrasts or create a sense of movement.
- Experiment with both approaches to find what works best for each unique aerial scene.
Creating Visual Tension
Visual tension in aerial photography can be masterfully created through the interplay of symmetry and asymmetry. When composing your shot, consider how you can use these opposing elements to create a dynamic and engaging image.
Symmetry offers a sense of balance and order, drawing the viewer's eye to the center of the frame. You'll find it in mirrored landscapes, perfectly aligned buildings, or evenly spaced natural features. To create symmetry, position your drone directly above your subject and frame it centrally.
Asymmetry, on the other hand, introduces visual interest and movement. It can guide the viewer's gaze across the image, creating a more dynamic composition. You can achieve this by placing your main subject off-center or including contrasting elements of different sizes or shapes within the frame.
To create visual tension, combine both symmetrical and asymmetrical elements in your shot. For example, capture a symmetrical cityscape with an asymmetrically placed focal point, like a uniquely shaped building or a winding river.
This contrast will add depth and intrigue to your aerial photographs, keeping viewers engaged and encouraging them to explore the entire image.
Foreground Interest for Depth

Adding foreground elements to your aerial photos creates depth and draws viewers into the scene. By including objects or features in the foreground, you'll give your images a sense of scale and dimension that's often lacking in aerial shots. This technique helps guide the viewer's eye through the composition and provides a more immersive experience.
When incorporating foreground interest, look for elements that complement your main subject without overpowering it. You can use natural features like trees, rocks, or water bodies, or man-made structures such as roads, buildings, or bridges. The key is to find a balance between the foreground and background elements to create a harmonious composition.
Here are three tips for effectively using foreground interest in your aerial photos:
- Experiment with different altitudes to adjust the prominence of foreground elements.
- Use leading lines in the foreground to direct attention towards your main subject.
- Consider the foreground's texture and color to add visual interest and contrast.
Remember that foreground interest shouldn't distract from your main subject but rather enhance it. By thoughtfully incorporating these elements, you'll create more engaging and dynamic aerial compositions that captivate your audience.
Negative Space in Aerial Shots

In aerial photography, you'll find negative space to be a powerful tool for emphasizing your main subject.
By strategically incorporating areas of emptiness around your focal point, you're drawing the viewer's eye directly to what matters most.
This deliberate use of space not only creates a sense of depth in your aerial shots but also allows the subject to breathe, resulting in a more impactful and balanced composition.
Emphasizing Subject Through Emptiness
Amid vast aerial landscapes, negative space becomes a powerful tool for emphasizing your subject. By strategically incorporating emptiness around your main focus, you'll create a striking visual contrast that draws the viewer's eye. This technique is particularly effective in aerial photography, where expansive backgrounds can easily overwhelm smaller subjects.
To effectively use negative space in your aerial shots:
- Identify a clear focal point: Choose a single, strong subject that will stand out against the surrounding emptiness.
- Position your subject off-center: Use the rule of thirds to create a more dynamic composition and leave ample space around your main element.
- Embrace simplicity: Remove distracting elements from the frame to create a clean, minimalist look that enhances the impact of your subject.
When you're composing your shot, pay attention to the balance between your subject and the surrounding emptiness. Too much negative space can make your image feel empty, while too little can diminish the impact of your focal point.
Experiment with different angles and altitudes to find the perfect balance that showcases your subject while leveraging the power of emptiness in your aerial photographs.
Creating Depth With Space
Negative space in aerial photography doesn't just emphasize your subject; it can also create a powerful sense of depth. By strategically incorporating empty areas in your composition, you'll guide the viewer's eye through the image and enhance the perception of distance.
To create depth with space, consider layering your shot. Place your main subject in the foreground and use negative space to separate it from background elements. This technique will make your image feel more three-dimensional.
You can also use leading lines within the negative space to draw the eye towards distant points, further enhancing depth.
Don't be afraid to leave large portions of your frame empty. In aerial photography, vast expanses of sky, water, or land can serve as compelling negative space. These areas can provide context and scale, making your subject appear more dramatic.
Experiment with different altitudes to manipulate the amount of negative space in your shots. Higher altitudes often allow for more emptiness, while lower flights can create intimate compositions with less negative space.
Color Contrast From the Sky
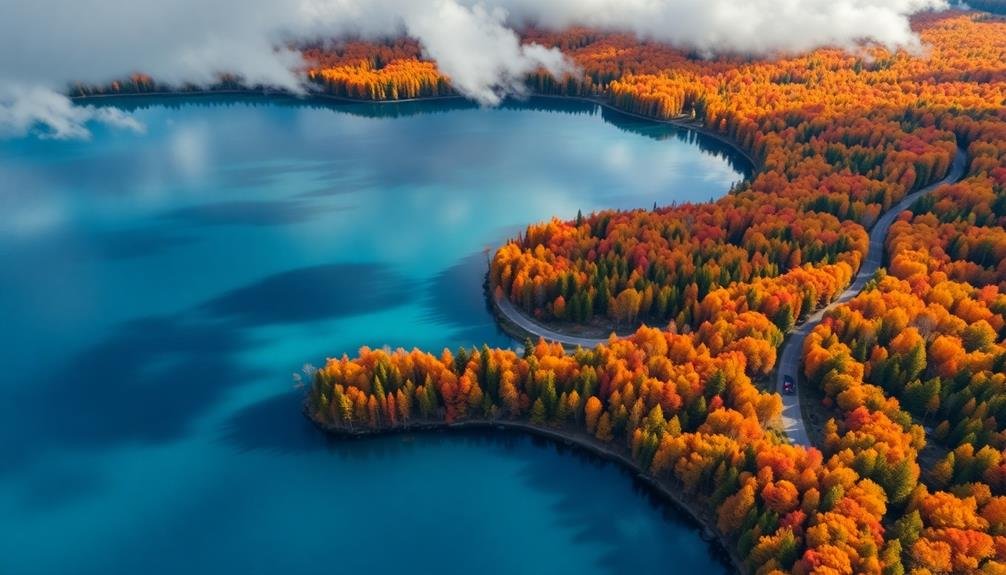
Color contrast from an aerial perspective offers a unique opportunity to create visually striking compositions. As you soar above the landscape, you'll notice how different hues interact in ways that aren't apparent from the ground. The sky itself becomes a powerful tool for creating contrast, offering a range of colors depending on the time of day and atmospheric conditions.
To maximize color contrast in your aerial photos, consider these techniques:
- Shoot during golden hour or blue hour for warm tones that contrast beautifully with cooler shadows.
- Look for complementary colors, such as blue water against orange sand or green fields against reddish soil.
- Use polarizing filters to enhance the sky's color and increase contrast with the ground.
Don't be afraid to experiment with different altitudes and angles to find the most dynamic color relationships. You'll often find that slight adjustments in your position can dramatically change the balance of colors in your frame.
Pay attention to how sunlight interacts with various surfaces, as it can create unexpected pops of color that add interest to your composition. Remember, the sky isn't just a backdrop – it's an integral part of your aerial color palette.
Patterns and Textures Below

The earth's surface reveals its secrets when viewed from above, offering a treasure trove of patterns and textures for aerial photographers. As you compose your shots, look for repetitive elements that create visual rhythm. Farmlands with their patchwork of fields, urban grids, and winding river systems can all provide striking geometric patterns.
Don't overlook natural textures like sand dunes, rock formations, or forest canopies. These can add depth and intrigue to your images. Pay attention to how light interacts with these textures, as shadows can enhance their visual impact. You'll find that different times of day dramatically alter the appearance of patterns below.
To create dynamic balance, try combining contrasting textures or patterns within the same frame. For example, juxtapose the organic shapes of coastlines against the rigid structure of a nearby city. Use leading lines within these patterns to guide the viewer's eye through your composition.
Frame Within a Frame

You can create depth and perspective in your aerial shots by using natural or artificial frames within your composition.
Look for elements like bridges, archways, or even cloud formations that can act as a frame, drawing the viewer's eye to your main subject.
Natural vs. Artificial Frames
Framing within aerial photography can be achieved through both natural and artificial elements, creating a "frame within a frame" effect that adds depth and focus to your compositions.
Natural frames often include landscape features like mountains, trees, or coastlines, while artificial frames can be man-made structures such as buildings, bridges, or roads.
When choosing between natural and artificial frames, consider the story you're trying to tell with your aerial shot. Natural frames often evoke a sense of harmony with the environment, while artificial frames can highlight human impact or urban development.
You'll want to experiment with both types to see which best suits your subject and artistic vision.
Here are three tips for effectively using natural and artificial frames in your aerial photography:
- Look for contrasting colors or textures between the frame and the main subject.
- Use leading lines within the frame to guide the viewer's eye to the focal point.
- Experiment with asymmetrical framing to create tension and visual interest.
Depth and Perspective
Mastering the concept of "frame within a frame" can dramatically enhance the depth and perspective in your aerial photographs. This technique involves using elements within the scene to create a natural border around your main subject, drawing the viewer's eye into the image.
When shooting from above, look for opportunities to frame your subject with surrounding landscape features. Trees, buildings, or geological formations can serve as excellent framing devices. You'll create a sense of depth by including these foreground elements, which guide the viewer's gaze towards the central focus of your image.
Consider using bridges, archways, or even clouds to frame your aerial shots. These elements not only add depth but also provide context and scale to your photographs. Experiment with different altitudes and angles to find the perfect framing opportunities.
Don't forget to pay attention to the negative space within your frame. Balancing the framed subject with open areas can create a more dynamic composition. By carefully positioning your drone, you can adjust the frame's size and shape to best complement your subject and enhance the overall perspective of your aerial photograph.
Contrasting Elements Highlight Subject
Building on the concept of framing, contrasting elements play a key role in highlighting your subject within aerial photography. By juxtaposing different colors, textures, or shapes, you can create visual interest and draw attention to your main subject.
Look for natural contrasts in the landscape, such as the meeting point of land and water, or the edge of a forest against an open field. These boundaries can serve as powerful compositional tools to guide the viewer's eye.
When composing your aerial shot, consider how you can use contrasting elements to create a frame within a frame. This technique adds depth and dimensionality to your image while emphasizing your subject.
Here are three ways to incorporate contrasting elements:
- Use light and shadow to create visual separation
- Pair organic shapes with geometric patterns
- Juxtapose complementary colors for added impact
Remember that contrast doesn't always have to be dramatic. Subtle differences in tone or texture can be just as effective in highlighting your subject.
As you experiment with contrasting elements, keep in mind the overall balance of your composition. Aim for a harmonious arrangement that leads the viewer's eye naturally through the frame, ultimately resting on your intended focal point.
Golden Ratio in Drone Photography

The Golden Ratio's application in drone photography elevates compositions from ordinary to extraordinary. This mathematical principle, approximately 1.618:1, has been used in art and architecture for centuries. In aerial photography, you can use it to create visually pleasing and balanced images.
To apply the Golden Ratio, divide your frame into a 3×3 grid, then subdivide one section further. Place your main subject at the intersection of these lines. You'll find that this creates a natural flow and harmony in your composition.
When shooting landscapes, align horizons or shorelines with the ratio's lines. For cityscapes, position prominent buildings or landmarks at the golden points.
You can also use the Golden Spiral, a logarithmic spiral based on the ratio, to guide the viewer's eye through your image. Start with your main subject at the center of the spiral and let secondary elements follow its curve. This technique works particularly well for capturing winding rivers, roads, or coastlines from above.
Experiment with different altitudes and angles to find the perfect balance using the Golden Ratio. It'll help you create more dynamic and aesthetically pleasing drone photographs.
Scale and Perspective Manipulation
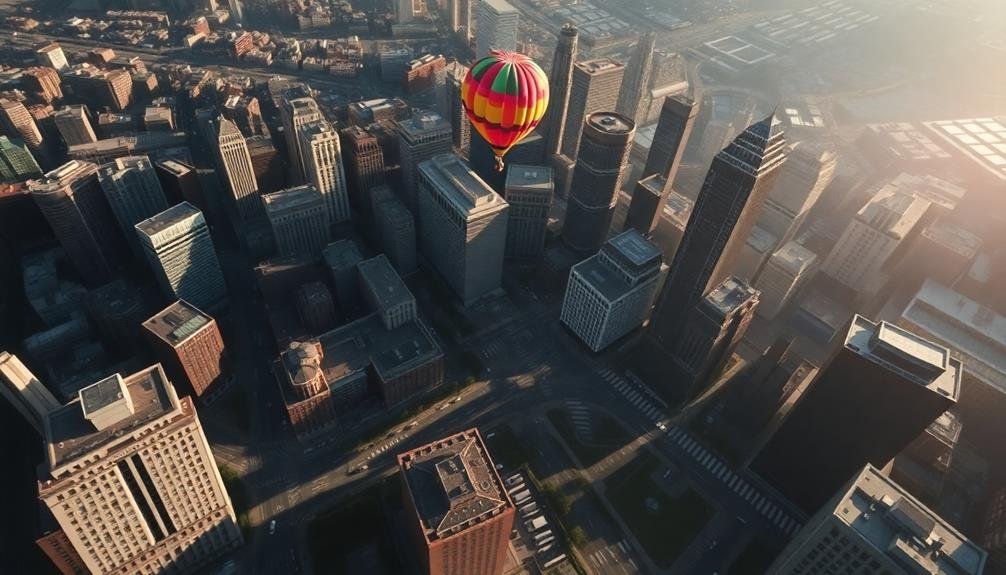
As you soar above the landscape, scale and perspective manipulation become powerful tools in your aerial photography arsenal. By adjusting your drone's altitude and angle, you can dramatically alter the viewer's perception of size and spatial relationships.
Experiment with flying at different heights to capture subjects in unique ways. Low-altitude shots can make ordinary objects appear larger than life, while high-altitude perspectives can shrink vast landscapes into miniature scenes.
To master scale and perspective manipulation, focus on:
- Juxtaposing elements of different sizes within the frame
- Using recognizable objects as reference points for scale
- Tilting your camera to create forced perspective effects
Don't be afraid to challenge conventional viewpoints. Fly your drone close to structures or natural features to emphasize their grandeur, or pull back to reveal unexpected patterns and symmetries.
Play with shadows and light to enhance depth and dimensionality. By manipulating scale and perspective, you'll create visually striking compositions that captivate viewers and offer fresh insights into familiar subjects.
Frequently Asked Questions
How Does Weather Affect Dynamic Balance in Aerial Photography?
Weather greatly impacts your aerial shots' dynamic balance. You'll face challenges with wind, light, and cloud formations. They'll affect your framing, exposure, and overall composition. Adapt quickly to changing conditions for balanced, compelling photos.
What Camera Settings Are Best for Maintaining Balance in Fast-Moving Aerial Shots?
You'll want to use fast shutter speeds, around 1/1000s or higher, to freeze motion. Set your aperture to f/8 for sharpness, and adjust ISO as needed. Continuous autofocus and burst mode will help capture balanced shots.
How Can I Achieve Dynamic Balance When Photographing Moving Subjects From Above?
You'll want to anticipate movement and frame your shot accordingly. Use leading lines, rule of thirds, and negative space to create balance. Adjust shutter speed to capture motion blur or freeze action as desired.
Are There Specific Drone Models Better Suited for Balanced Aerial Composition?
You'll find that most modern drones can handle balanced aerial composition. It's not about the model, but your skills. Focus on mastering flight control, understanding composition principles, and practicing with whatever drone you've got.
How Do Different Altitudes Impact the Dynamic Balance of Aerial Photographs?
You'll find that altitude greatly affects dynamic balance in aerial photos. Lower heights emphasize foreground elements, while higher altitudes create a more balanced perspective. Experiment with different elevations to achieve your desired compositional effect.
In Summary
You've learned powerful techniques to elevate your aerial photography. Now it's time to put them into practice. As you soar above, remember to balance these compositional elements for stunning results. Don't be afraid to experiment and break the rules occasionally. With each flight, you'll refine your eye and create more enchanting images. Keep pushing your boundaries, and soon you'll be capturing breathtaking aerial shots that truly stand out from the crowd.
As educators and advocates for responsible drone use, we’re committed to sharing our knowledge and expertise with aspiring aerial photographers.


Leave a Reply