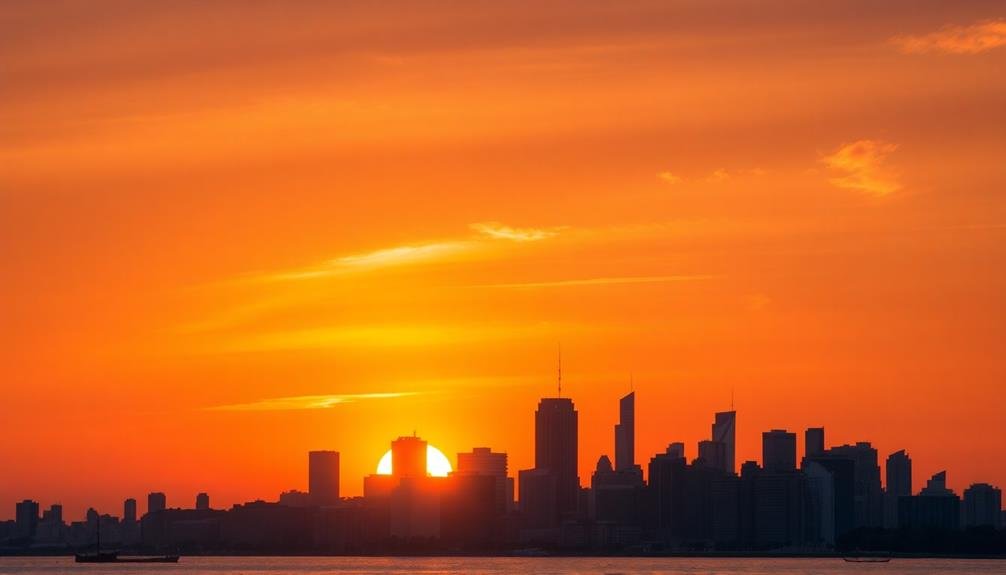
To capture stunning golden hour skyscapes, start by adjusting your white balance and enhancing warm tones. Increase dynamic range and balance highlights with shadows using bracketing or filters. Apply graduated filters for dramatic color shifts and sharpen cloud details while reducing noise in darker areas. Add subtle vignetting and use color grading techniques to enhance the overall mood. For expansive scenes, try panoramic stitching. Don't forget to experiment with different camera settings and composition techniques to make the most of the golden light. These tips will help you elevate your skyscape photography, but there's always more to explore in this enthralling genre.
Key Takeaways
- Adjust white balance to enhance warm tones and capture accurate colors during golden hour.
- Use graduated filters or exposure blending to balance bright skies with darker foregrounds.
- Apply selective sharpening to enhance cloud details while reducing noise in darker areas.
- Experiment with subtle vignetting and color grading techniques to create mood and depth.
- Capture panoramic shots by overlapping frames and using specialized stitching software for seamless results.
Adjust White Balance Settings

When it comes to capturing breathtaking skyscapes, adjusting your camera's white balance settings is essential. During golden hour, the color temperature of light changes rapidly, casting warm hues across the sky. To accurately capture these colors, you'll need to move beyond your camera's auto white balance mode.
Start by selecting the "Daylight" or "Sunny" preset, which typically provides a good baseline for golden hour shots. If the results appear too cool, switch to the "Cloudy" or "Shade" setting to add warmth.
For more precise control, use your camera's custom white balance feature. Take a test shot of a neutral gray card or white object in the same lighting conditions as your intended skyscape. Use this image to set a custom white balance that perfectly matches the scene.
Don't be afraid to experiment with different white balance settings to achieve your desired look. Slightly cooler settings can emphasize blues in the sky, while warmer tones can enhance golden hues.
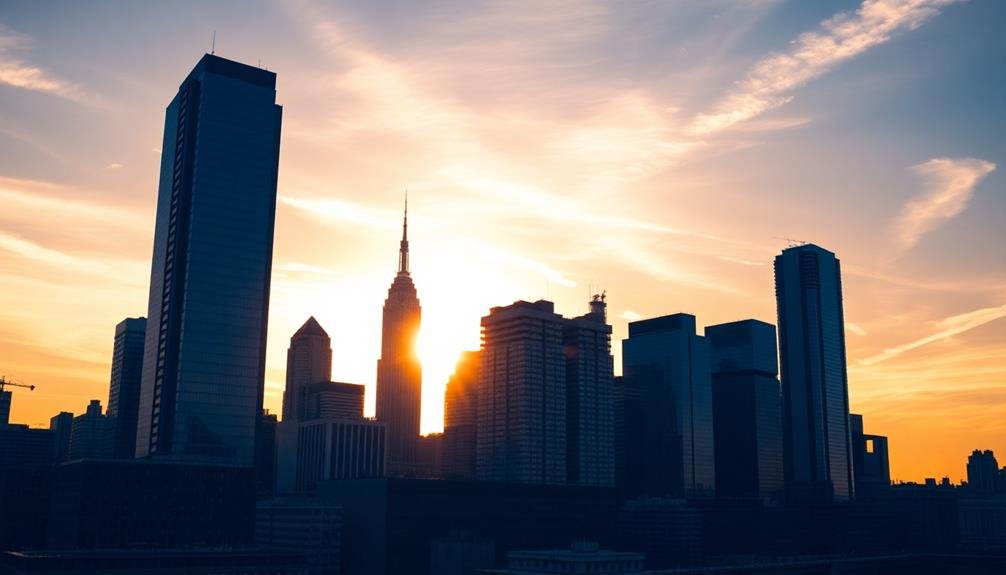
Enhance Warm Tones
To bring out the best in your skyscape photos, you'll want to play up those warm, golden tones. During golden hour, the sun's low angle creates a naturally warm color palette, but you can enhance these hues even further in post-processing.
Use your editing software's temperature and tint sliders to add more warmth to your image. Increase the orange and yellow saturation slightly, but be careful not to overdo it and make the scene look unnatural.
Consider using graduated filters or adjustment brushes to selectively enhance warm tones in specific areas of your skyscape. This technique allows you to intensify the golden glow around the sun or add warmth to clouds without affecting the entire image.
You can also experiment with split toning, which adds warm hues to the highlights while keeping cooler tones in the shadows.
To create stunning golden hour skyscapes, try these techniques:
- Use a polarizing filter to deepen blue skies and enhance cloud contrast
- Incorporate foreground elements to add depth and interest to your composition
- Experiment with long exposures to capture movement in clouds or water
Increase Dynamic Range

Increasing dynamic range is essential for capturing stunning skyscapes. To achieve this, you'll need to employ several techniques. First, use bracketing to capture multiple exposures of the same scene. Take at least three shots: one properly exposed, one underexposed, and one overexposed. This allows you to combine the best parts of each image in post-processing.
Consider using graduated neutral density filters to balance the bright sky with the darker foreground. These filters darken the top portion of your frame, preventing overexposure of the sky while maintaining detail in the landscape below.
In post-processing, utilize HDR (High Dynamic Range) techniques to merge your bracketed shots. This combines the best-exposed parts of each image, resulting in a final photo with a wider range of tones. Be cautious not to overdo it, as excessive HDR can lead to unrealistic results.
Alternatively, try exposure blending in Photoshop. This manual method gives you more control over which parts of each exposure you want to use in your final image. It's particularly useful for scenes with moving elements, where HDR might create ghosting effects.
Balance Highlights and Shadows
You'll often face challenging lighting conditions when shooting skyscapes, with bright highlights in the sky and dark shadows on the ground.
To balance these extremes, you can employ HDR techniques by capturing multiple exposures and blending them in post-processing.
Alternatively, you might use graduated neutral density filters to darken the sky portion of your image, allowing for a more balanced exposure in-camera.
Use HDR Techniques
Many photographers struggle to capture the full dynamic range of a dramatic skyscape in a single exposure. That's where High Dynamic Range (HDR) techniques come in handy. By using HDR, you'll be able to preserve both highlight and shadow details, creating a more balanced and visually appealing image.
To use HDR effectively for skyscapes, follow these steps:
- Bracket your exposures: Take multiple shots of the same scene at different exposure levels, typically -2, 0, and +2 stops.
- Use a tripod: This guarantees your images are perfectly aligned for easy blending later.
- Process in HDR software: Combine your bracketed exposures using specialized HDR software or your preferred photo editing program.
When processing your HDR images, aim for a natural look rather than an over-processed appearance. Adjust the tone mapping carefully to maintain a realistic sky color and avoid halos around high-contrast edges.
Employ Graduated Filters
While HDR techniques offer powerful digital solutions, graduated filters provide an in-camera approach to balancing highlights and shadows in skyscapes. These physical filters darken the brighter portions of your frame, typically the sky, allowing you to capture a more balanced exposure in a single shot.
To use graduated filters effectively, you'll need to choose the right type for your scene. Here's a quick guide:
| Filter Type | Gradient | Best For |
|---|---|---|
| Hard-Edge | Abrupt | Straight horizons |
| Soft-Edge | Gradual | Uneven horizons |
| Reverse | Center-weighted | Sunset/sunrise |
When using graduated filters, position the dividing line at the horizon or where the brightness changes dramatically. You can stack multiple filters for more control or combine them with polarizers for enhanced effects. Don't forget to adjust your camera settings to account for the reduced light entering the lens.
Apply Graduated Filters

Graduated filters are essential tools for capturing stunning skyscapes.
You'll use them to balance the brightness between the sky and foreground, preventing overexposed skies or underexposed landscapes.
These filters also allow you to create dramatic color shifts, enhancing the mood and atmosphere of your skyscape photographs.
Balancing Sky and Foreground
In spite of their beauty, skyscapes often present a challenge when it comes to balancing exposure between the bright sky and darker foreground elements. To capture both areas effectively, you'll need to employ some thoughtful techniques. One of the most effective methods is using graduated neutral density filters, which darken the sky while leaving the foreground untouched.
When balancing sky and foreground, consider these key points:
- Expose for the foreground: Set your camera's exposure based on the darker ground elements, then use filters or post-processing to manage the brighter sky.
- Use the histogram: Check your camera's histogram to verify you're not losing detail in the highlights or shadows.
- Bracket your shots: Take multiple exposures at different settings, which you can blend later in post-processing.
If you don't have graduated filters, you can still achieve balance by taking multiple exposures and blending them in post-processing. This technique, known as exposure blending, allows you to combine the best parts of each exposure for a well-balanced final image.
With practice, you'll be able to create stunning skyscapes that showcase both the dramatic sky and interesting foreground elements.
Creating Dramatic Color Transitions
Stunning skyscapes often feature dramatic color shifts that captivate viewers. To create these eye-catching changes in your photos, you'll need to master the use of graduated filters. These tools allow you to selectively adjust exposure and color across different parts of your image, resulting in smooth, natural-looking gradients.
Start by choosing the right type of graduated filter for your scene. Soft-edge filters work well for subtle changes, while hard-edge filters are better for distinct horizon lines. Position the filter in front of your lens, aligning the change area with the horizon or where you want the effect to begin.
Experiment with different strengths and colors of filters to achieve your desired look. You can stack multiple filters for more complex effects or use reverse graduated filters for scenes with bright horizons.
Don't forget to adjust your camera settings to compensate for the reduced light entering the lens.
In post-processing, fine-tune your color changes using digital graduated filters or adjustment brushes. Pay attention to color temperature and saturation to enhance the mood of your skyscape.
With practice, you'll create stunning images that showcase the dramatic beauty of the sky.
Sharpen Cloud Details
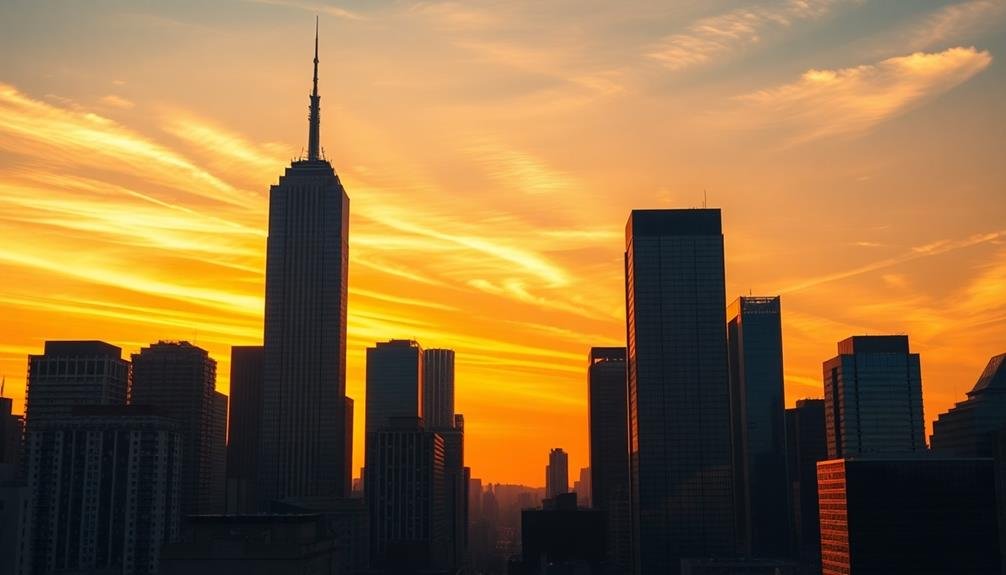
Fluffy clouds can transform into dramatic focal points with the right sharpening techniques. During golden hour, the sun's low angle creates striking textures and shadows on cloud formations.
To enhance these details, you'll need to apply selective sharpening in post-processing. Start by adjusting the overall clarity and contrast of your image to bring out the cloud structure.
Next, use a sharpening brush or mask to target specific areas of the clouds. Focus on the edges and areas with the most texture, but be careful not to overdo it. Oversharpening can lead to unnatural-looking results and introduce unwanted noise.
To achieve the best results when sharpening cloud details:
- Use a low opacity brush and build up the effect gradually
- Pay attention to the blending areas between sharp and soft parts of the clouds
- Experiment with different sharpening methods, such as high-pass filtering or frequency separation
Reduce Noise in Darker Areas

Many nighttime skyscapes suffer from digital noise, especially in darker areas of the image. To combat this issue, you'll need to employ several techniques both during the shoot and in post-processing.
First, use a lower ISO setting whenever possible to minimize noise at the source. If you're shooting in low light, consider using a tripod and longer exposure times instead of increasing ISO.
When editing, utilize noise reduction software or tools in your preferred editing program. Apply noise reduction selectively to the darker areas of your image, as these are often the most affected. Be careful not to overdo it, as excessive noise reduction can lead to a loss of detail and create an unnatural, plastic-like appearance.
Another effective technique is to shoot multiple exposures of the same scene and blend them in post-processing. This method allows you to capture cleaner data in the darker areas without compromising the highlights.
You can also try capturing RAW files, which provide more flexibility in noise reduction during post-processing. Finally, consider using exposure bracketing to guarantee you have a range of exposures to work with, giving you more options for reducing noise in your final image.
Add Subtle Vignetting

A subtle vignette can enhance the visual appeal of your skyscape photographs by gently drawing the viewer's eye towards the center of the image. When applied correctly, vignetting adds depth and dimension to your golden hour shots, creating a more immersive experience for the viewer.
To add a subtle vignette to your skyscape photos, you'll want to follow these steps:
- Use post-processing software: Programs like Adobe Lightroom or Photoshop offer tools specifically designed for adding vignettes.
- Choose the right shape: Circular vignettes work well for most skyscapes, but experiment with rectangular or custom shapes for unique effects.
- Adjust opacity and feathering: Start with a low opacity (around 10-15%) and gradually increase it until you achieve the desired effect. Use feathering to create a smooth shift between the darkened edges and the center of the image.
Remember that less is more when it comes to vignetting. You're aiming for a subtle effect that complements your skyscape without overpowering it.
Pay attention to the overall mood of your image and adjust the vignette accordingly. For darker, moodier skies, you can use a slightly stronger vignette, while lighter, more ethereal scenes often benefit from a very gentle touch.
Utilize Color Grading Techniques

Color grading mastery can elevate your skyscape photography from good to extraordinary. It's a powerful tool that allows you to enhance the mood and atmosphere of your golden hour shots. Start by adjusting the overall temperature and tint to achieve a balanced color palette. Then, focus on fine-tuning individual color channels to bring out the vibrancy of the sky's hues.
Experiment with split-toning techniques to add depth and complexity to your images. This method involves applying different colors to the highlights and shadows, creating a unique look that can make your skyscapes stand out. Don't shy away from using gradients to simulate the natural shift of light during golden hour.
Here's a quick guide to color grading effects for different moods:
| Mood | Highlights | Shadows |
|---|---|---|
| Warm/Cozy | Orange/Yellow | Purple/Blue |
| Cool/Calm | Blue/Cyan | Orange/Red |
| Dramatic | Red/Magenta | Teal/Green |
Create Panoramic Stitches

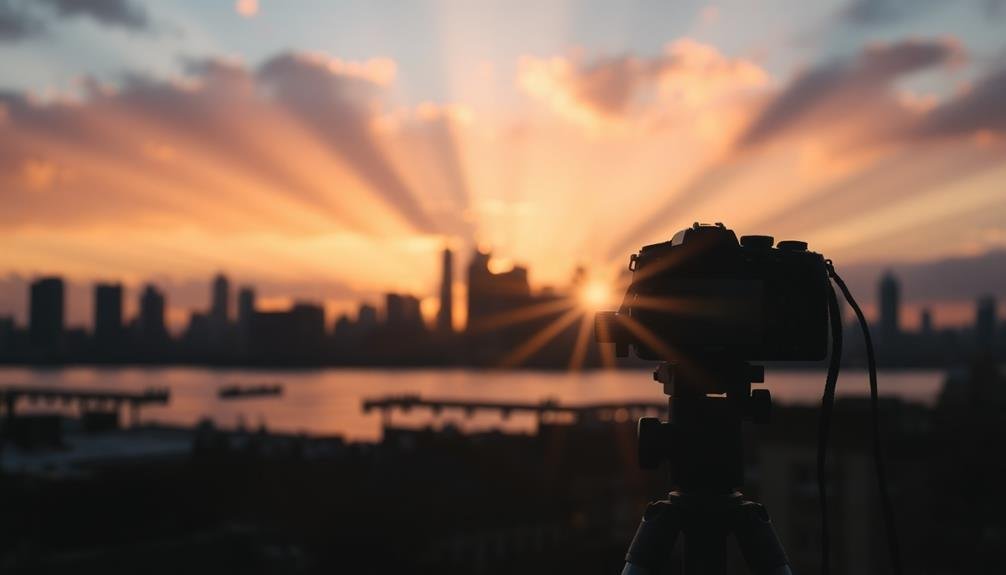
Capturing the expansive beauty of a skyscape often requires more than a single frame can offer. That's where panoramic stitching comes in handy. By taking multiple overlapping shots and combining them, you'll create a breathtaking wide-angle view that truly captures the grandeur of the sky.
To create stunning panoramic stitches, follow these steps:
- Use a tripod to guarantee consistency between shots.
- Set your camera to manual mode, maintaining the same exposure settings across all images.
- Overlap each frame by about 30% to give your stitching software enough information to work with.
When shooting, rotate your camera around its nodal point to minimize parallax errors. This is especially important for scenes with foreground elements. Start from one end of your composition and move steadily to the other, taking care not to rush.
After capturing your images, use specialized stitching software like Adobe Lightroom, PTGui, or Hugin to merge them seamlessly. These programs will align your shots, blend exposures, and correct any distortions.
With practice, you'll master the art of creating panoramic stitches that showcase the sky's full splendor.
Frequently Asked Questions
What Camera Gear Is Essential for Golden Hour Skyscape Photography?
You'll need a DSLR or mirrorless camera with manual controls, a wide-angle lens, and a sturdy tripod. Don't forget filters like a graduated neutral density filter. A remote shutter release can help prevent camera shake.
How Can I Predict the Best Golden Hour Conditions for Skyscapes?
You can predict ideal golden hour conditions by checking weather forecasts, using sun-tracking apps, and monitoring cloud patterns. Look for partly cloudy skies and low humidity. Don't forget to scout locations in advance for the best compositions.
Are There Any Safety Considerations When Shooting During Golden Hour?
Be aware of your surroundings when shooting during golden hour. You'll need to watch for uneven terrain, wildlife, and changing light conditions. Don't forget to bring a flashlight, as it'll get dark quickly after sunset.
How Do I Find Unique Locations for Golden Hour Skyscape Photography?
To find unique locations for golden hour skyscape photography, you'll want to scout areas with interesting foregrounds. Try elevated spots, reflective surfaces, or urban rooftops. Research local landmarks and use apps to discover new vantage points.
Can I Achieve Golden Hour Effects in Post-Processing if I Miss the Actual Time?
You can simulate golden hour effects in post-processing, but it's challenging to replicate the authentic look. Try adjusting white balance, adding warm tones, and enhancing highlights. However, it's always best to capture the real thing when possible.
In Summary
You've now got the tools to capture breathtaking golden hour skyscapes. Remember, it's all about balancing light and color. Don't be afraid to experiment with your camera settings and post-processing techniques. The more you practice, the better you'll become at seizing those fleeting moments of magical light. So grab your gear, head out during the golden hour, and start creating stunning images that'll take your photography to new heights.
As educators and advocates for responsible drone use, we’re committed to sharing our knowledge and expertise with aspiring aerial photographers.


Leave a Reply