
For beginner sky photographers, three outstanding online courses stand out. First, "Nightscapes: Landscape Astrophotography" on Udemy covers essential night sky techniques. Second, SkillShare's "Introduction to Night Sky Photography" offers thorough basics for capturing celestial scenes. Third, CreativeLive's "Night Photography Week" provides extensive lessons on various aspects of nocturnal imaging. These courses will teach you vital camera settings, composition techniques, and post-processing skills specific to sky photography. You'll learn to master ISO, shutter speed, and aperture for ideal exposures, as well as creative editing methods to enhance your sky images. Discover how these courses can elevate your sky photography to new heights.
Key Takeaways
- Skillshare offers "Night Sky Photography: Capture the Milky Way" by Lance Keimig, covering essential techniques for beginners.
- Udemy's "Astrophotography Masterclass" by Phil Ebiner provides comprehensive instruction on capturing celestial objects.
- CreativeLive's "Fundamentals of Landscape Photography" by Marc Muench includes sections on sky and night photography.
- These courses cover crucial aspects like camera settings, composition techniques, and post-processing skills for sky photography.
- Online platforms provide flexibility for learning at your own pace and often include practical assignments for hands-on experience.
Mastering Drone Camera Settings
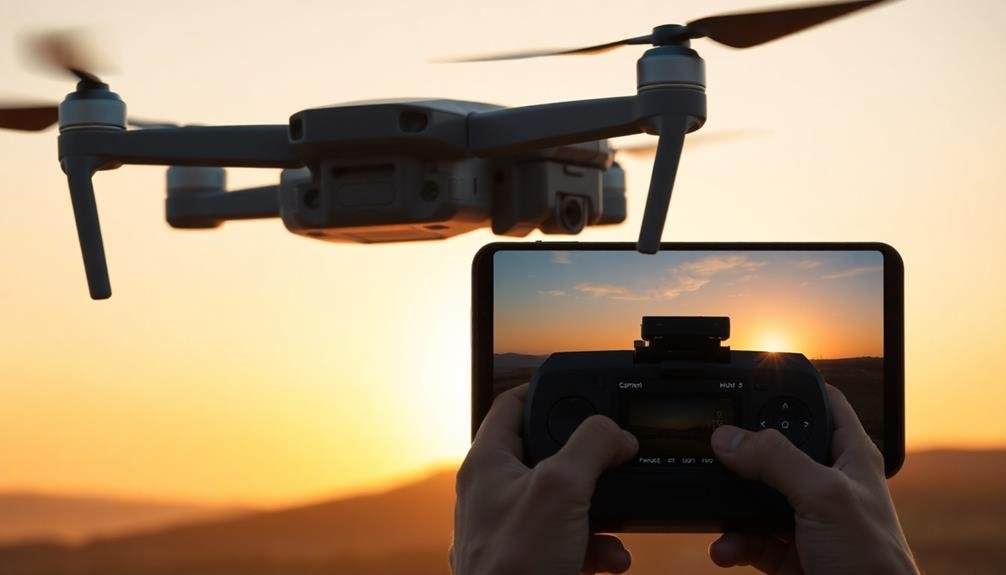
Three essential camera settings you'll need to master for successful drone sky photography are ISO, shutter speed, and aperture. These form the exposure triangle, working together to control the amount of light entering your camera sensor.
ISO determines your camera's sensitivity to light. For sky photography, start with a low ISO (100-400) to minimize noise. Increase it only when necessary in low-light conditions.
Shutter speed controls how long your camera's sensor is exposed to light. For crisp sky shots, use faster shutter speeds (1/500s or higher) to freeze motion and capture sharp details in clouds or stars.
Aperture affects depth of field and light intake. A smaller aperture (higher f-number) increases depth of field, keeping more of the sky in focus. However, this reduces light, so balance it with ISO and shutter speed.
Experiment with these settings to achieve the desired exposure and effect. For example, use a slower shutter speed to capture motion blur in clouds, or a wider aperture for astrophotography to gather more light from distant stars.
Composition Techniques for Aerial Shots

Now that you've mastered your drone's camera settings, it's time to focus on creating visually stunning aerial compositions. Start by using the rule of thirds to balance your shots. Imagine your frame divided into a 3×3 grid and place key elements along these lines or at their intersections.
Experiment with different angles and perspectives. Try shooting directly downward for a bird's-eye view or capture oblique angles for more depth.
Look for patterns, textures, and symmetry in landscapes, which can create visually striking images from above. Consider leading lines to guide the viewer's eye through your composition. Roads, rivers, or coastlines can serve as natural pathways.
Don't forget about negative space; sometimes, a minimalist approach can be powerful in aerial photography. Play with scale by including recognizable objects to provide context and emphasize the vastness of a scene.
Utilize natural light conditions, such as golden hour or long shadows, to add drama to your shots. Lastly, don't be afraid to break the rules. Sometimes, centering your subject or creating intentional asymmetry can result in a unique and enchanting image.
Post-Processing Sky Photography Images

Your sky photography journey doesn't end when you press the shutter button. Post-processing is an essential step in creating stunning sky images. Online courses can teach you how to enhance your photos using software like Adobe Lightroom or Photoshop.
Look for courses that cover vital techniques such as adjusting exposure, contrast, and color balance. You'll learn how to bring out the details in clouds, enhance the vibrancy of sunsets, and correct any lens distortions.
Advanced courses might explore HDR processing, which is particularly useful for capturing the wide dynamic range often present in sky scenes.
Some courses focus on specific types of sky photography, like astrophotography or aurora shots. These specialized classes will teach you how to reduce noise in night sky images, stack multiple exposures, and create star trails.
Don't forget about courses that cover creative editing techniques. You'll discover how to add drama to stormy skies, create dreamy long-exposure effects, or even combine multiple sky elements into a single image.
Frequently Asked Questions
What Equipment Do I Need to Get Started With Sky Photography?
You'll need a DSLR or mirrorless camera with manual settings, a sturdy tripod, and a wide-angle lens. Don't forget extra batteries, memory cards, and a remote shutter release. A star tracker can be helpful for long exposures.
How Do I Choose the Best Locations for Capturing Stunning Sky Shots?
To find great sky photography locations, you'll want to seek out areas with minimal light pollution. Look for open spaces, elevated spots, and coastal regions. Don't forget to check weather forecasts and plan around celestial events.
Are There Any Legal Restrictions for Sky Photography in Certain Areas?
You'll find legal restrictions for sky photography in some areas. Check local laws, especially near airports, military zones, and private property. Always obtain necessary permits and respect no-fly zones for drones if you're using them.
What Time of Day Is Best for Capturing Different Types of Sky Scenes?
You'll find different sky scenes throughout the day. Capture colorful sunrises at dawn, dramatic clouds midday, golden hour warmth before sunset, and starry nights after dark. Each time offers unique lighting and atmospheric conditions.
How Can I Protect My Camera Equipment From Harsh Weather Conditions?
You'll want to use weatherproof camera covers, silica gel packets, and rain sleeves to protect your gear. Keep your equipment in a waterproof bag when not in use, and always carry a microfiber cloth to wipe away moisture.
In Summary
You've now got the tools to take your sky photography to new heights. With these courses, you'll master drone settings, perfect your aerial compositions, and polish your images in post-processing. Don't be afraid to experiment and develop your unique style. Remember, practice makes perfect, so get out there and start shooting! The sky's the limit for your photography journey, and you're well on your way to capturing breathtaking aerial images.
As educators and advocates for responsible drone use, we’re committed to sharing our knowledge and expertise with aspiring aerial photographers.


Leave a Reply